Over time, your Salesforce orgs will accumulate unnecessary metadata. Redundant fields, objects, and other items take up considerable space and, without decluttering, you could start to see an impact on your org’s performance.
Cleaning up your orgs by deleting metadata can seem like a scary solution, but it doesn’t have to be. In this post we’ll look at the key use cases for making destructive changes, different ways of deleting metadata in your org, and how Gearset simplifies that process with the added peace of mind that you can roll back at any time.
What is a destructive change?
In Salesforce, a destructive change is any change that deletes a metadata component from your org. Examples of a destructive change could be deleting a custom field or an object, or removing Apex classes and triggers. Deleting metadata out of your production environment is very risky — a wrong move could lead to data loss, orphaned dependencies, or cause unexpected behaviour. With no undo button, there’s not a lot you can do once your destructive change has been made — unless you have a reliable third-party tool to help.
Stop flying blind: How Truckstop brought clarity to a complex org
Use cases for making a destructive change
There are a few use cases why a business might want, or need, to delete metadata from their production org:
Reduce technical debt
Technical debt builds up when you take shortcuts in your development processes to speed up delivery at the cost of code quality. Perfectly designed code takes time, so delivering short-term fixes has the benefit of delivering value to users quickly. But these quick fixes can accumulate as technical debt if they aren’t deleted when a better solution is released.
Improve the performance of your org
Cluttered Salesforce orgs contain lots of redundant metadata that will slow processes down and cause performance issues for your end users. It’s really important to clean up your Salesforce org by deleting redundant metadata on a regular basis.
Avoid hitting metadata limits
In the same way your data can hit certain limits, so too can your metadata. For example, the number of custom fields on an object is limited depending on the type of org, and you’re also limited to 200 custom metadata types per org, which includes those developed in the org and installed from managed and unmanaged packages.
Evolving business requirements
Business requirements can change and some customizations might not be relevant any more, leading to even more outdated metadata. This is especially true when Salesforce releases new functionality which removes the need for something you have built. It’s good housekeeping to keep on top of this outdated metadata and stop it from building up and causing performance issues down the line.
How to deploy a destructive change in Salesforce
In Salesforce, destructive changes are managed through the metadata file destructiveChanges.xml. This file lists the items that need to be deleted, and is deployed alongside your other metadata changes. Here are the native tools you can use to deploy your destructive changes to your target environment.
Change sets
It’s important to highlight that not all deployment tools allow for destructive changes. Change sets in particular doesn’t offer any support for deletions and can only be used to add metadata to your orgs.
Ant Migration Tool
It’s possible to delete objects and fields with the ANT migration tool using a destructiveChanges.xml file, but this process is very manual and can be a headache. There’s no way to see dependencies so these have to be manually added by the admin and ANT relies on specifying the correct XML version to ensure compatibility with Salesforce’s metadata API, which can cause significant errors. There’s also no way to roll back your deployment. It’s best practice for teams using ANT to deploy destructive changes into a sandbox environment first, to validate the outcome and check that nothing is broken before deploying to production.
Salesforce CLI
The Salesforce CLI was released as part of Salesforce DX. It was intended as a replacement for the ANT migration tool and allows developers to deploy to their environments using the command line and SFDX commands. To delete components using the Salesforce CLI you first need to install it into your terminal. Then, using the same deploy() call as when deploying components, you make the deletion by including a delete manifest file that’s named destructiveChanges.xml. This file should contain a list of the components that you want to delete. As well as your delete manifest file, you need to include an empty package.xml file. This tells Salesforce that you have deletions to make, but no components to deploy.
It’s important to note that you can’t use the destructiveChanges.xml file to delete items linked to an active Lightning page, like a custom object, a component on the page, or the page itself. Before deleting components, you have to deactivate the page’s action override in the Lightning App Builder.
DevOps Center
Salesforce’s answer to a DevOps solution is DevOps Centre. While it’s a slight improvement on change sets, it still has a long way to go in terms of functionality. You can deploy destructive changes with DevOps Center but it doesn’t offer any rollback functionality. To undo any changes you need to revert them in your source control system. You then need to deploy these changes back to the target through DevOps Center.
How to easily deploy destructive changes with Gearset
With Gearset, making destructive changes is as simple as deploying your metadata. Our aim is for your Salesforce workflow to be as smooth as it can be — and deletions are no exception to that.
Let’s walk through how to deploy a deletion now. To follow along, sign up to your free trial of Gearset.
Run a comparison
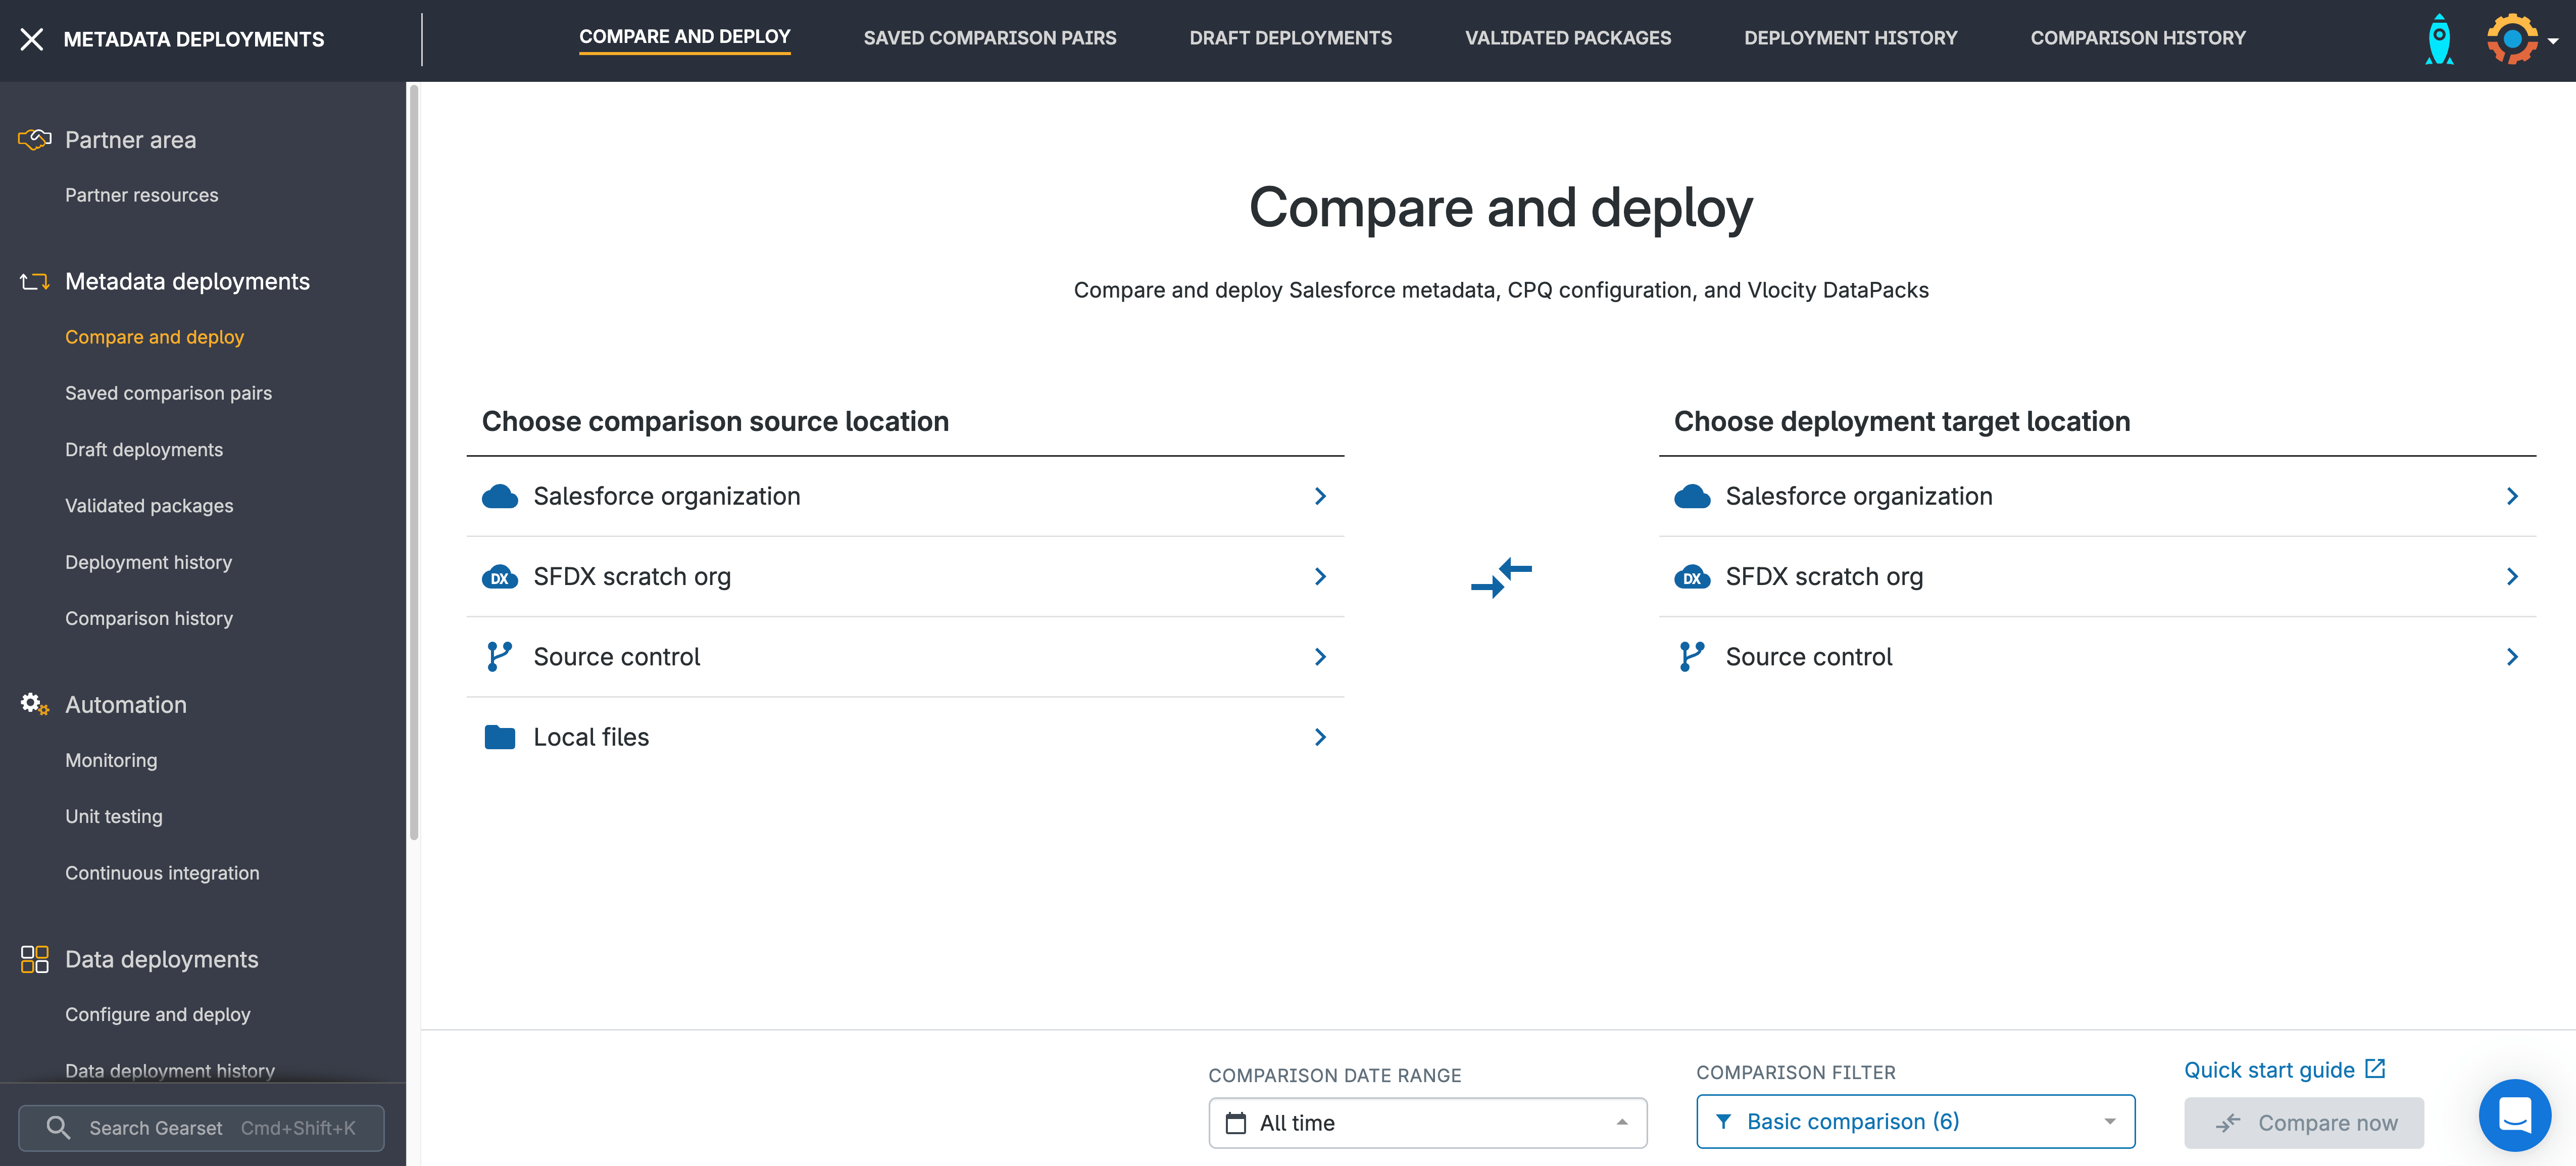
From the Compare and deploy page, select your source and target environments. This can be a Salesforce org, scratch org, source control, or a local file. Choose a comparison filter then click Deploy.
Select your deleted items
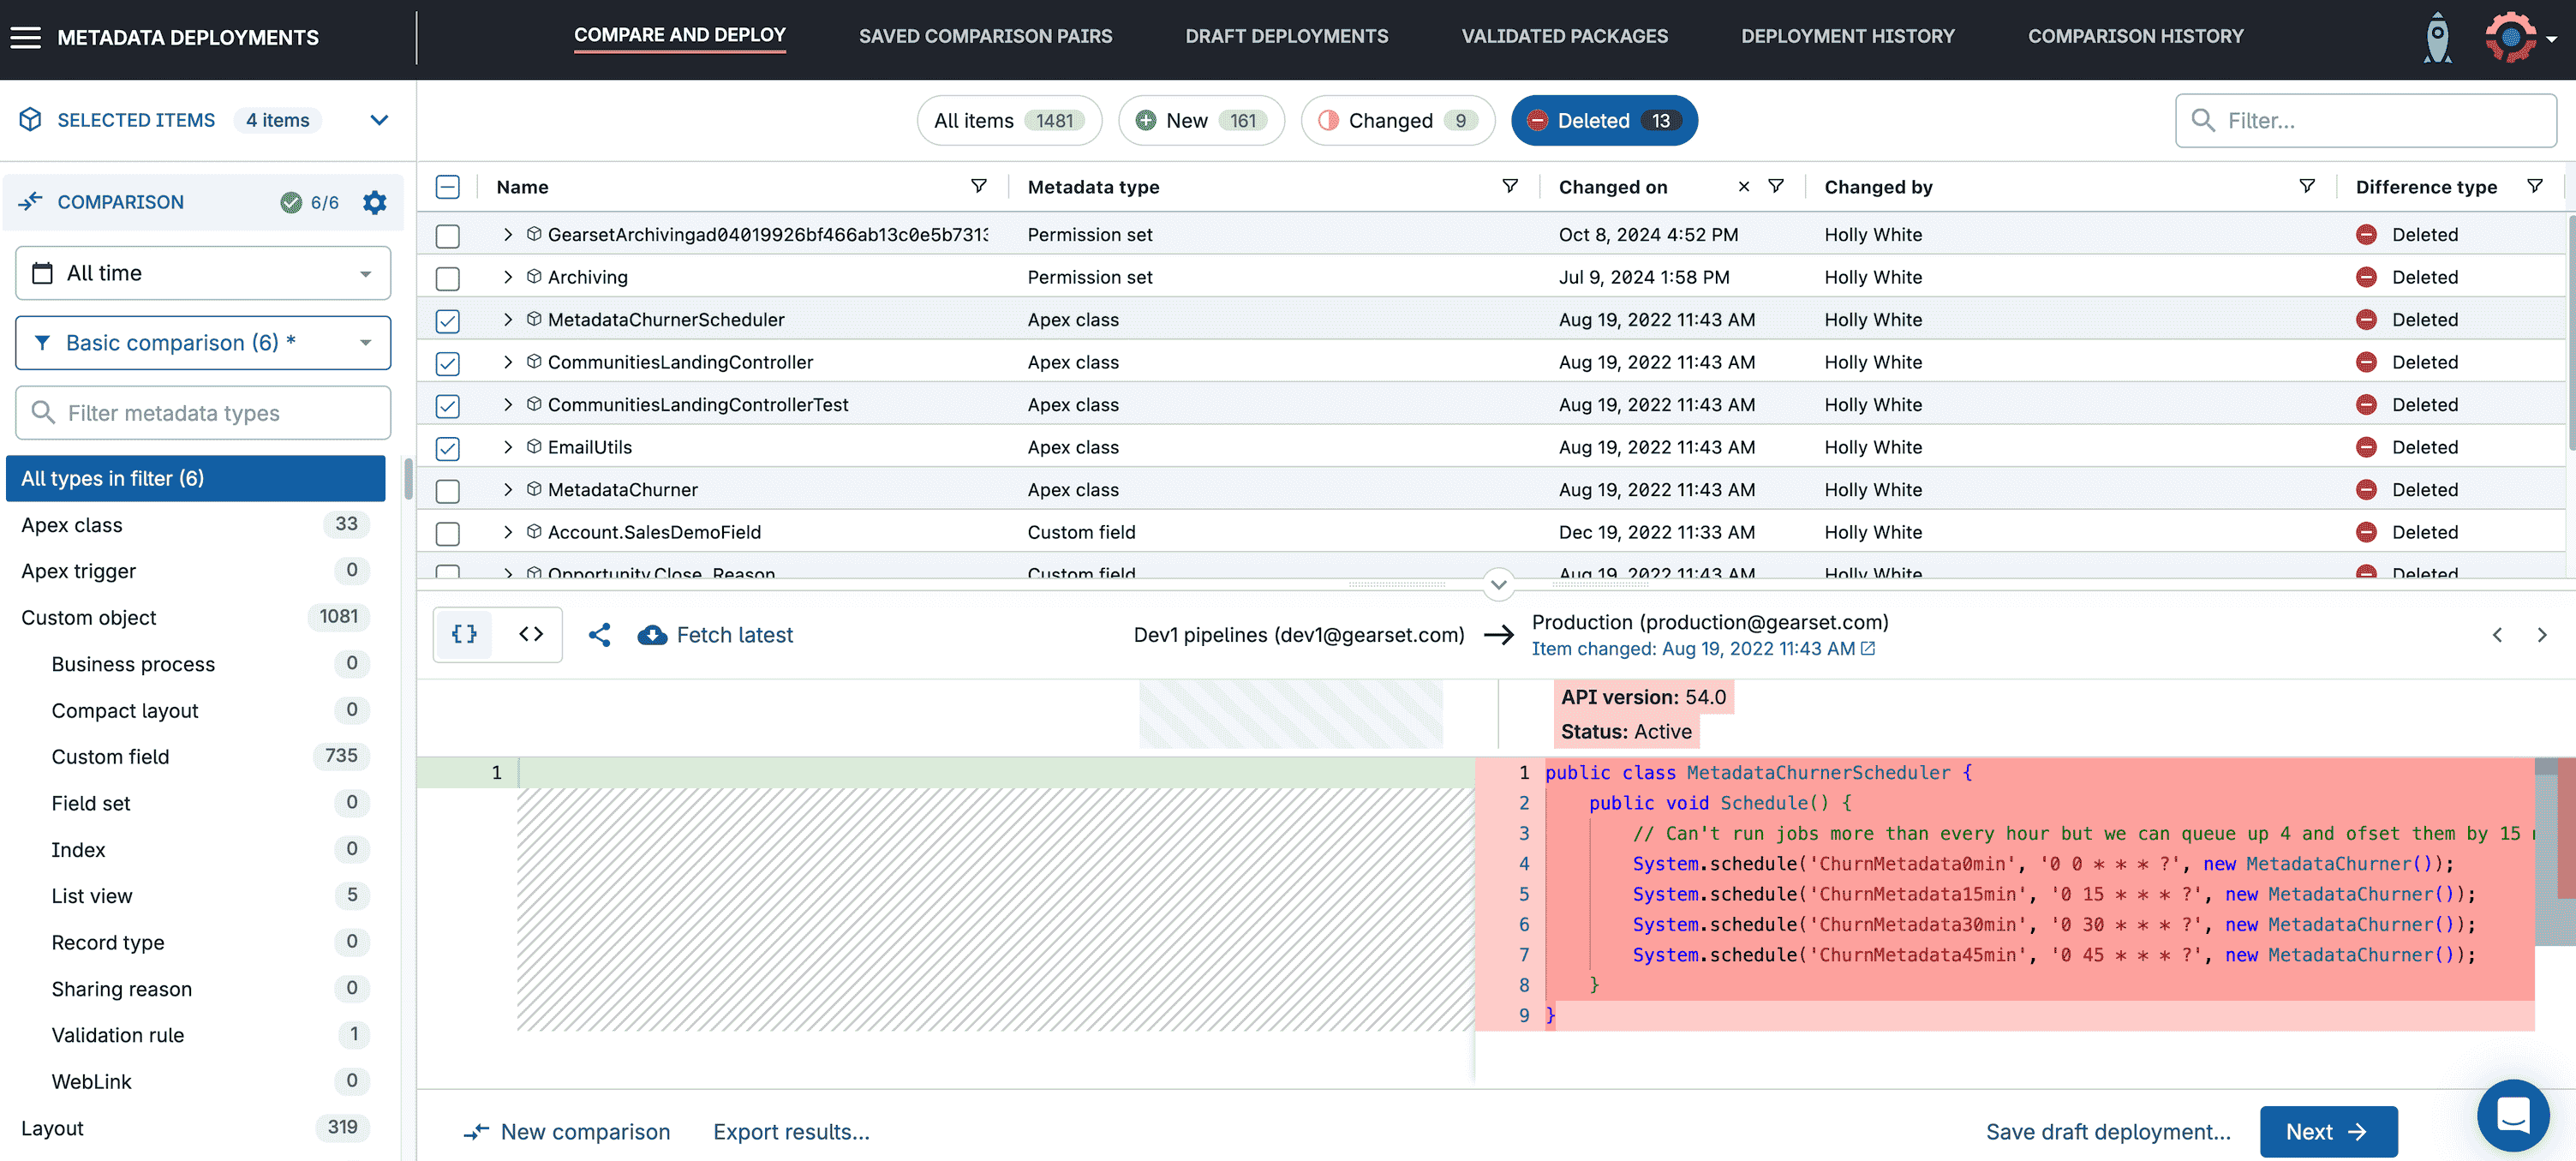
From the Deleted tab, choose the items you want to remove from the target environment. Click Next.
Run the problem analyzers
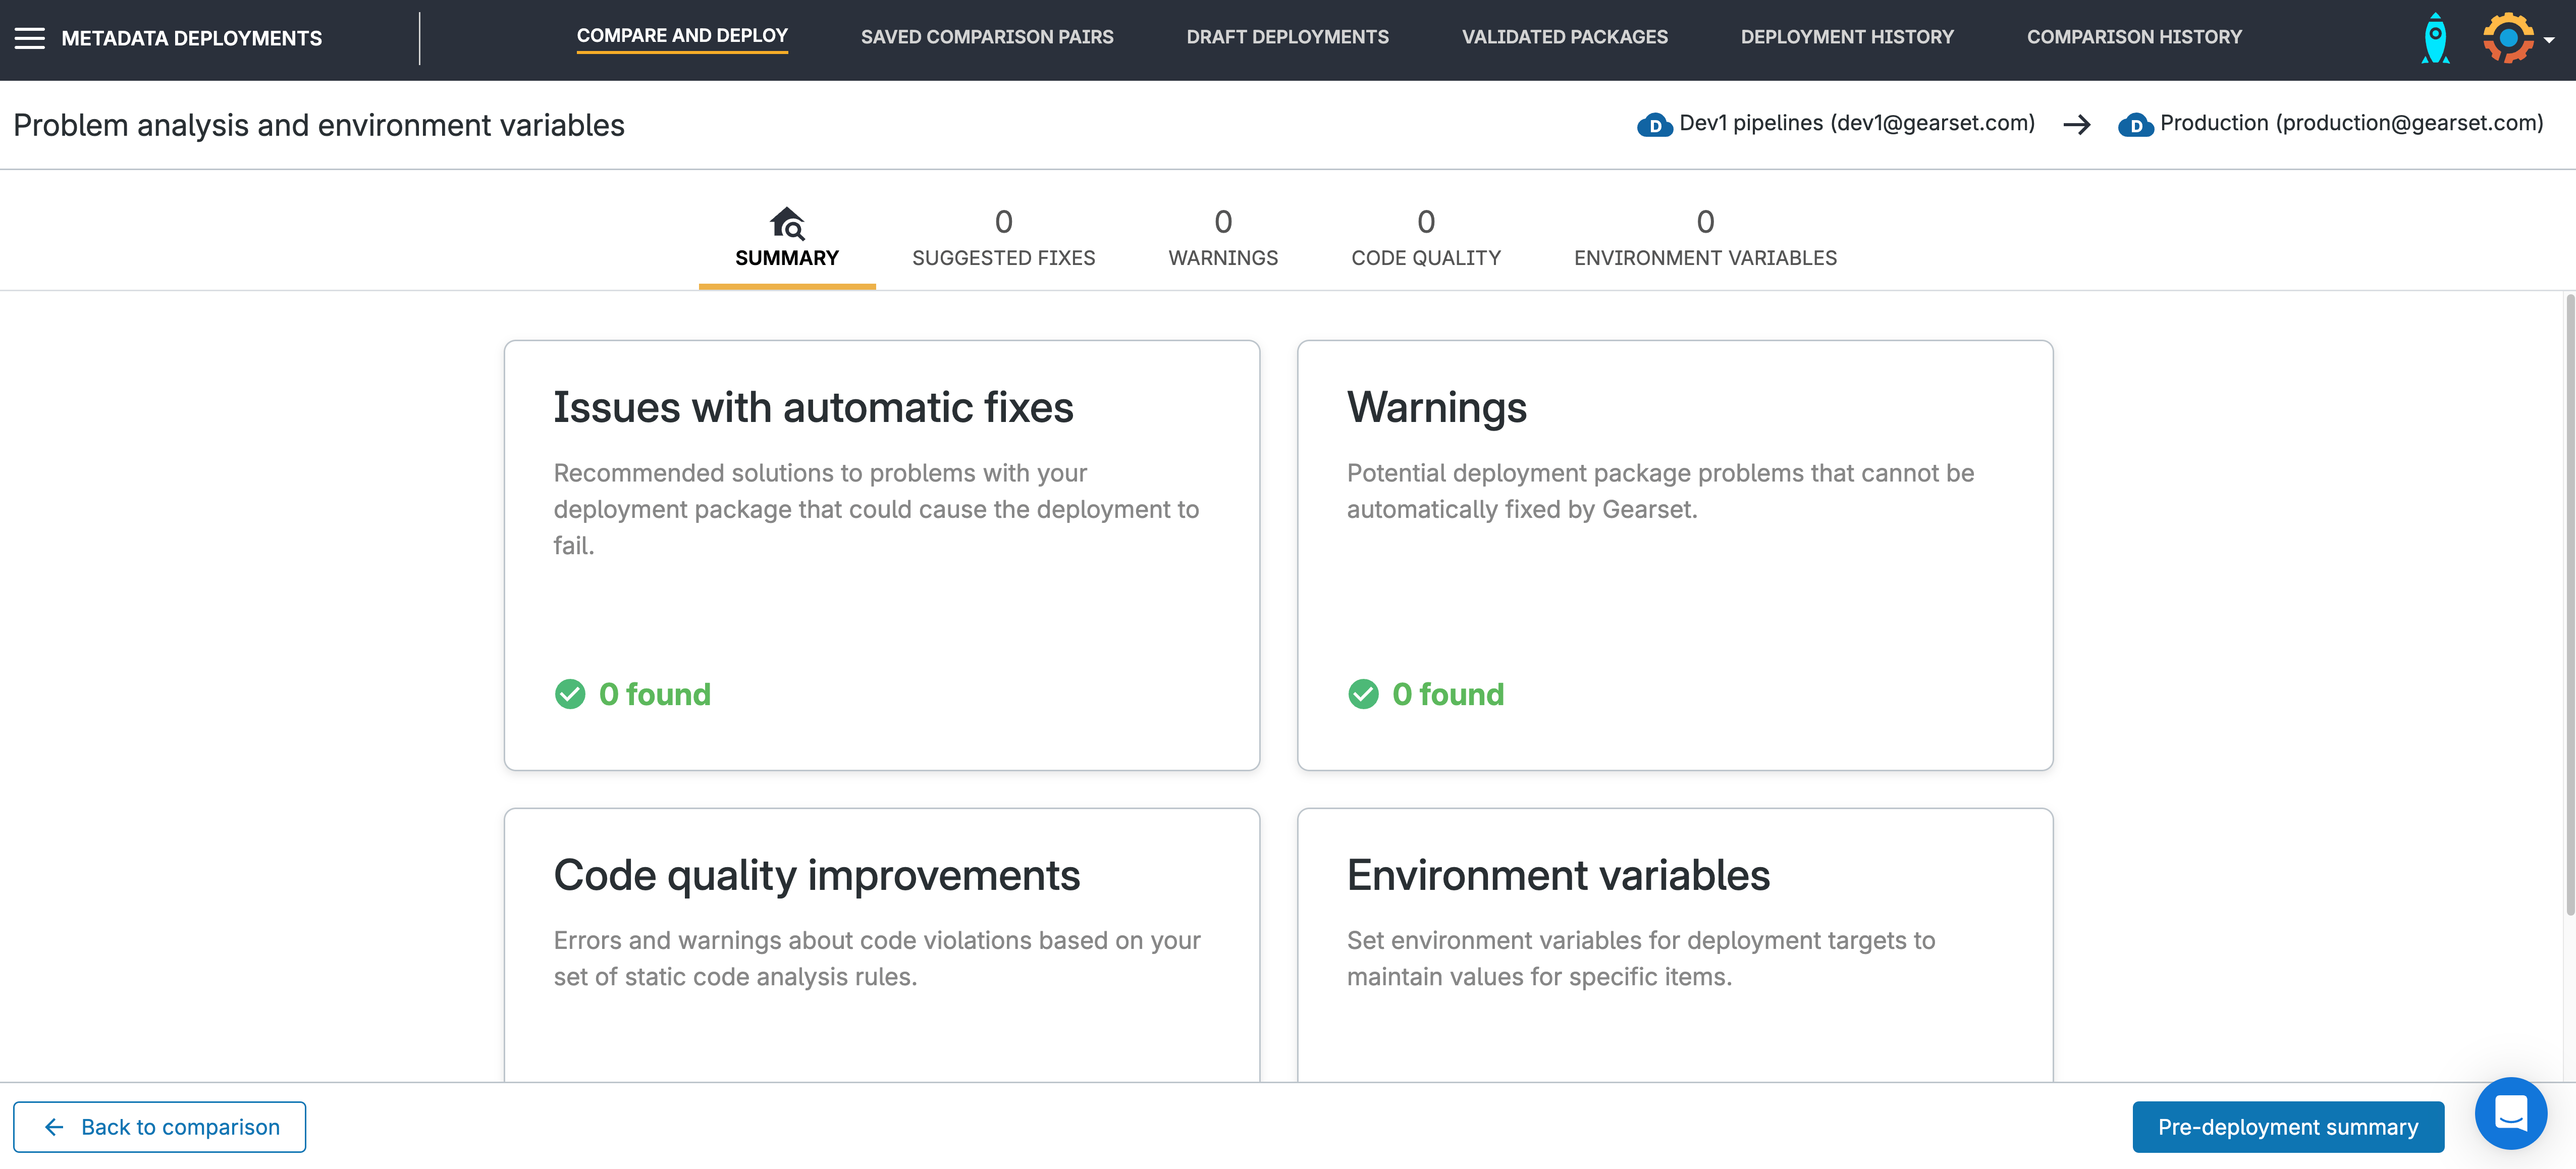
Gearset’s problem analyzers will pick up any dependencies that have been missed from your deletion and suggest deleting them as part of your deployment package — if they reference your deletion, they’re most likely redundant. Gearset shows you exactly which items would be deleted from your target environment. When you’re done, click through to the Pre-deployment summary.
Deploy your changes
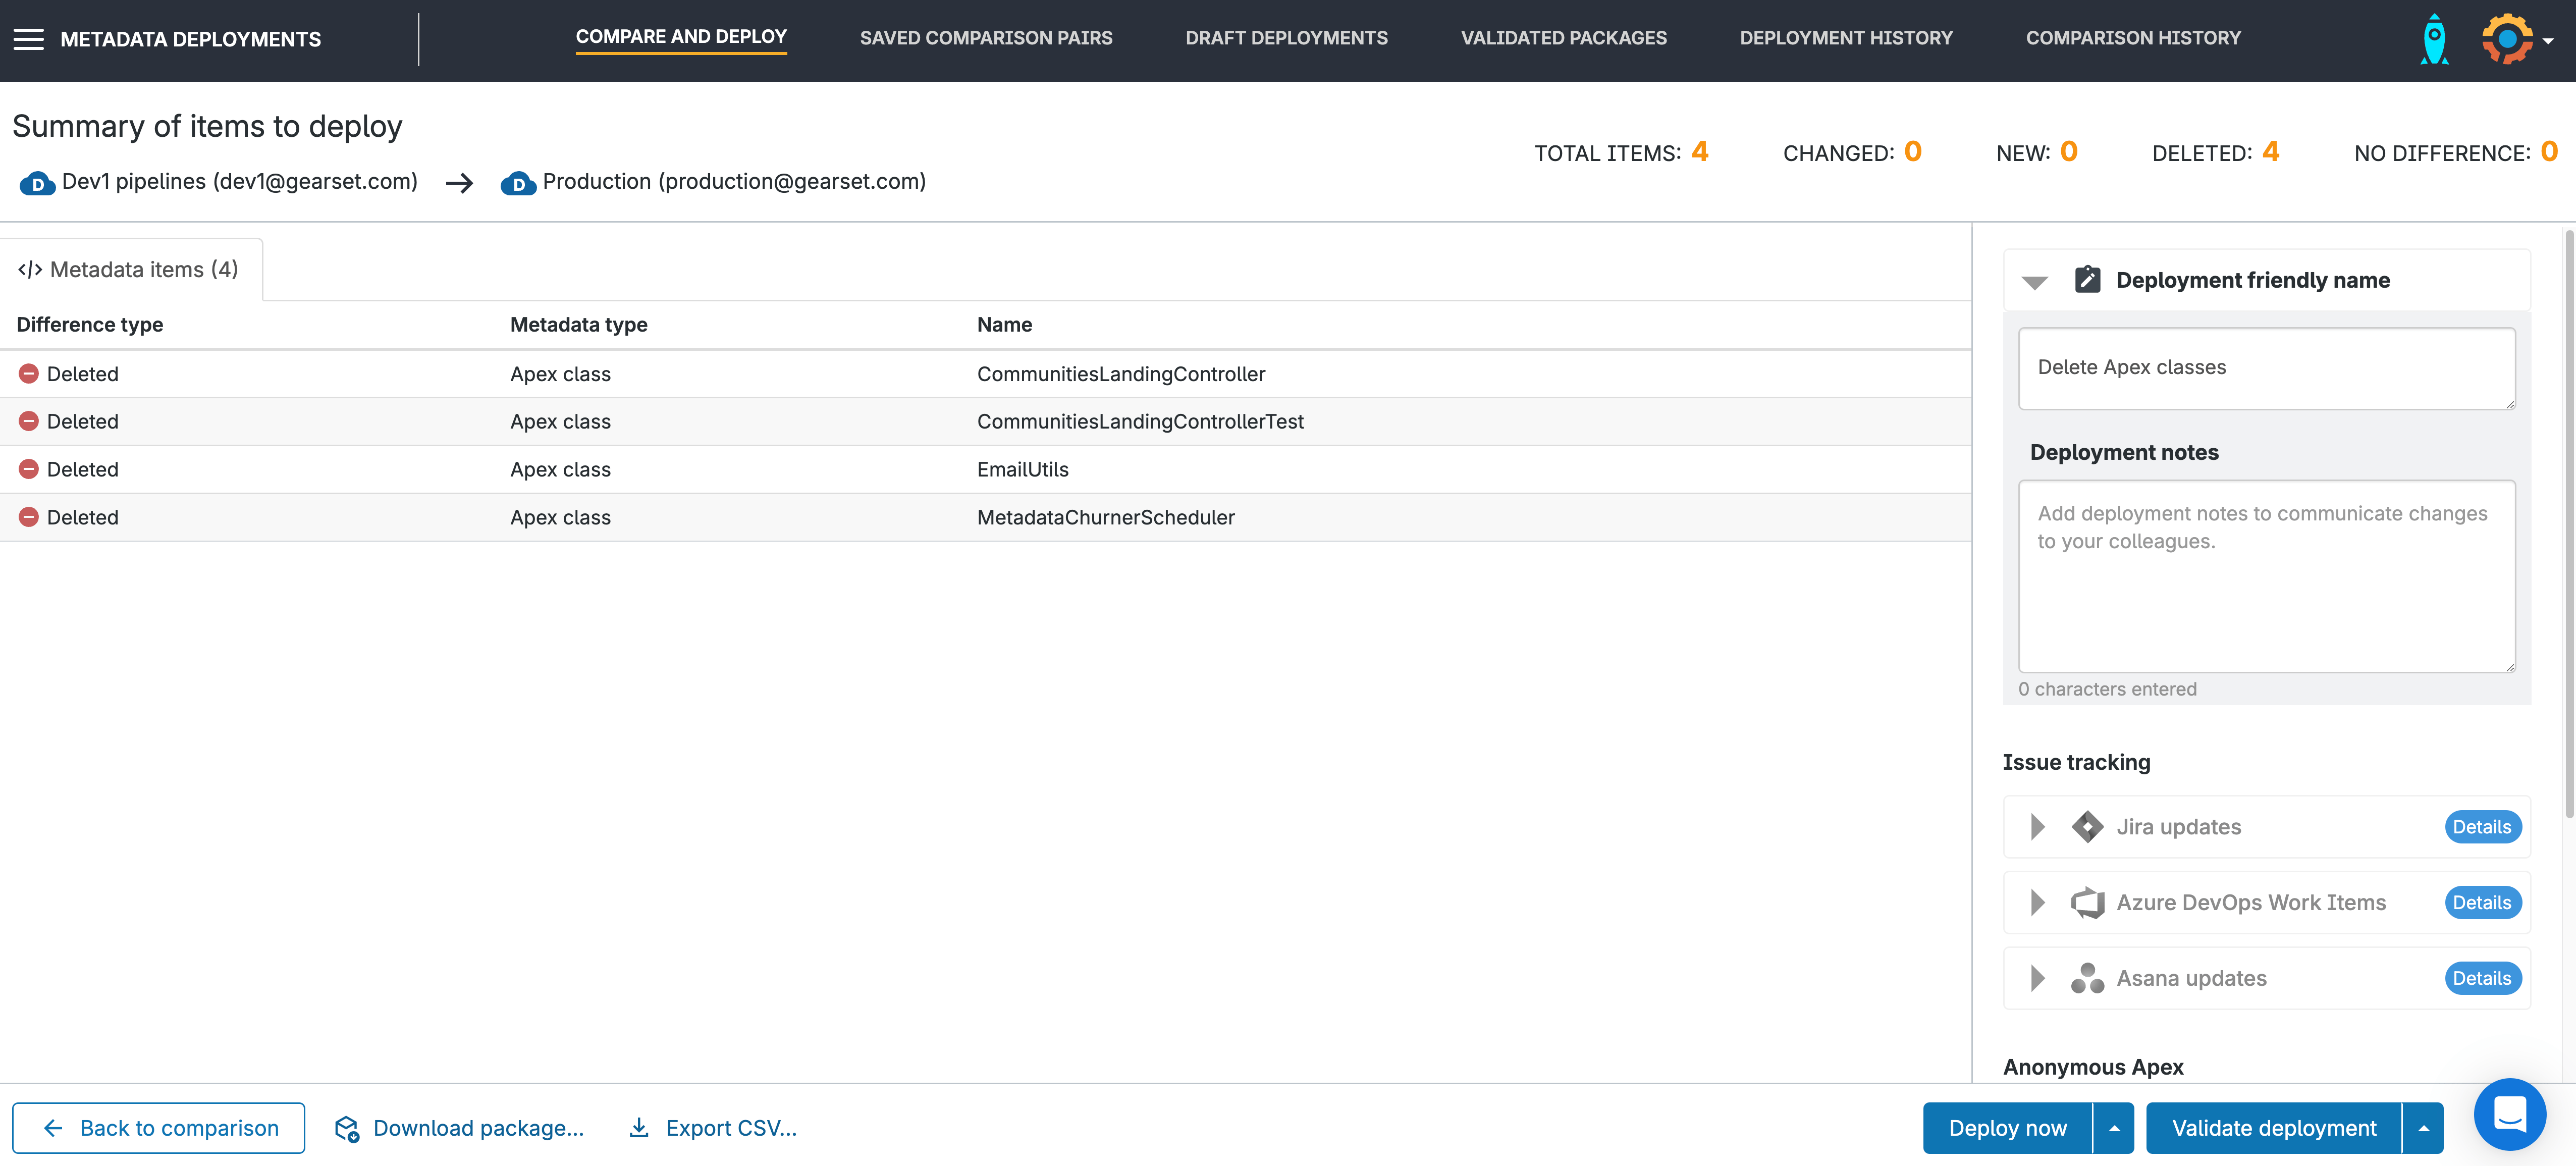
Name your deployment and include any useful notes for the rest of your team. You can also add and update any associated tickets from Jira, Azure DevOps Work Items or Asana for easy tracking and visibility. You can then choose to Validate deployment, Deploy now, or schedule the package to deploy at another time.
Finish the deployment
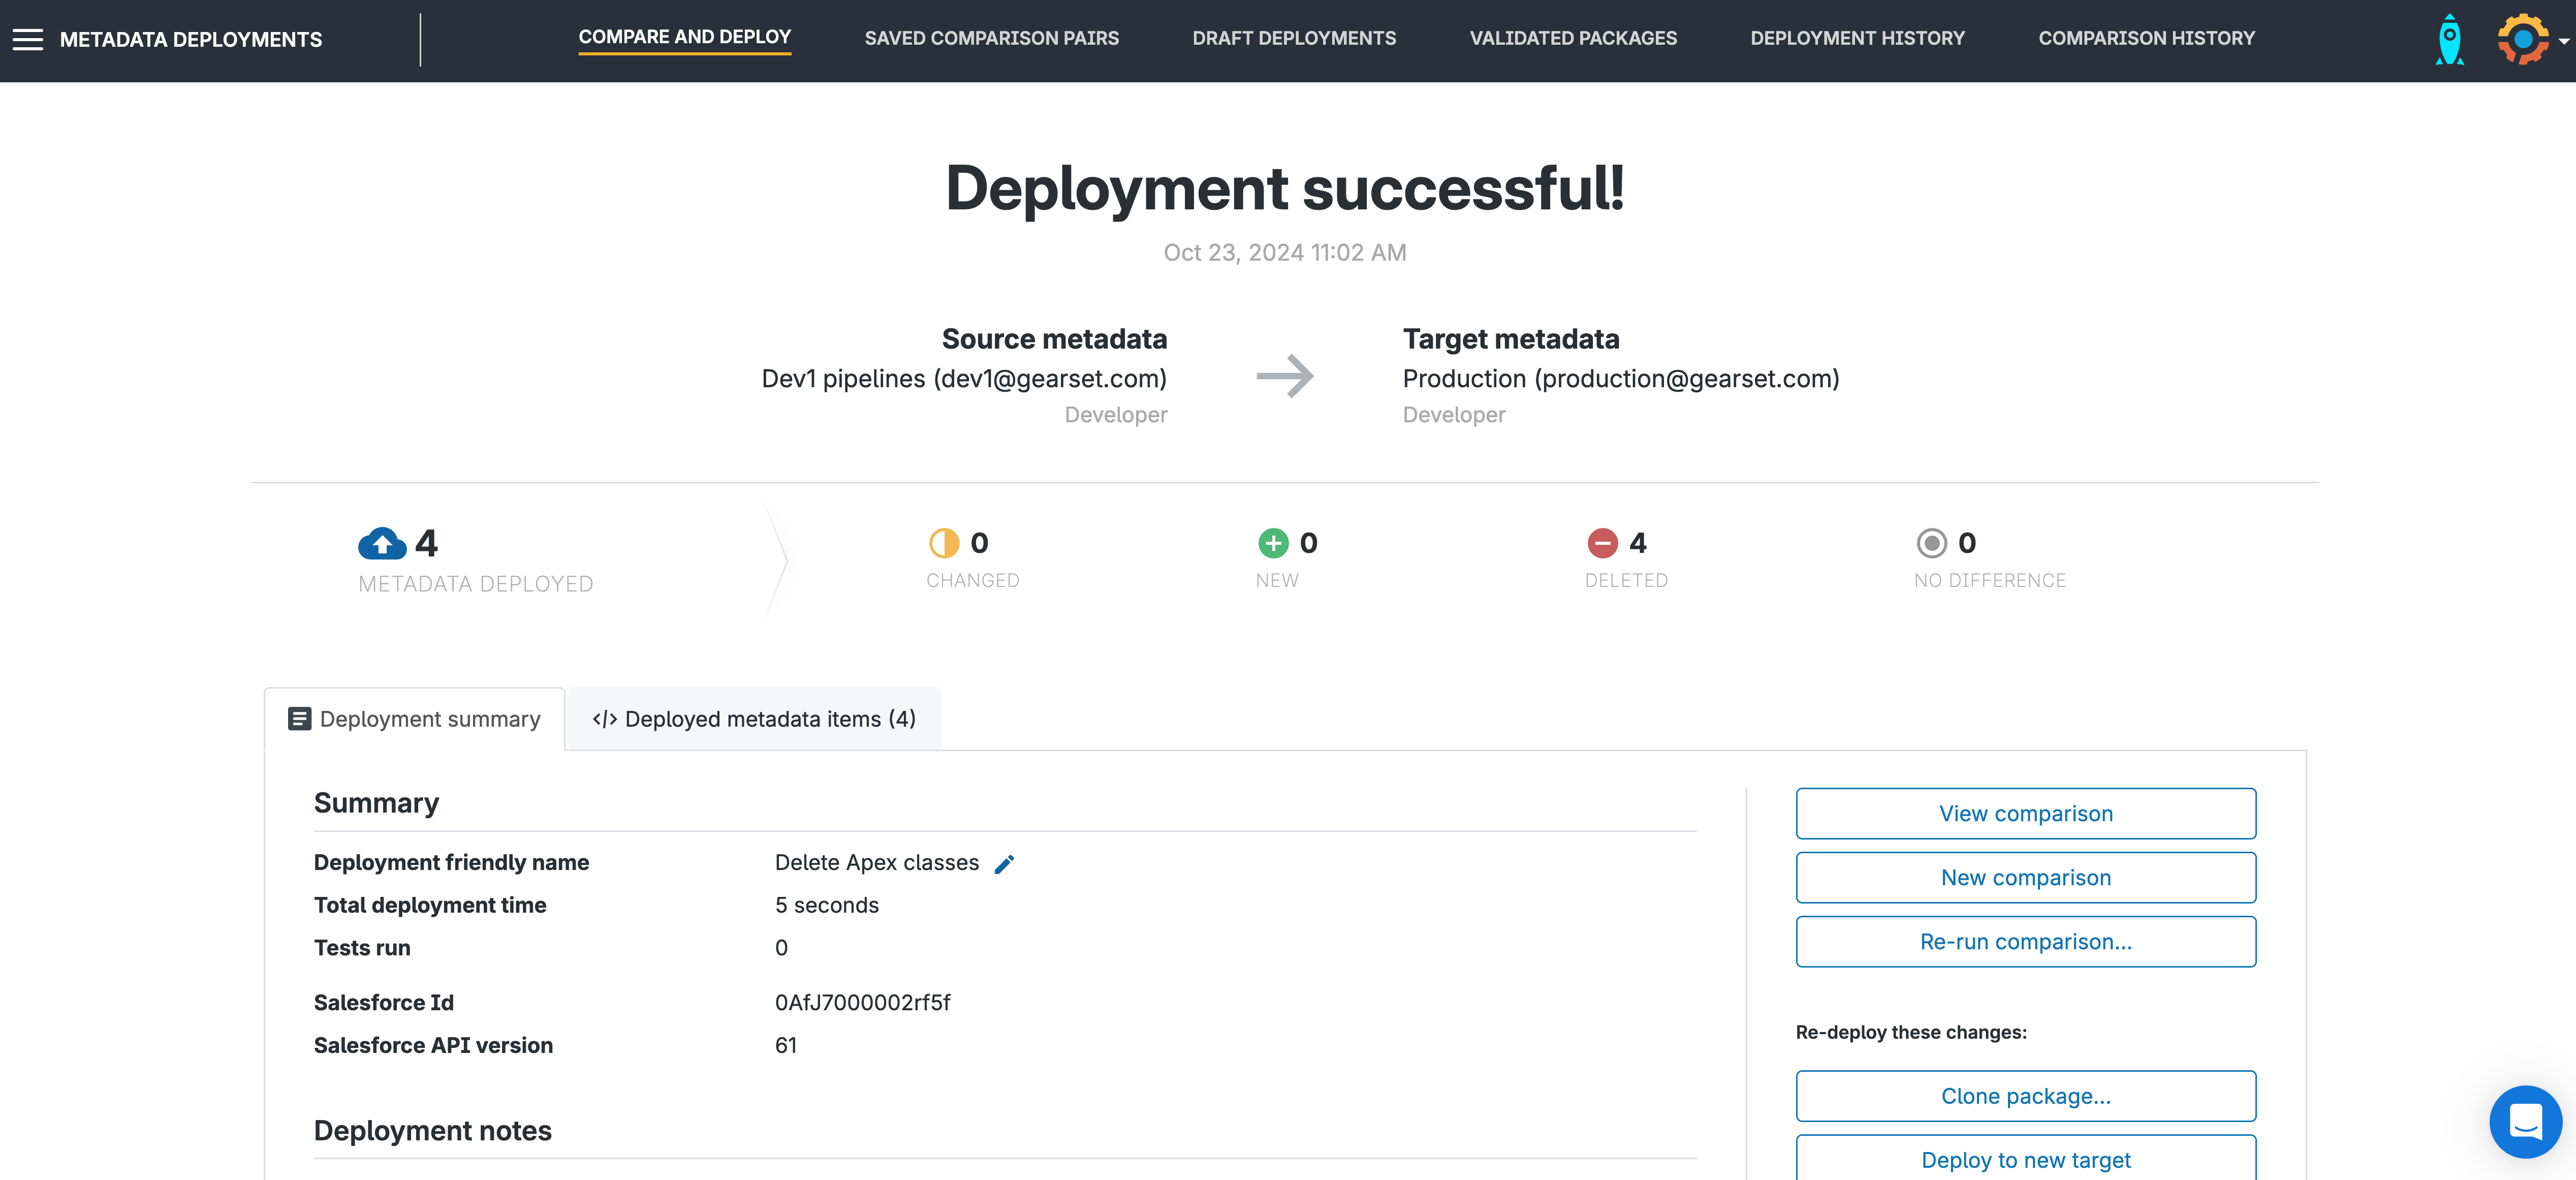
Once the deployment has run, you’ll be given a summary of the deployment and can download a full PDF report at any time from the Deployment history page.
Need to roll back your deletion? No problem!
Having the option to roll back your deployment is a gamechanger. Reverting changes with the click of a button minimizes any disruption to your end users.
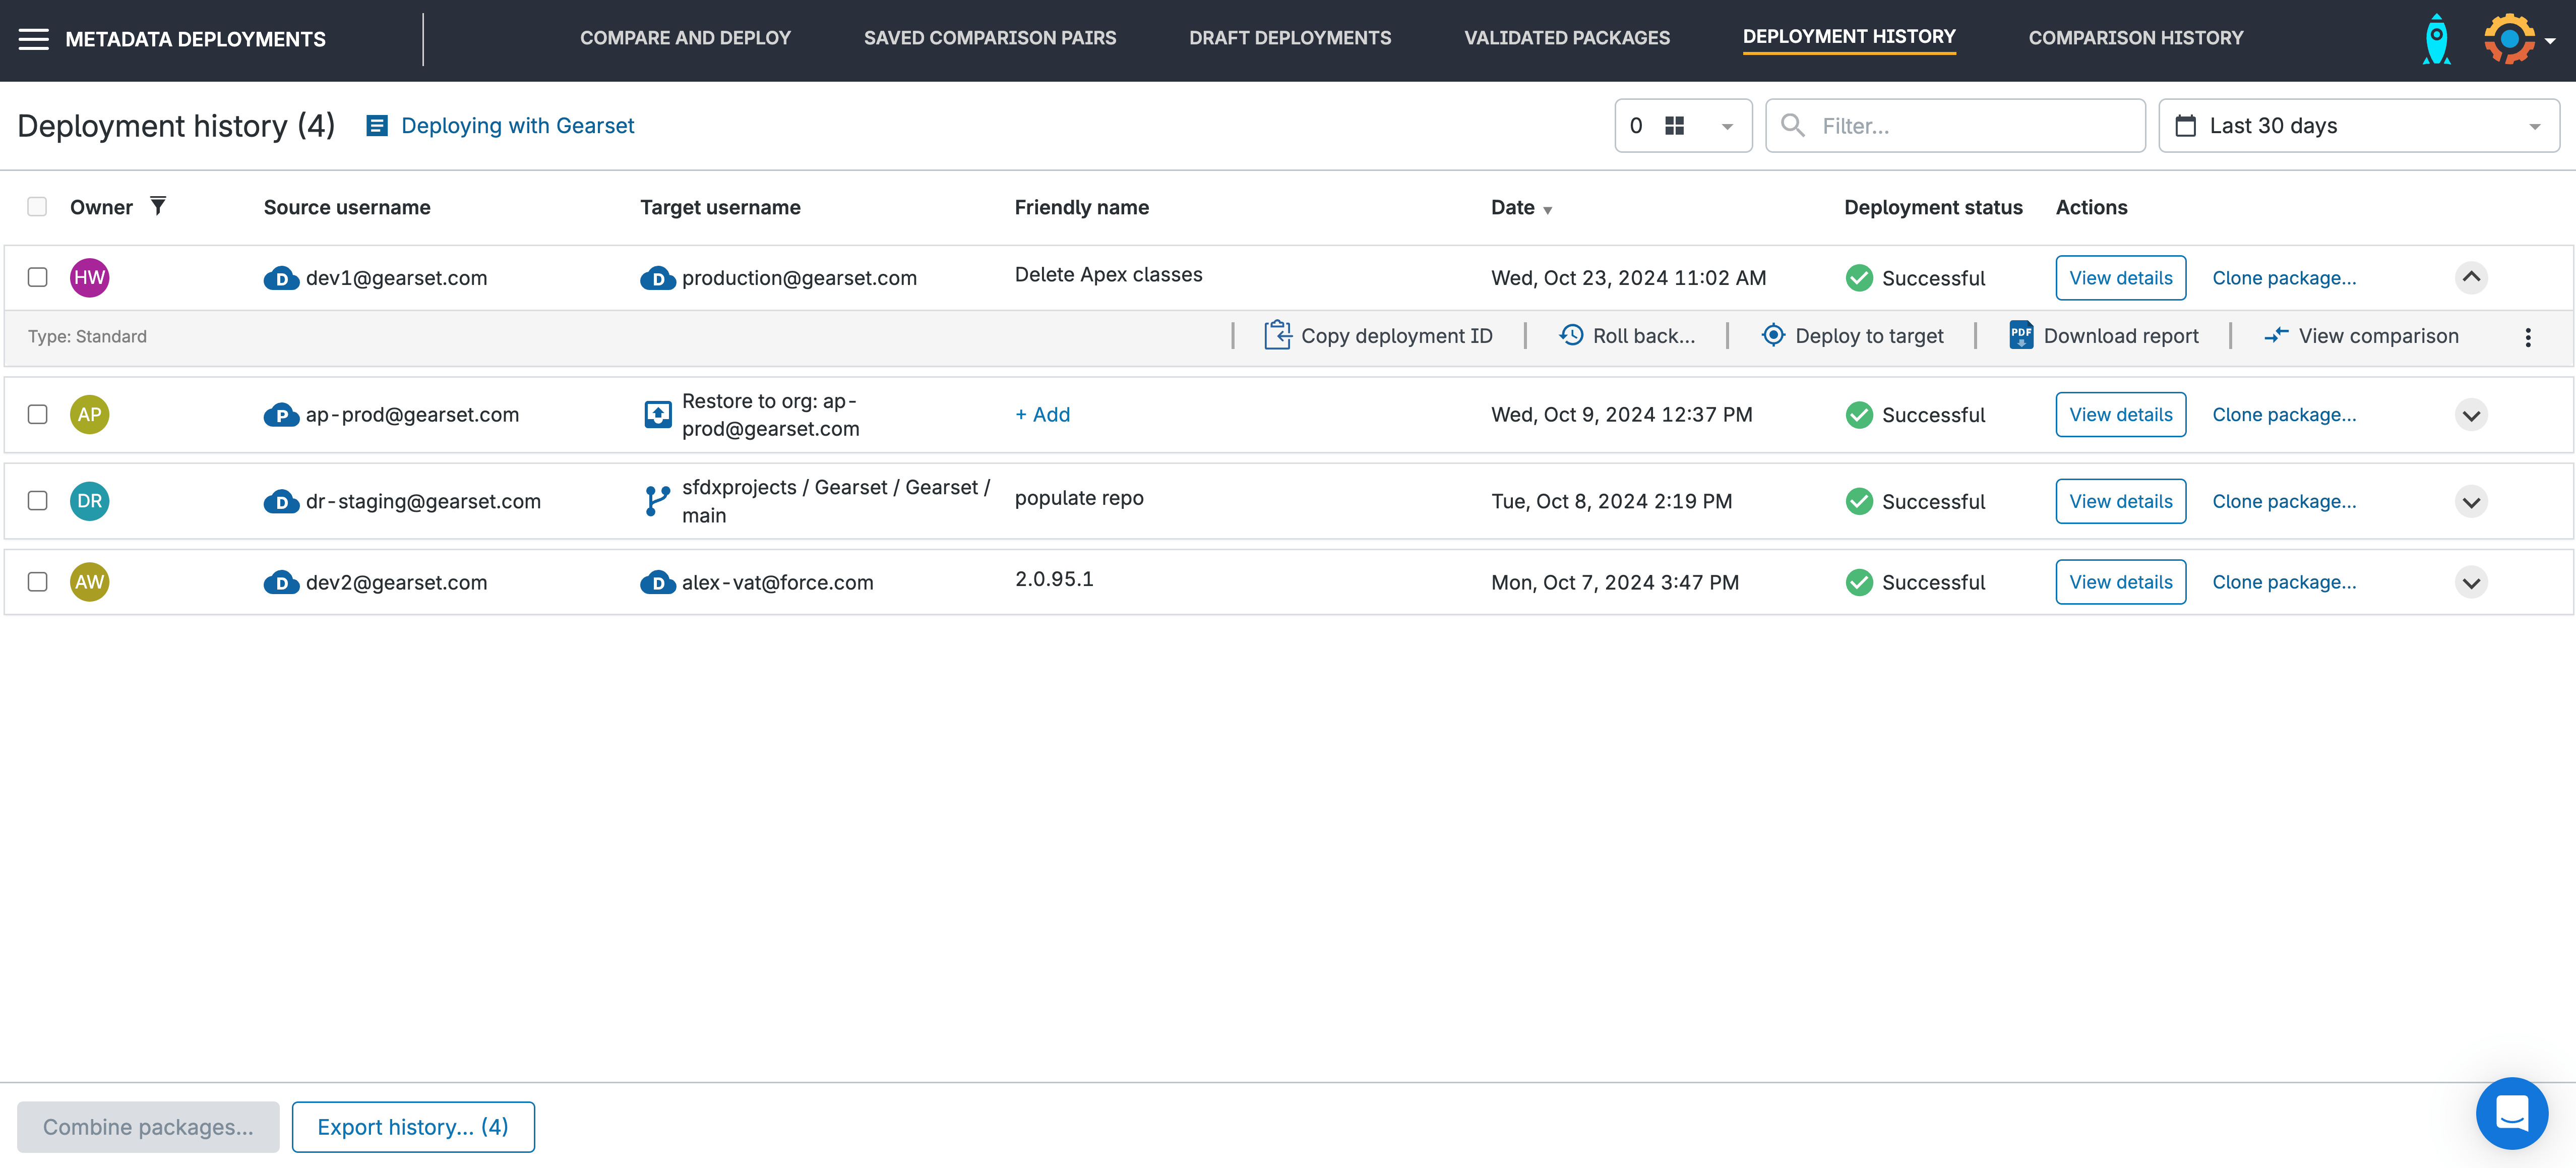
If you decide that you want to undo your deletion, head to the Deployment history tab in Gearset and select your deployment. Click Roll back.
Gearset takes a snapshot of your orgs before every deployment which is then used as the comparison if you want to undo the deployment — or in this case, the destructive change. Gearset will quickly see the differences between the org and snapshot, and you can choose to revert the changes partially or in full.
Deploy and delete safely with Gearset
Making destructive changes is high risk, and it can take a lot of time to figure out whether the component you’re deleting will cause issues in production. The only way to be sure you can safely proceed with a deletion is by having something to fall back on if everything goes wrong. In other words, it’s important to have the ability to roll back after deletions.
By using Gearset, Salesforce teams can quickly and confidently manage deployments knowing that there’s a safety net available if they want to revert any changes. Start your 30-day free trial of Gearset today to give you complete peace of mind, whether you’re adding metadata to your orgs — or deleting it.


