
Apex Triggers are a powerful tool for automating a range of tasks, from data validation to custom business logic. In this article, we’ll cover some of the fundamentals to be aware of when working with Apex Triggers. Then we’ll explore some of the smart functionality Gearset has for making Apex deployments easier.
When to use Apex Triggers
Using Apex Triggers, you can specify actions that should happen immediately before or after a record is inserted, updated, deleted, merged, upserted, or even undeleted.
Apex Triggers perform a similar function to Record-Triggered Flows. If the process you need to automate is fairly straightforward and supported by Flows, then a Record-Triggered Flow might be the best option. But Apex Triggers offer you more flexibility, as you can create a more complex automated process with custom code.
For large-scale data processing, Batch Apex may also be an option. But Batch Apex executes on a schedule or on demand, not via triggers. It’s designed for a smaller number of large processes — only five Batch Apex jobs can run at the same time. If you need a custom process to happen immediately, every time a certain kind of record changes, you should use Apex Triggers.
Virtual Summit: Taking control of complex orgs
Apex Trigger best practices
There are plenty of pitfalls to avoid when writing Apex Triggers, and various ways to optimize your code. You’ll find helpful guides in Salesforce’s own documentation, as well as from the community.
The most important best practices to know are:
- Avoid multiple triggers per object. It’s possible to create multiple Apex Triggers for one object, but there’s no quick way to determine the order in which they should run.
- Make sure you have no recursions. Your Apex Triggers shouldn’t call themselves, either directly or via another Apex class.
- Bulkify your code. Write Apex Triggers that still work when several records change at once.
Another important area to consider is code reuse. It’s easier and more efficient to maintain a codebase where the same functions use the same code. For example, you might want to write helper classes that can be used by multiple triggers. But you should keep separation of concerns, so that refactoring code doesn’t unintentionally break something.
Do you need a test class for an Apex Trigger?
While you don’t strictly need to write a test class to create and deploy any given Apex Trigger, you do need to maintain code coverage of at least 75% — otherwise you won’t be able to deploy your code to production.
You should write test classes for Apex Triggers just as for any Apex class. Tests make sure your code executes as intended, and you can automate unit tests in production to avoid silent test failures caused by breaking changes. Test-driven development — writing robust tests first then creating code that passes those tests — is a best practice approach.
As well as testing your Apex Triggers, running static code analysis will improve your code quality. With an agreed ruleset across your development team, your codebase will become more consistent, efficient, and secure, as well as being easier to review and refactor.
How to deploy Apex triggers natively in Salesforce
Apex classes can’t be written in production. They must be created in a development environment and deployed to production.
There are several options for deploying on Salesforce, from native tools to third-party solutions. In the rest of this article, we’ll look at how to deploy using change sets, and how the same deployment works with Gearset.
You can only use change sets to deploy between Salesforce orgs. If you haven’t already set up a connection between your sandbox and production orgs, you’ll need to connect and authorize deployments between them.
1. Build an outbound change set
In your sandbox org, head to the Outbound Change Sets page and find the components you want to deploy. You’ll need to work out which bits of metadata you’ve changed, and all of their dependencies. For example, if you’ve written a test class for your Apex Trigger, you’ll need to deploy them both. Clicking View/Add dependencies will show you the components your trigger depends on — these should all be included in your change set.
2. Upload the outbound change set
From the Outbound Change Sets page, click Upload for the change set you want to deploy. Once you’ve uploaded a change set, it can’t be recalled or edited.
3. Log in to your production org
To deploy the change set, you must log in to the target org — ultimately this will be the production org. This means anyone involved in deployments to production must have login access to the production environment, which isn’t ideal from a security viewpoint.
4. Deploy the inbound change set
Head to the Inbound Change Sets page and find the relevant change set with your Apex Trigger. You can validate a change set before deploying. If your validation or deployment fails, you’ll need to work out what went wrong, implement a fix, then try again with another change set from the sandbox org.
Note: Unlike other metadata changes, there is no way to delete Apex in production, and you can’t deploy deletions via change sets. Another deployment tool will be needed to remove any Apex Triggers from production.
How to deploy Apex Triggers using Gearset
Using Gearset to deploy Apex Triggers has several advantages over change sets:
- Complete visibility of your the differences between your orgs
- Automatic problem analysis for common errors like missed dependencies
- Automatic detection of relevant tests to run during deployment
- Validations and deployment scheduling ahead of time
- The ability to cherry pick individual lines of code to deploy
- The ability to make destructive changes safely
- Full or partial rollback of any deployment in your Gearset history
All this makes deployments faster and easier — and that’s before even getting on to a mature DevOps process in Gearset with a CI/CD pipeline for automated deployments.
If you’d like to follow along with this walkthrough, you can try all of Gearset free for 30 days.
1. Build your deployment package
First, select the source and target for your deployment. In this example, we’re deploying from a developer org to production, but you can deploy to and from version control or a scratch org using exactly the same workflow. Unlike with change sets, users can have delegated access to deploy to an org, without having login access to that org.
In this example, we’re going to use Gearset’s recently upgraded comparison workflow, so we’ll hit Compare now 2.0.
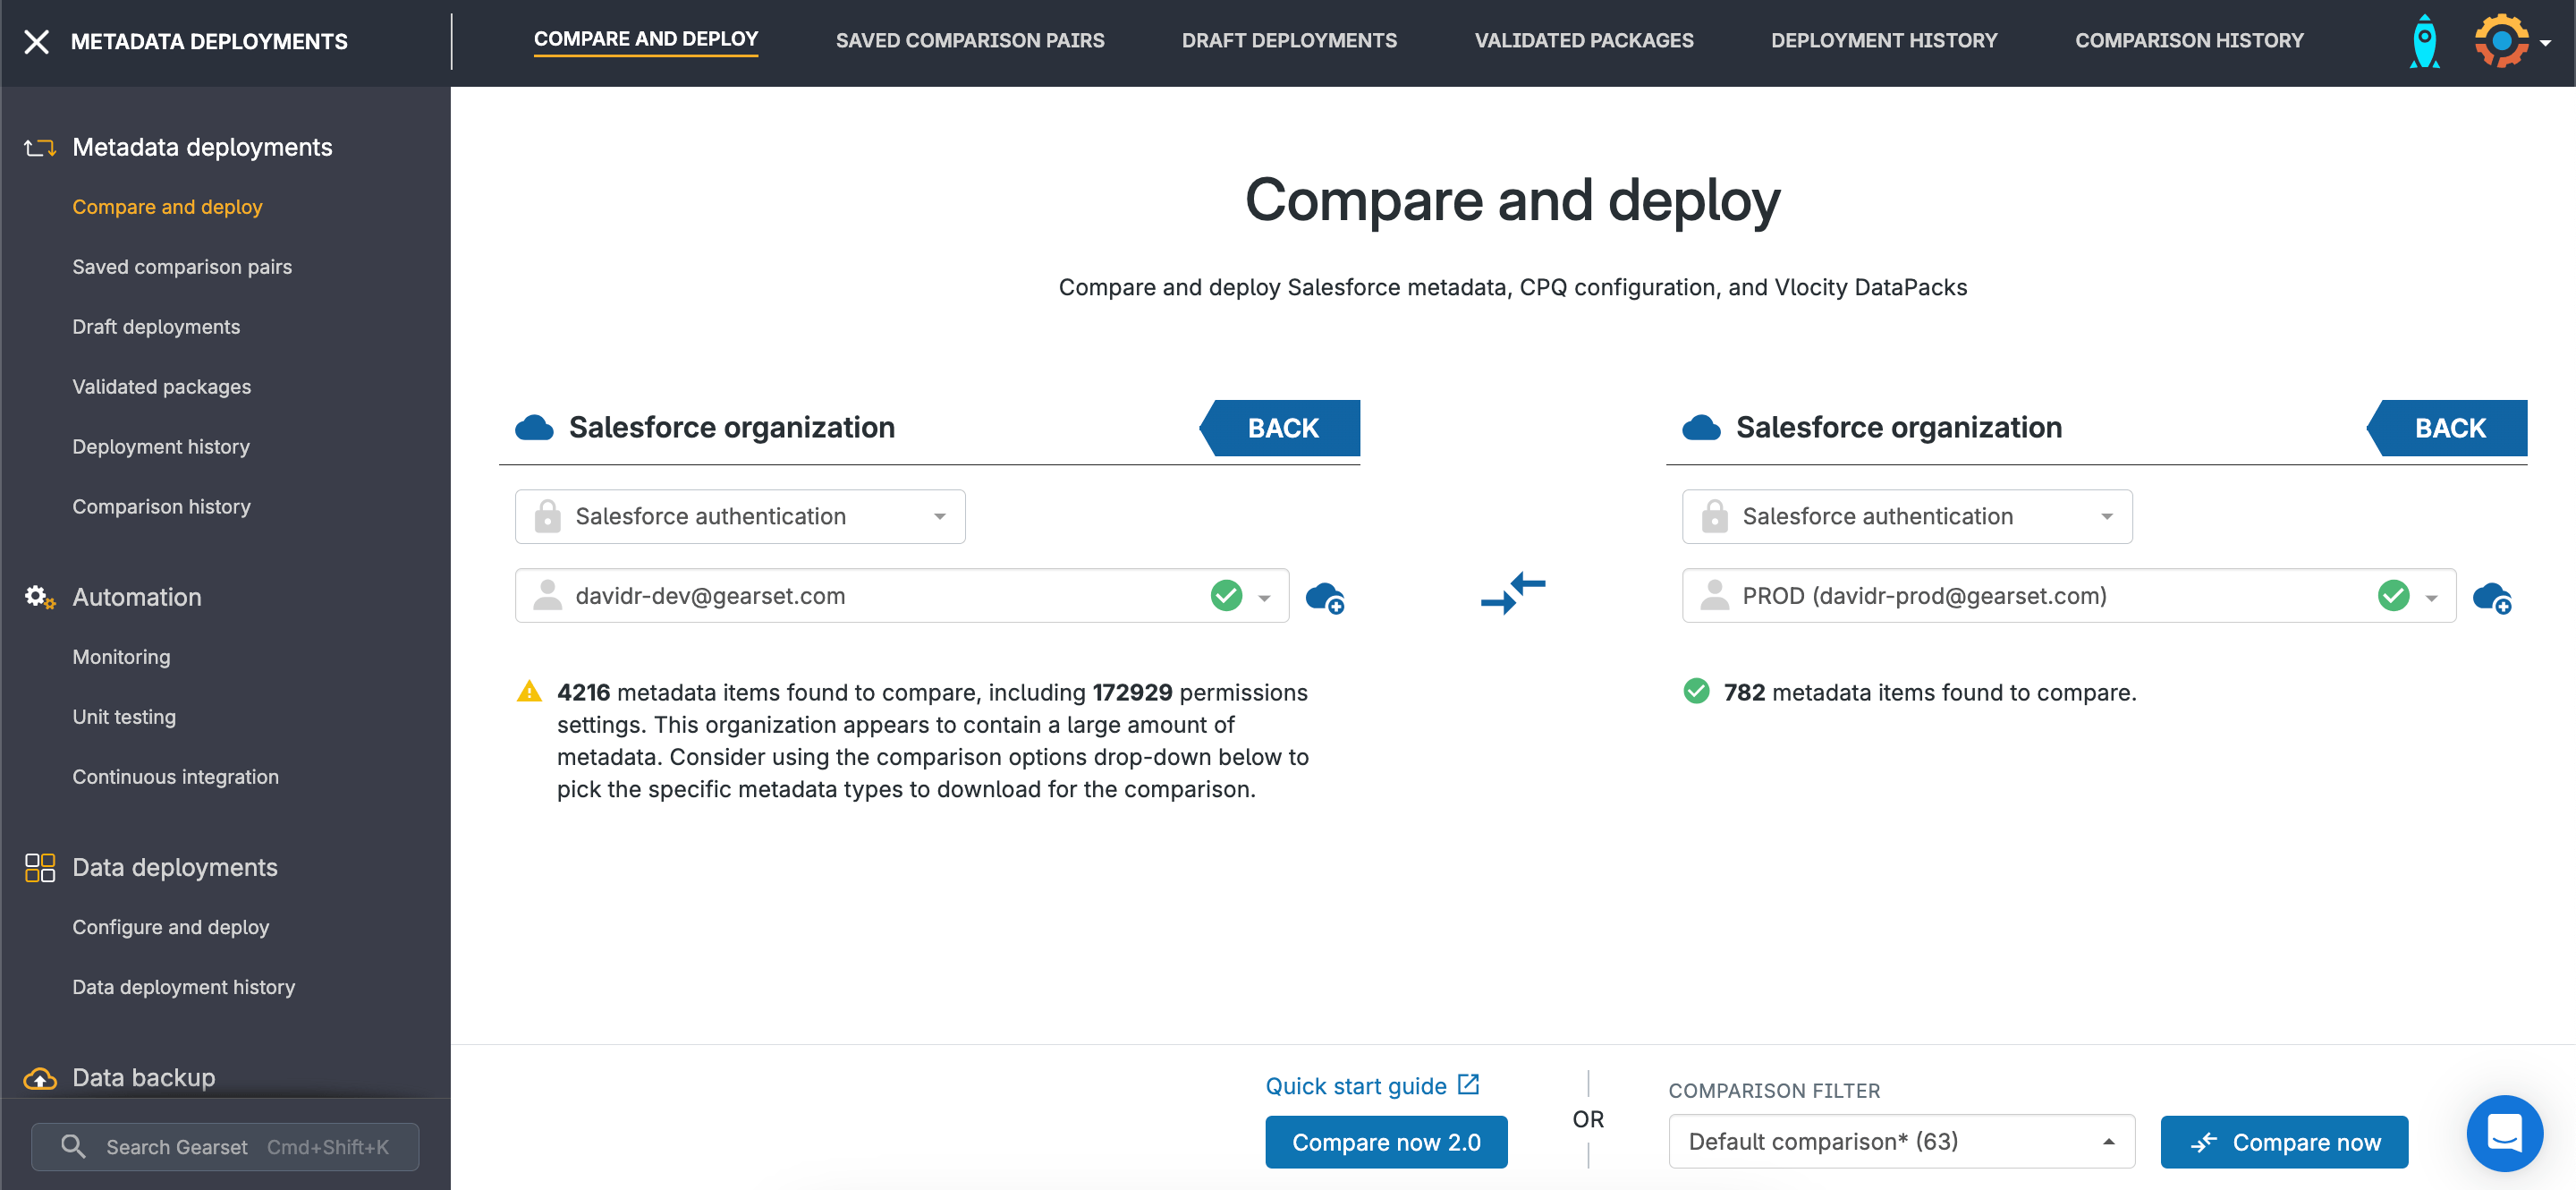
Apex classes and Apex triggers are included in Gearset’s “basic comparison” filter, so selecting that pulls the relevant metadata into our comparison.
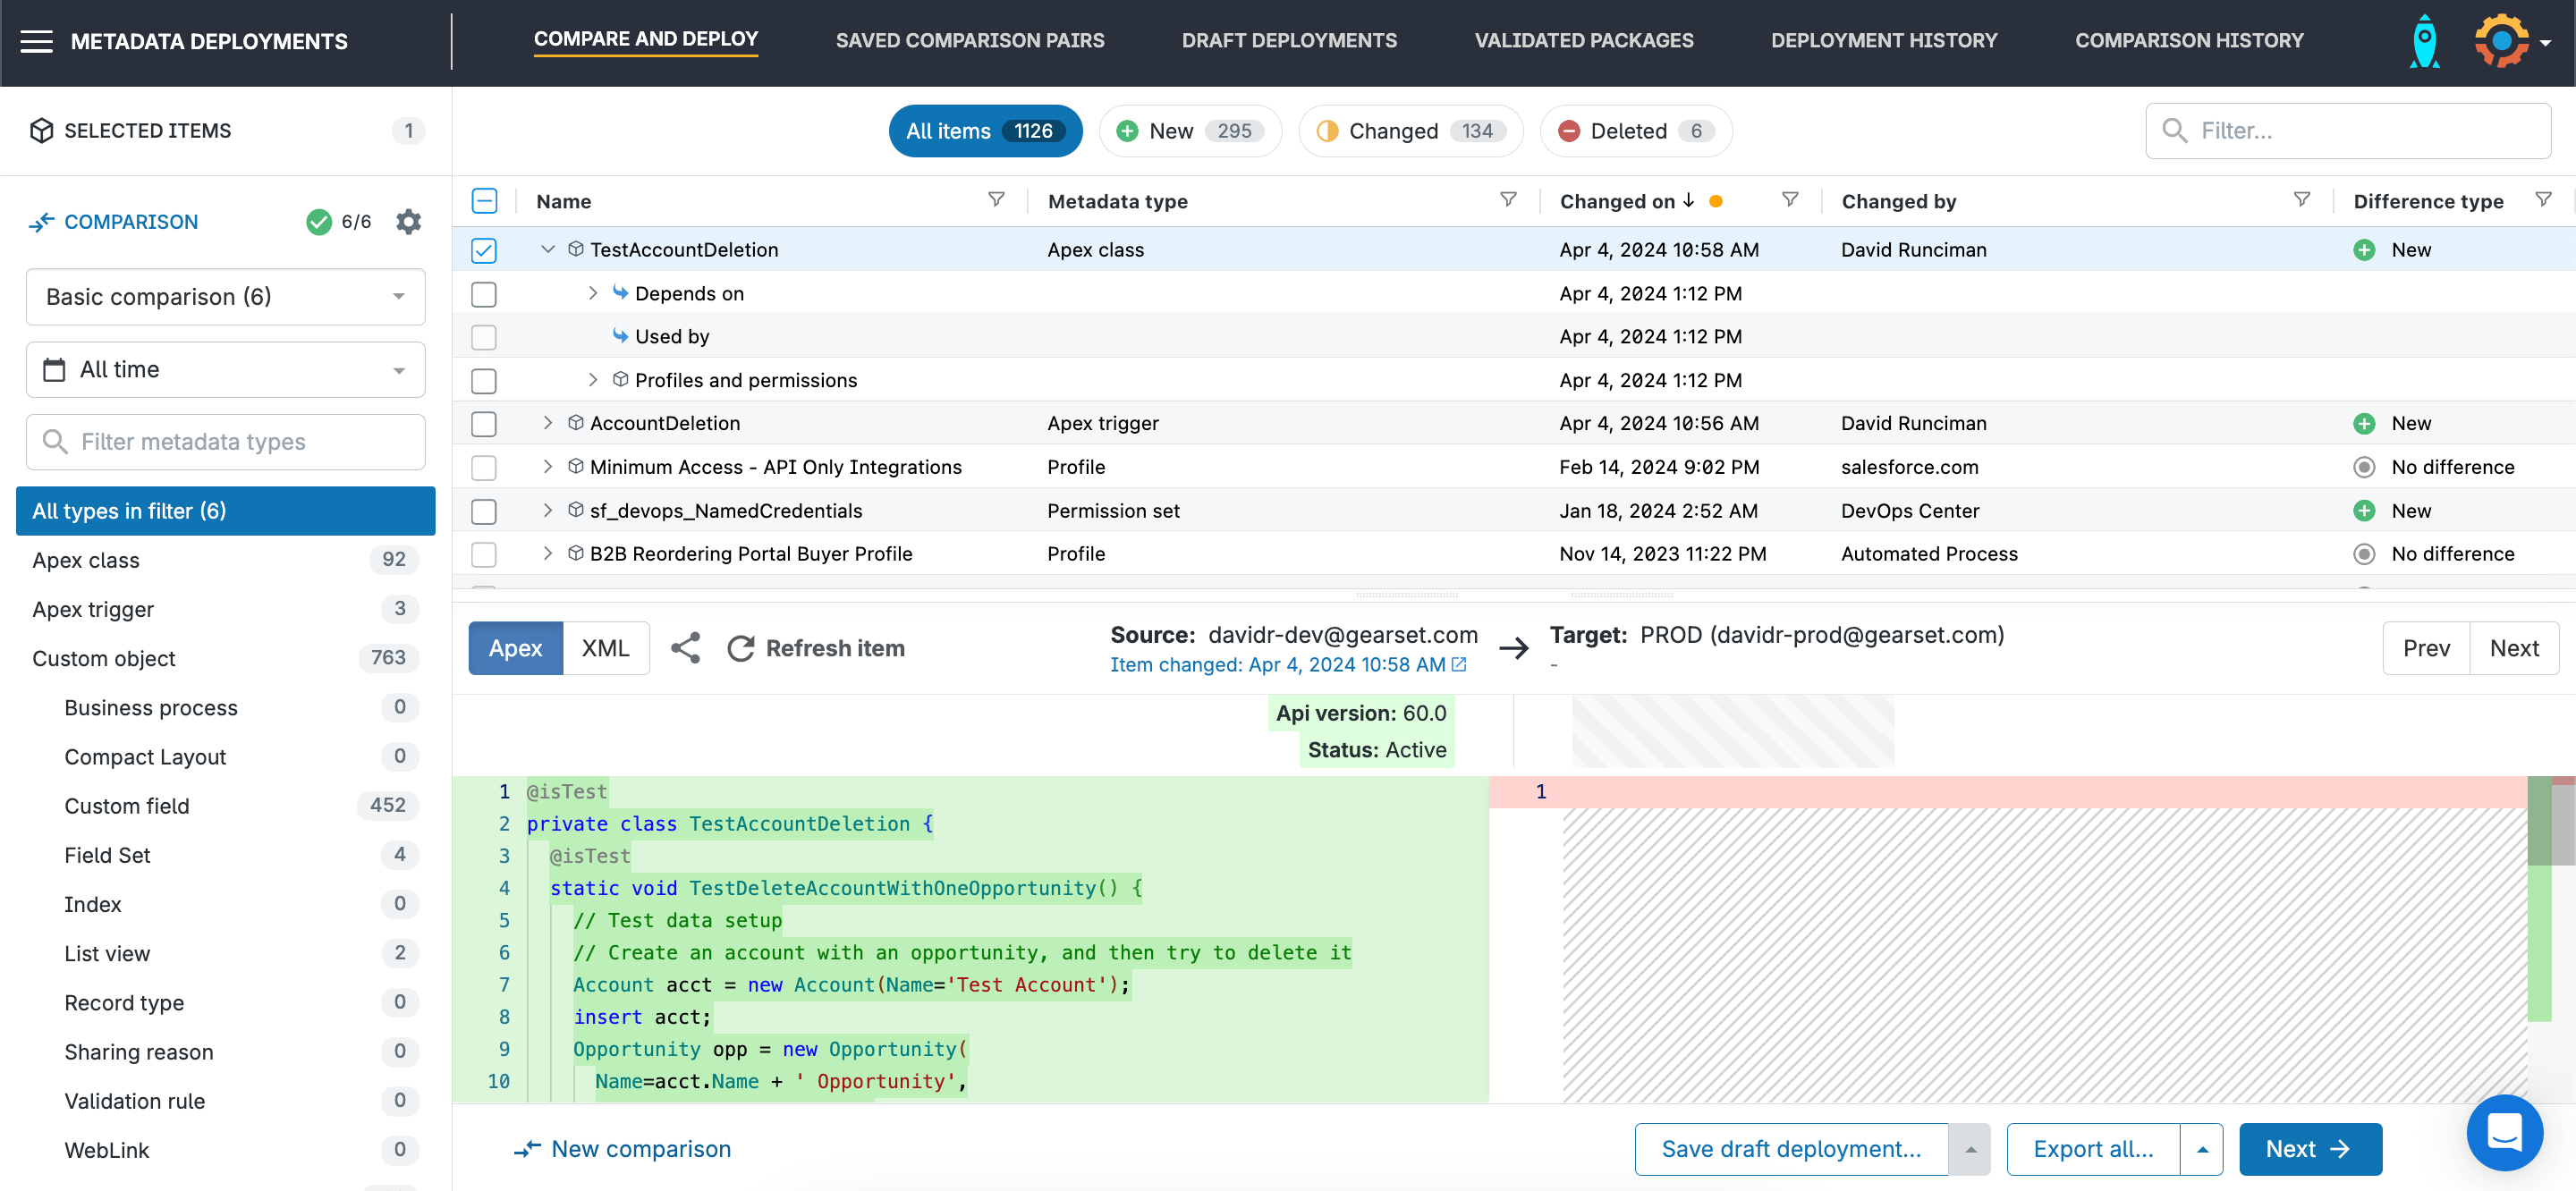
We can see all the items of those metadata types listed in the top half of the page, and by selecting an item we can see the exact differences between source and target in the bottom half of the page.
For Apex classes and triggers, you can select specific lines of code to deploy with Gearset’s Precision Deployments. This allows you to deploy individual methods or code blocks while holding back other changes you’re still working on, and avoids overwriting work in the target.
Gearset displays the most recent changes at the top, as they’re most likely to be the changes we want to deploy. So we can see our TestAccountDeletion test class and our AccountDeletion Apex Trigger. We can open up the dropdown for any item and explore its dependencies and related items.
When we’ve selected our items for deployment, we can click Next. In this example, we can see we forgot to select our AccountDeletion trigger — we’ll see how Gearset handles that.
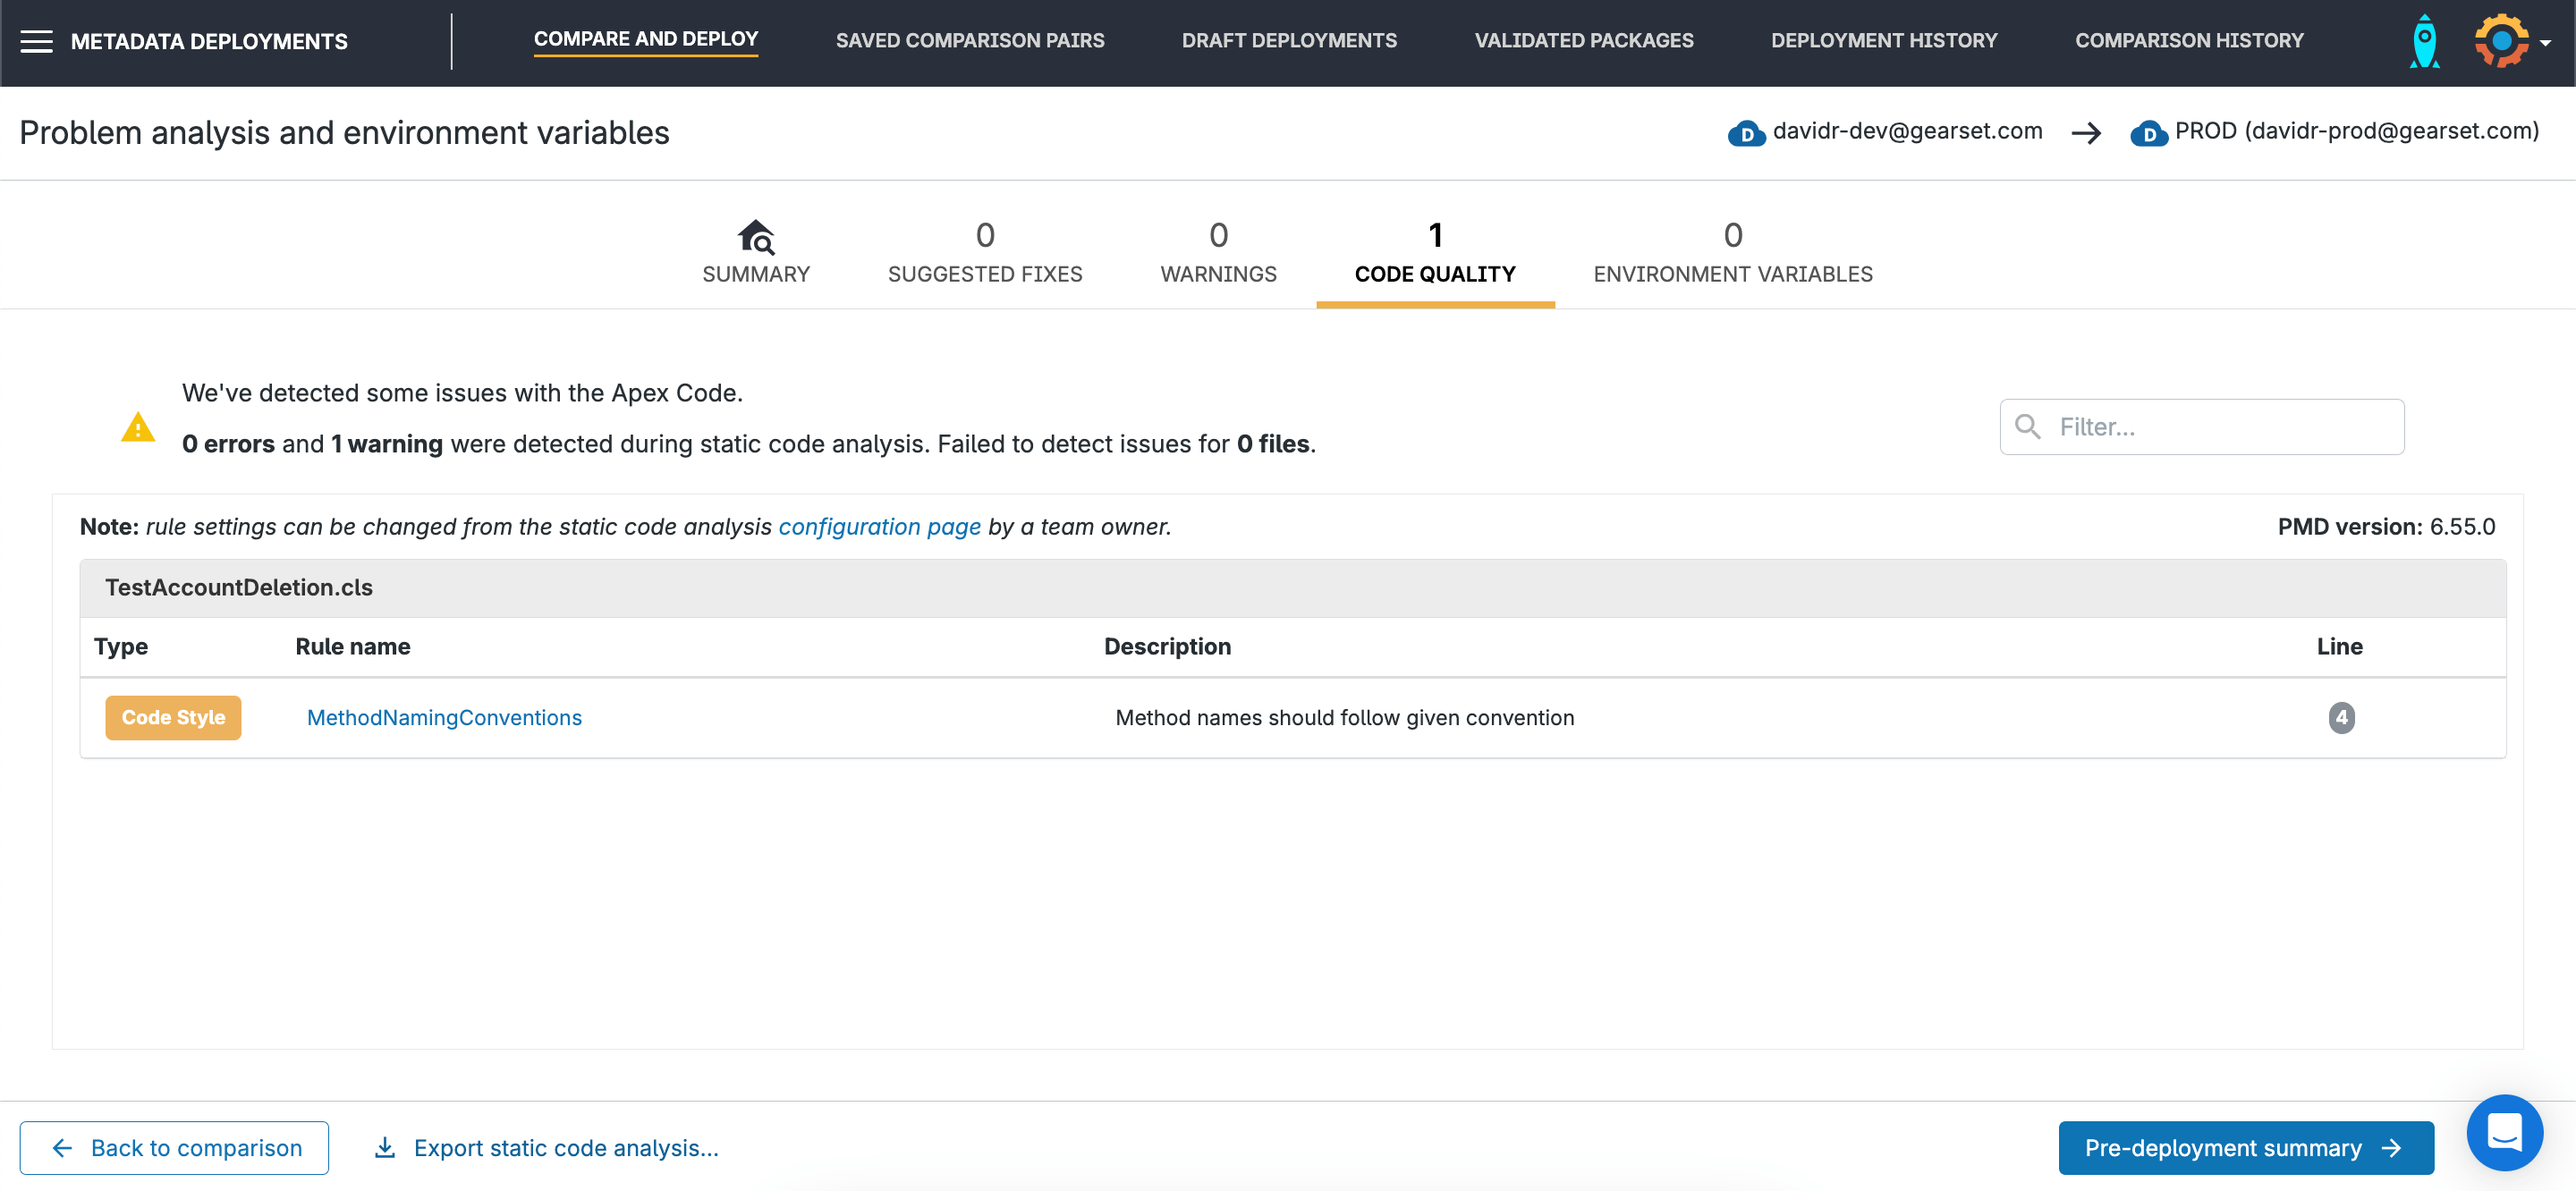
2. Act on any problem analysis results
Gearset has dozens of problem analyzers that find and fix common deployment issues. Missing dependencies are a classic example, and here we can see that Gearset is fixing our mistake from earlier.
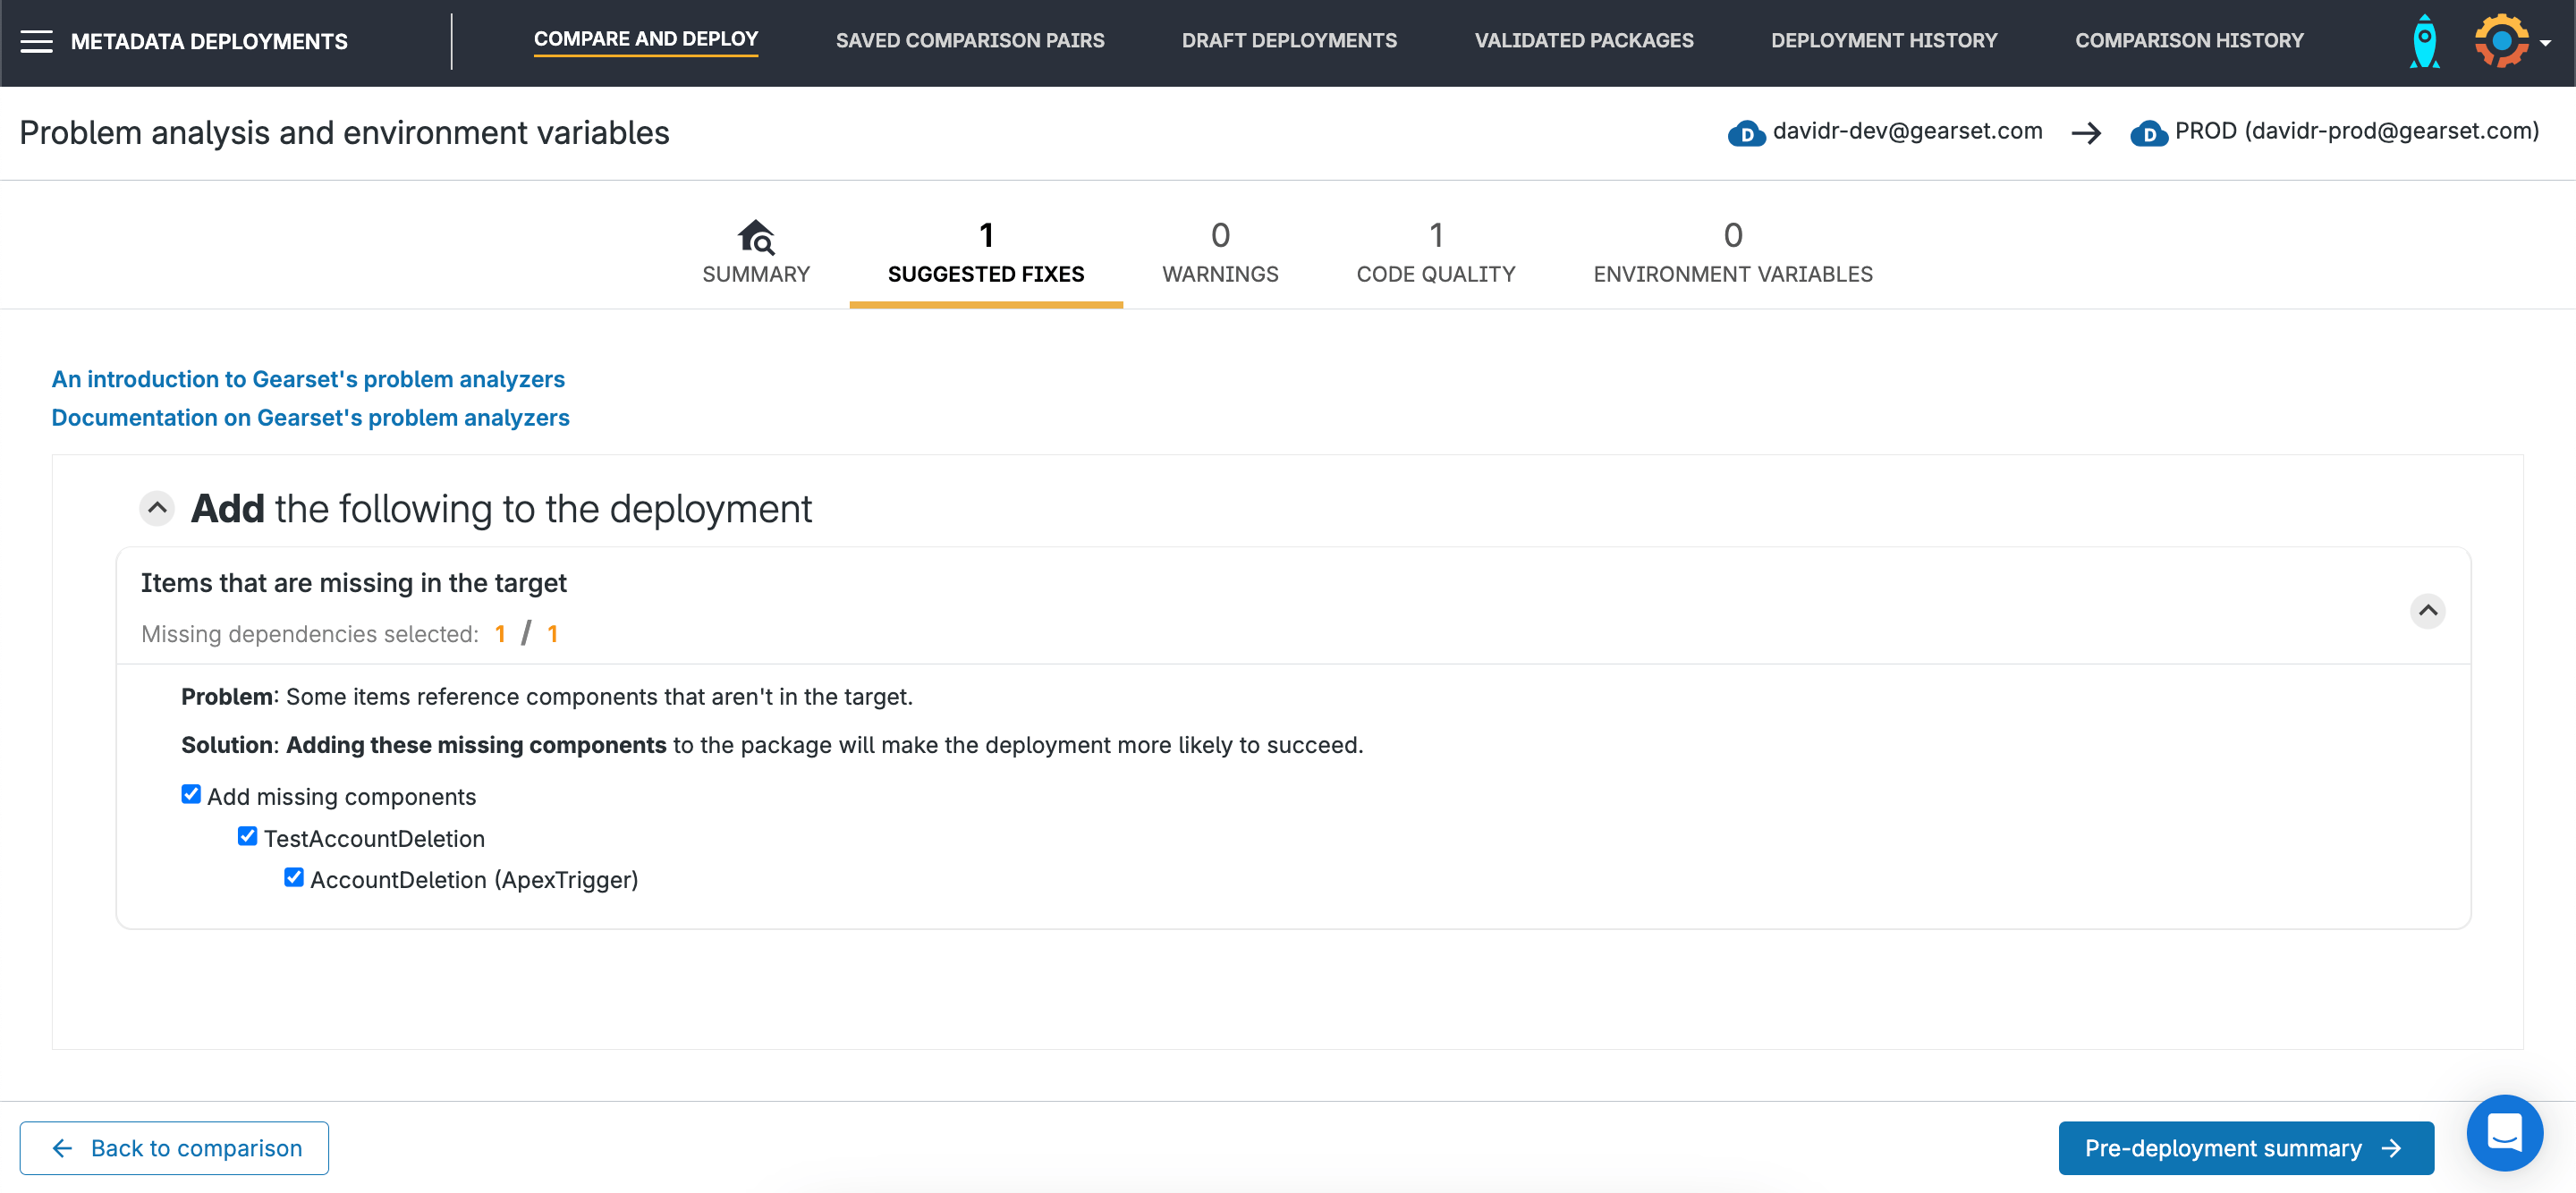
We can also look at static code analysis results for the Apex code we’re deploying. Our team has configured a PMD ruleset and this test class doesn’t follow our agreed conventions. This won’t block our deployment right now, although you can change the settings in Gearset to enforce particular rules and improve code quality.
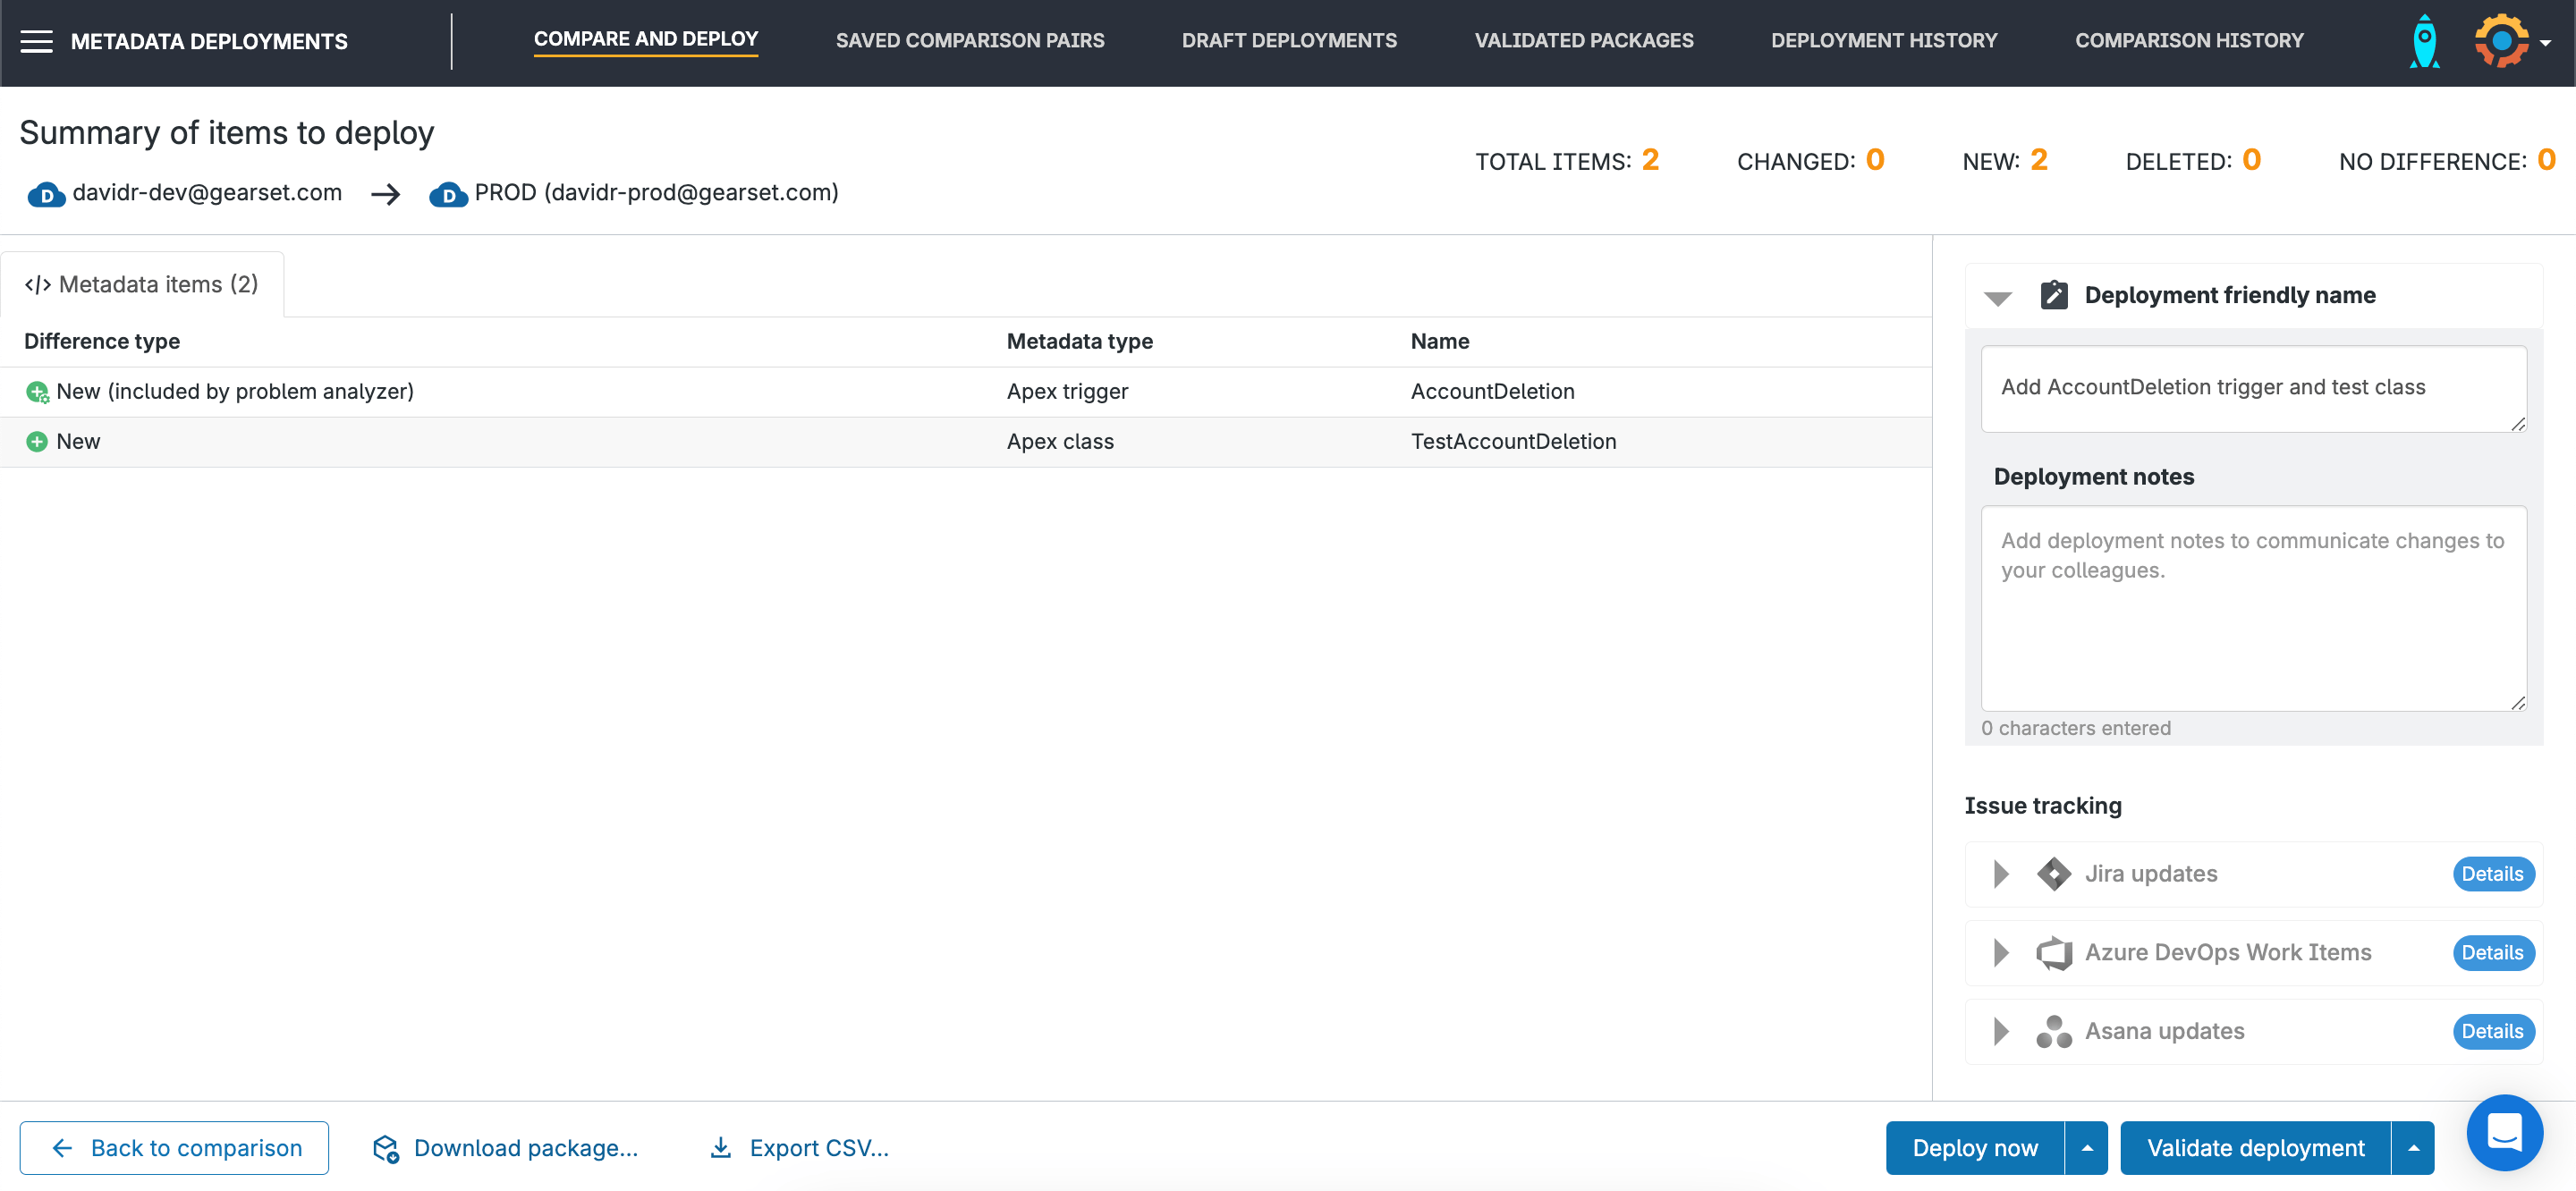
3. Deploy the package
Pressing Pre-deployment summary takes us to a summary of all the items we’re going to deploy. We can add a name and notes to the deployment. We can connect the deployment to one or multiple tickets in our work tracking tool, append a list of deployed items to the tickets, and even move tickets along the kanban board.
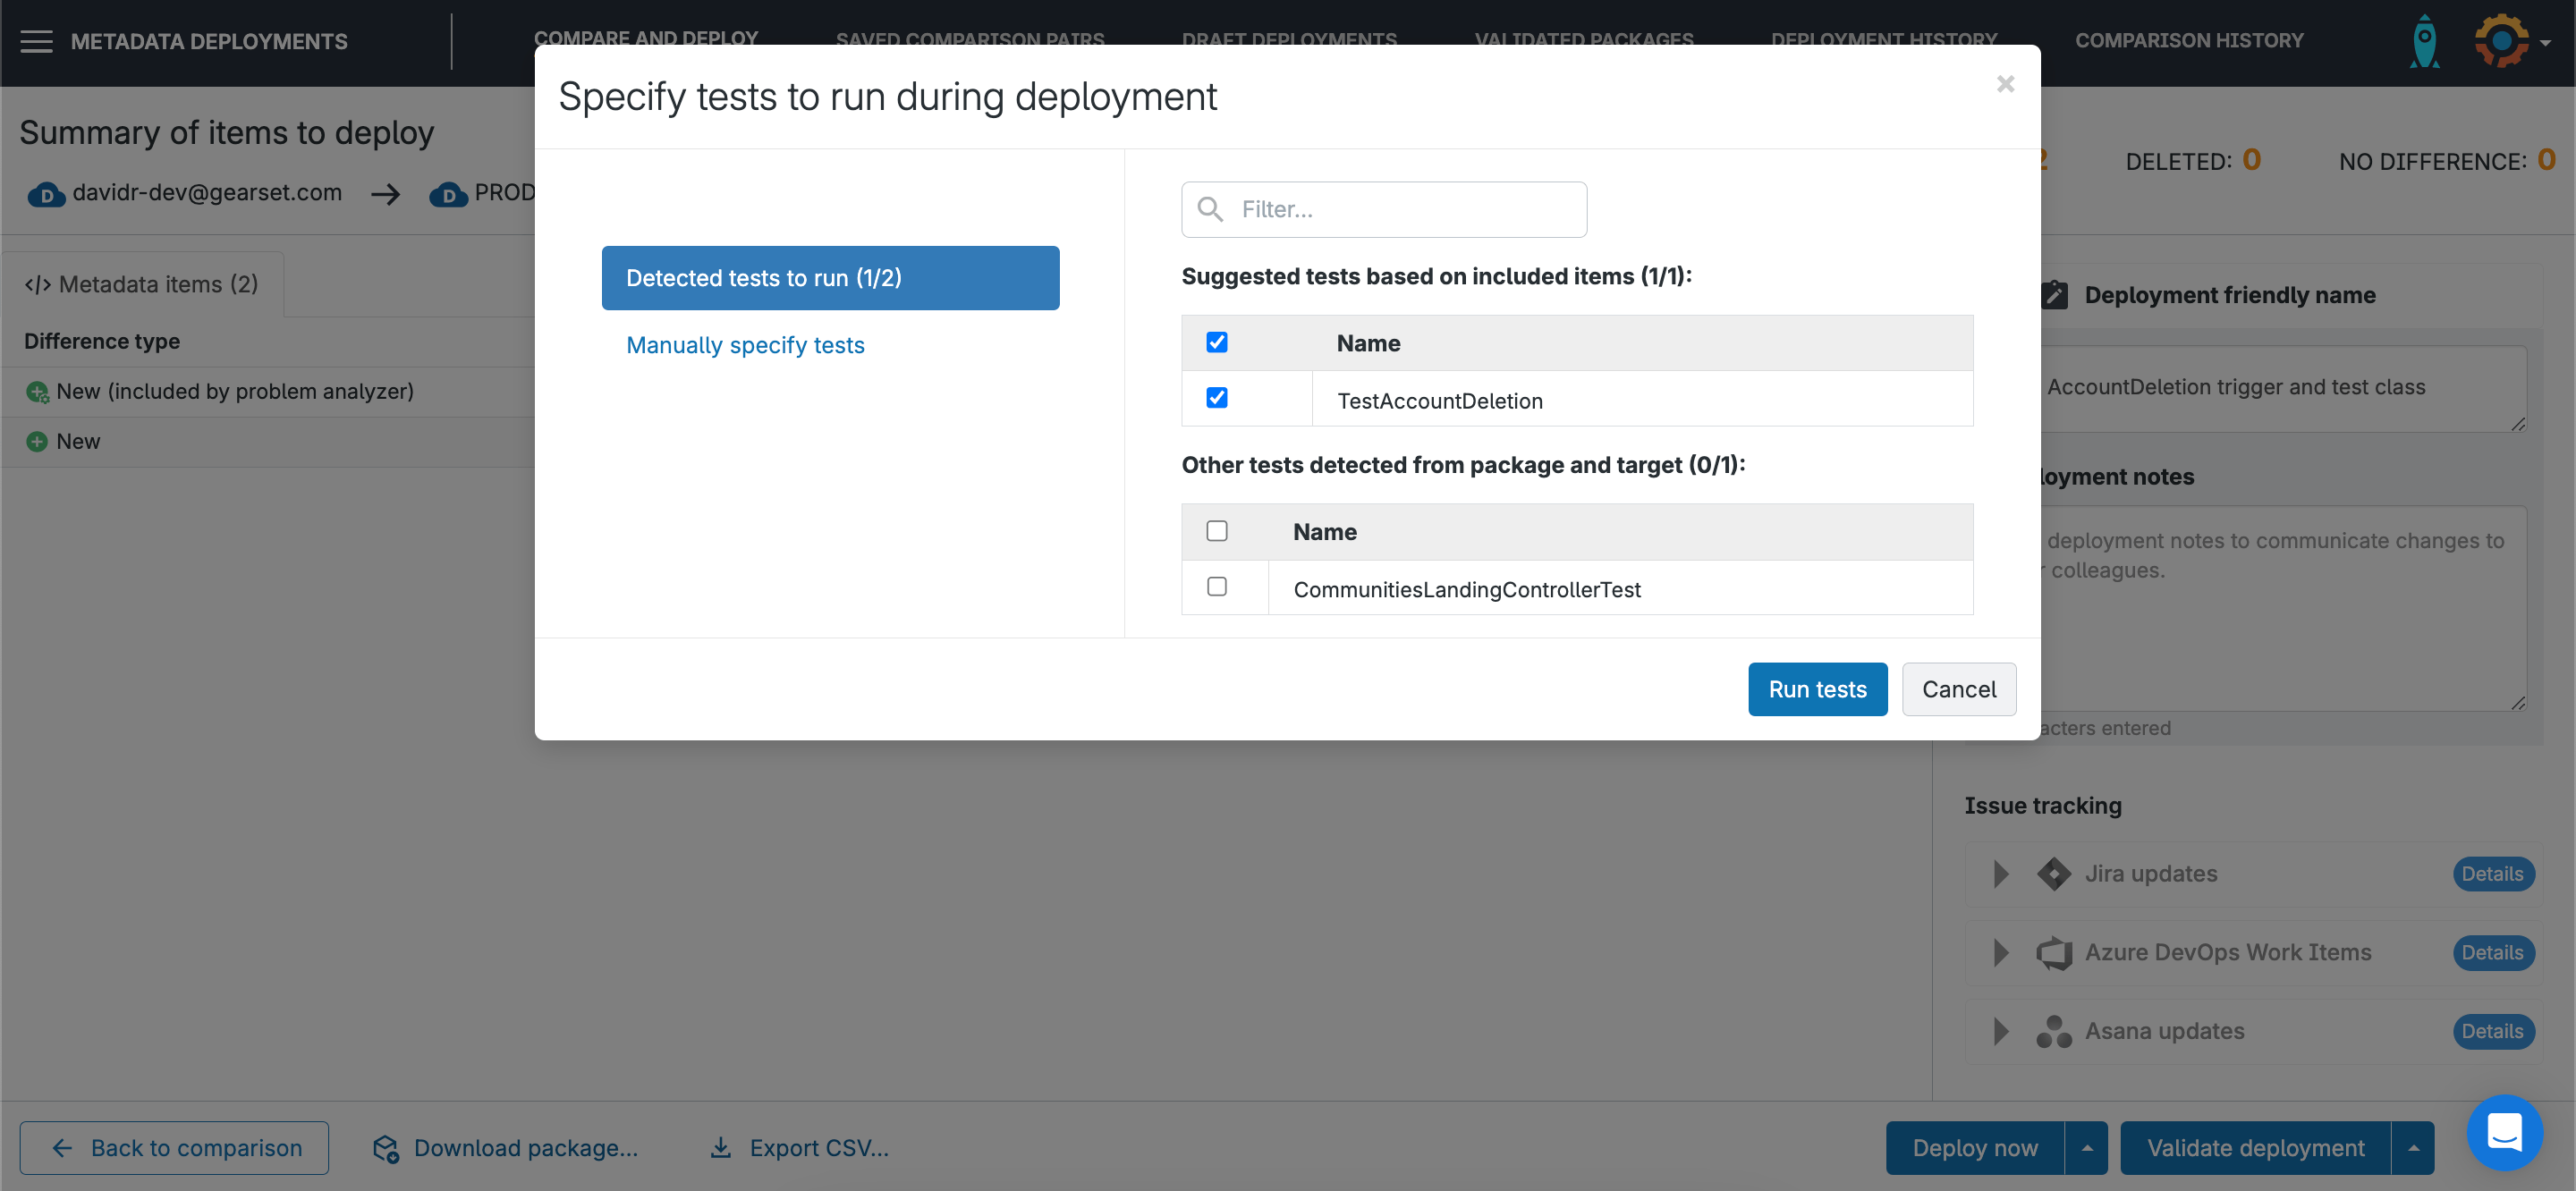
Clicking the arrow next to Deploy now, we can see options for running unit tests during this deployment. Gearset can automatically detect the relevant tests to run, based on the tests in our deployment package and any dependencies. You can also choose to schedule the deployment for a later time, such as midnight or a weekend, when it’s less likely that there will be end users in the target org.
Once we’ve run our tests and deployed the changes, we get a summary of the deployment and can download a full PDF report.
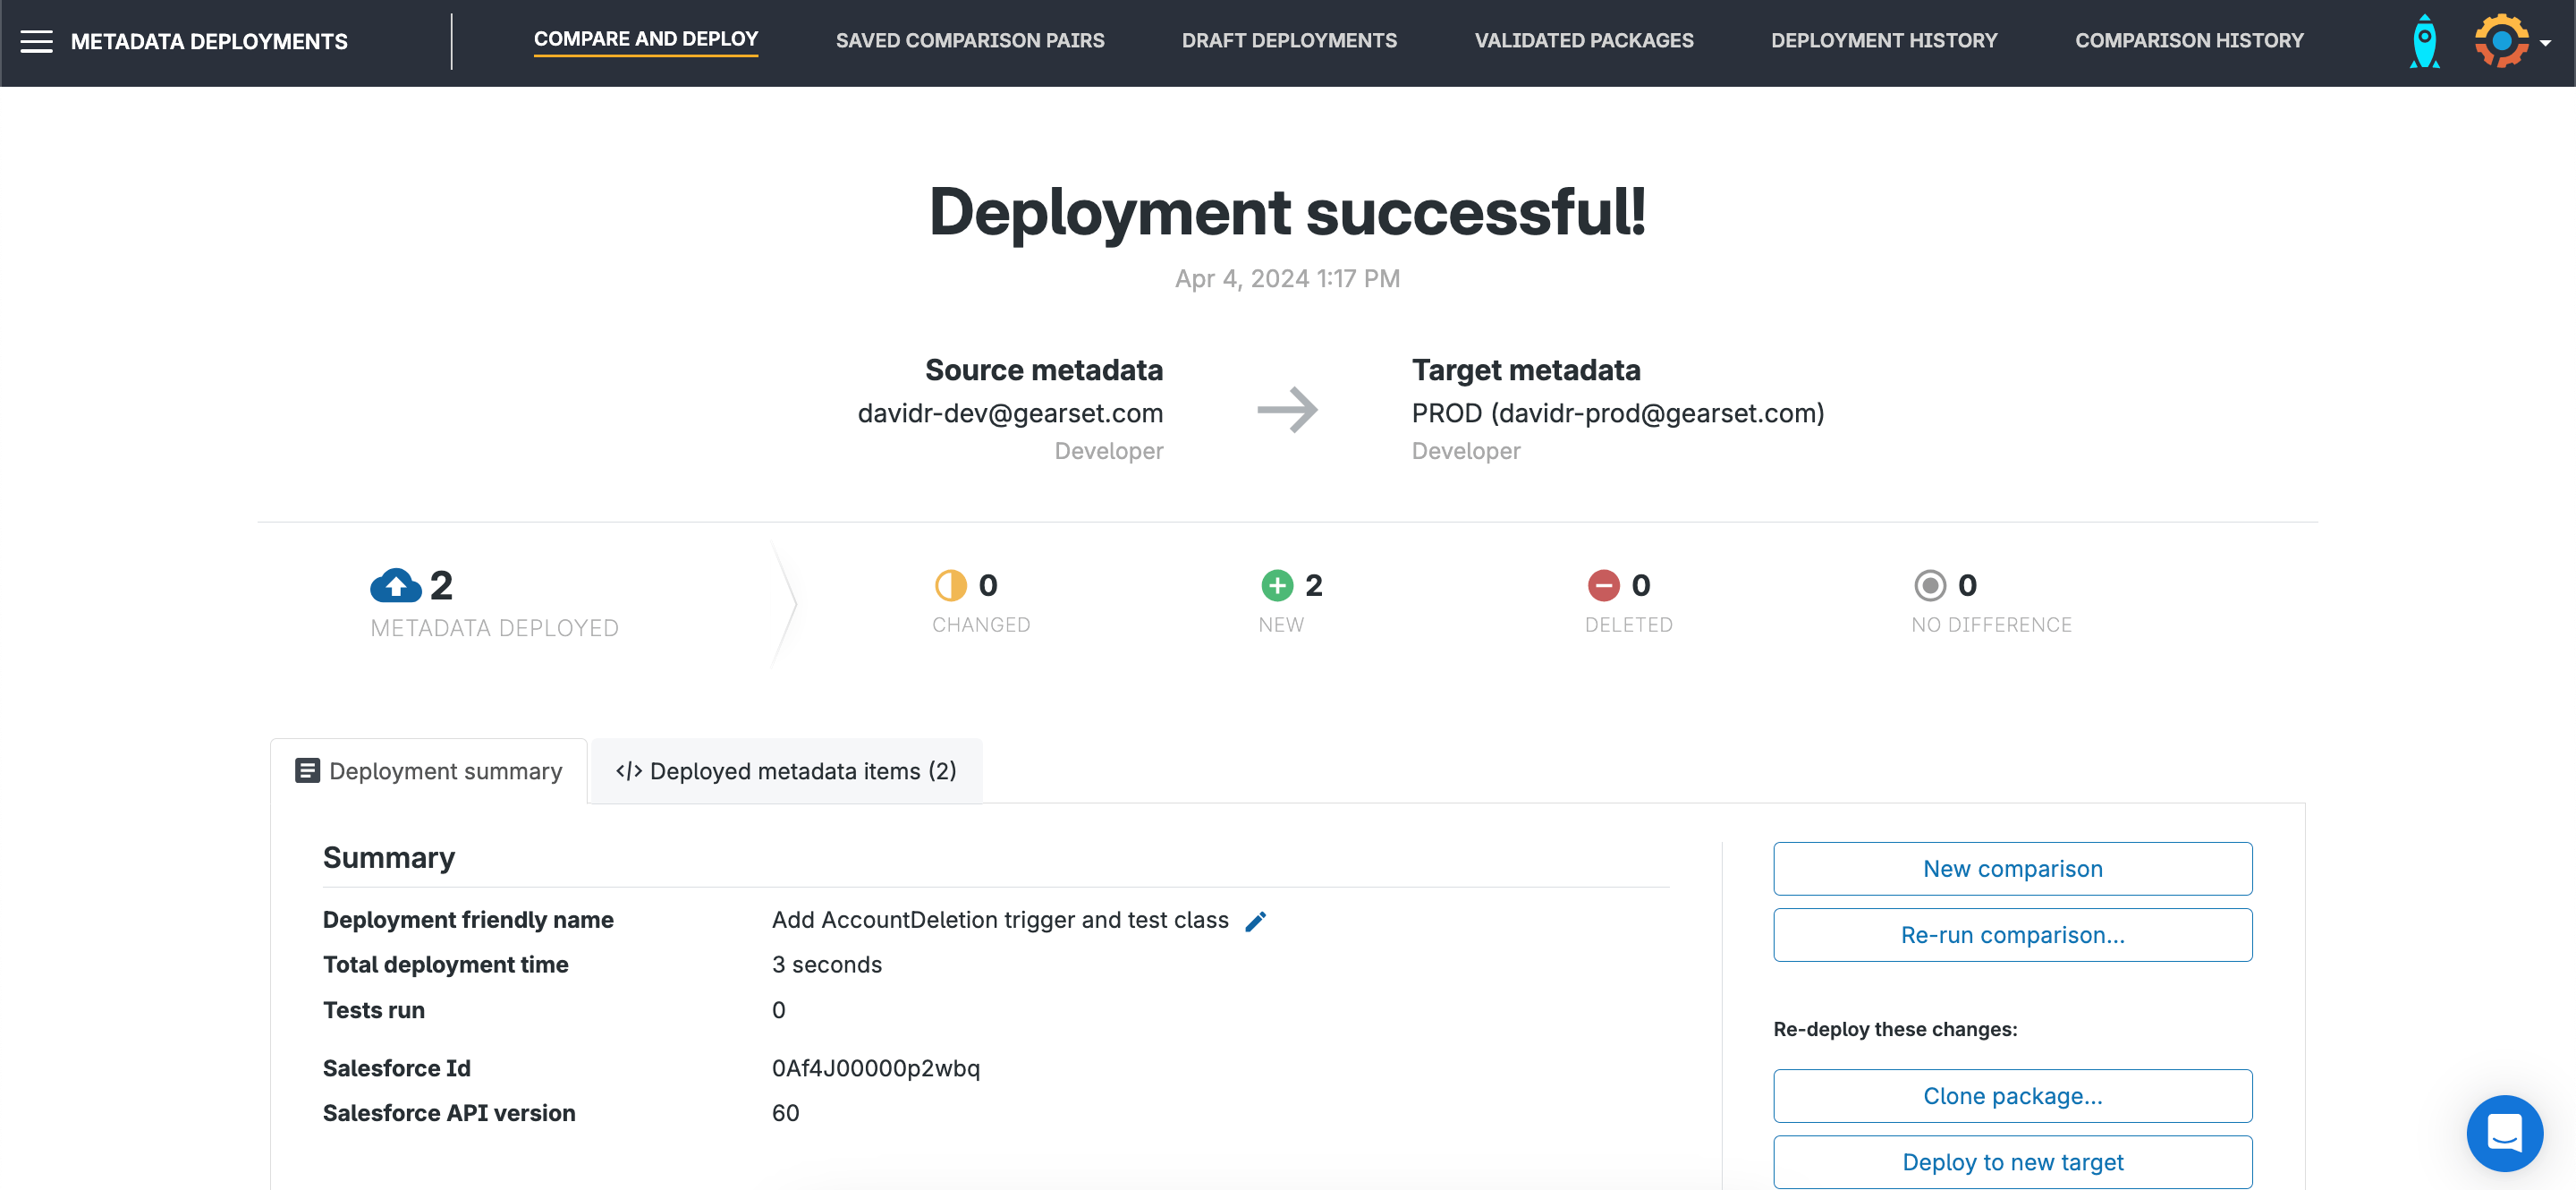
Should we need to, the deployment can be rolled back from our deployment history.
Pull the trigger!
Deploying Apex Triggers can be quick and easy with Gearset’s Salesforce metadata deployment solution! If you’re ready to get started with Gearset, sign up for a free 30-day trial or arrange a tailored demo to explore the full platform.
