Adopting version control is a fundamental part of Salesforce DevOps. There are many distributed version control systems available but the most widely used in the Salesforce ecosystem is Git, with GitHub as the preferred repository hosting tool. For those who have already implemented version control with GitHub and are running reliable deployments through a source-driven workflow, the next step is to add automation.
If this feels like a big jump, Gearset is here to help. In this post we’ll look specifically at GitHub and how it integrates with Gearset to build an automated Salesforce deployment pipeline. And, you’ll see how easy it is to get started with Gearset’s Pipelines to automatically deploy your metadata from your GitHub repository.
Why GitHub?
With over 100 million users, GitHub is the world’s largest version control host on the market today. While there are other options out there — like Bitbucket, AWS CodeCommit, Azure DevOps, and GitLab — GitHub is the system that most teams are using to track their metadata changes in Salesforce.
The benefits of GitHub:
- Widely known so teammates will likely know how to use it
- Manage and track changes to your Salesforce code and configuration
- Collaborate with teammates on code reviews
- Automation capabilities offered through GitHub Actions or a third-party platform
- Store and maintain project documentation alongside the code
- Has cloud-hosted options as well as offering on-premises hosting with GitHub Enterprise
- Security options like code scanning and access control on repositories and branches
- Fits with your existing tech stack thanks to a huge amount of integration options
- Has an active community of support and advice
Benefits of version control and CI/CD
Version control is an important part of Salesforce DevOps. Utilizing a version control system, such as Git, enables you to efficiently make, merge, and monitor changes without the risk of overwriting each other’s work. It also allows you to easily rollback deployments to previous versions and increase collaboration across the entire team.
You can customize your branching strategy to fit your team. For example, commit to short-lived feature branches then merge into main (feature-based development), or merge feature branches into a release branch and merge to main on a set cadence. These are just two types of strategy you can choose from.
Getting to grips with version control is the first step to setting up a CI/CD pipeline for Salesforce. If you want to learn more, watch this Git deep dive video, or read about version control best practices.
Once version control is well established as your source of truth, and your deployments are repeatable and reliable, you can begin to automate your pipeline by using continuous integration and continuous delivery (CI/CD). The benefits of automation include speeding up testing processes and catching issues early by constantly merging code changes into shared environments.
Continuous integration (CI) focuses on automatically progressing work along the release pipeline, so that new work can be integrated into shared environments and tested quickly. This encourages rapid feedback loops and means the developers’ work on a feature branch can be quickly merged onto a shared branch, a sandbox environment for testing, or to live environments. Continuous delivery (CD) focuses on releasing small slices to live environments, to deliver value to end users as quickly as possible. The overall goal of CI/CD is to close feedback loops and streamline the entire release process — saving time and money.
Download the free ebook to learn more about CI/CD for Salesforce:
Can we build a CI/CD pipeline with generic tools?
It’s not easy to build an automated pipeline in GitHub for your Salesforce release management process. You’ll need to use an automation/orchestration tool to fetch the Salesforce DX project from the repo and then use the SFDX CLI to run commands to build your project. You can do this locally with a tool like VSCode.
Building this kind of CI/CD pipeline is a very manual and expensive process and will need constant maintenance once built. Without this upkeep, something can break unexpectedly — especially if there are big changes in a Salesforce release or something is released into an environment that you weren’t expecting.
Read more about why using a purpose-built solution for Salesforce, like Gearset, will save your team a lot of time and headaches in the long run.
Stop flying blind: How Truckstop brought clarity to a complex org
How to set up a CI/CD pipeline with GitHub and Gearset
Gearset supports all the Git-based providers mentioned above (and more!). Once you’ve connected your version control to Gearset, you can build a seamless DevOps process, committing metadata to Git and deploying to your orgs. You can then build a CI/CD pipeline in Gearset’s Pipelines, giving you and your team better visibility and control of all your changes.
In this walkthrough we’ll be looking at how to set up your Salesforce pipeline in Gearset, using GitHub. You can sign up for a free 30-day trial of Gearset and follow along with these steps.
How does Gearset integrate with GitHub?
It’s really easy to hook up your GitHub repo to Gearset.
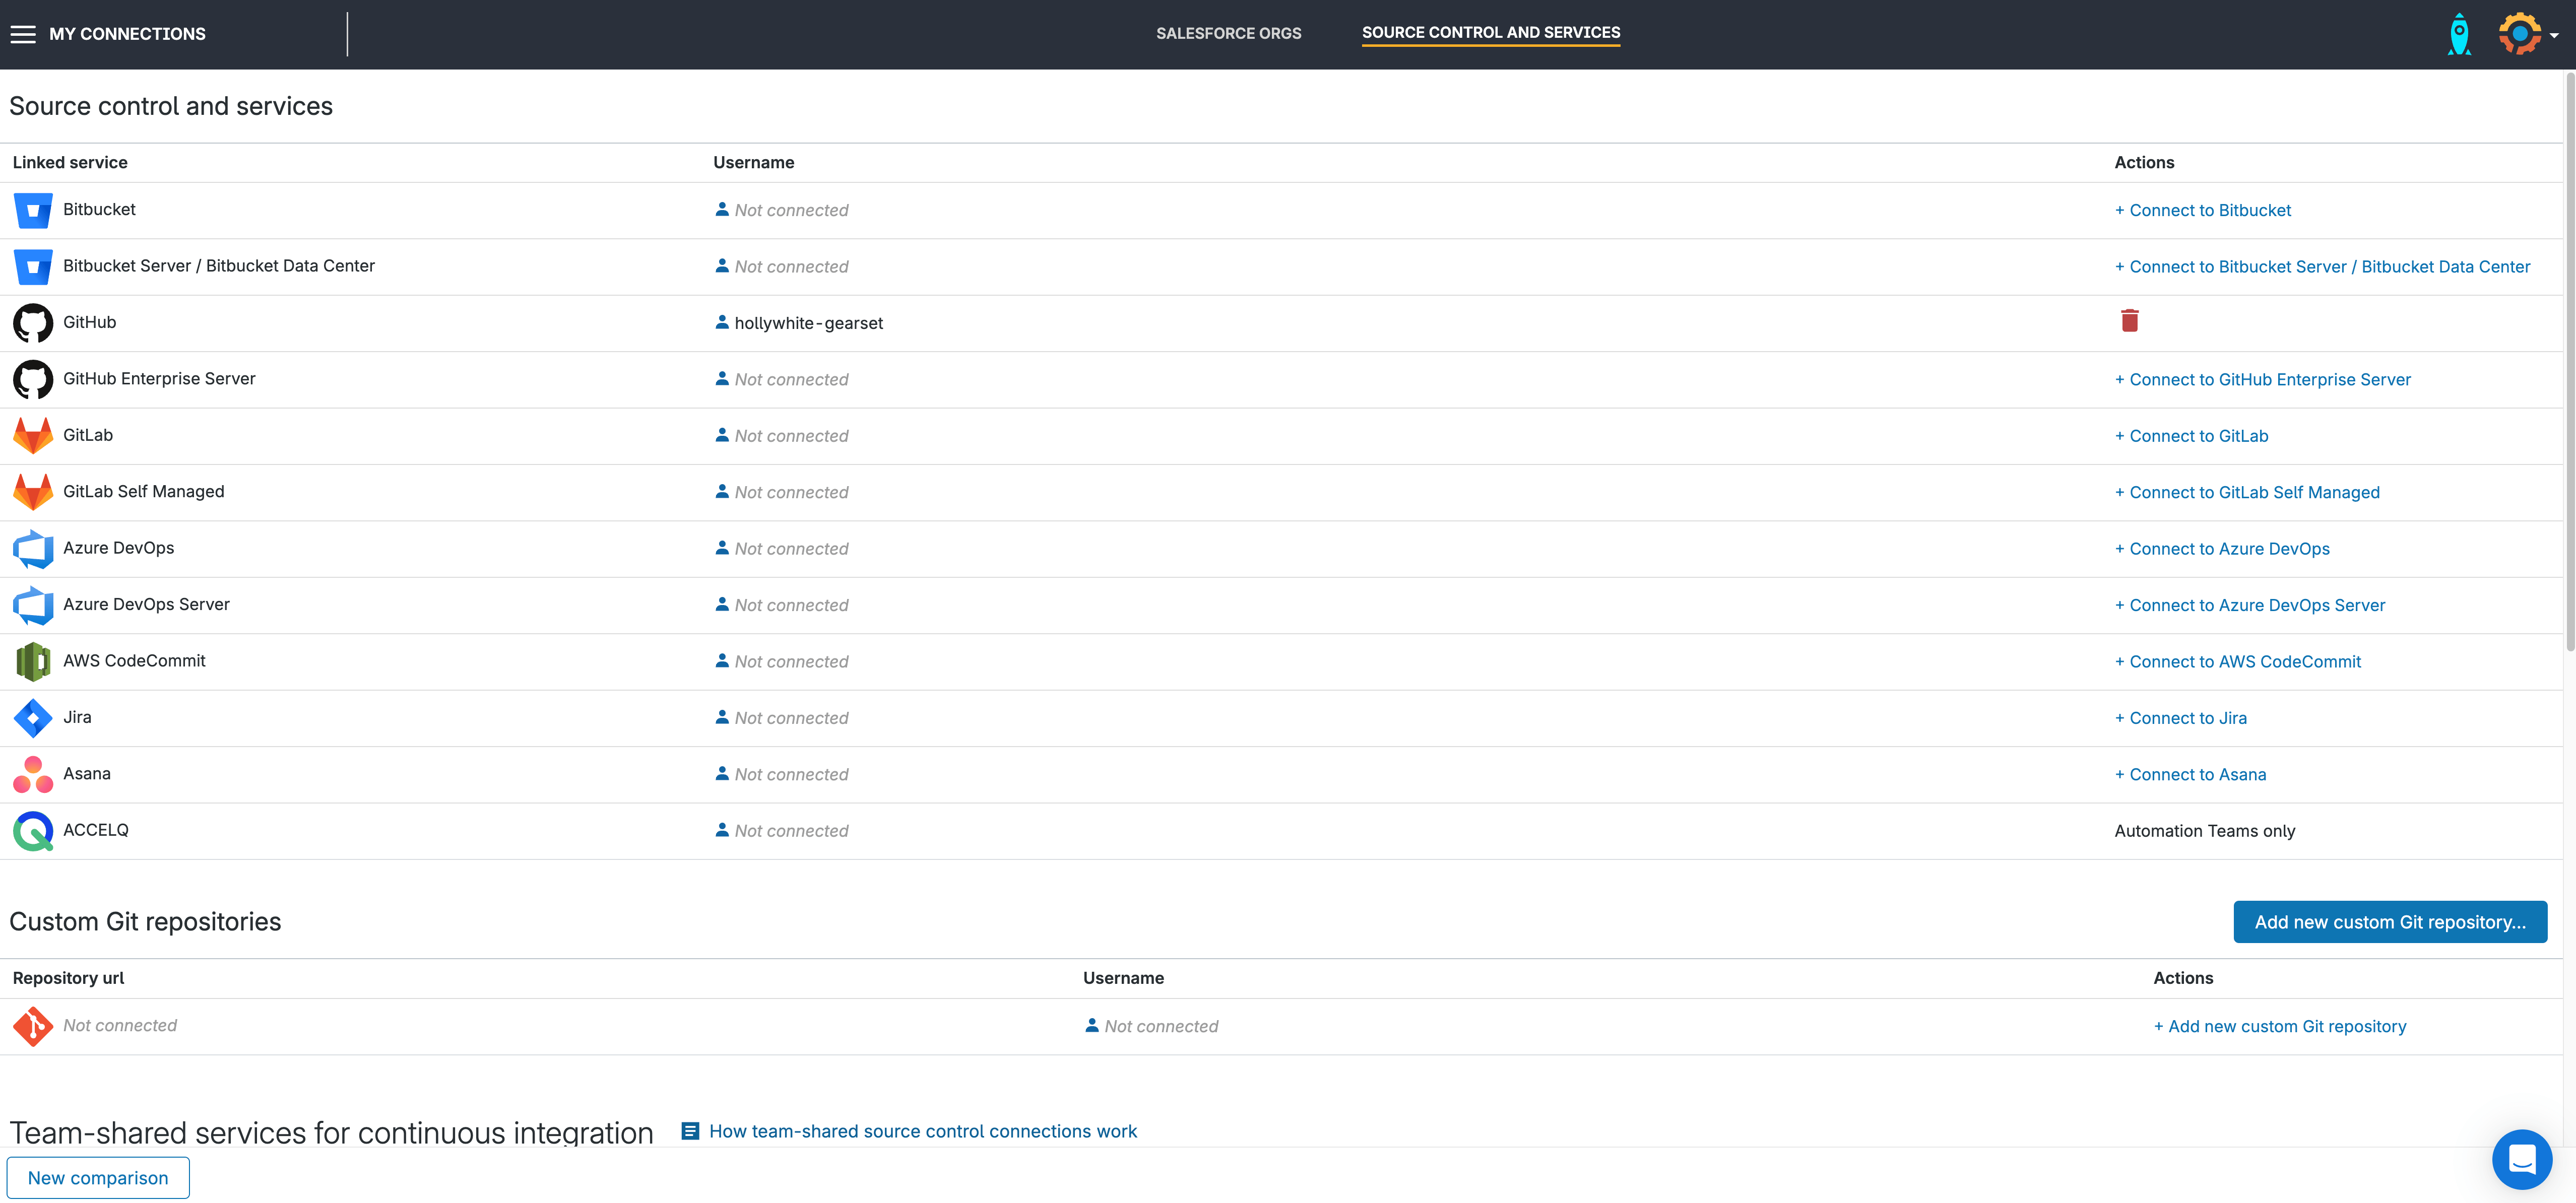
In Gearset, go to the Source control and services page and click + Connect to GitHub.
You’ll be taken to GitHub’s OAuth page for authentication.

Once complete, you will be redirected back to Gearset and you should now be able to use GitHub branches as your source or target — which you can confirm with Compare and Deploy.
Add a new pipeline
Once you’re all set up and have connected your GitHub with Gearset, it’s time to get hands on with Gearset’s Pipelines.
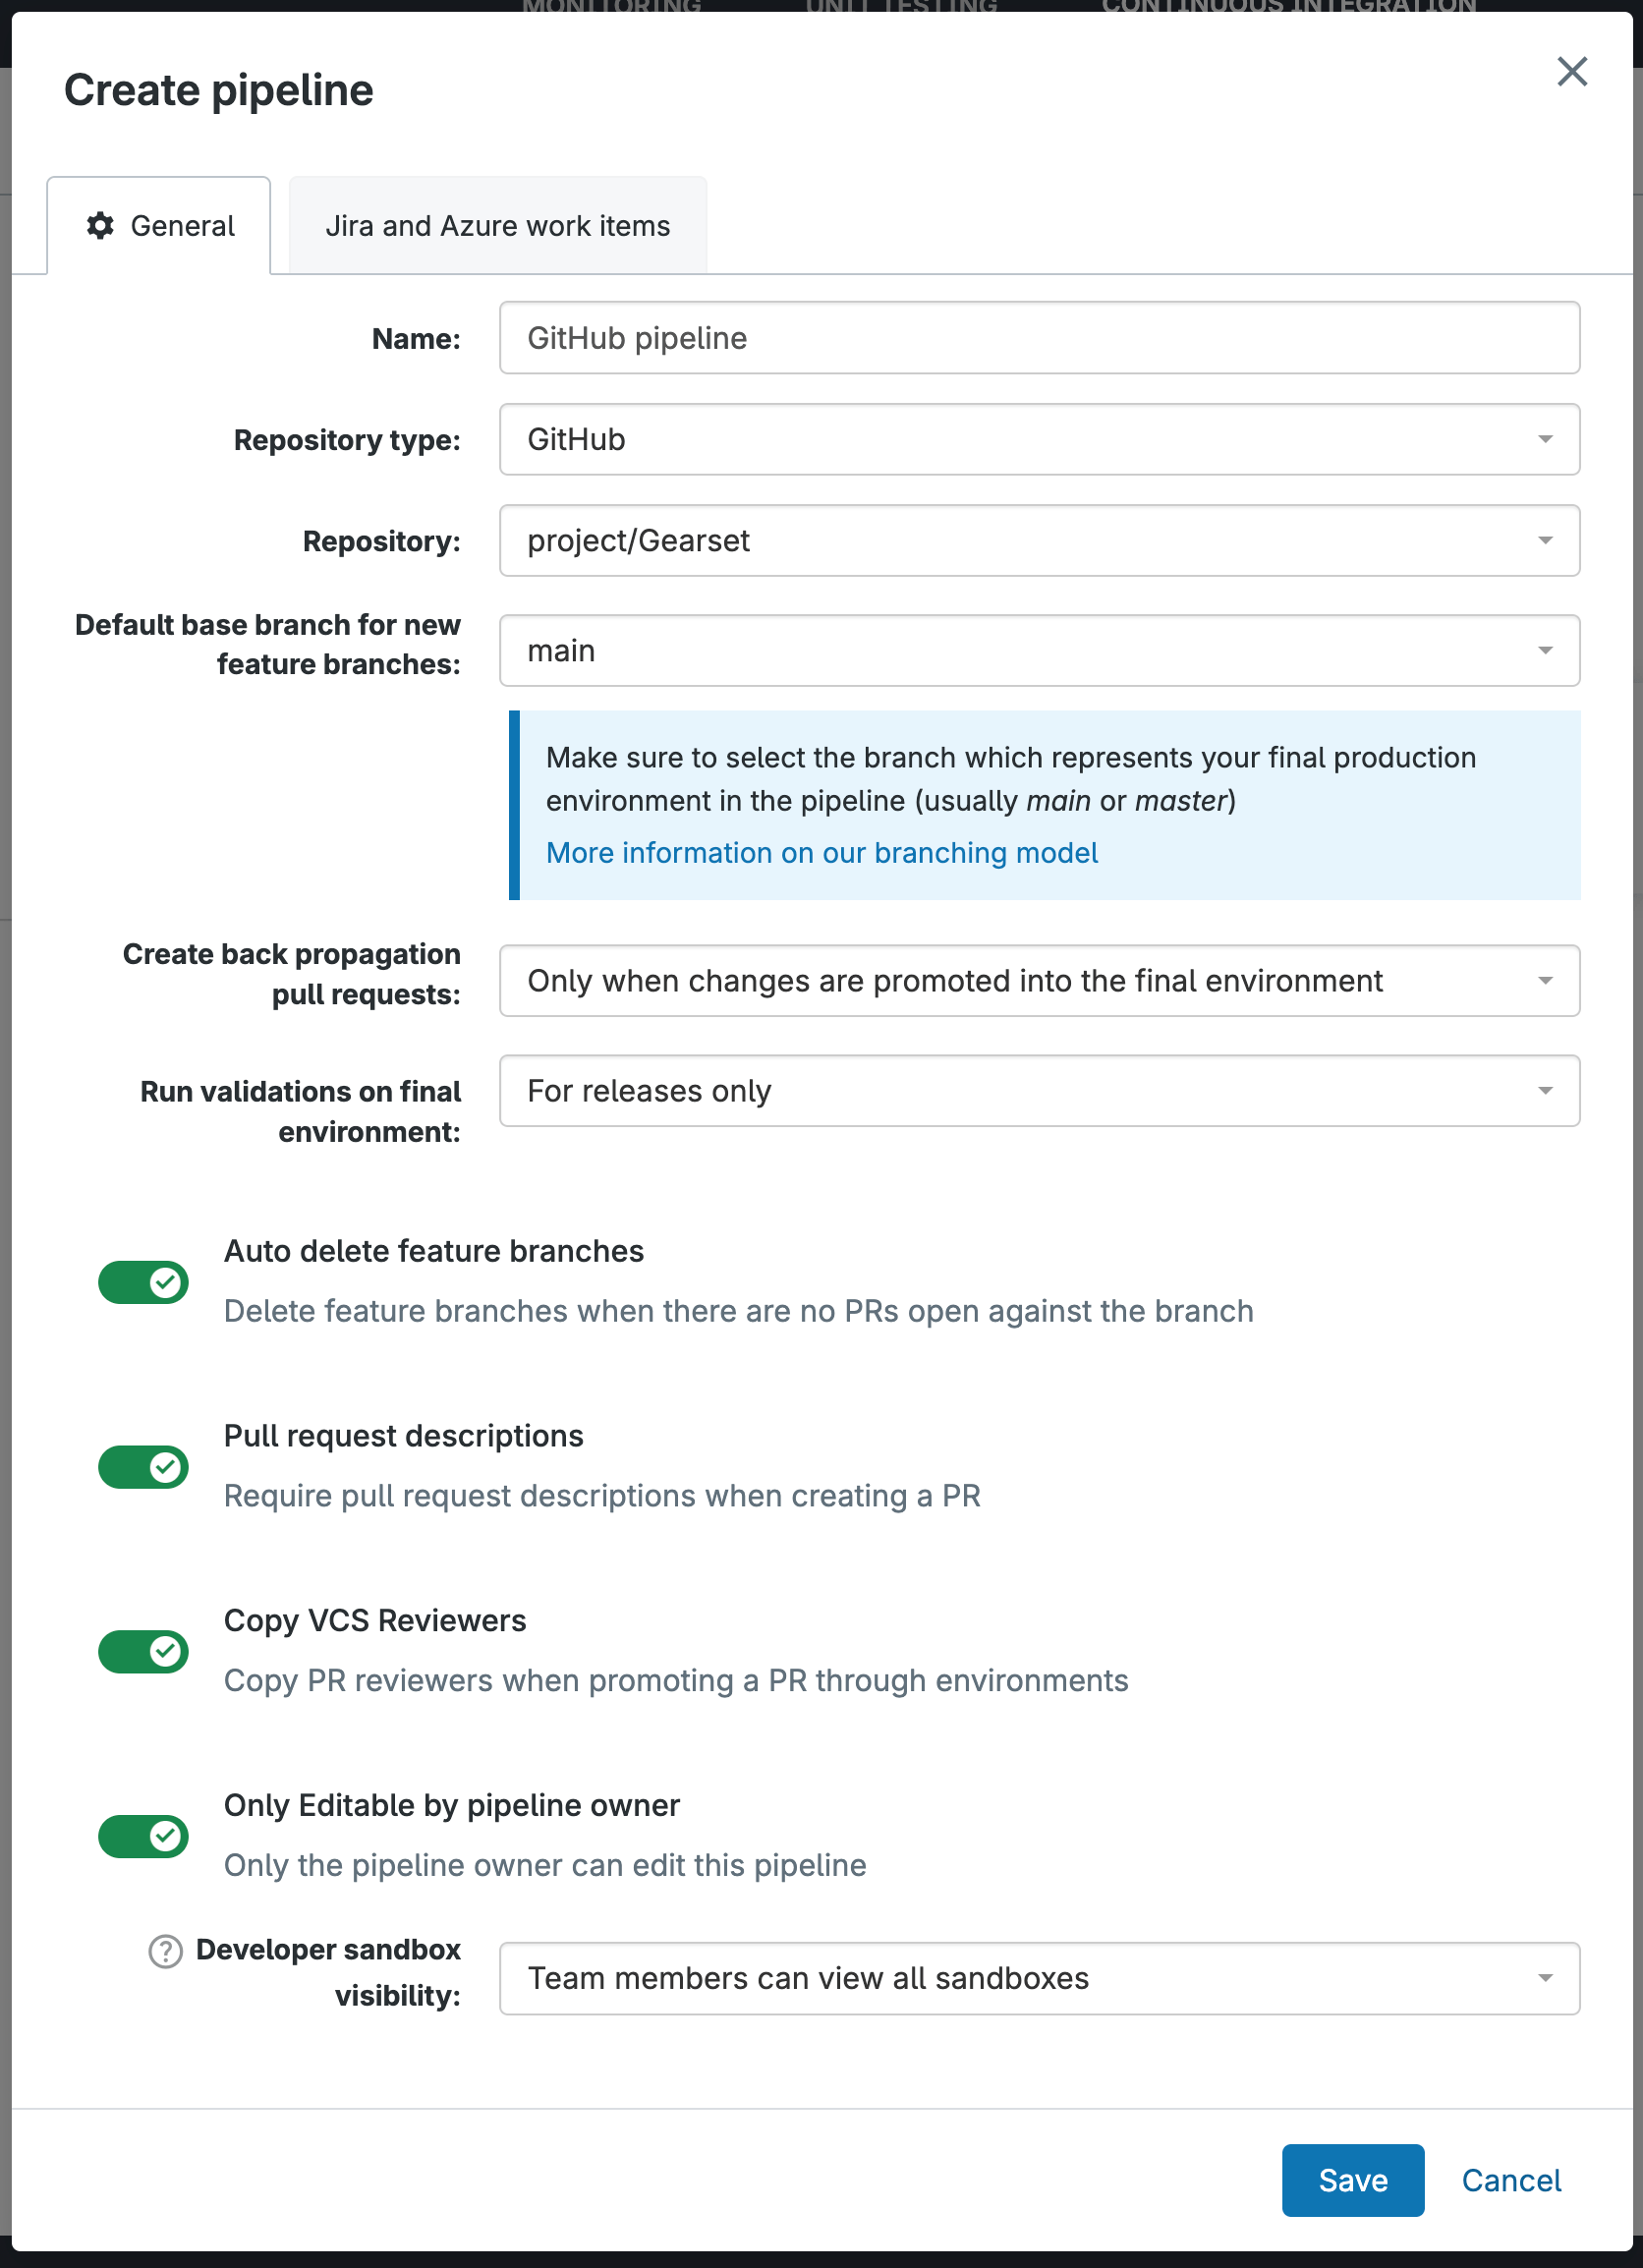
Select Continuous Integration from the left hand side menu. In the top right, click Pipelines and then Add new pipeline using the +.
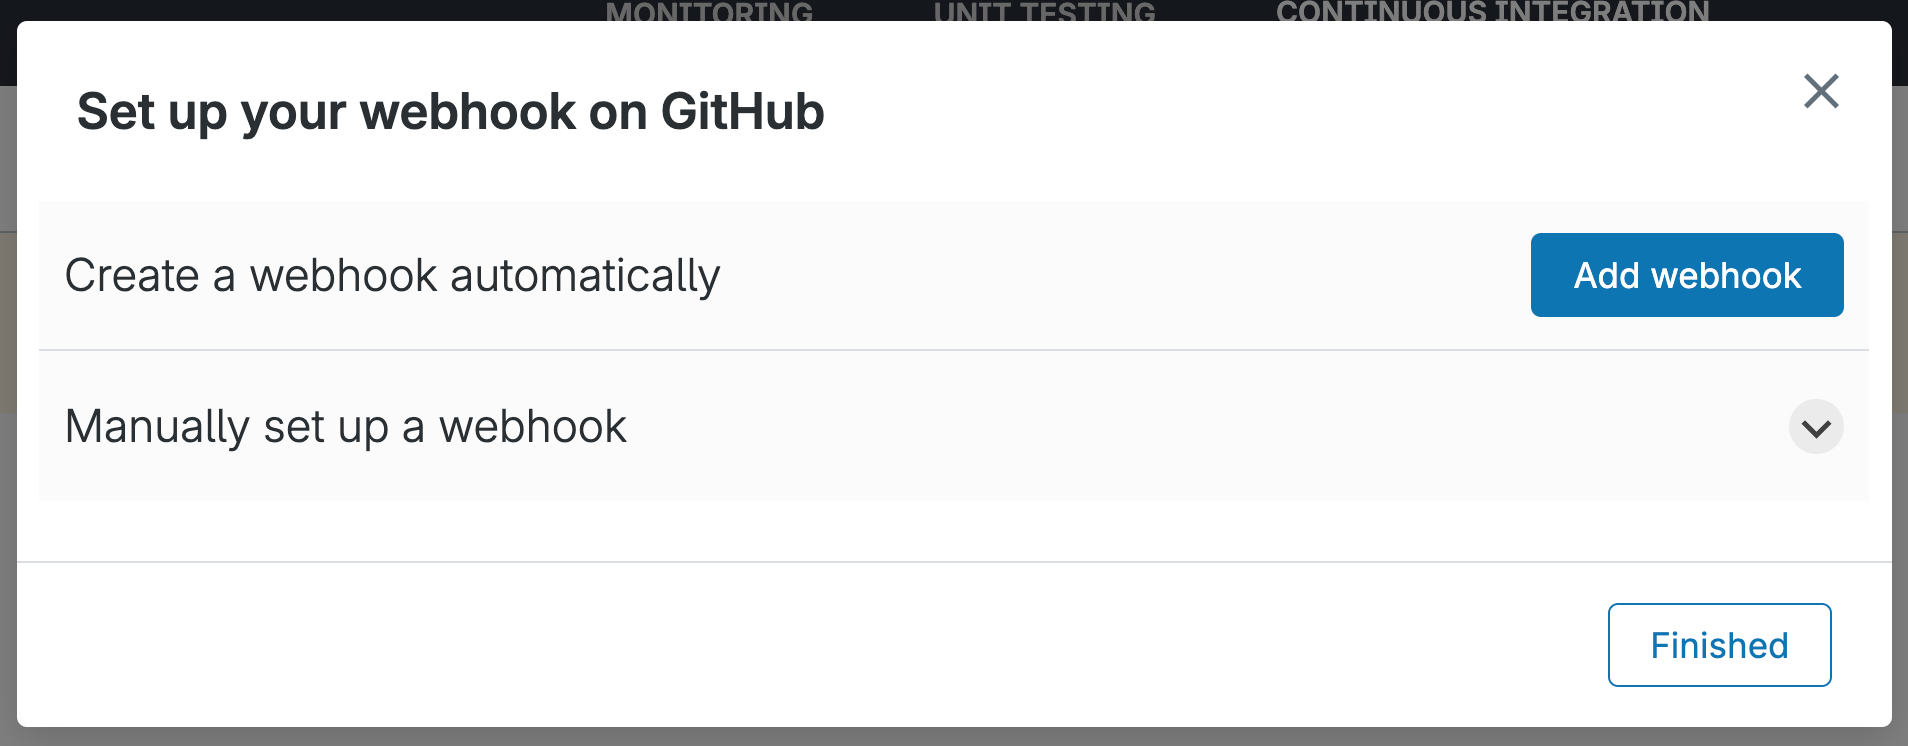
Add webhook
Click Add webhook and Gearset will automatically create one for you. You can also manually set one up. The webhook allows Gearset to sync in real time with your Git repositories and branches.
Create new environment
Next, click Create environment and then select Create new environment/job. Follow Gearset’s CI job wizard through the next steps to configure your job.
Add more environments
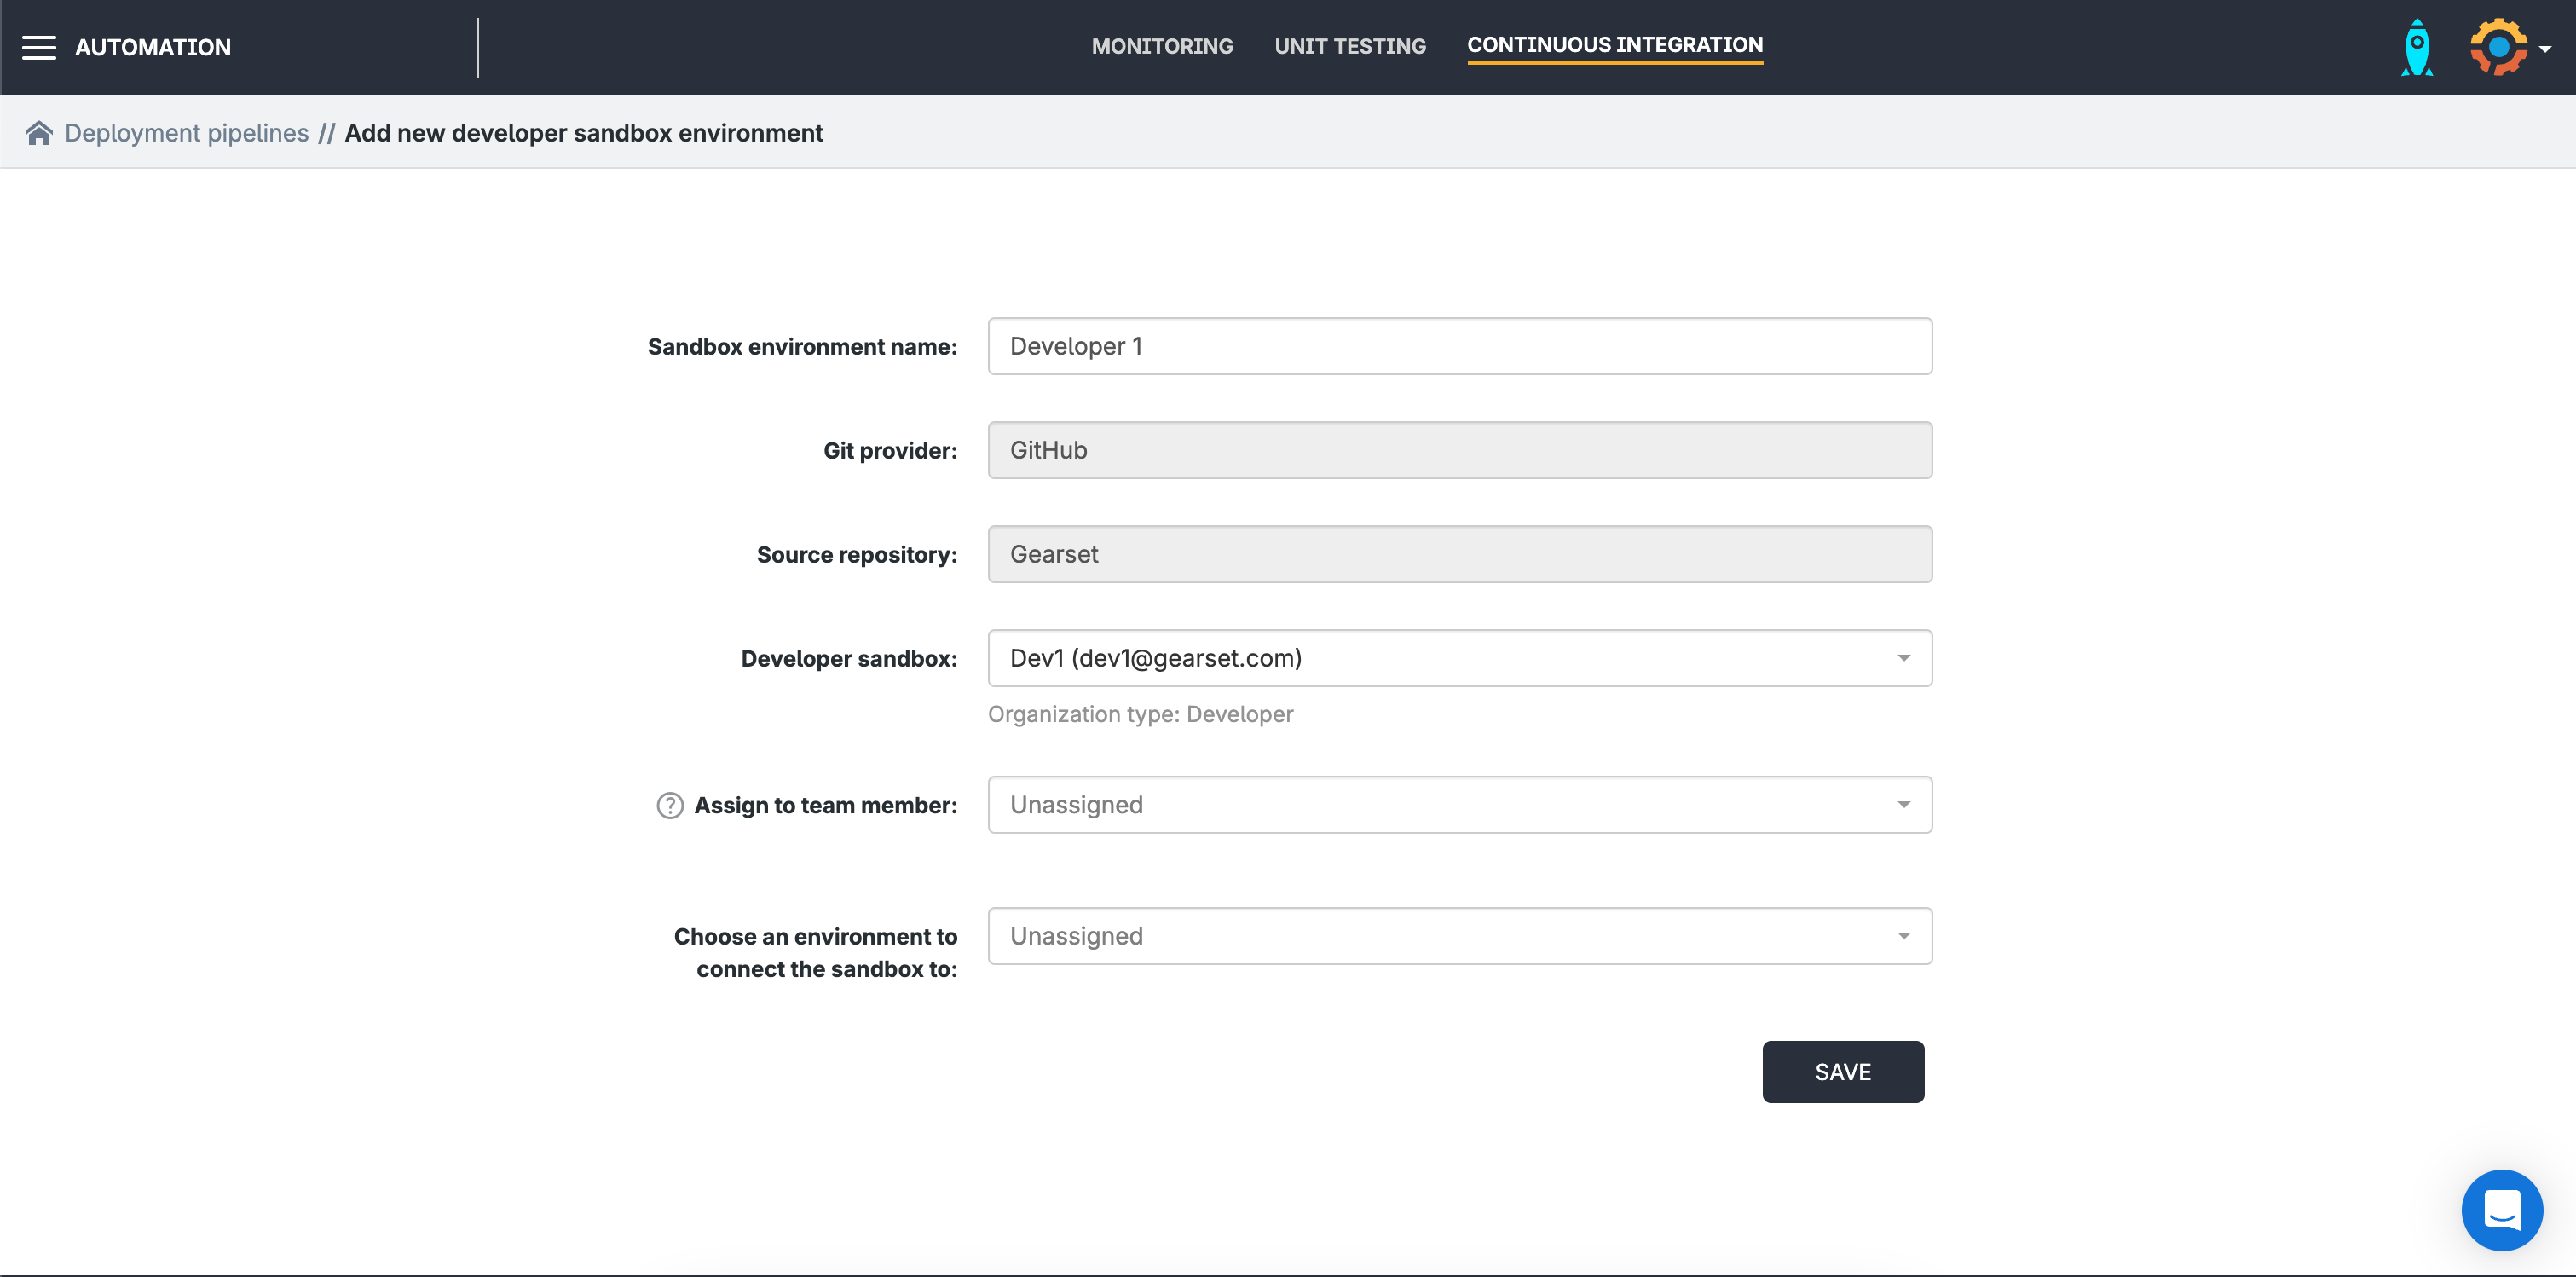
Add as many environments as you need, clicking + Add environment in the top right.
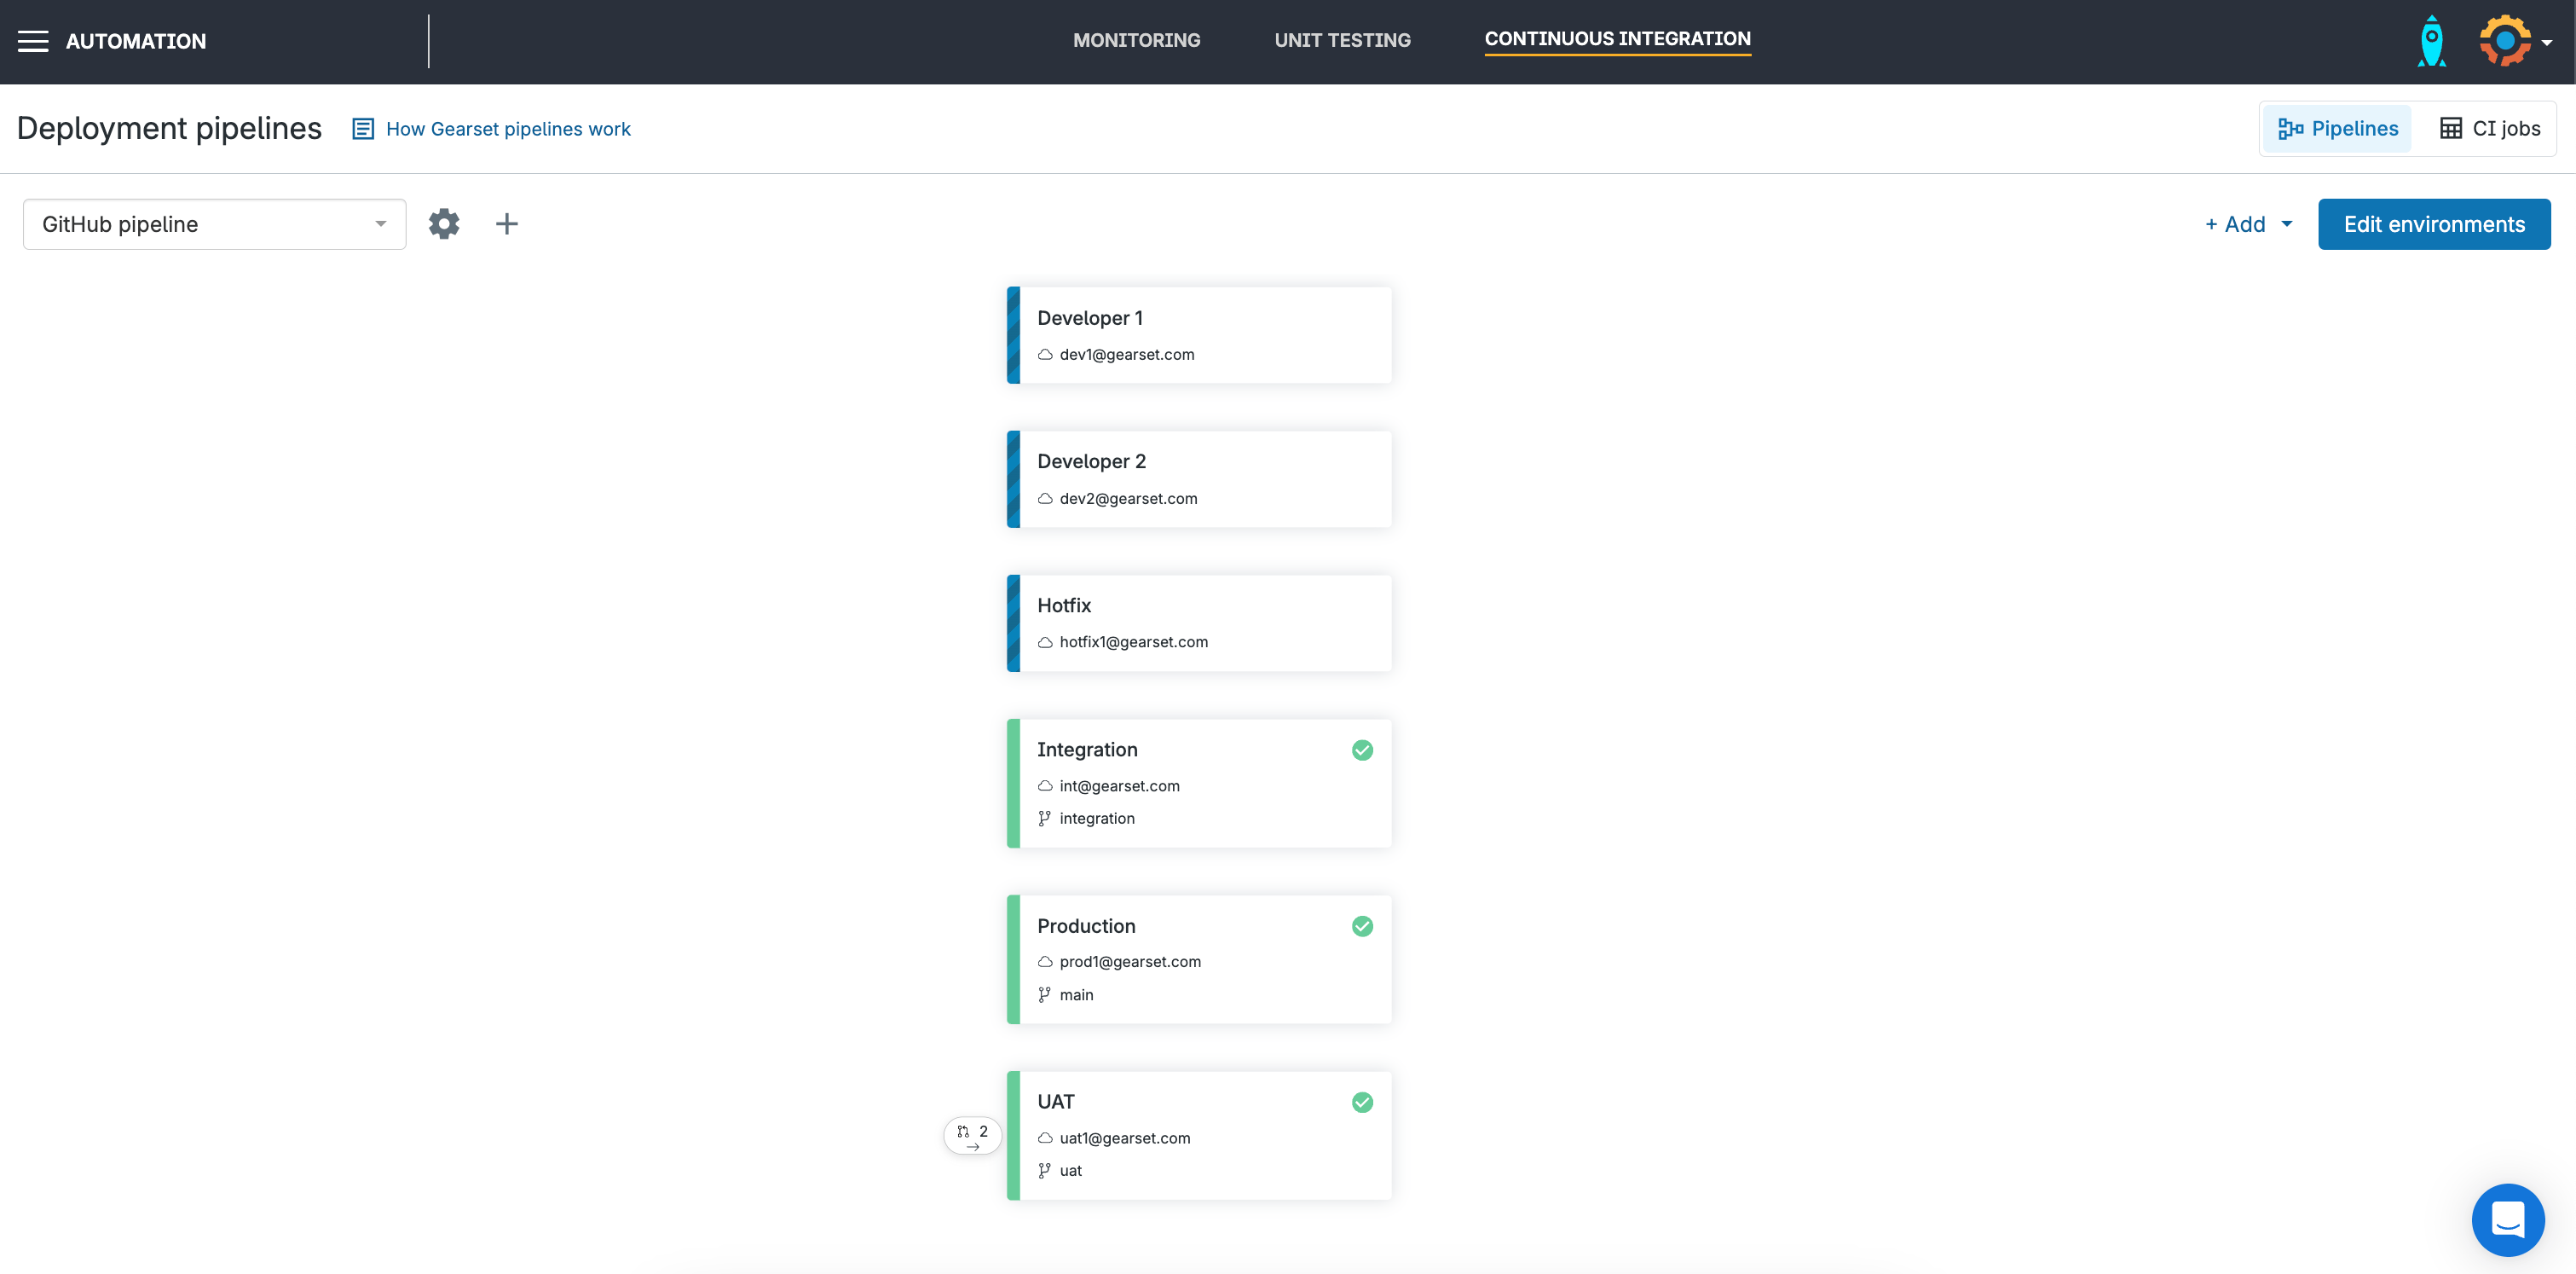
Edit and link your environments
Once you’ve added your environments, and any sandboxes you need, click Edit environments in the top right corner and arrange your environments in order.
After arranging your environments, link them together by dragging the circles to the next environment in the pipeline. When you’re happy, click Save changes.
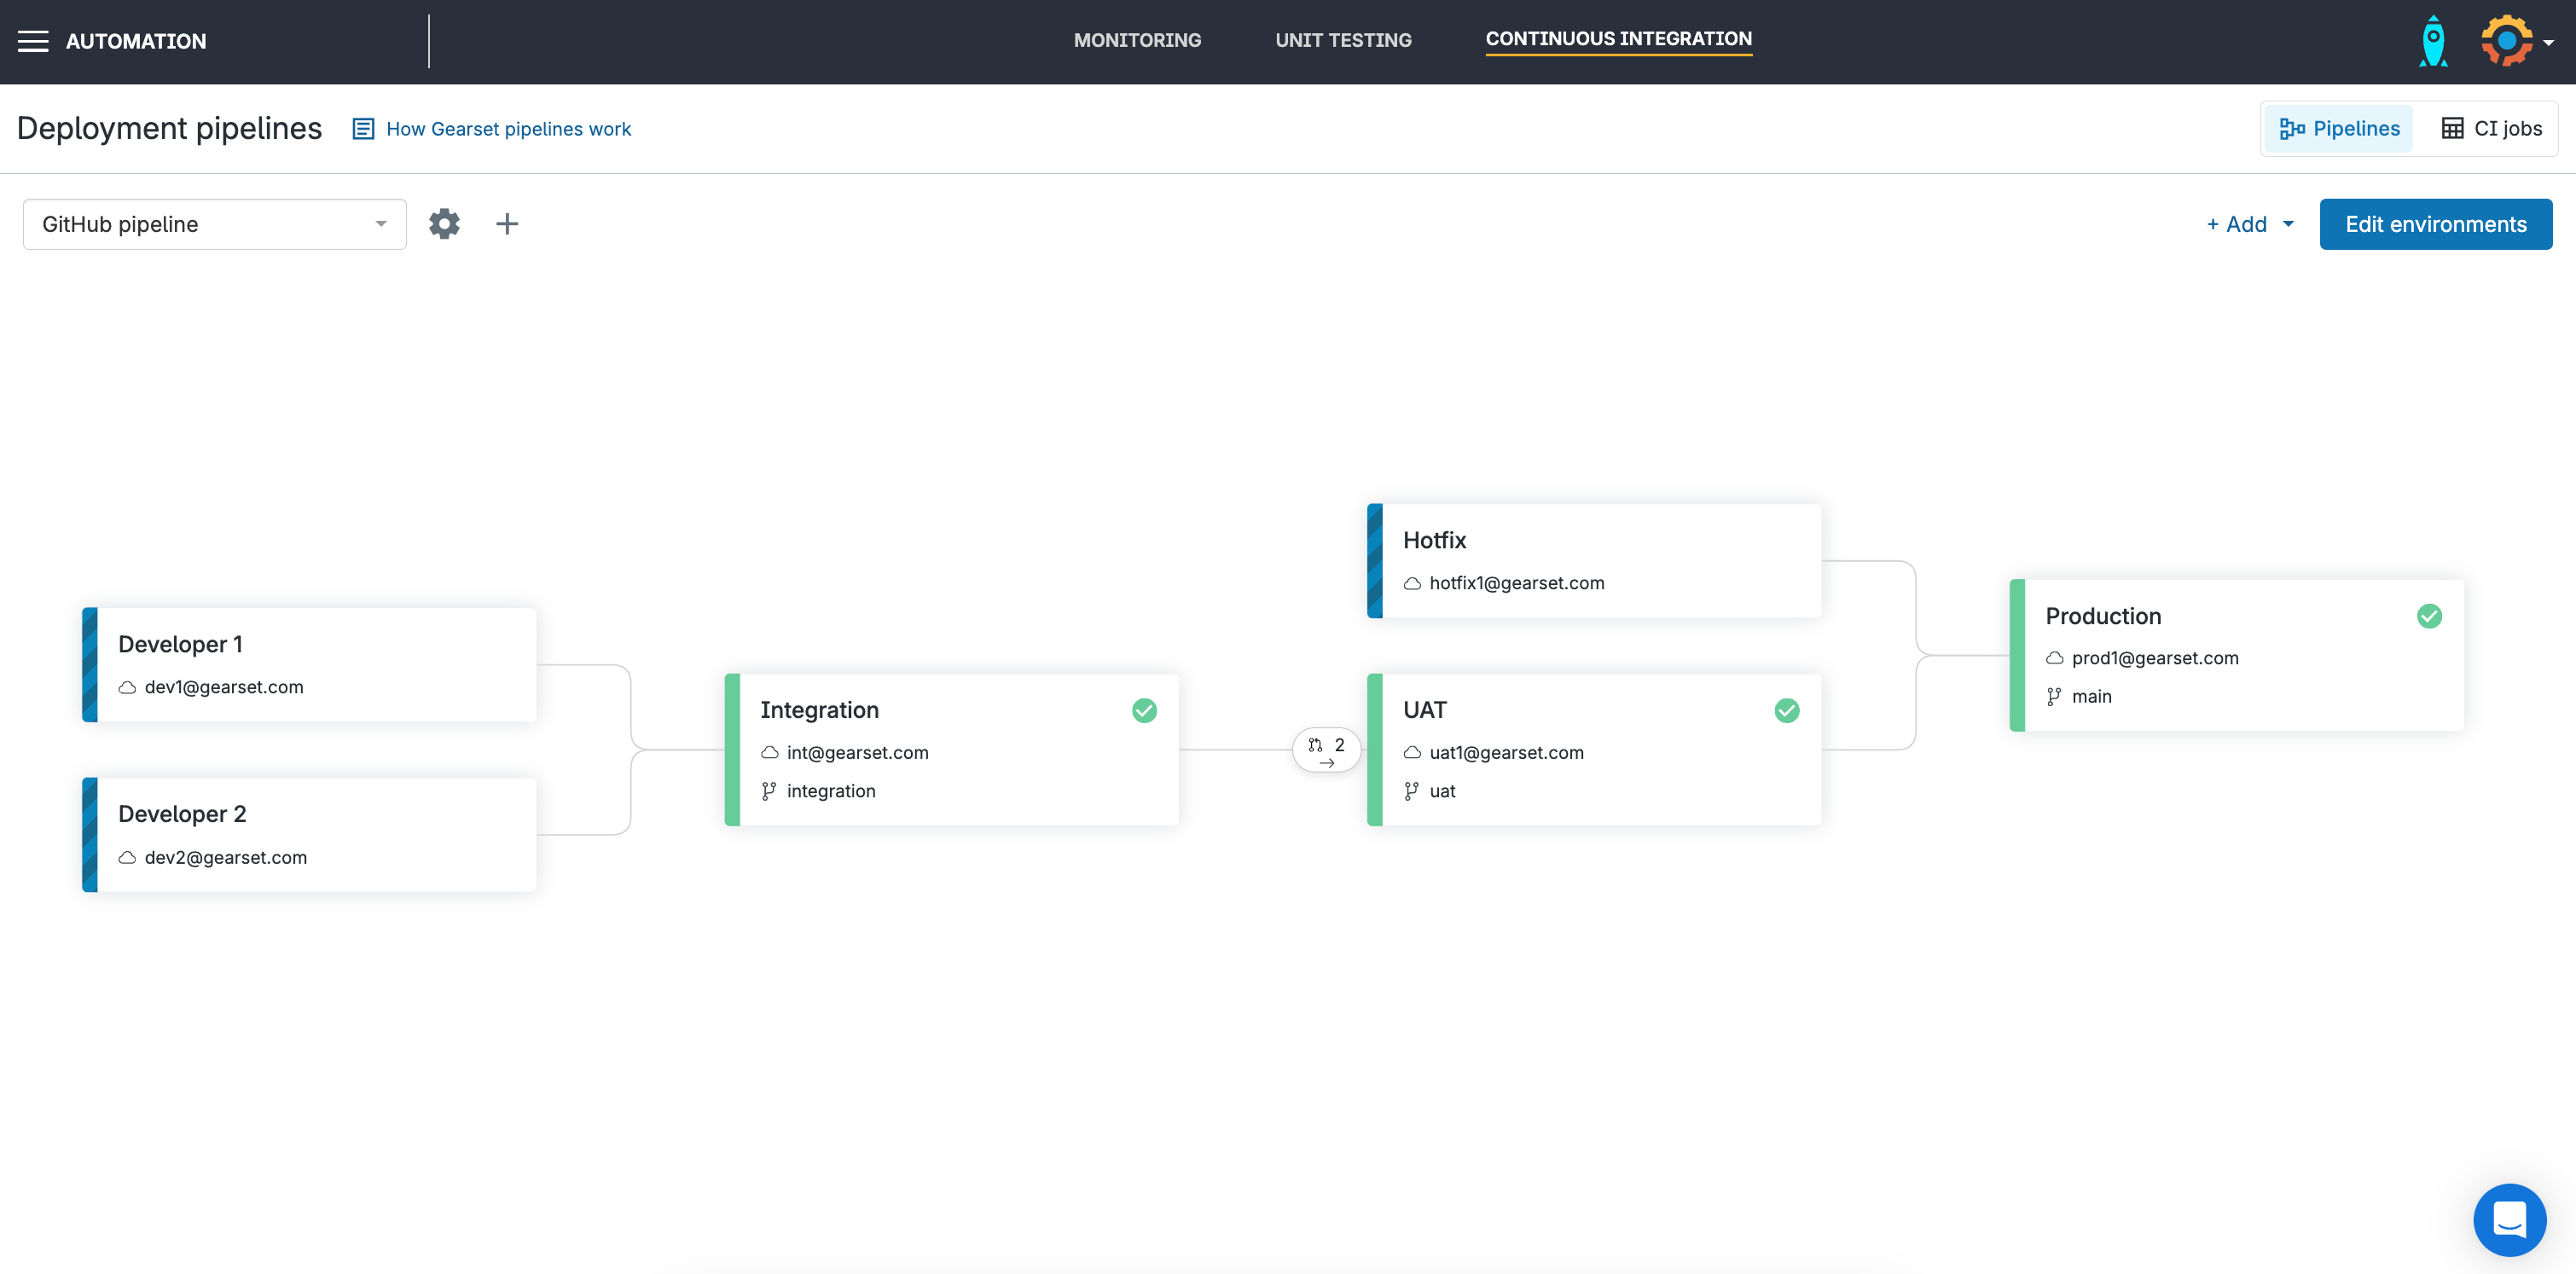
Your first GitHub pipeline is done!
You’ve just set up your first CI/CD pipeline using GitHub with Gearset! Now Gearset is in a position to work alongside GitHub and allow the creation of feature branches, raising pull requests, and automatically promoting your Salesforce changes as you merge into each environment, giving you an all encompassing CI/CD workflow. Gearset will also respect to any git branch protections you have in place with your chosen VCS, not just GitHub.
Get started today!
Building a reliable CI/CD pipeline for Salesforce with GitHub is straightforward thanks to Gearset’s Pipelines. Pipelines solves fundamental challenges associated with CI/CD for Salesforce, so you can easily manage even the most complex release processes.
Watch this video to see Pipelines in action, or book a demo to speak with our DevOps experts.


