
Adopting version control is fundamental for DevOps. And although Salesforce teams are adopting DevOps and version controlling their metadata, CPQ can add a layer of complexity. This means you might end up with two different processes — one for configuration data and one for metadata.
Gearset makes committing your CPQ configuration to version control as easy as possible. In this post we’ll show how you can make CPQ deployments part of your DevOps process, with the help of your chosen version control provider.
For a broad overview of the CPQ challenge and Gearset’s solutions, download our free whitepaper.
Salesforce CPQ challenges
If you’re reading this post, it’s likely you know the challenges that Salesforce CPQ configuration data can bring. Not only are the product configurations complex, but integrating Salesforce CPQ with other systems can take a long time to figure out.
This level of complexity and in-depth troubleshooting takes time, which slows down the entire development process, adds stress to the development and sales teams, and can cause customers to become frustrated.
The path to get there can be hard going but, if implemented correctly, CPQ will help save time, increase accuracy and help to win bigger deals. It’s completely worth it in the end.
One of the main CPQ challenges to overcome is the deployment process. Like any configuration in Salesforce, CPQ changes should be made in development environments and then deployed to production. But because it isn’t regular metadata, CPQ isn’t supported by the native deployment tools: change sets and DevOps Center. Other tools like Data Loader can be used to migrate configuration data, but it’s an extremely difficult process.
Deploying CPQ to version control adds other difficulties as well. You’ll need a solution that can help you deploy Salesforce CPQ changes alongside dependent metadata, and keep everything in your Git repository deployable to Salesforce.
Virtual Summit: Taking control of complex orgs
Why should I version control my Salesforce CPQ?
Version control is fundamental for DevOps. So when it comes to CPQ config, there are many benefits to using version control:
Enhanced collaboration
Embracing version control opens up collaboration throughout the whole team. Not only can the team see what branches are being worked on and give real-time feedback, but working together from the same source of truth means you can work on parallel development streams without overwriting other team members’ work.
Manage code conflicts and deployment risk
Once work is ready to be merged, you can do so with easy conflict resolution. Version controlling your CPQ config allows each team member to work on their own branch. This helps highlight any code conflicts and combine the whole team’s changes properly without overwriting anyone’s work.
Track changes easily
Version control provides you with a version history so you can track changes to your CPQ configurations over time. This is especially useful for auditing, but can be crucial for troubleshooting if something goes wrong.
Reduce bugs through code review
Version control allows teams to easily review each other’s code before it’s merged into the main branch. This means errors are caught early and bugs are less likely to make their way into production.
Keep environments in sync
Keeping your code consistent across all your environments minimizes the risk of configurational drift with your CPQ configuration — which, if left, can take weeks to fix.
Simple rollback
Using version control means you can easily roll back to an earlier version quickly and easily. This is great if you spot an error or bug in the CPQ config that wasn’t there before your release.
Release faster
By having your CPQ in version control, you save time spent developing and troubleshooting, which allows you to deliver changes to the end user as quickly as possible.
Regulatory compliance
Some industries have to adhere to strict compliance requirements, like SOX. The ability to track the version history of your CPQ configuration means that regulators can easily see a full audit trail.
How can I get my CPQ configuration into version control?
NOTE: Gearset’s comparisons have had an upgrade! We’re updating all our blog posts with the new UI images — but in the meantime, you can learn more about what’s changed.
With Gearset, you can seed your repository with all your CPQ configuration, to make it the source of truth, then deploy all your CPQ changes through version control alongside metadata. Sign up to a free 30-day trial of Gearset to follow along with this walkthrough.
As part of Gearset for CPQ you’ll need to run the external ID setup — a simple, automated process, which prevents duplicate records from being created and enables rollbacks of changed CPQ items. The external ID doesn’t interfere with any existing external ID fields you may already have.
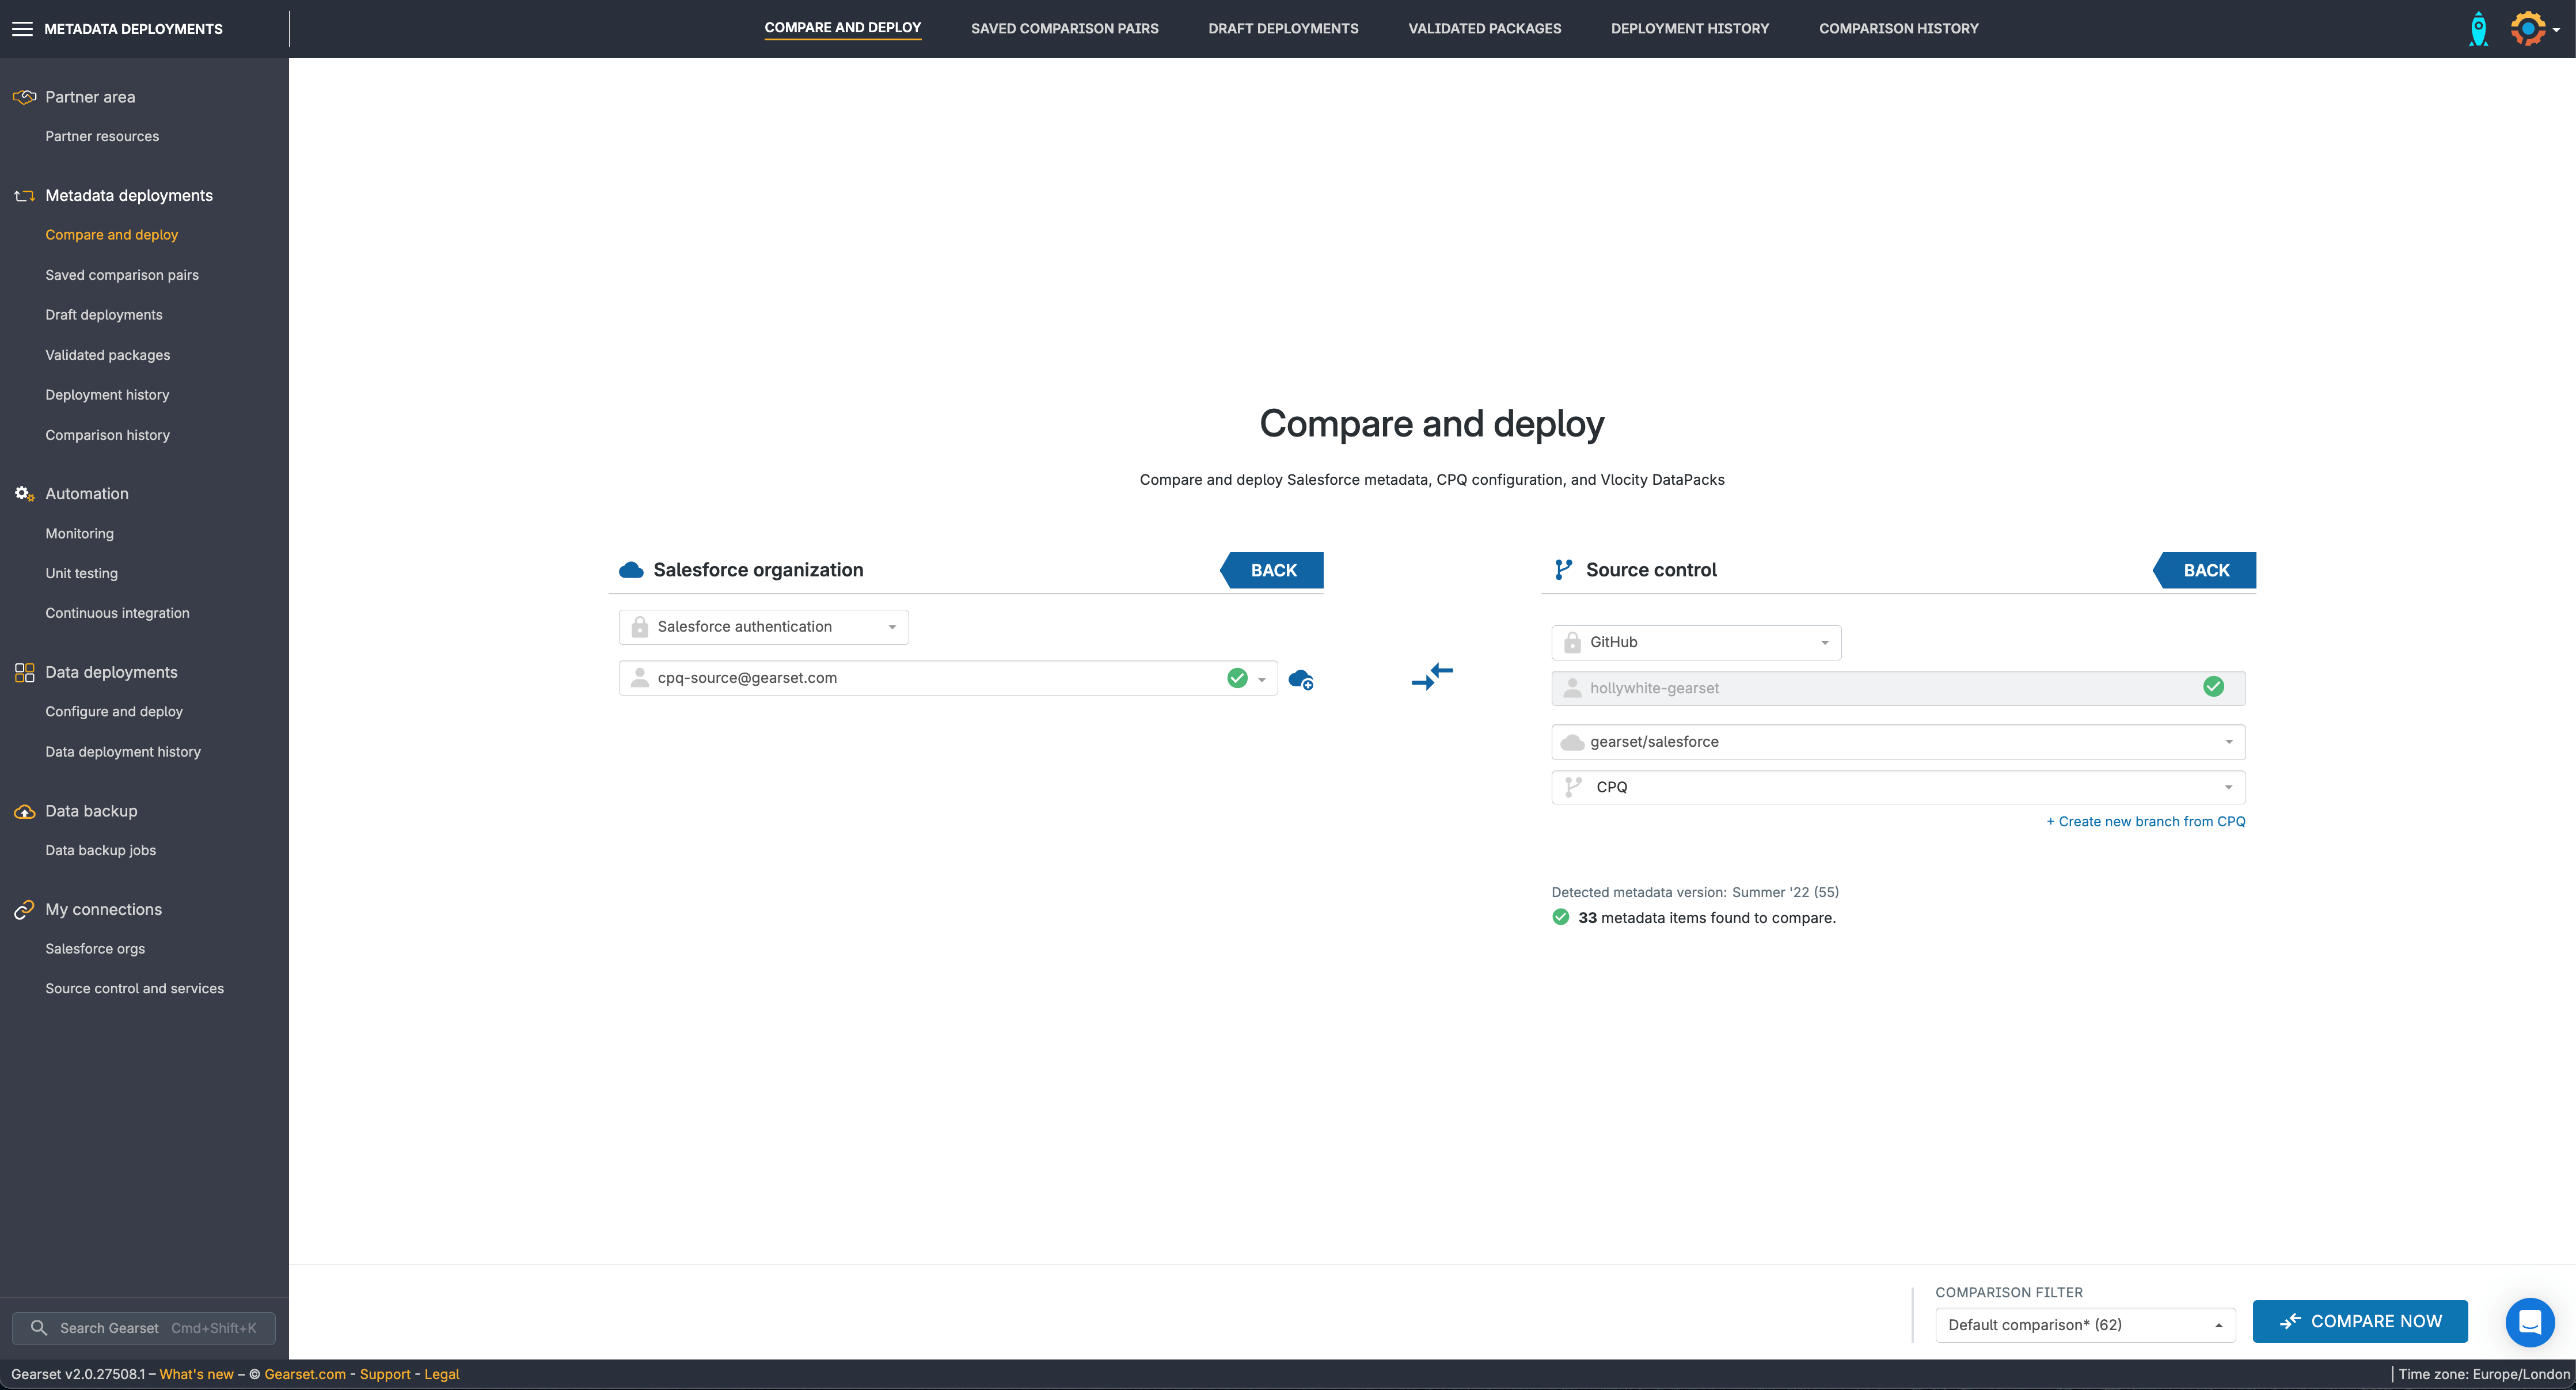
1. Select your source and target
From Gearset’s Compare and deploy page, choose your source CPQ org and the target repository. You can create a new branch from within Gearset’s UI, or select an existing branch.
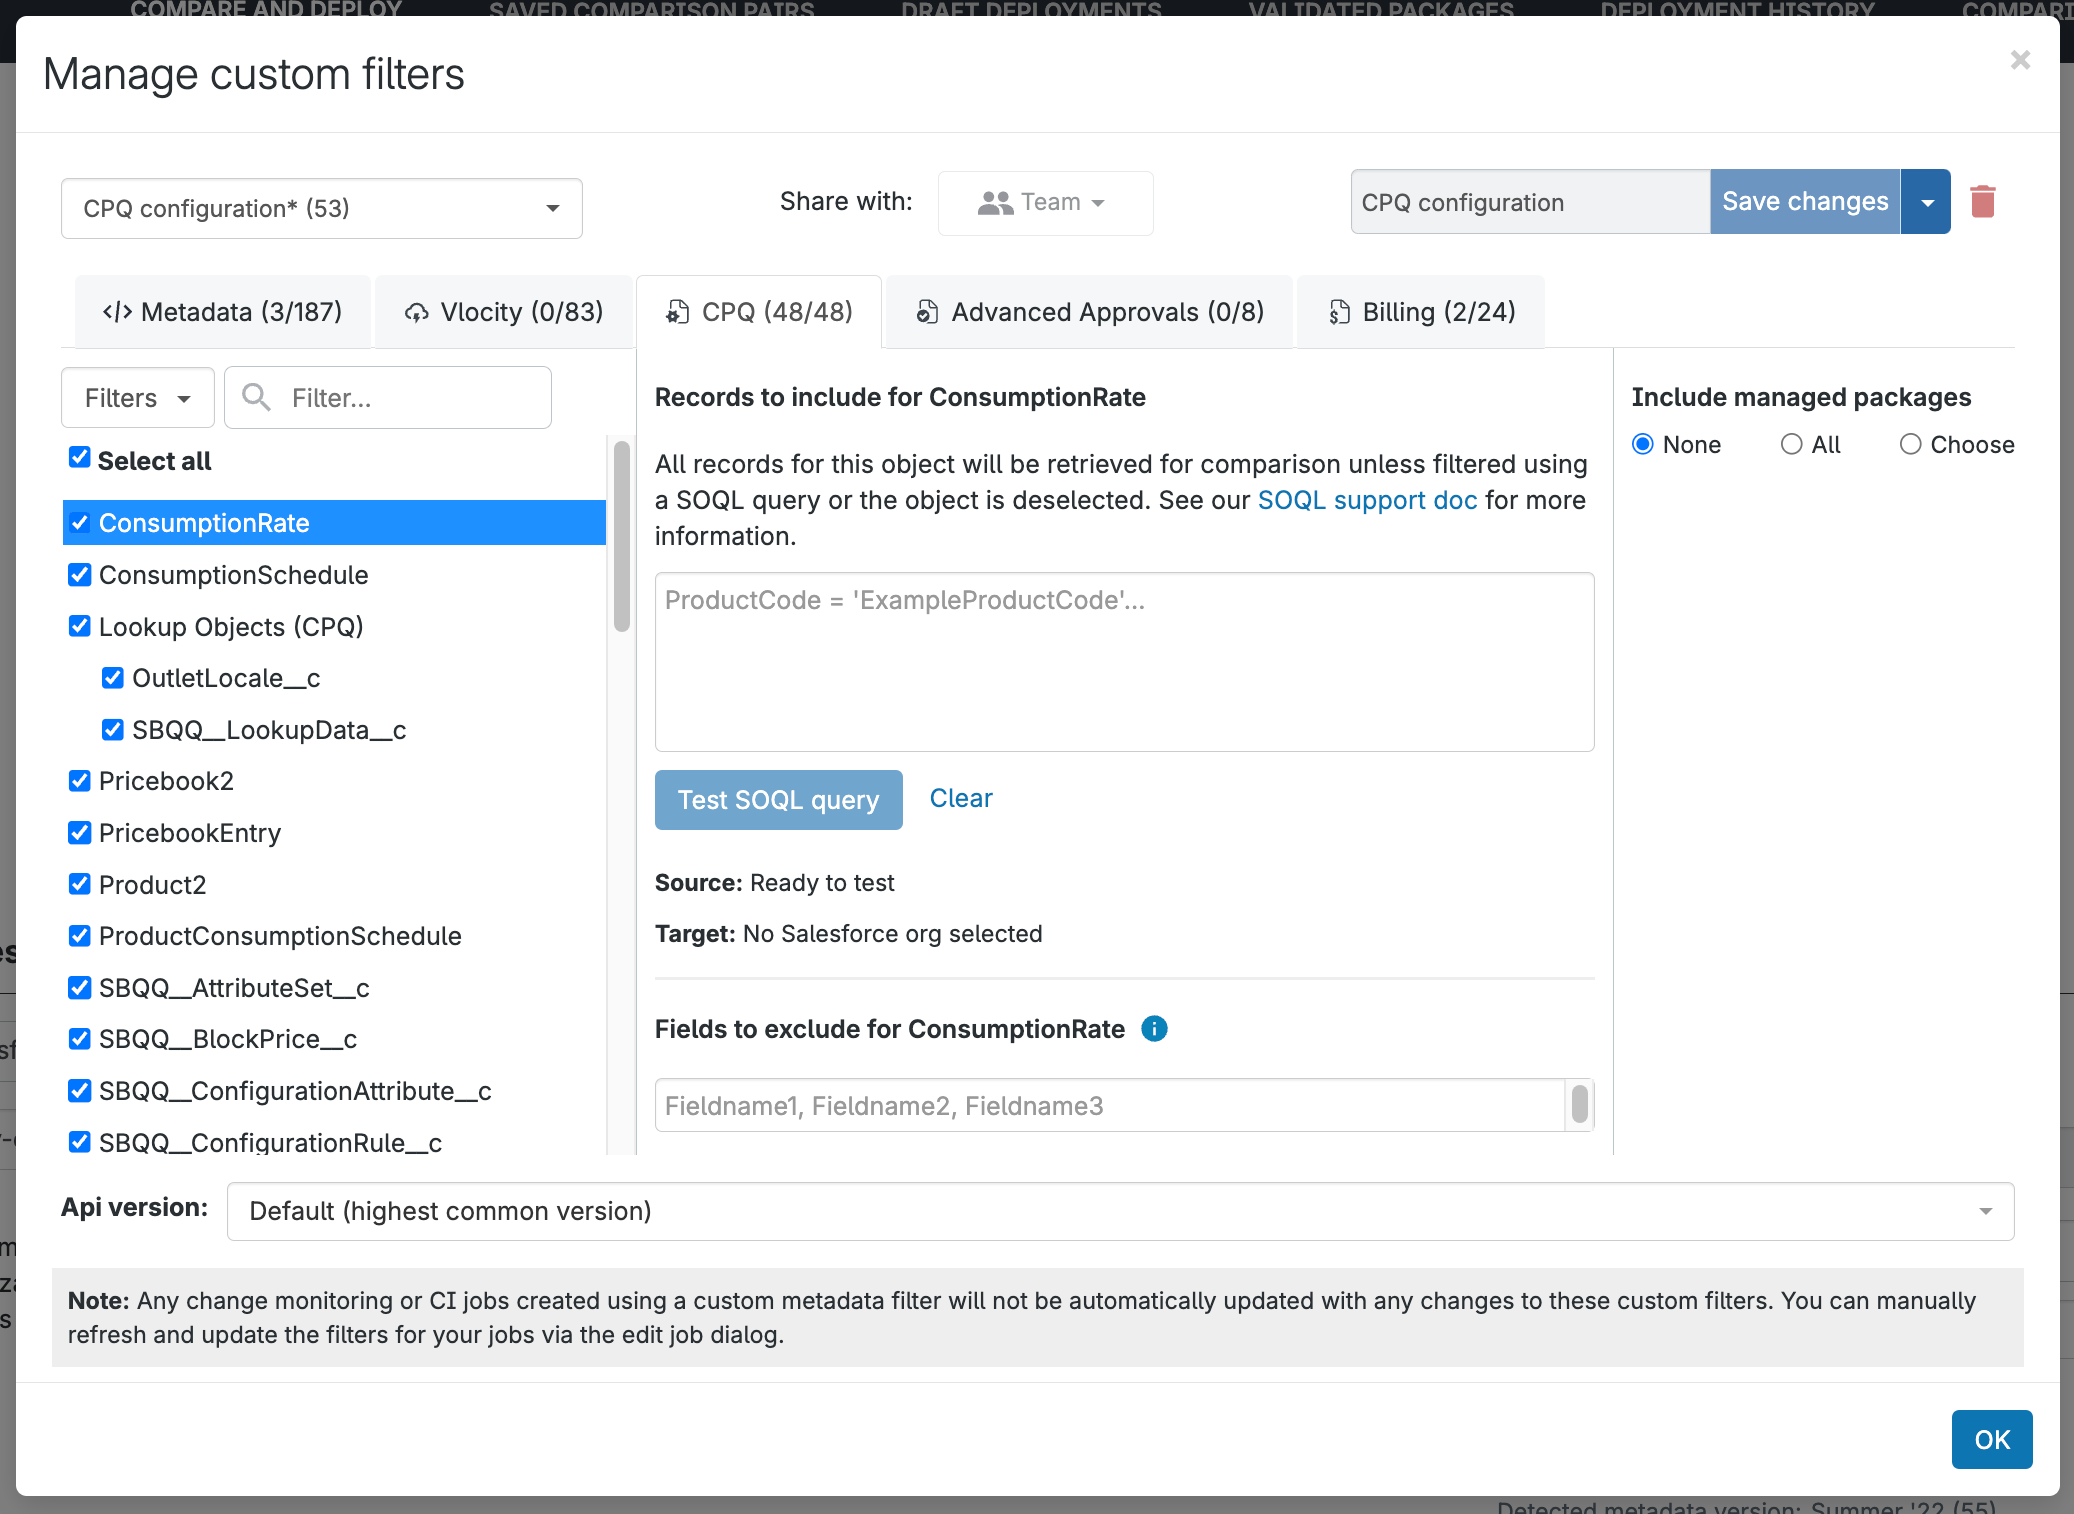
2. Choose a comparison filter
Choose a CPQ comparison filter from the drop down menu or create your own in a custom filter, then click Compare now.
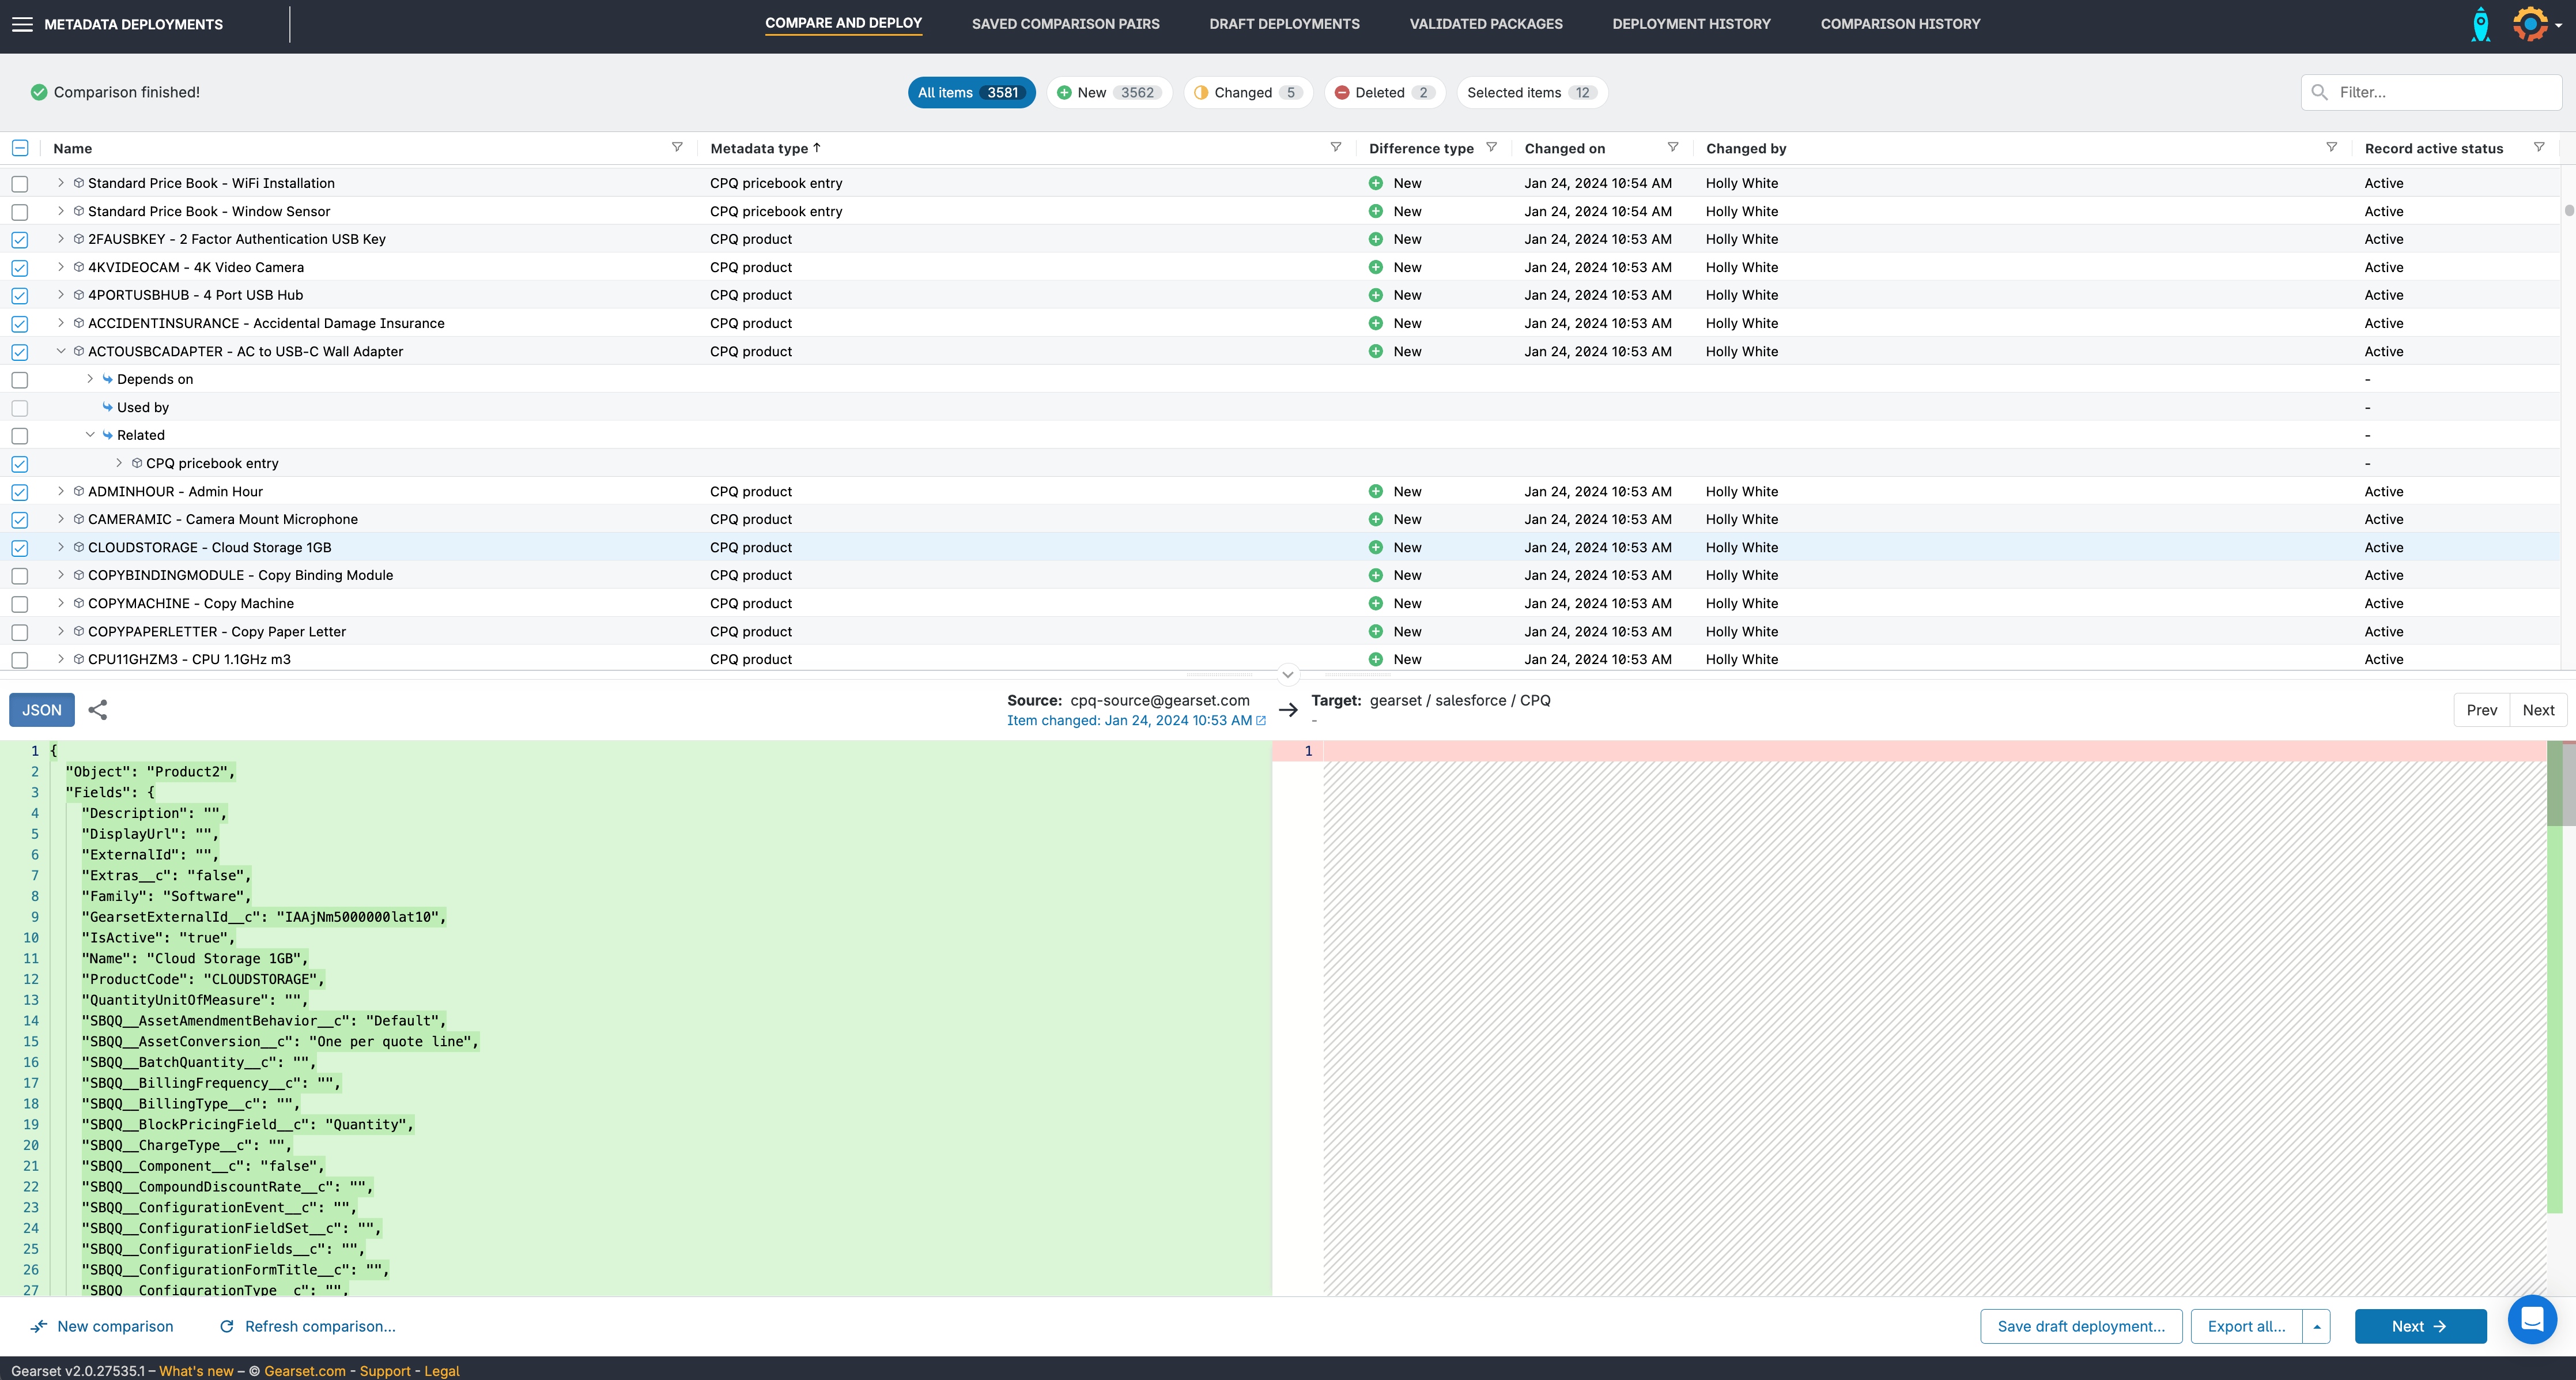
3. Pick your CPQ components
On the comparison screen, choose the CPQ configuration you want to commit to your version control branch and click Next.
4. Add any forgotten dependencies
Gearset’s problem analysis will pick up any forgotten dependencies and help you add them to your deployment. Then click Pre-deployment summary.
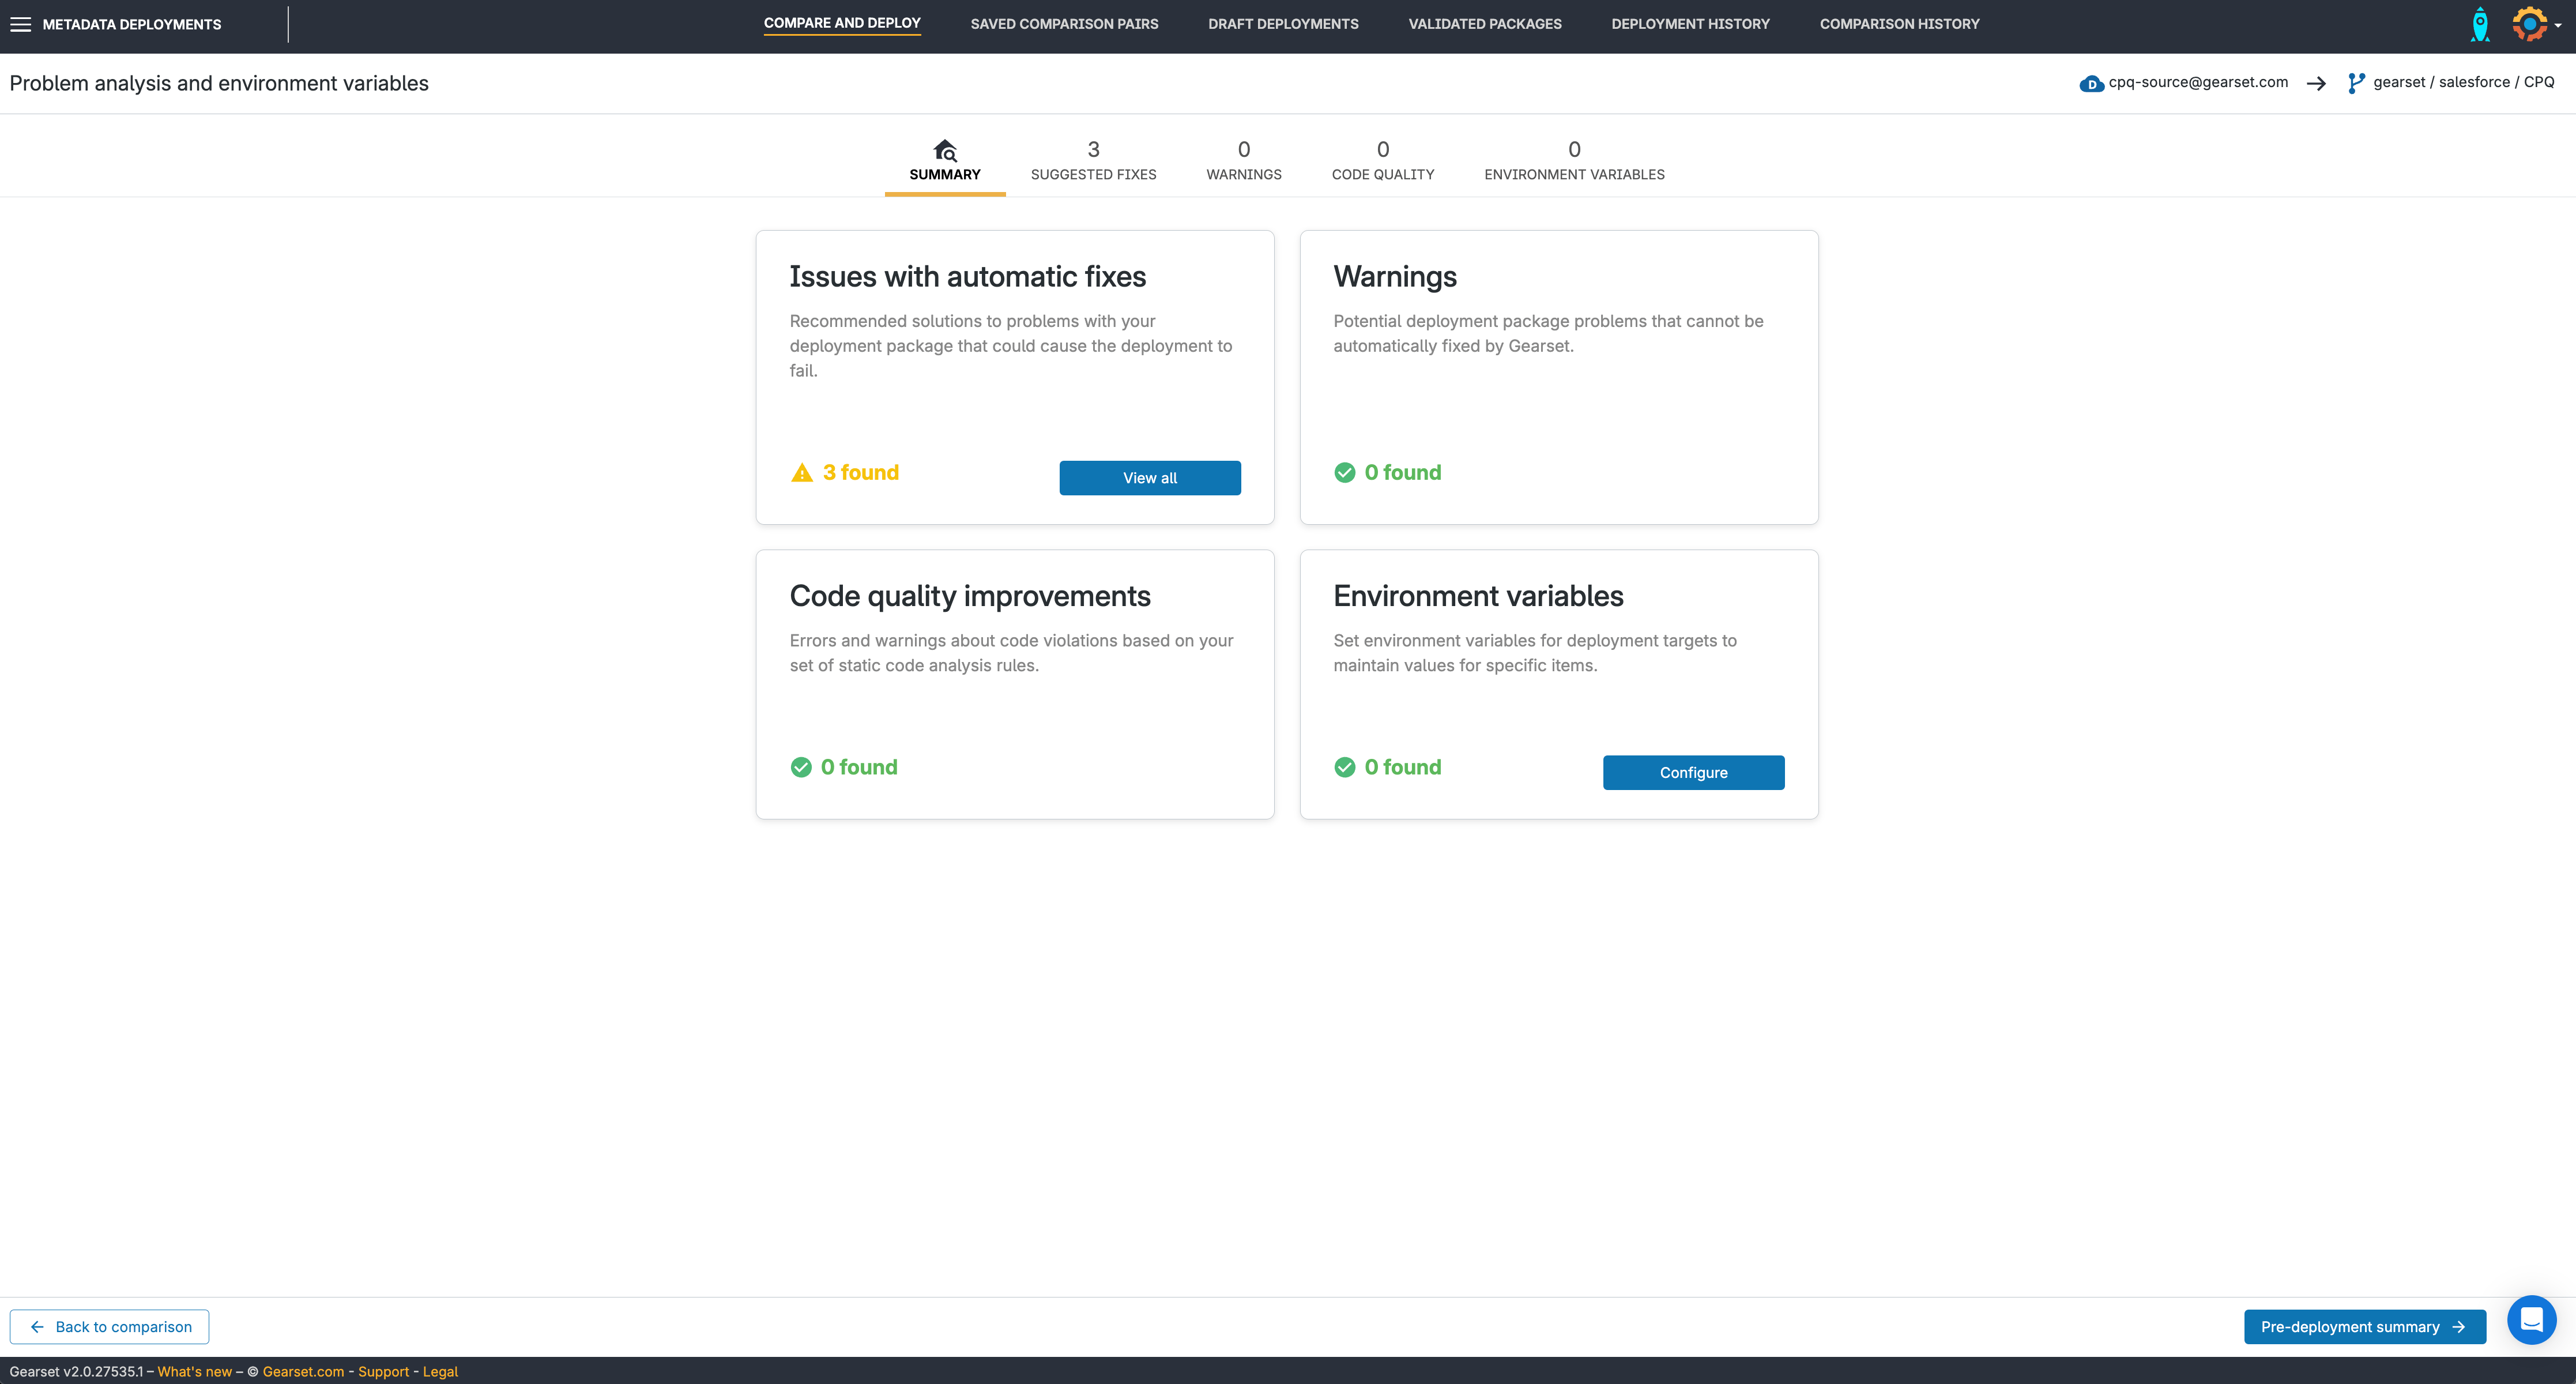
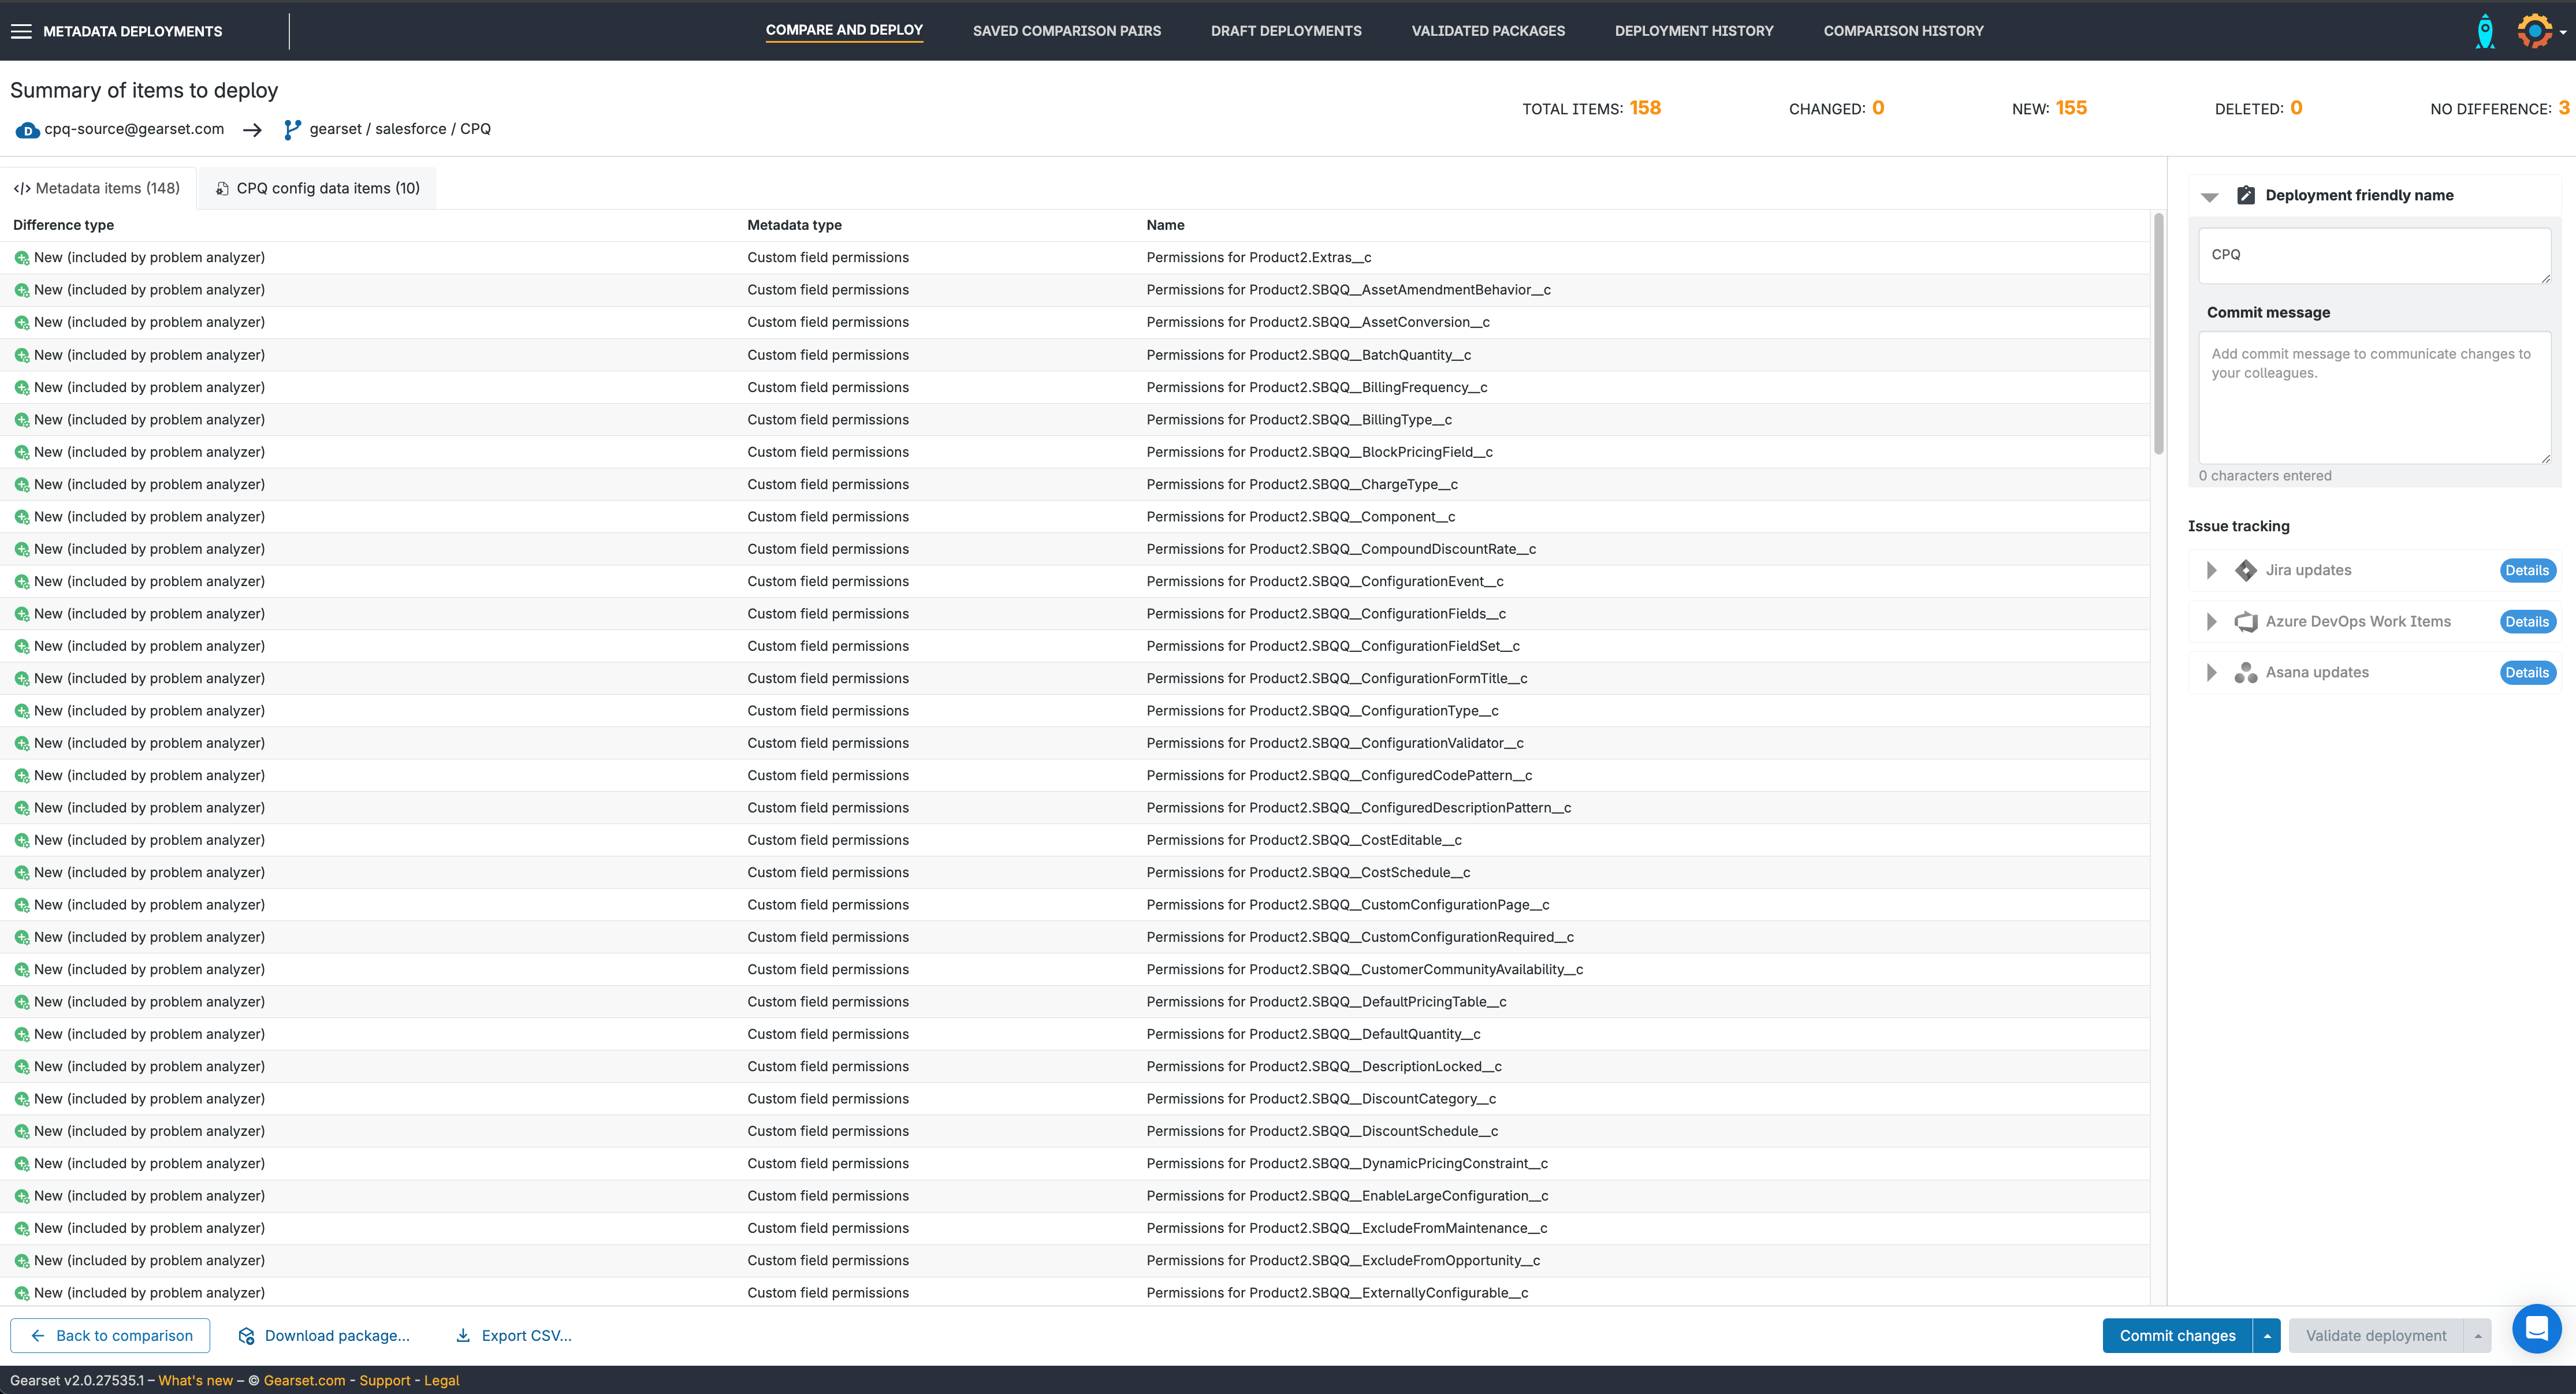
5. Check your deployment summary
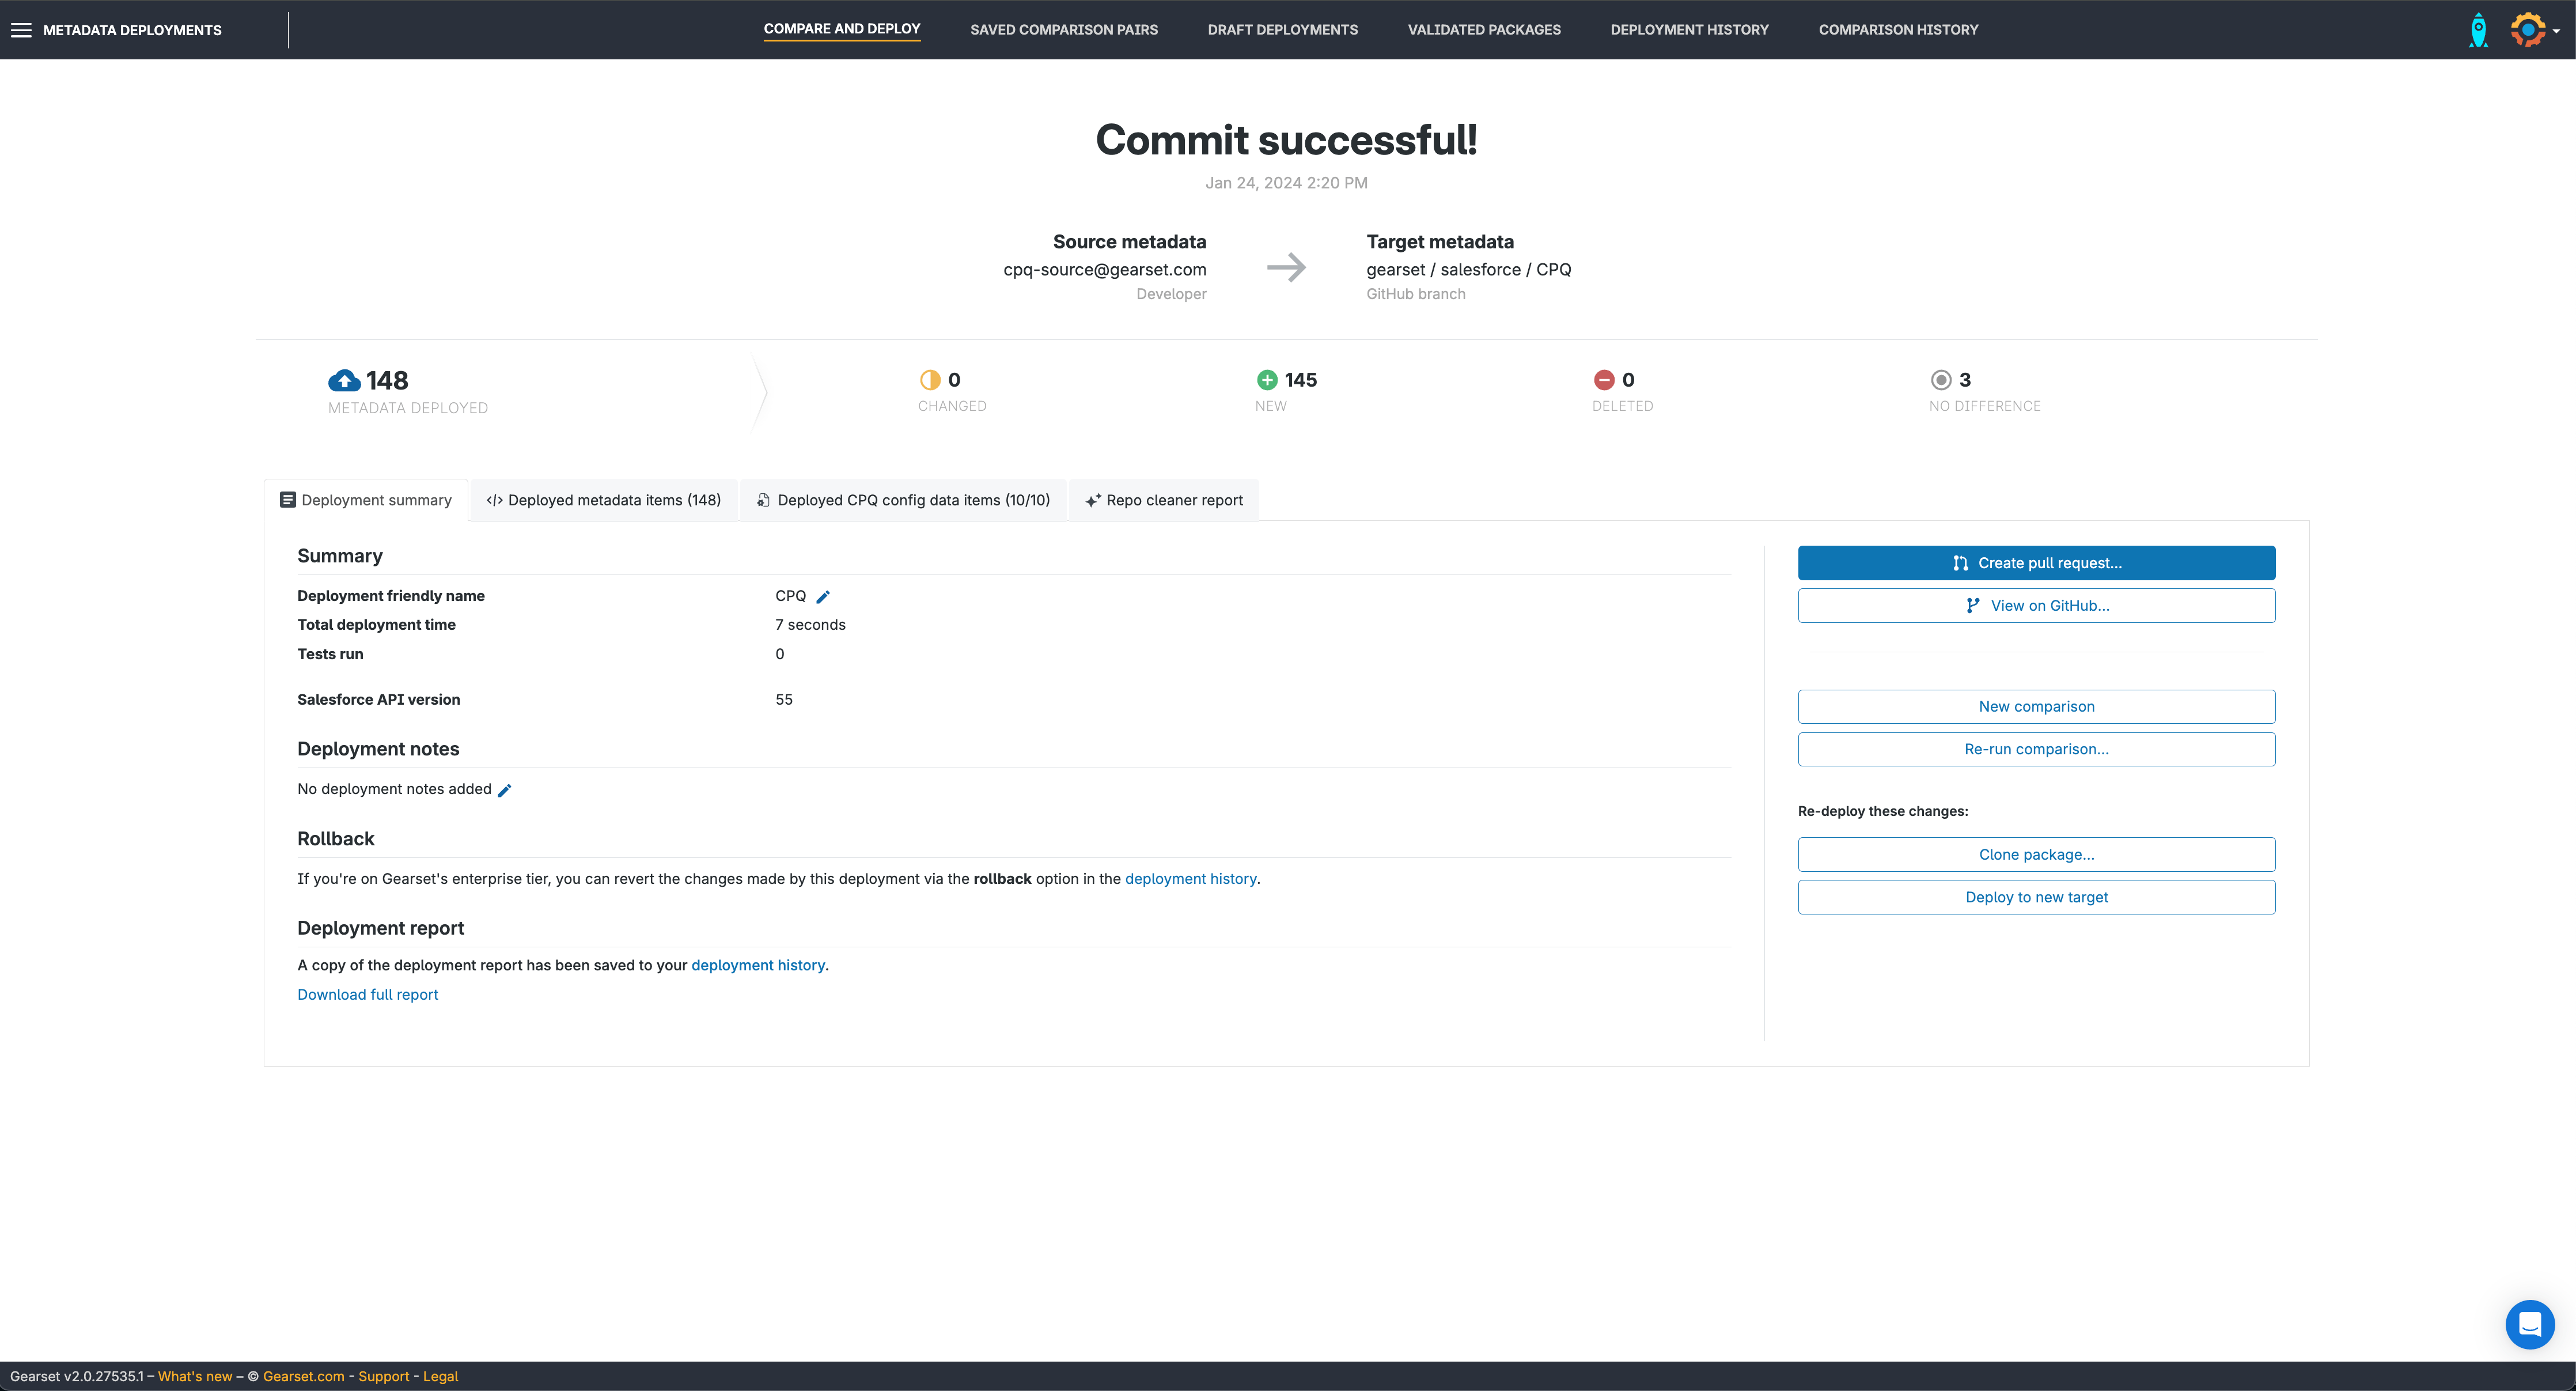
You’ll see a list of the CPQ configuration that will be committed to your branch. Give the deployment a friendly name before clicking Commit changes.
6. Create your pull request
After you’ve successfully committed your CPQ configuration, you’ll be able to create a pull request from the Gearset UI, and view your commits in your version control system.
7. Release to production
Once you’ve created the PR and your code has been reviewed, you’re ready to merge the CPQ branch with your main branch and release your configuration to production.
What version control providers does Gearset integrate with?
Gearset integrates seamlessly with a whole host of industry-leading apps and platforms, including all major Git hosting providers, including:
- GitHub
- GitHub Enterprise
- GitLab
- Bitbucket
- Bitbucket Server/ Data Center
- AWS CodeCommit
- Azure DevOps
- Azure DevOps Server
If you’re just starting out on your version control journey and wondering which version control provider to pick, you can check out our blog post explaining all the available options.
The future of Salesforce CPQ
It’s worth noting that Salesforce has put CPQ into end-of-sale (EOS) meaning it will no longer be sold to new customers. Instead, Revenue Cloud Advanced helps automate every stage of the quote-to-revenue process, and is designed to accommodate the more challenging revenue requirements of complex, contemporary businesses.
Ready to commit?
To discuss how you can start using version control with your Salesforce CPQ config, book a demo with one of our experts. To find out more about Gearset’s CPQ solution, you can download our free whitepaper.
