Static code analysis (SCA) can help your team identify trends and issues throughout your codebase and get plans in place to tackle them. When it comes to testing, it’s always good to try taking a ‘shift left’ approach — carrying out tests to find and quash any issues earlier on in the development process. In this article we’ll run through how you can shift Apex SCA testing left into your local development environments using PMD for Visual Studio Code (VSCode).
What’s shift left testing in DevOps?
The ‘shift left’ principle for software testing is all about testing early. If you mapped out your development workflow, with early development on the left through to the final release on the right, different kinds of testing will probably be used at different points. It’s best practice to introduce tests as early in the workflow as possible.
Shift-left testing benefits for your team
Shifting left has a number of benefits. It helps you to:
- Identify issues early on and make more informed decisions about how to tackle them
- Improve the quality of your work with smarter solutions and fewer quick fixes
- Increase the efficiency of your development cycle
- Minimize the chance of releases being blocked by test failures
- Reduce the cost in time and effort of reworking poor-quality code
Code quality and testing
While it’s different to testing that your code works as intended, testing for code quality with static code analysis is important. It can make up a big part of your overall testing strategy at the various stages, including unit, integration and regression testing, as you want to ensure consistent guidelines are followed and key areas (like security) are considered at all stages. For Apex analysis, we’d encourage you to use PMD.
What is PMD?
PMD is an open-source static code analyzer focused on specific languages, including Apex. You can use PMD rulesets to highlight common mistakes/flaws in your source code, allowing quality gates to be applied at various stages. For Salesforce developers writing Apex, PMD has lots of default rules around different areas (best practice, security, performance etc). You can extend those rulesets as needed with your own custom rules.
You can use PMD via other tools and platforms, including Gearset’s static code analysis functionality and Salesforce’s own Code Analyzer which draws on the PMD library along with some other source code analyzers.
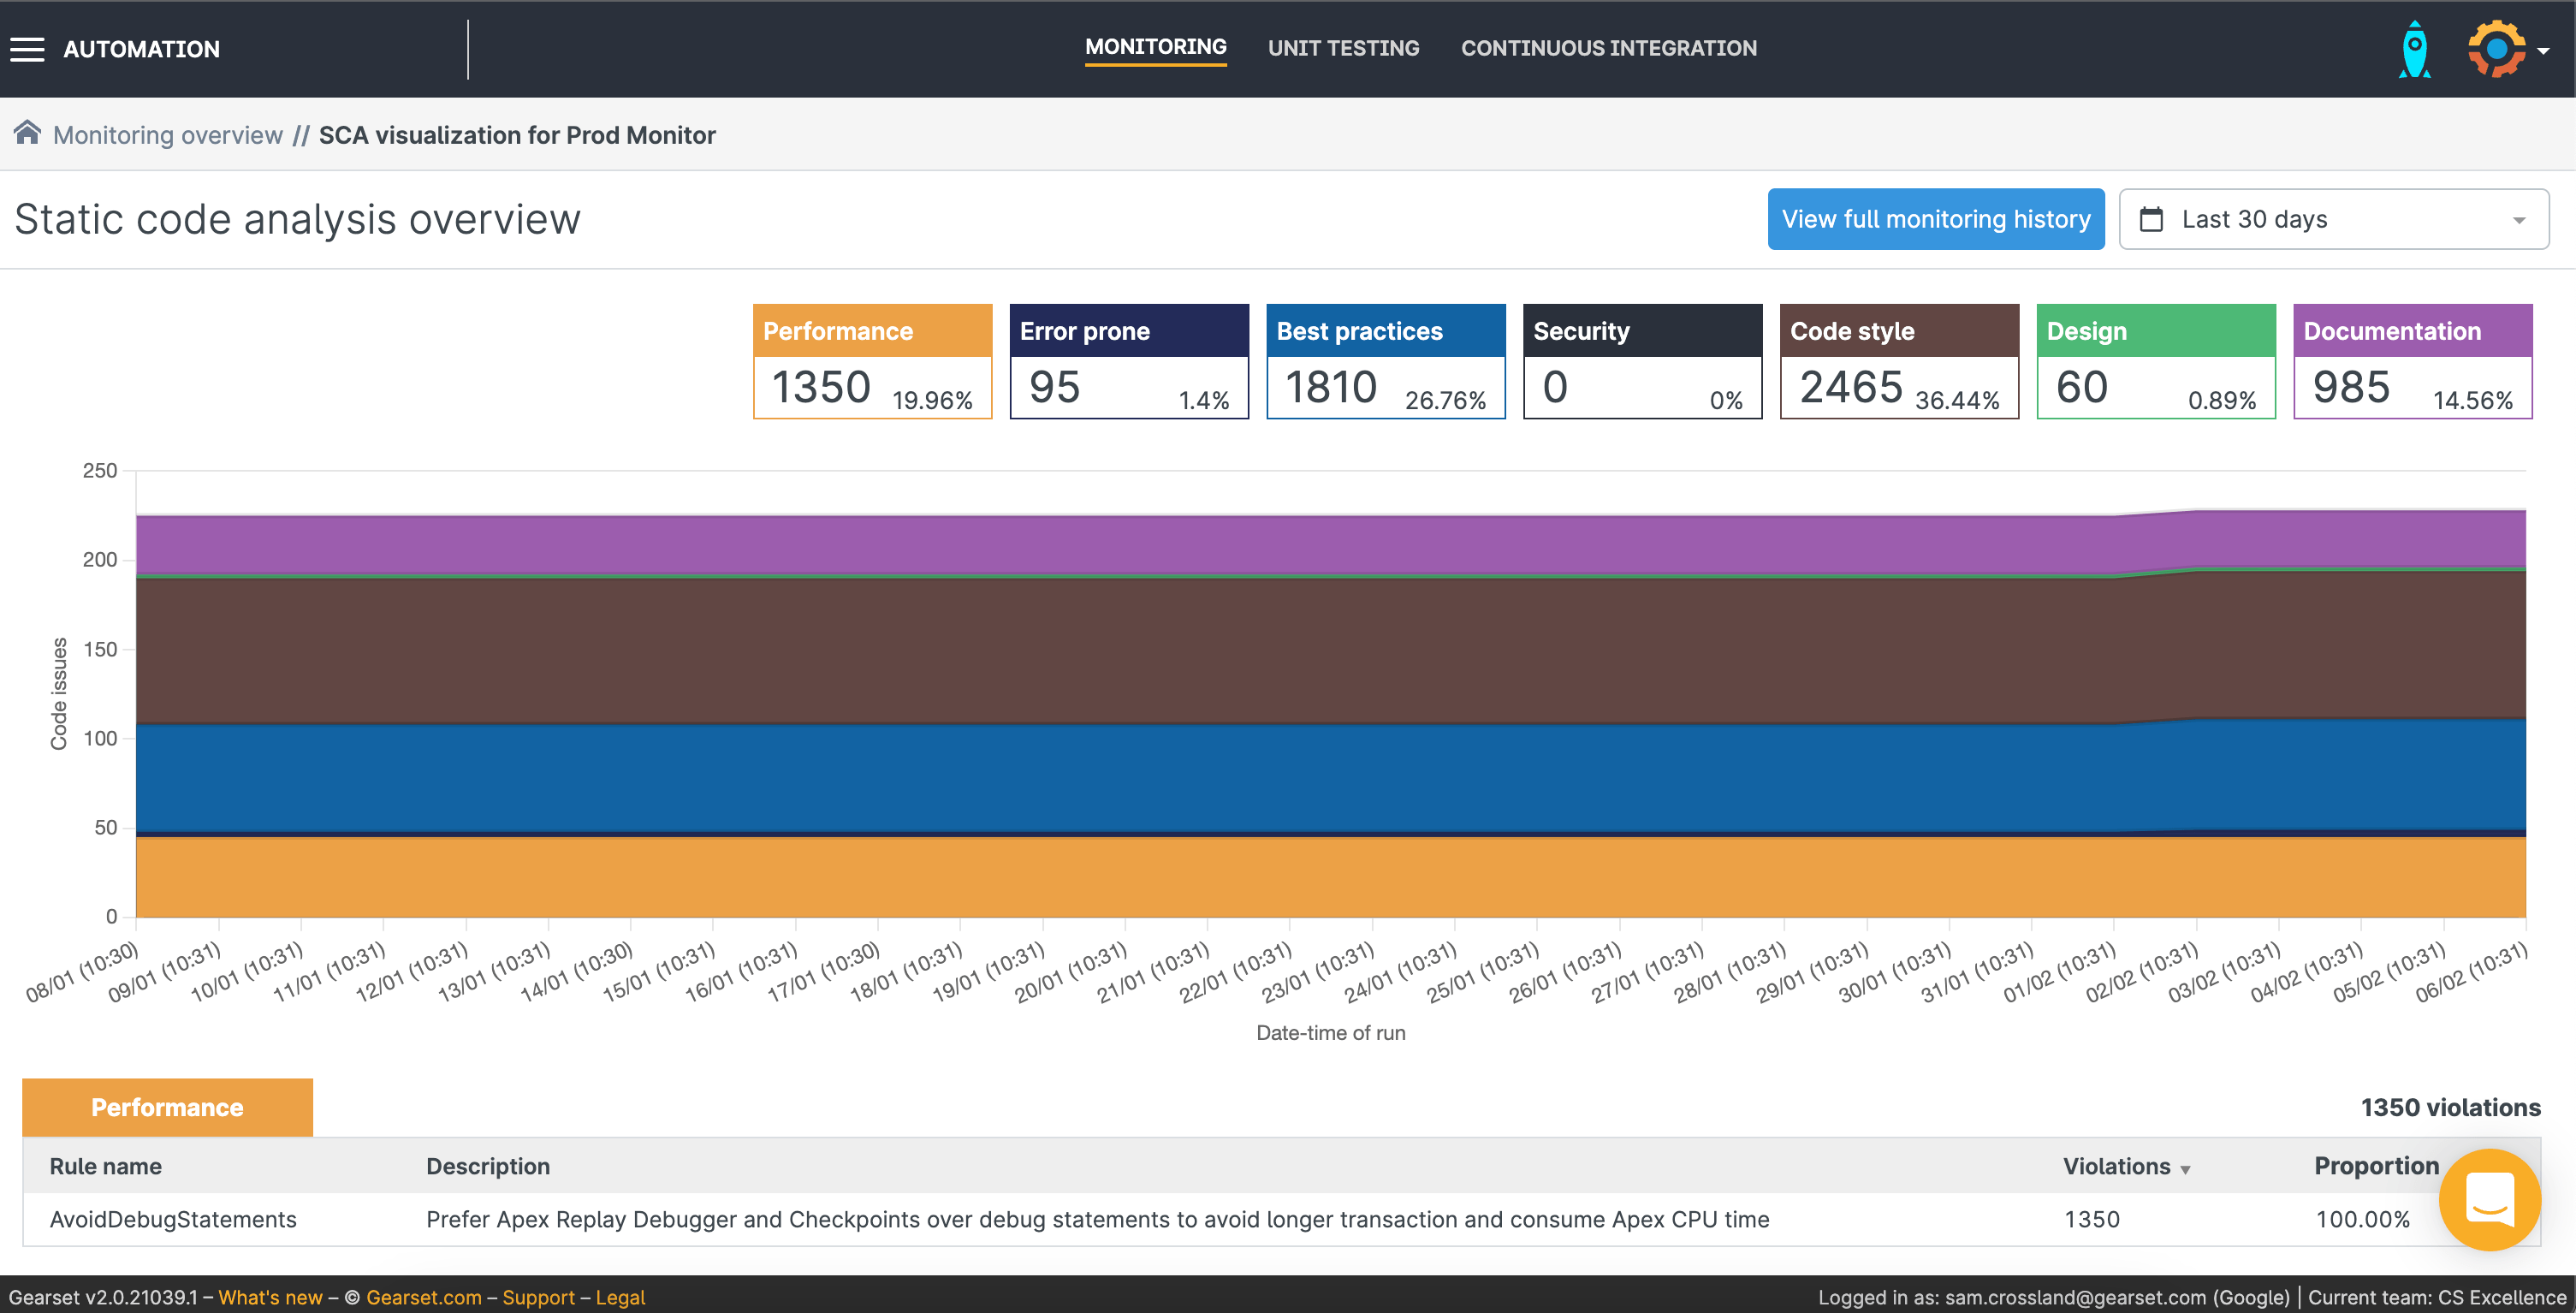
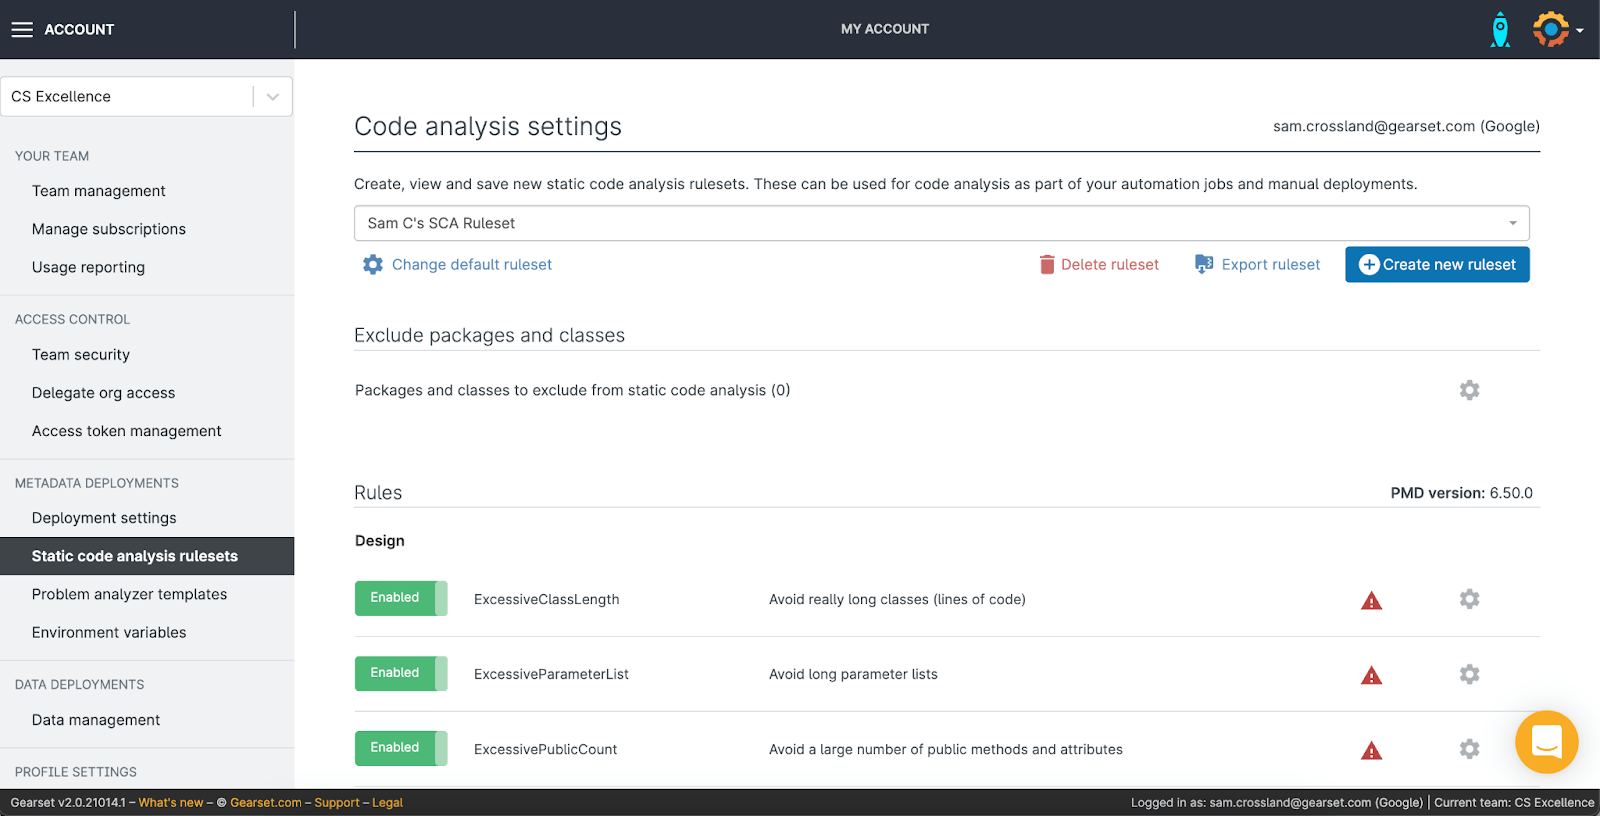
You and your team won’t necessarily want to use the entire PMD ruleset, so you can configure or disable rules to meet your needs. The screenshot below shows how you can do this within Gearset. For more guidance on building the right ruleset, download our Static Code Analysis for Apex whitepaper, or take a look at the SCA course on our free training platform, DevOps Launchpad.
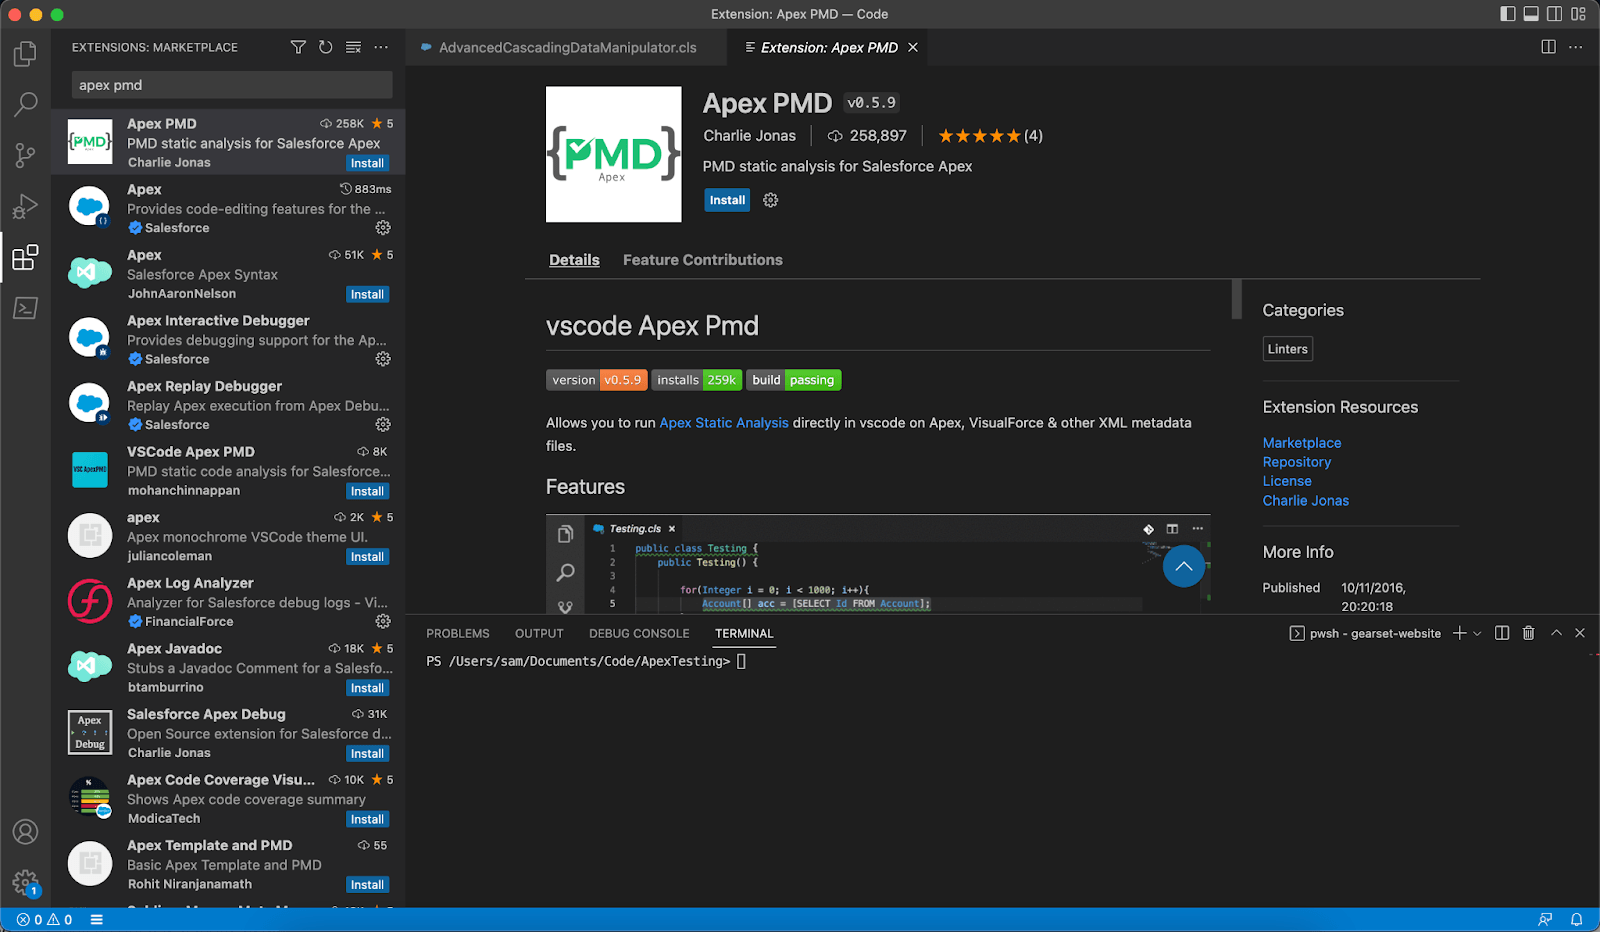
With PMD being open source, various contributors can support its development and extend its capabilities. One available extension is Apex PMD for VSCode which allows you to run PMD static code analysis within your local VSCode instances and find issues earlier on in the process at the developer level.
Please note that Apex PMD is a marketplace extension for VSCode and not officially endorsed by Gearset or Salesforce, so make sure to clarify any security/installation concerns within your organization before getting started.
When using PMD in VSCode, it’s key that your ruleset aligns with the rules used later in your workflow. In the rest of this article, we’ll walk through setting up Gearset, the Apex PMD extension and VSCode for consistent static analysis that runs throughout your workflow.
Install Apex PMD to VSCode
Open up VSCode, click on the extensions icon (or cmd+shift+X on a Mac) on the left hand side, and search for ‘Apex PMD’. Make sure your selection matches this one. Click Install.
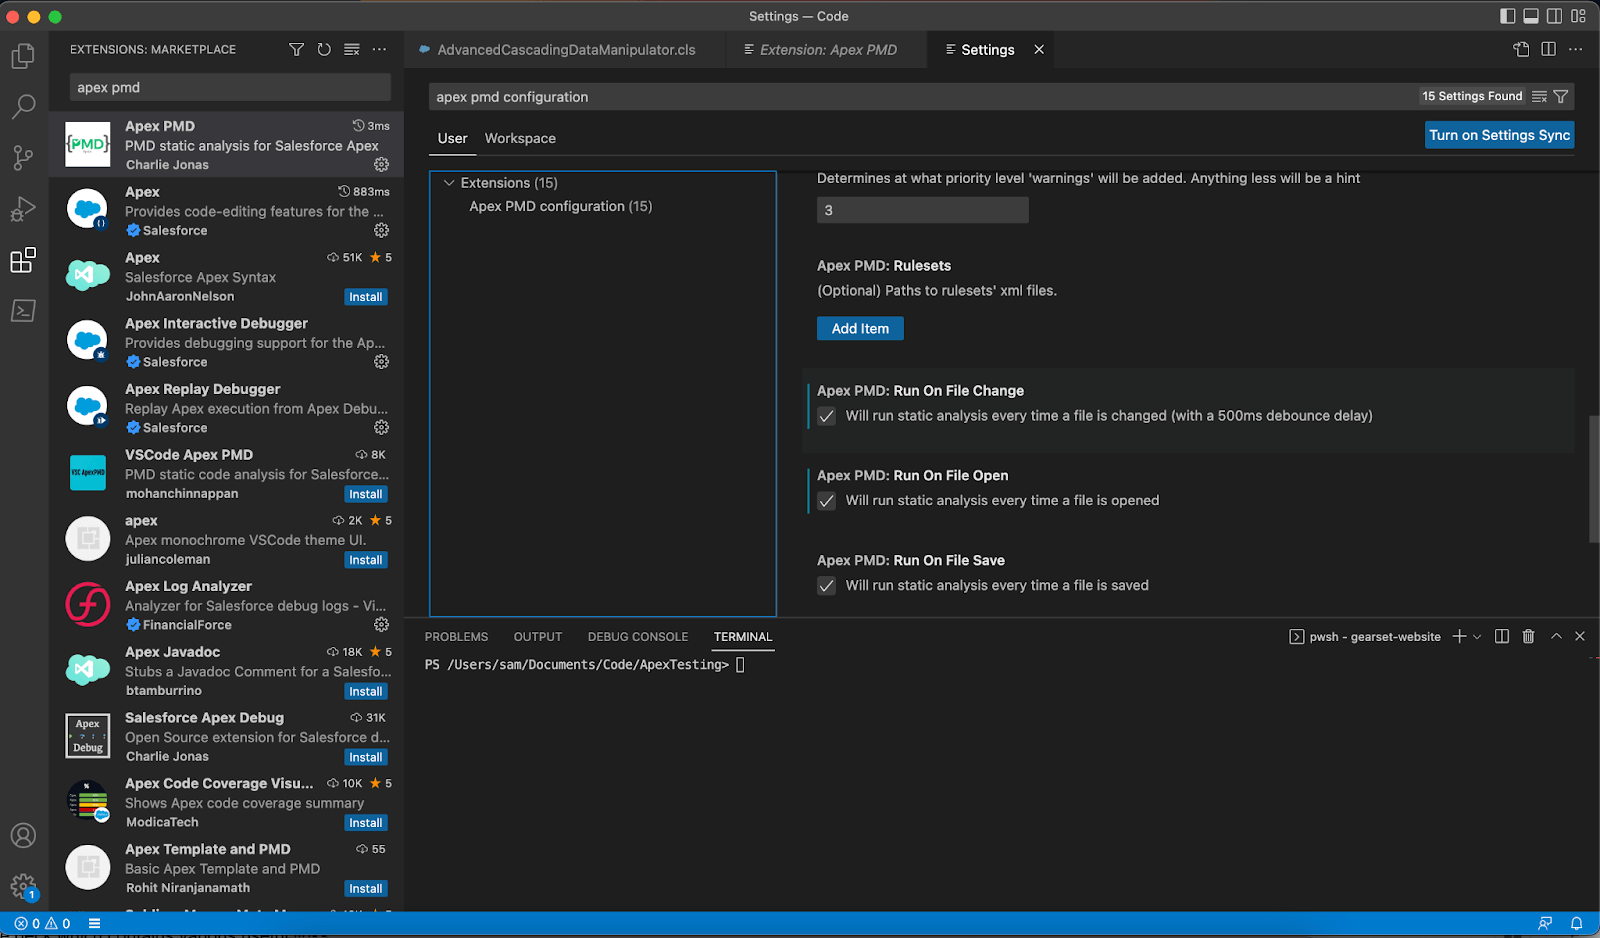
Once installed, head to Code > Settings across the top bar (or cmd+,) to open up the Settings panel within VSCode. To check it’s installed correctly, search for ‘Apex PMD Configuration’ — it should appear in the panel under Extensions.
With Apex PMD successfully installed to VSCode, you’re ready to customize it with your PMD ruleset from Gearset to ensure alignment at the multiple gates in your process.
Configure your PMD ruleset in Gearset and sync with VSCode
To see what rules are available and create specific subsets, head to the Code analysis settings page in Gearset. Click the blue Create new ruleset button, give your ruleset a name (I’m calling mine ‘Sam C - Security Ruleset’), and hit Create.
Use the toggles to disable or enable specific rules. Click the cog icons to customize rules — including the parameters and severity of the warning.
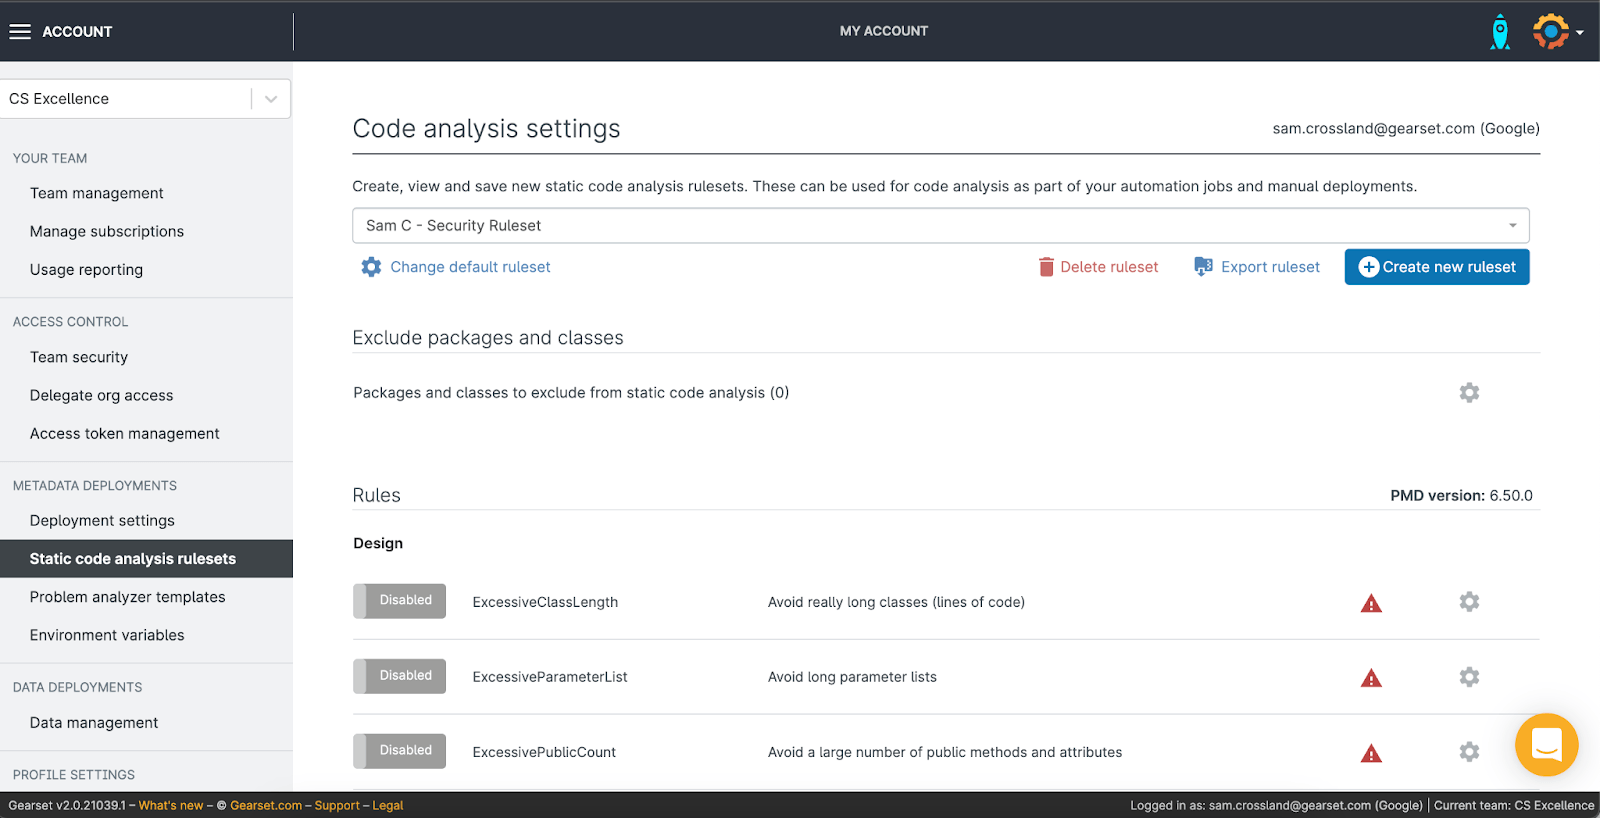
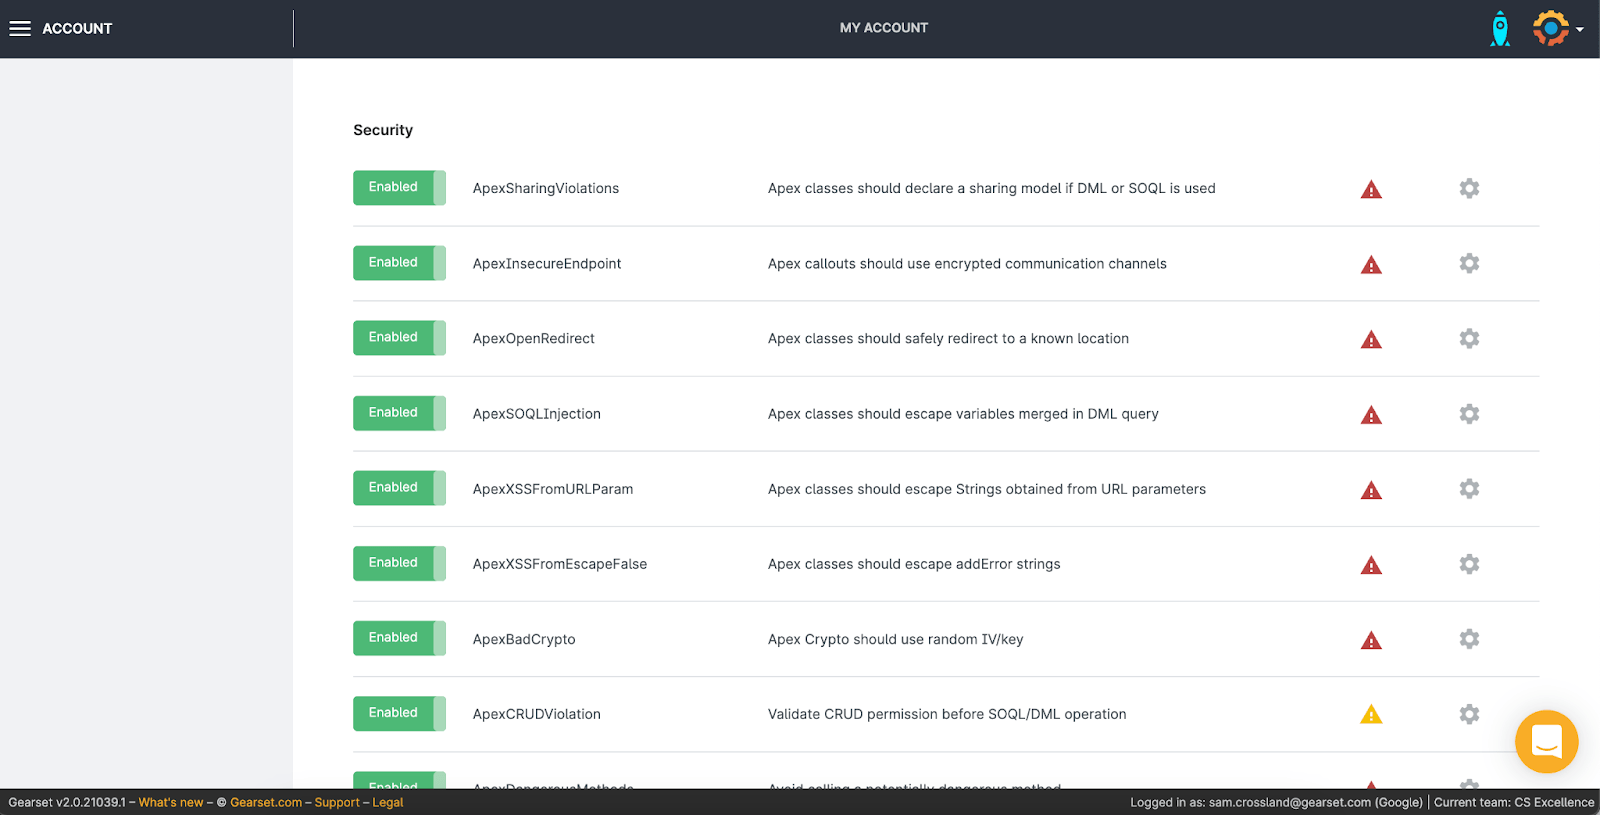
Once you and your team have agreed on a ruleset, click on the Export ruleset button. This will download an XML file containing some details about the ruleset, the specific rules you’ve selected and whether they’re flagged as an ‘error’ or ‘warning’ (priority 1 or 3 respectively).
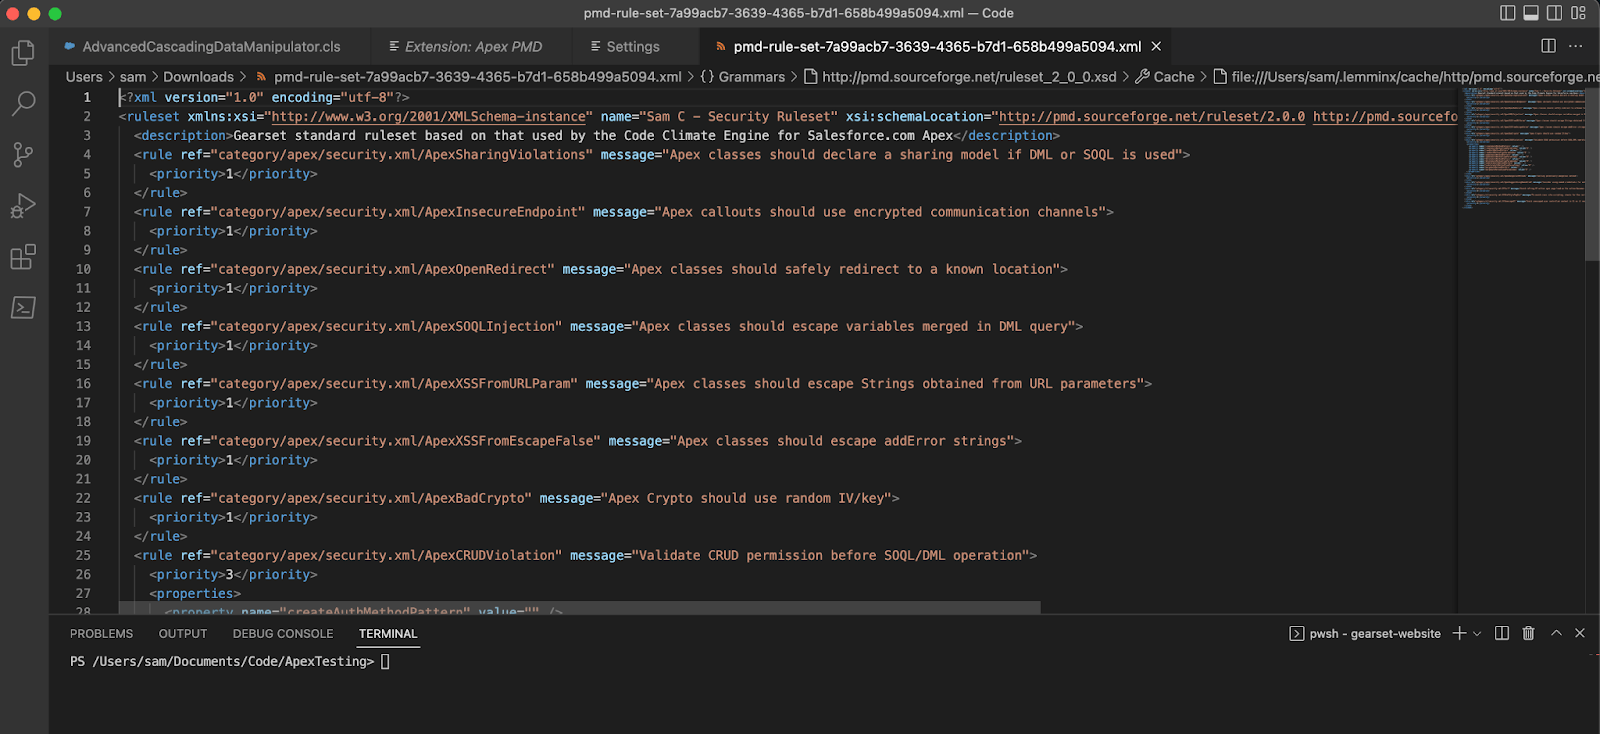
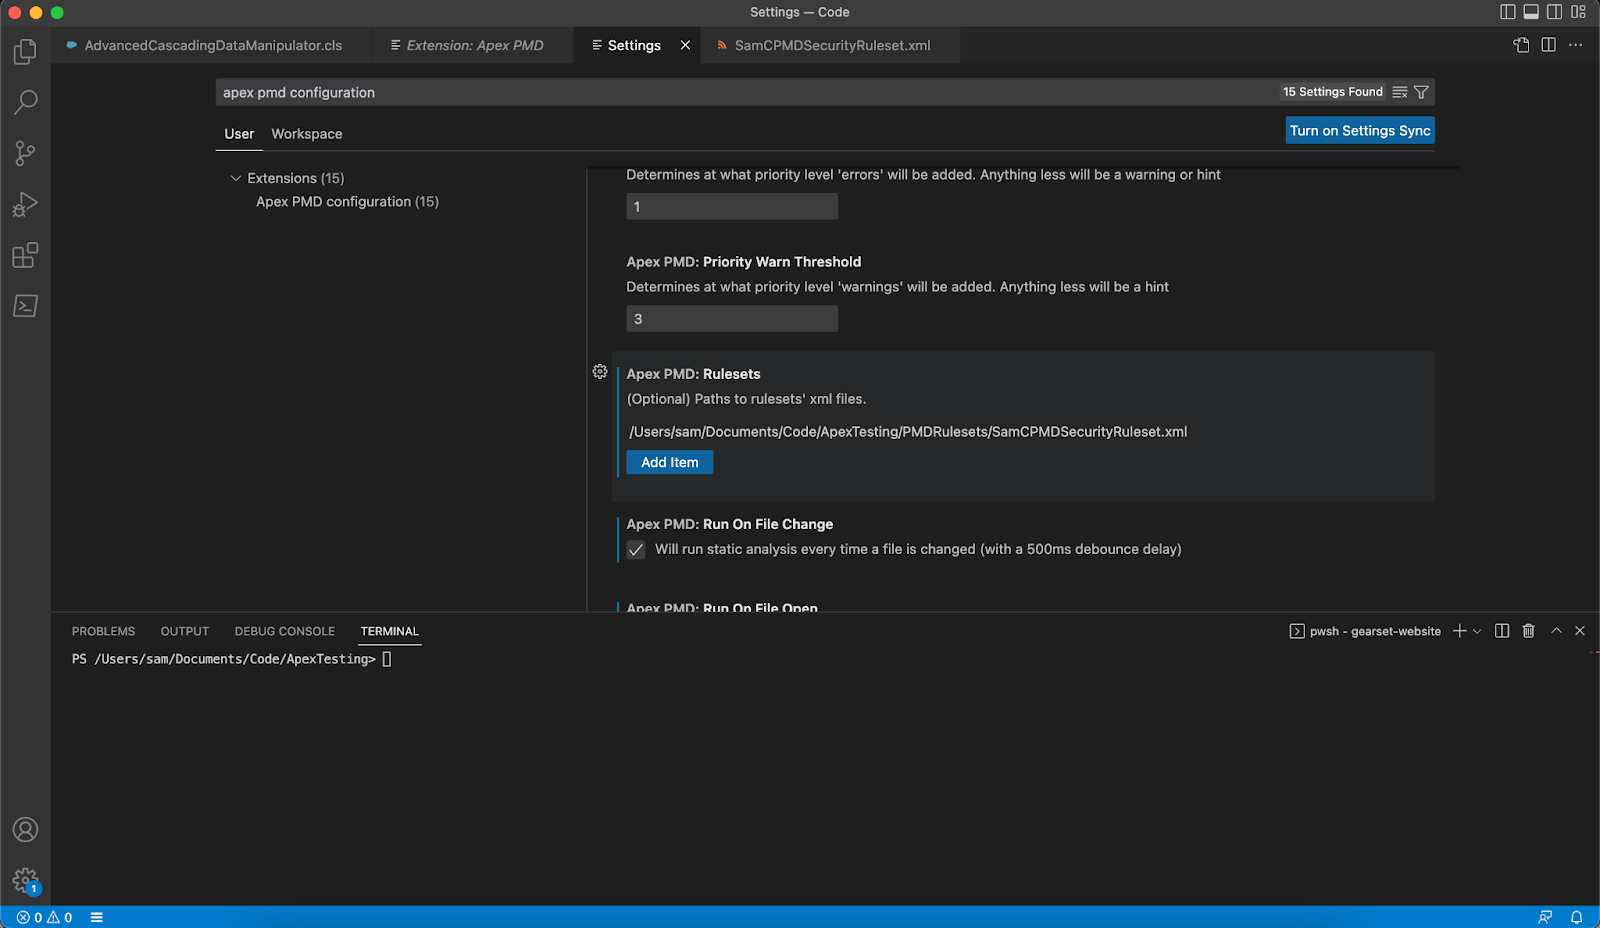
Once you have that file, you can rename it to something more meaningful (e.g ‘SamCPMDSecurityRuleset.xml’ in my case) and move it to a different location. Then copy the file path, head back into Settings on VSCode, find the Apex PMD: Rulesets section, click on Add Item and pass the ruleset in.
To test this is all configured and working as expected, open up an Apex class in a separate tab, and make sure the Output window is selected at the bottom.
You can then head to the Command Palette (cmd+shift+p) and search for ‘Apex Static’. This will bring up a few options: to run it on the specific file, clear the problems view, or run it on the whole workspace. VSCode allows you to set up keyboard shortcuts for these various options, which makes running tests even faster!

Once the analysis has run, you’ll see the Problems tab at the bottom is populated with the results from the ruleset you’ve selected. In this example we can see 1 error and 26 warnings. You can then click through to snap to the specific line, and click the embedded link to load the PMD website with further information and advice.
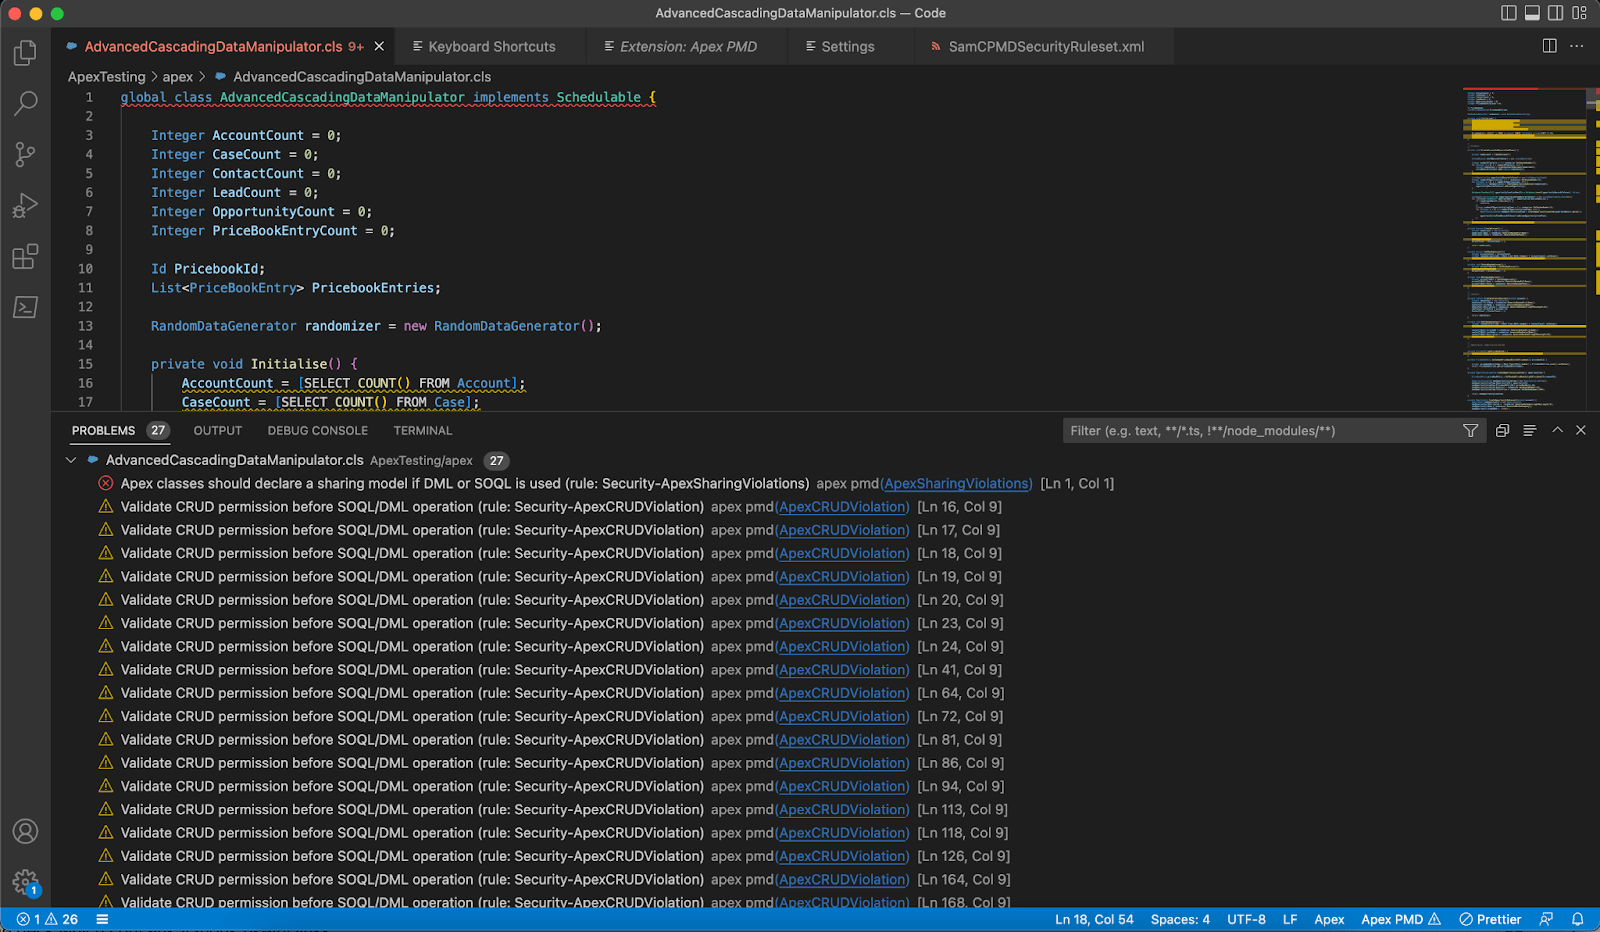
Depending on the configuration settings selected (user vs workspace) and the size of your team, you can now keep everyone aligned on the right rulesets you’re interested in, whether that’s for security, performance, or a full check.
You can also tweak the settings in VSCode to fit your needs. The ‘Run on file save’ and ‘Enable cache’ settings can really speed things up, as SCA runs automatically as developers are working through their code.
Don’t forget to regularly assess the rulesets you’re using in VSCode and Gearset to make sure there’s no drift, so everyone’s expectations are consistent.
It pays to get tests and analysis right
Taking a shift left approach to SCA gives you early visibility on Apex code quality issues at the local level, so you can identify and quash problems as soon as possible and have a tighter range of results at later quality gate stages. Considering how critical Apex classes and logic can become in production, having the right unit testing and static code analysis strategy in place pays dividends later on into the deployment process.
If you want to catch errors and code quality issues in your development cycle, Gearset’s automated unit testing solution can help you. Start a free 30-day trial to get on top of your Apex and build a better release process, or get in touch to book a demo for your team.


