

For developers building on the Salesforce platform, testing new features in an environment that’s identical to your production environment is the ultimate dream. Unfortunately, this perfection is hard to reach — mainly because duplicating your production org and all its data isn’t only time consuming, but highly irresponsible. The number one goal of any business should be protecting all of the precious business and customer data.
One way that you can responsibly match your production org as closely as possible is to seed a sandbox with dummy data that behaves in the same way as your real data. This allows you to test features and train new users in a completely isolated environment that very closely matches your safe production environment. In this post we’ll take a close look at sandbox seeding: why it matters, how to do it with Salesforce’s Data Loader, and how Gearset makes it easier.
Virtual Summit: Taking control of complex orgs
What is sandbox seeding?
Sandbox seeding is the process of taking data from your production org and deploying it into your sandbox environment. Some people call it data seeding, and it’s often what people have in mind when they’re talking about data deployments in a Salesforce context. For sensitive data like contact information, you can obscure the data by masking it while still allowing it to behave like the original data.
There are a few different types of sandbox out there and each one has its own characteristics and limitations:
- A Developer sandbox is intended for development and testing in an isolated environment. These sandboxes only include a copy of your production org’s metadata and have a limited amount of file and data storage of 200MB.
- A Developer Pro sandbox is similar to the Developer sandbox, but it can handle much larger data sets — with a storage capacity of 1GB.
- A Partial Copy sandbox holds a copy of the metadata from your production org, as well as a limited subset of sample test data.
- A Full Copy sandbox is an environment which provides a complete copy of your production org, including all data and metadata.
Understanding the differences and limitations of each sandbox type can help you make more informed decisions when seeding them with data.
What are the benefits of sandbox seeding?
There are a bunch of reasons why teams start doing sandbox seeding. Here are four important ones:
1. Test changes before moving them to production
The most common use case for a sandbox is to test changes before they reach production. Having an environment that closely resembles the production environment greatly increases the chances that your changes will behave in the way you expect them to once they’re deployed. This saves time and means you’re not having to roll back your deployment to unpick errors.
2. Avoid the delay of a sandbox refresh
Sandbox refreshes can be slow and inconvenient so having a faster option for bringing your orgs back in sync is a real time-saver. Sandbox seeding doesn’t replace sandbox refreshes entirely, but saves the need to do them as often.
3. Train employees using realistic environments
The other common use case for using a sandbox environment is to train employees. Having a dedicated training sandbox that uses the most realistic data possible means training will be more effective and your team is less likely to break something when given access to live environments.
4. Release on demand
Using real data allows a really robust testing process in a full sandbox which gives teams the confidence to ship to production on demand — an important DevOps principle. This is true whether you’re still using an org-to-org release model or deploying from version control.
Sandbox seeding challenges
Although sandbox seeding has a whole bunch of benefits, there are also some challenges that teams can come up against too. If these challenges aren’t navigated carefully by teams then there can be some serious consequences.
Masking confidential data
Duplicating production data to seed a sandbox brings a whole host of data protection questions around privacy-focused regulations like GDPR, CCPA, HIPAA and SOX compliance. Protecting this sensitive data is key, so it’s crucial to use data masking when moving data from an environment to your sandboxes. Data masking requires a bit of time to make sure you’re concealing every field that might contain sensitive data.
Maintaining data relationships
Preserving record relationships during a data deployment is a pain point that comes up time and time again. These linked relationships make sure you can view records and all their related data. If you’re only seeding your sandbox with a random selection of data from production that doesn’t include these parent-child relationships, then you can’t test or build your code properly and risk impacting its quality.
Seeding relevant data
Using relevant data is best practice when seeding your sandboxes. Testing with irrelevant data can soon allow bugs and errors to slip into production even though you’ve fully tested in the sandbox. The challenge is that sandboxes are limited by size, so unless you have a full copy sandbox, you’re going to have to carefully pick the most appropriate data to test and build with.
Keeping data fresh and environments in sync
As the data and metadata in all of your environments changes, they gradually drift further apart. Stale data in sandboxes is less useful for testing and debugging, so it’s important to have a plan for keeping environments in sync.
Keeping costs down
Sandboxes aren’t cheap. If you’re using a partial or full copy sandbox then you’re looking at it costing between 20-30% of net spend on Salesforce. Developer sandboxes are the only ones that are free but come with a tiny amount of storage. The fact is, if you’re using sandboxes, you’re going to pay a percentage of your net spend for the privilege.
How to seed a sandbox with Salesforce’s Data Loader
Data Loader is Salesforce’s answer to data seeding your orgs. You can use Data Loader to insert, update, upsert, delete or export data. It works by taking a CSV file of your data and inserting it into your org.
- Prepare your CSV file.
- Download and install Data Loader, then log in using your Salesforce account details.
- Choose Insert, then select the Salesforce object where you want to insert the data.
- Select the CSV file you want to use to seed the sandbox.
- Click Next. Data Loader will begin the process of inserting your data into your sandbox.
- If you need to seed data to multiple objects, you’ll need to rerun the process for each object with a separate CSV file.
There are various things to watch out for if you try using Data Loader for sandbox seeding. Not only is it very manual and time consuming, but you’ll often spend a while preparing the CSV, formatting it correctly and removing duplicates. You’ll also need to have sufficient memory (256mb) and disk space (120mb) on top of having a Java runtime environment (JRE) — which is shipped as part of a JDK by most vendors.
Having a thorough understanding of the data schema to preserve record relationships will help, but even then it’s a painful task. Let’s say you want to load Accounts and Contacts and keep the relationships. You could map them to each other using external record IDs. Or you could upload the Accounts, then update your CSV for the Contact records with all the Account record IDs. Either option is pretty tedious.
If there’s a proxy host between your machine and Salesforce, then the proxy host, port and credentials need to be set up in the Data Loader UI before trying to connect to Salesforce. Once you’ve successfully connected to Salesforce, you’ll need to define the field mappings.
How to seed a sandbox with Gearset
Gearset makes data deployments a quick and simple process, in contrast to the painstakingly slow and repetitive nature of Salesforce’s Data Loader. You can sign up for a free trial now to follow along with the steps below.
1. Navigate to data deployments
Under the Data deployments section on the left hand side of the main comparison page, select Configure and Deploy.
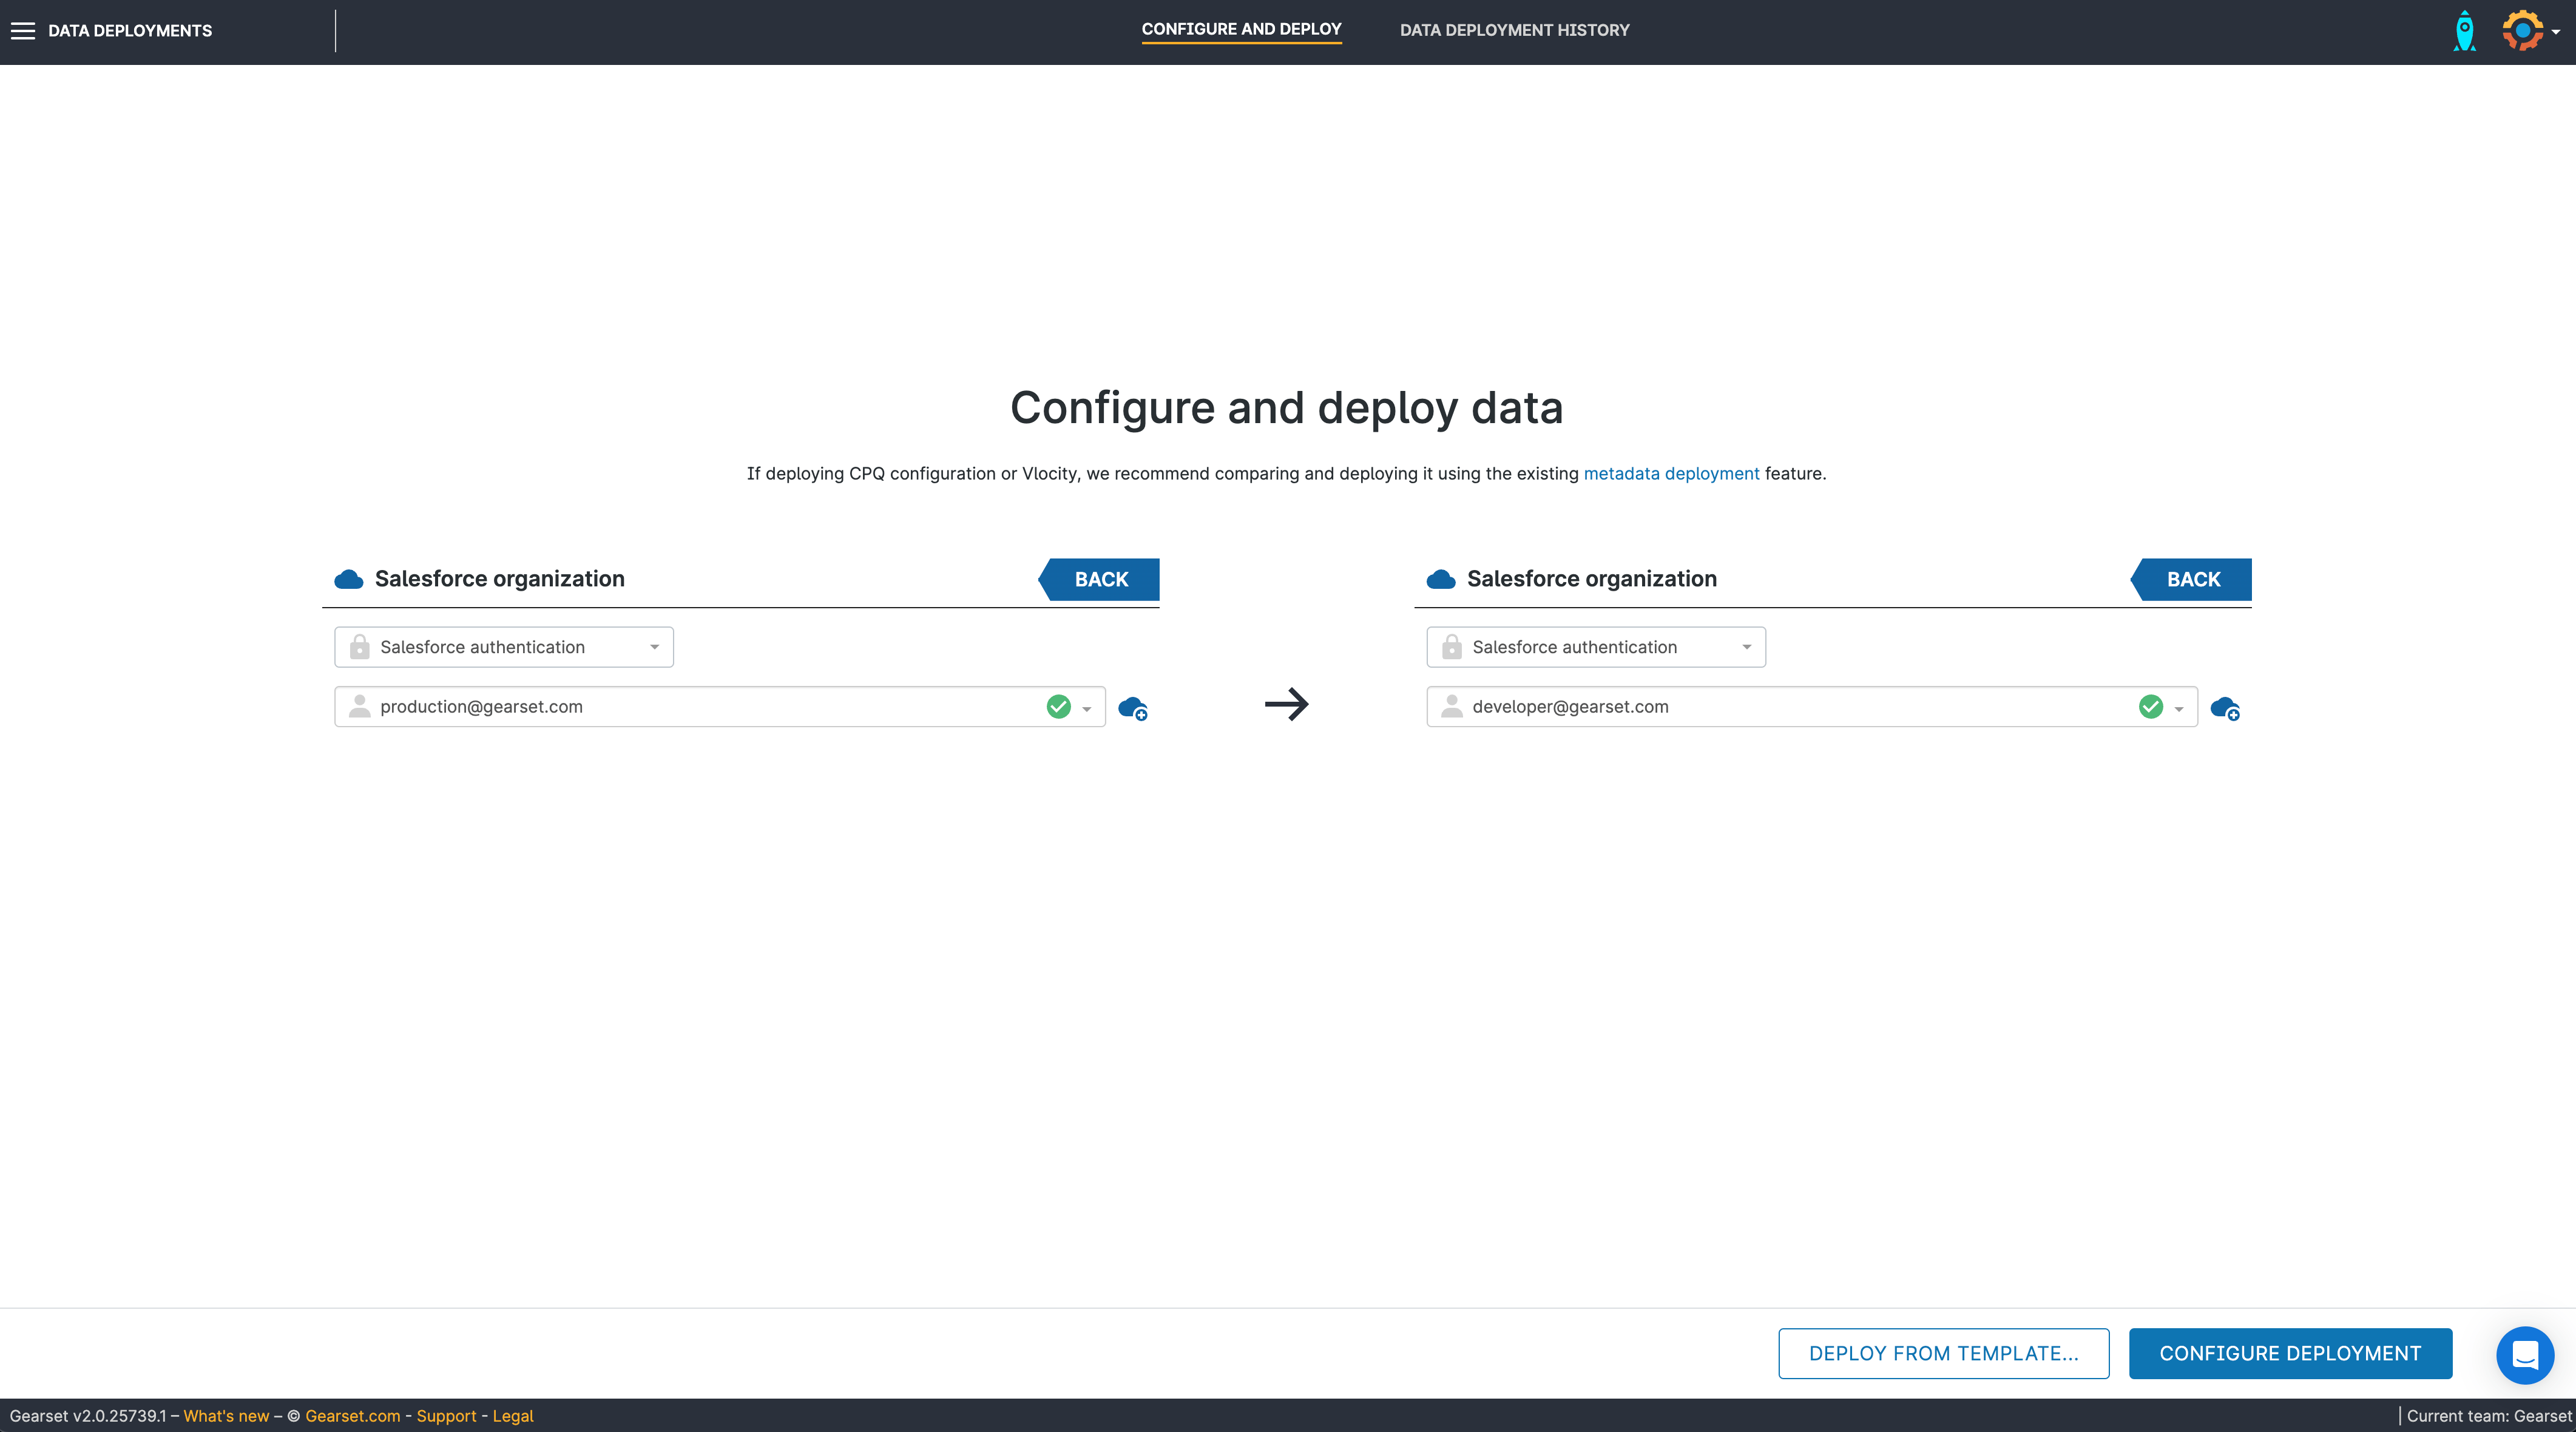
2. Select your orgs
Choose the source and target orgs. In this example, we’re seeding data from production to a developer sandbox. Click Configure deployment.
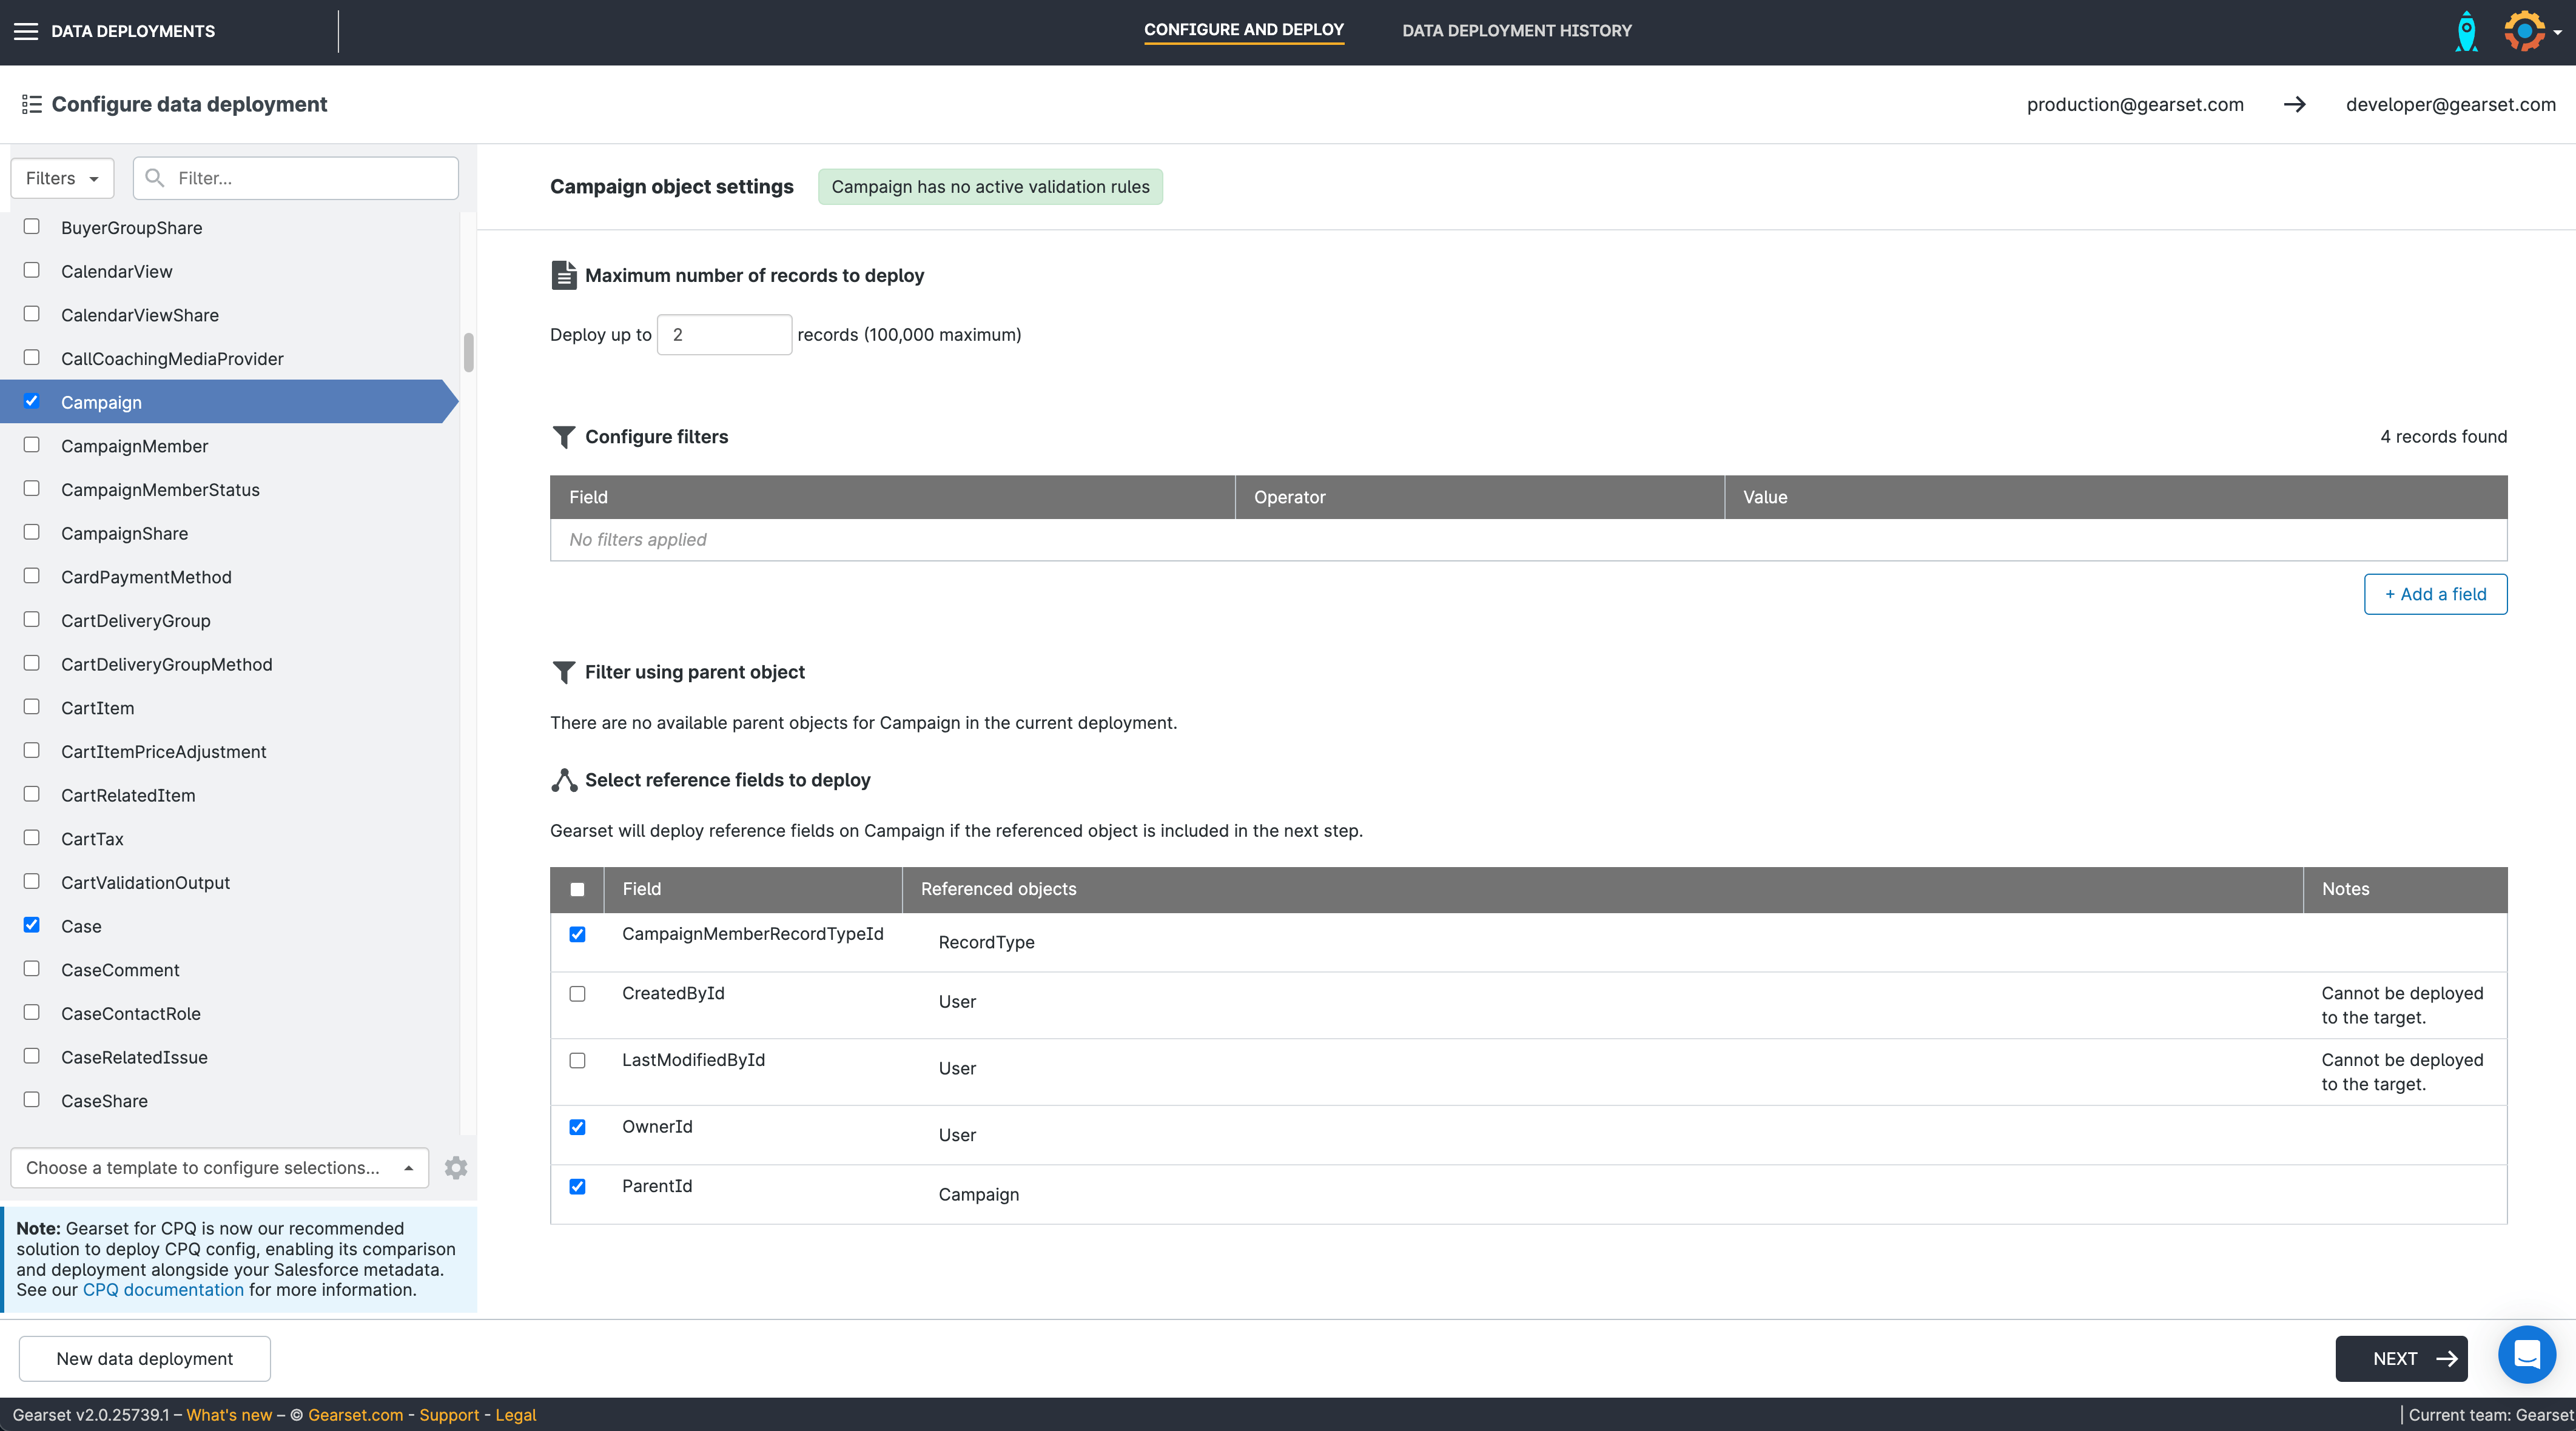
3. Choose the objects you want to deploy
Select the primary objects you want to deploy. Use the Filter using parent object to further filter the records to deploy, by restricting it based on the parent object. Click Next.
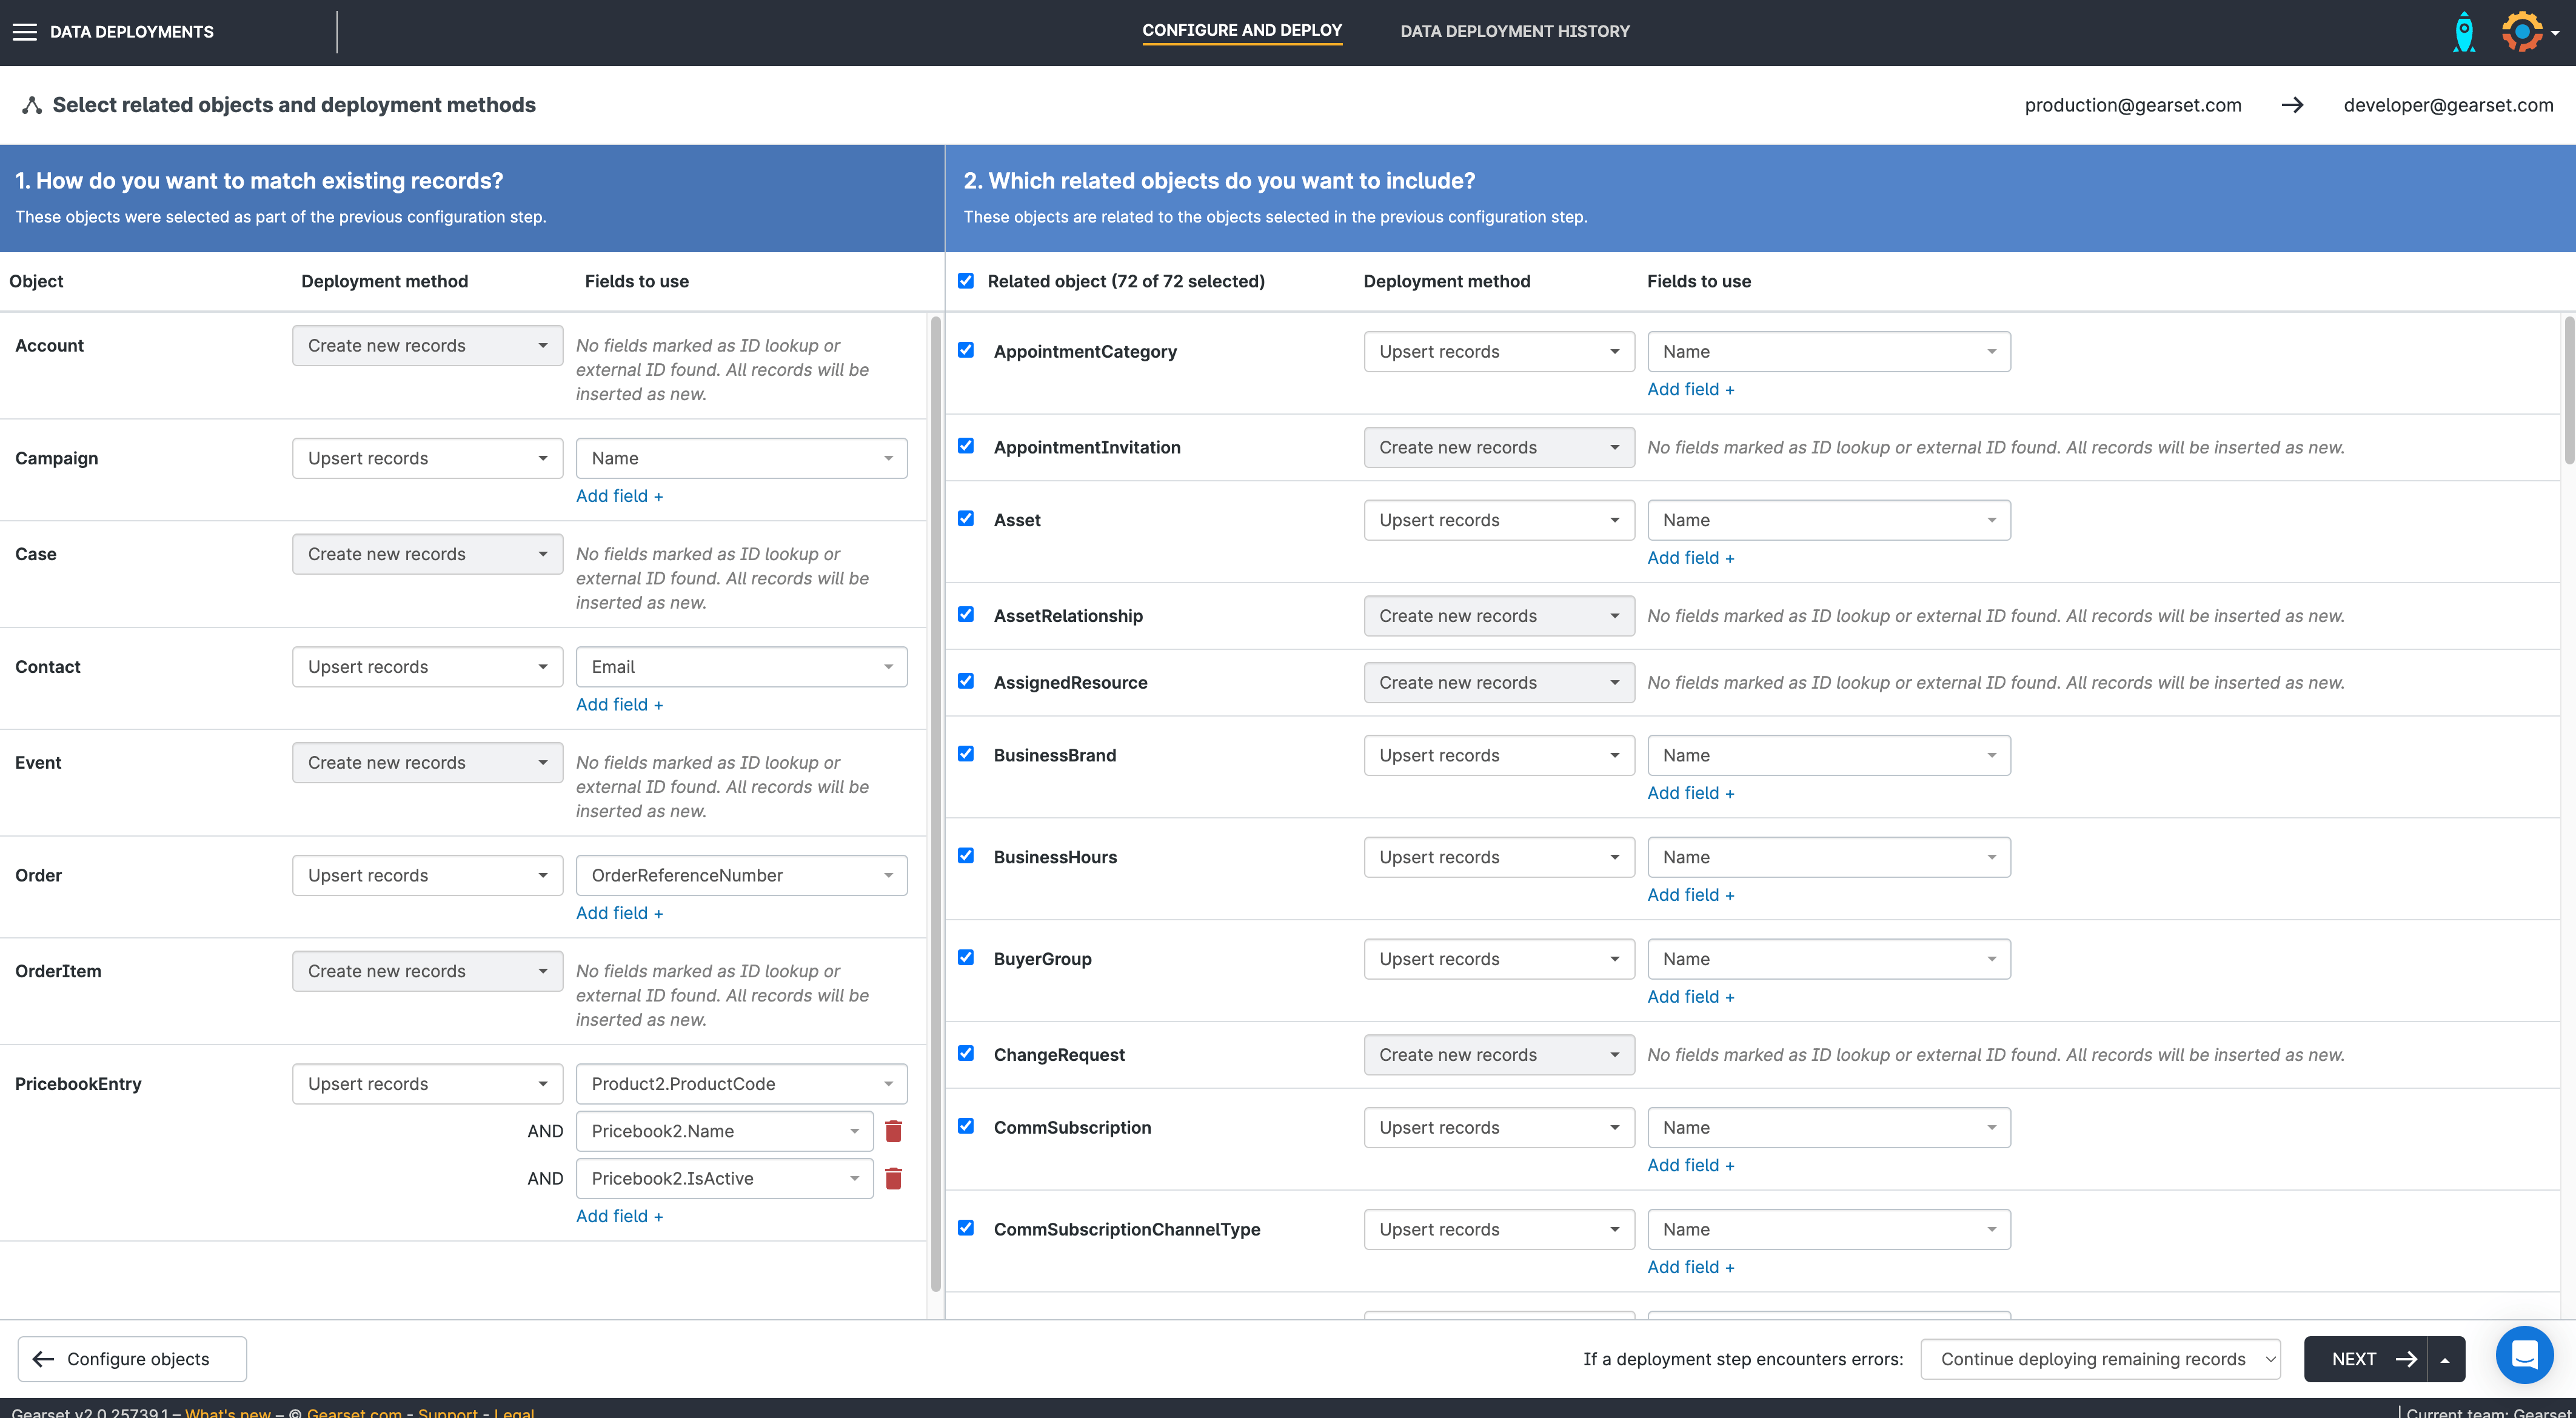
4. Select any related objects
Choose how you want to match existing records and what related objects to include in your deployment. Choose whether you’d like the data deployment to continue if it hits an error deploying a record or if you want it to stop. Then hit Next.
5. Choose your data masking settings
On the next screen you’ll be able to choose which fields you’d like to mask. You can choose the exact fields to mask by toggling them on or off — and you can also configure how you want them to be masked.
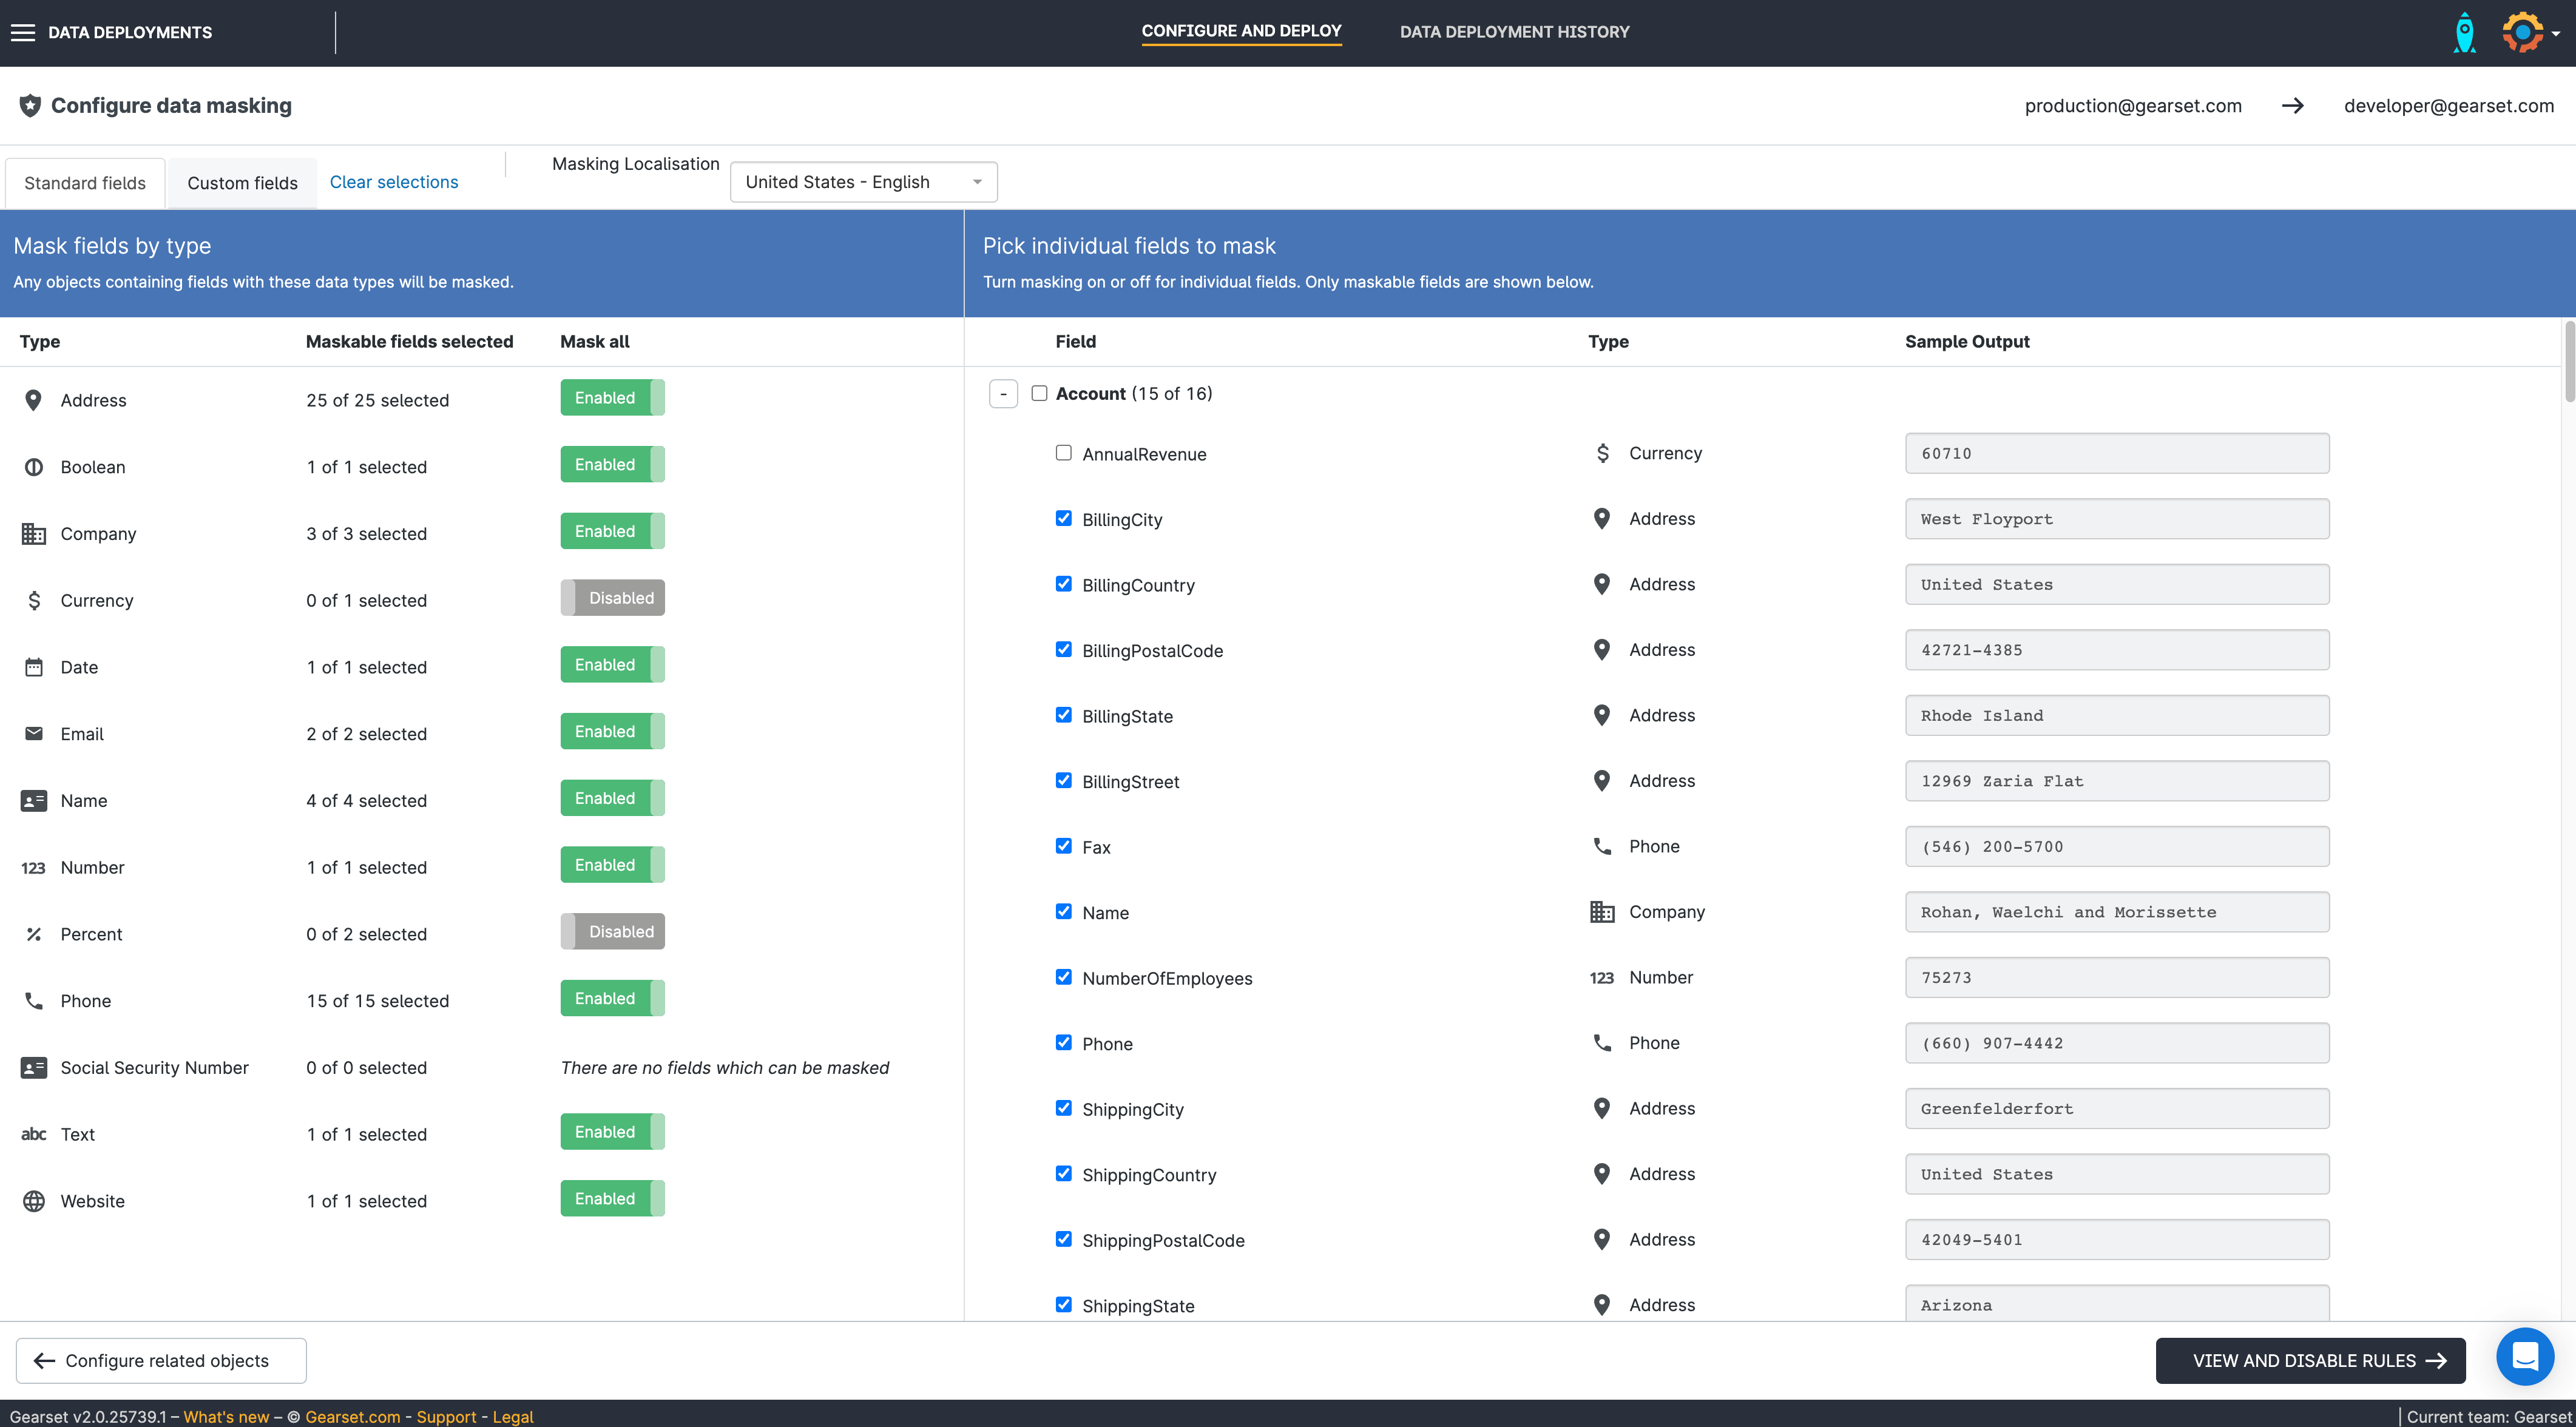
6. Disable any rules
Click View and disable rules. Disable any validation rules, triggers or flows. Click through to the Pre-deployment summary.
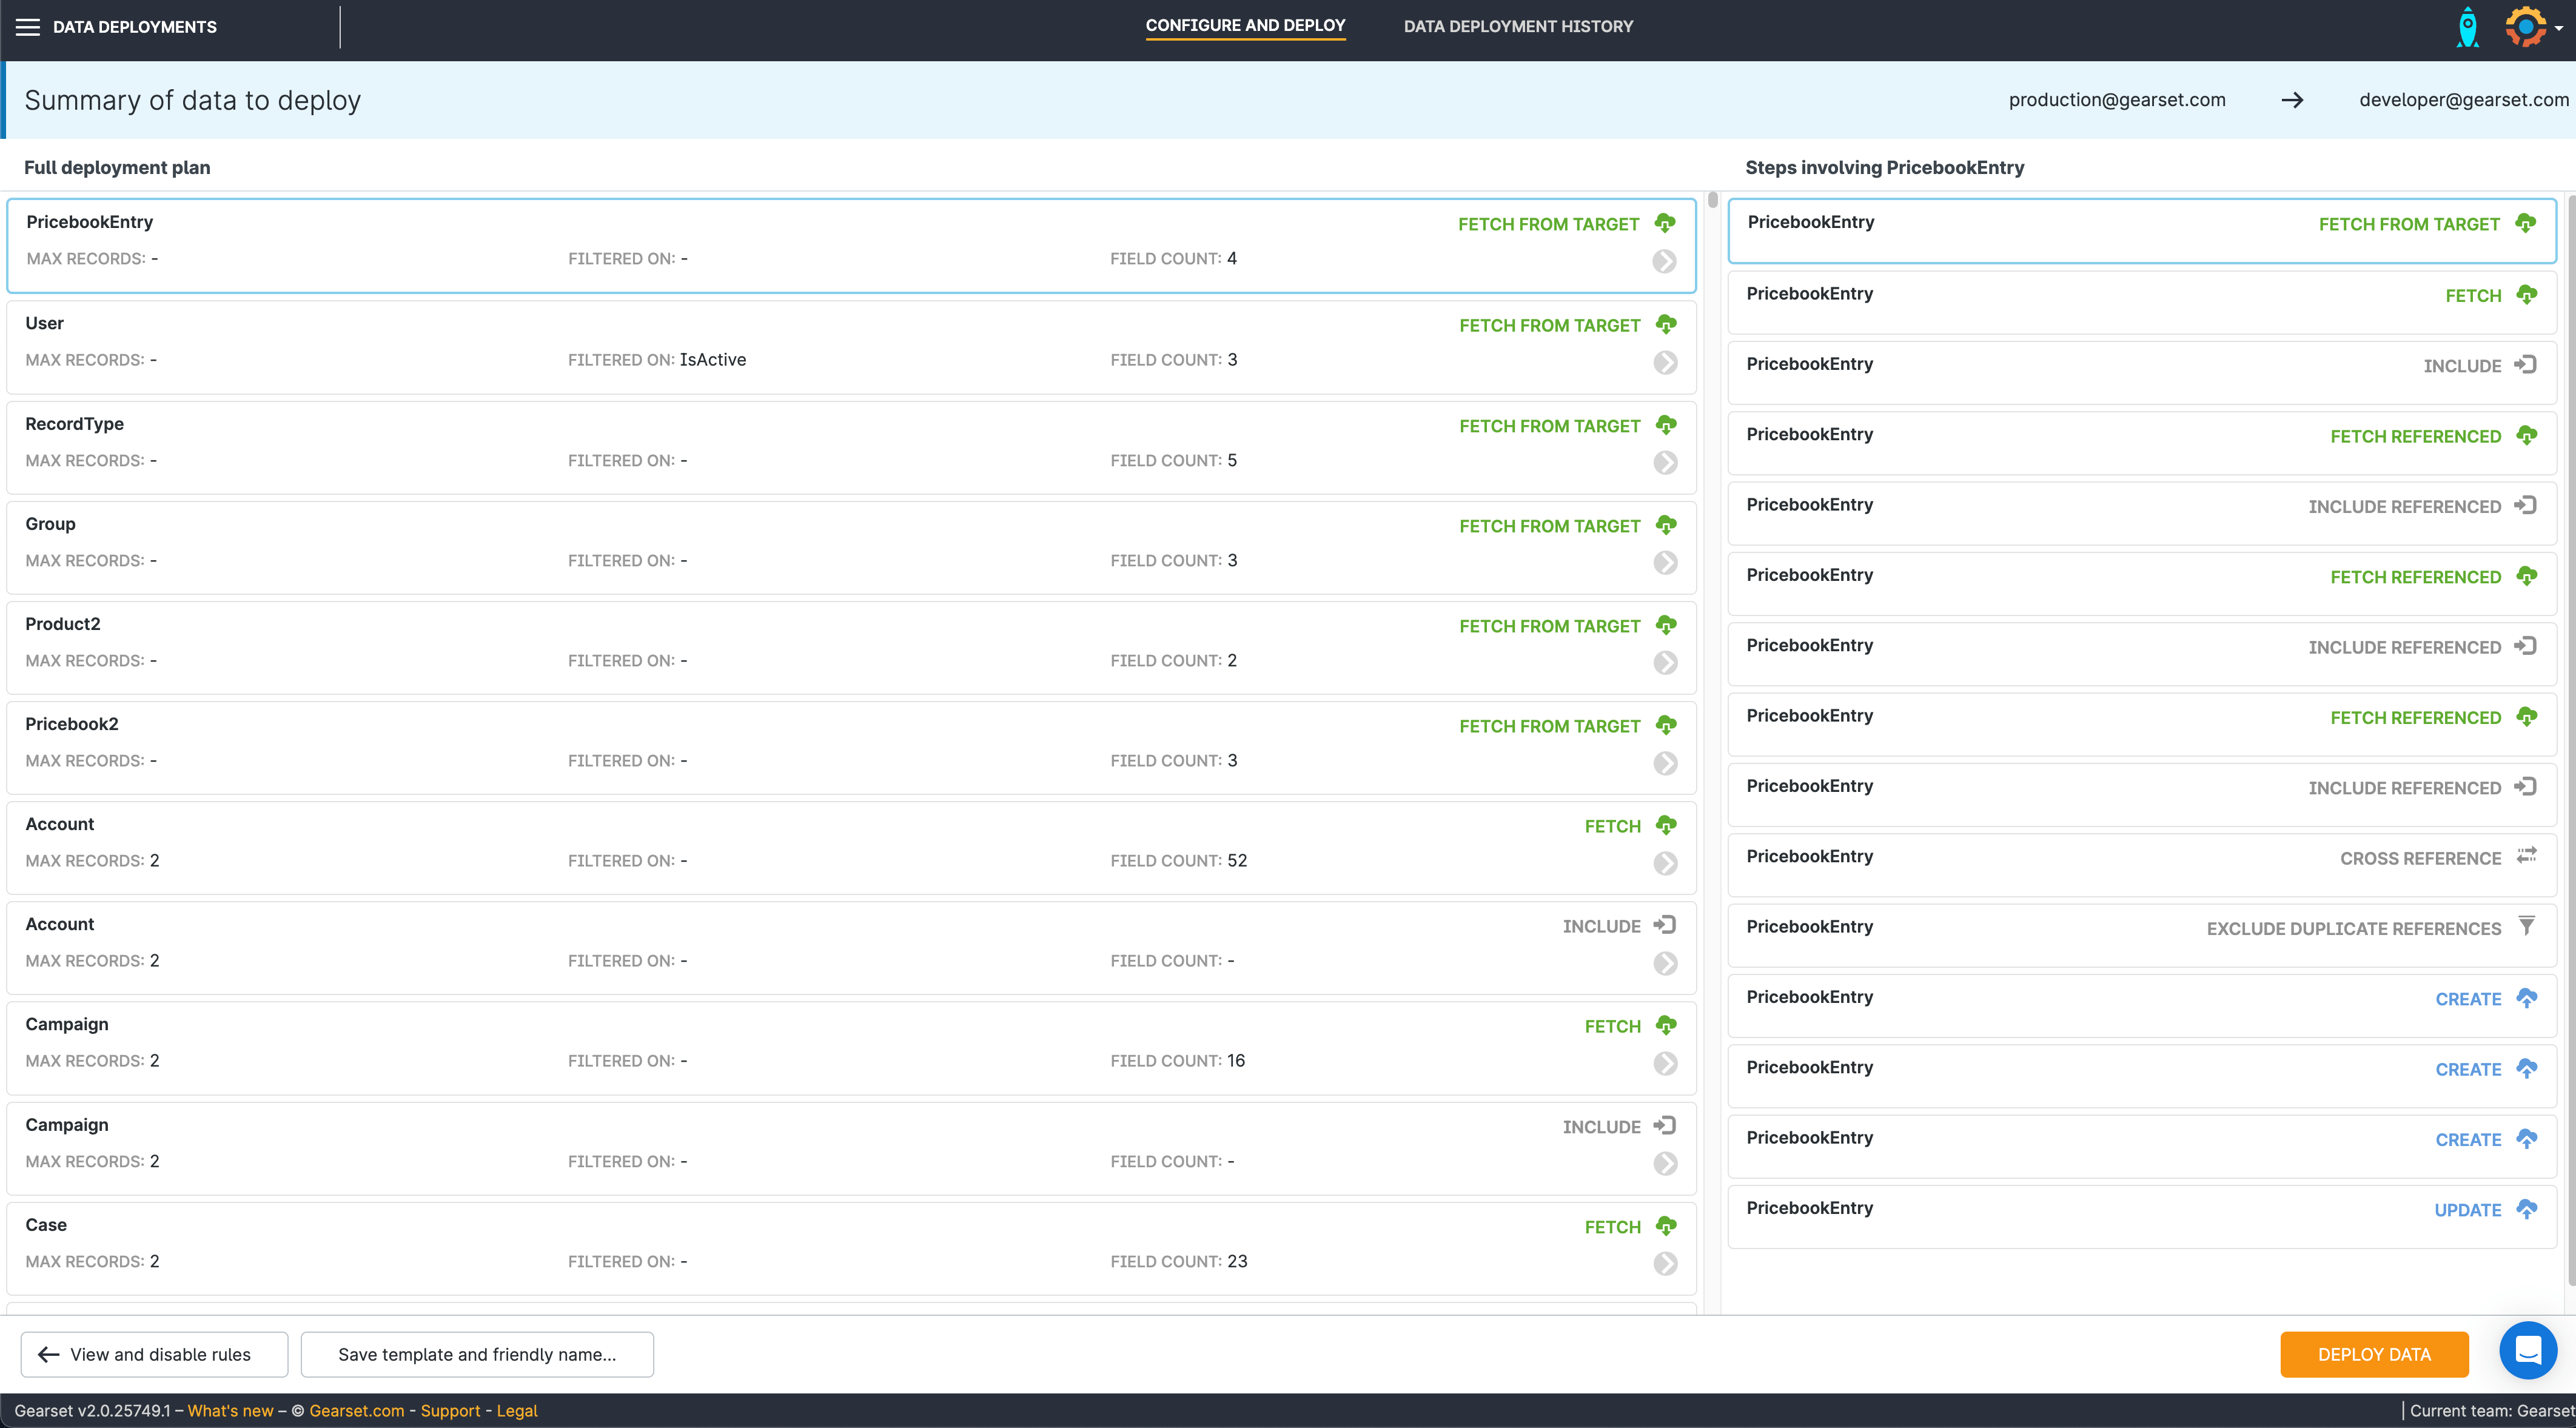
7. Check your deployment summary
Double check your deployment summary. Click Deploy data.
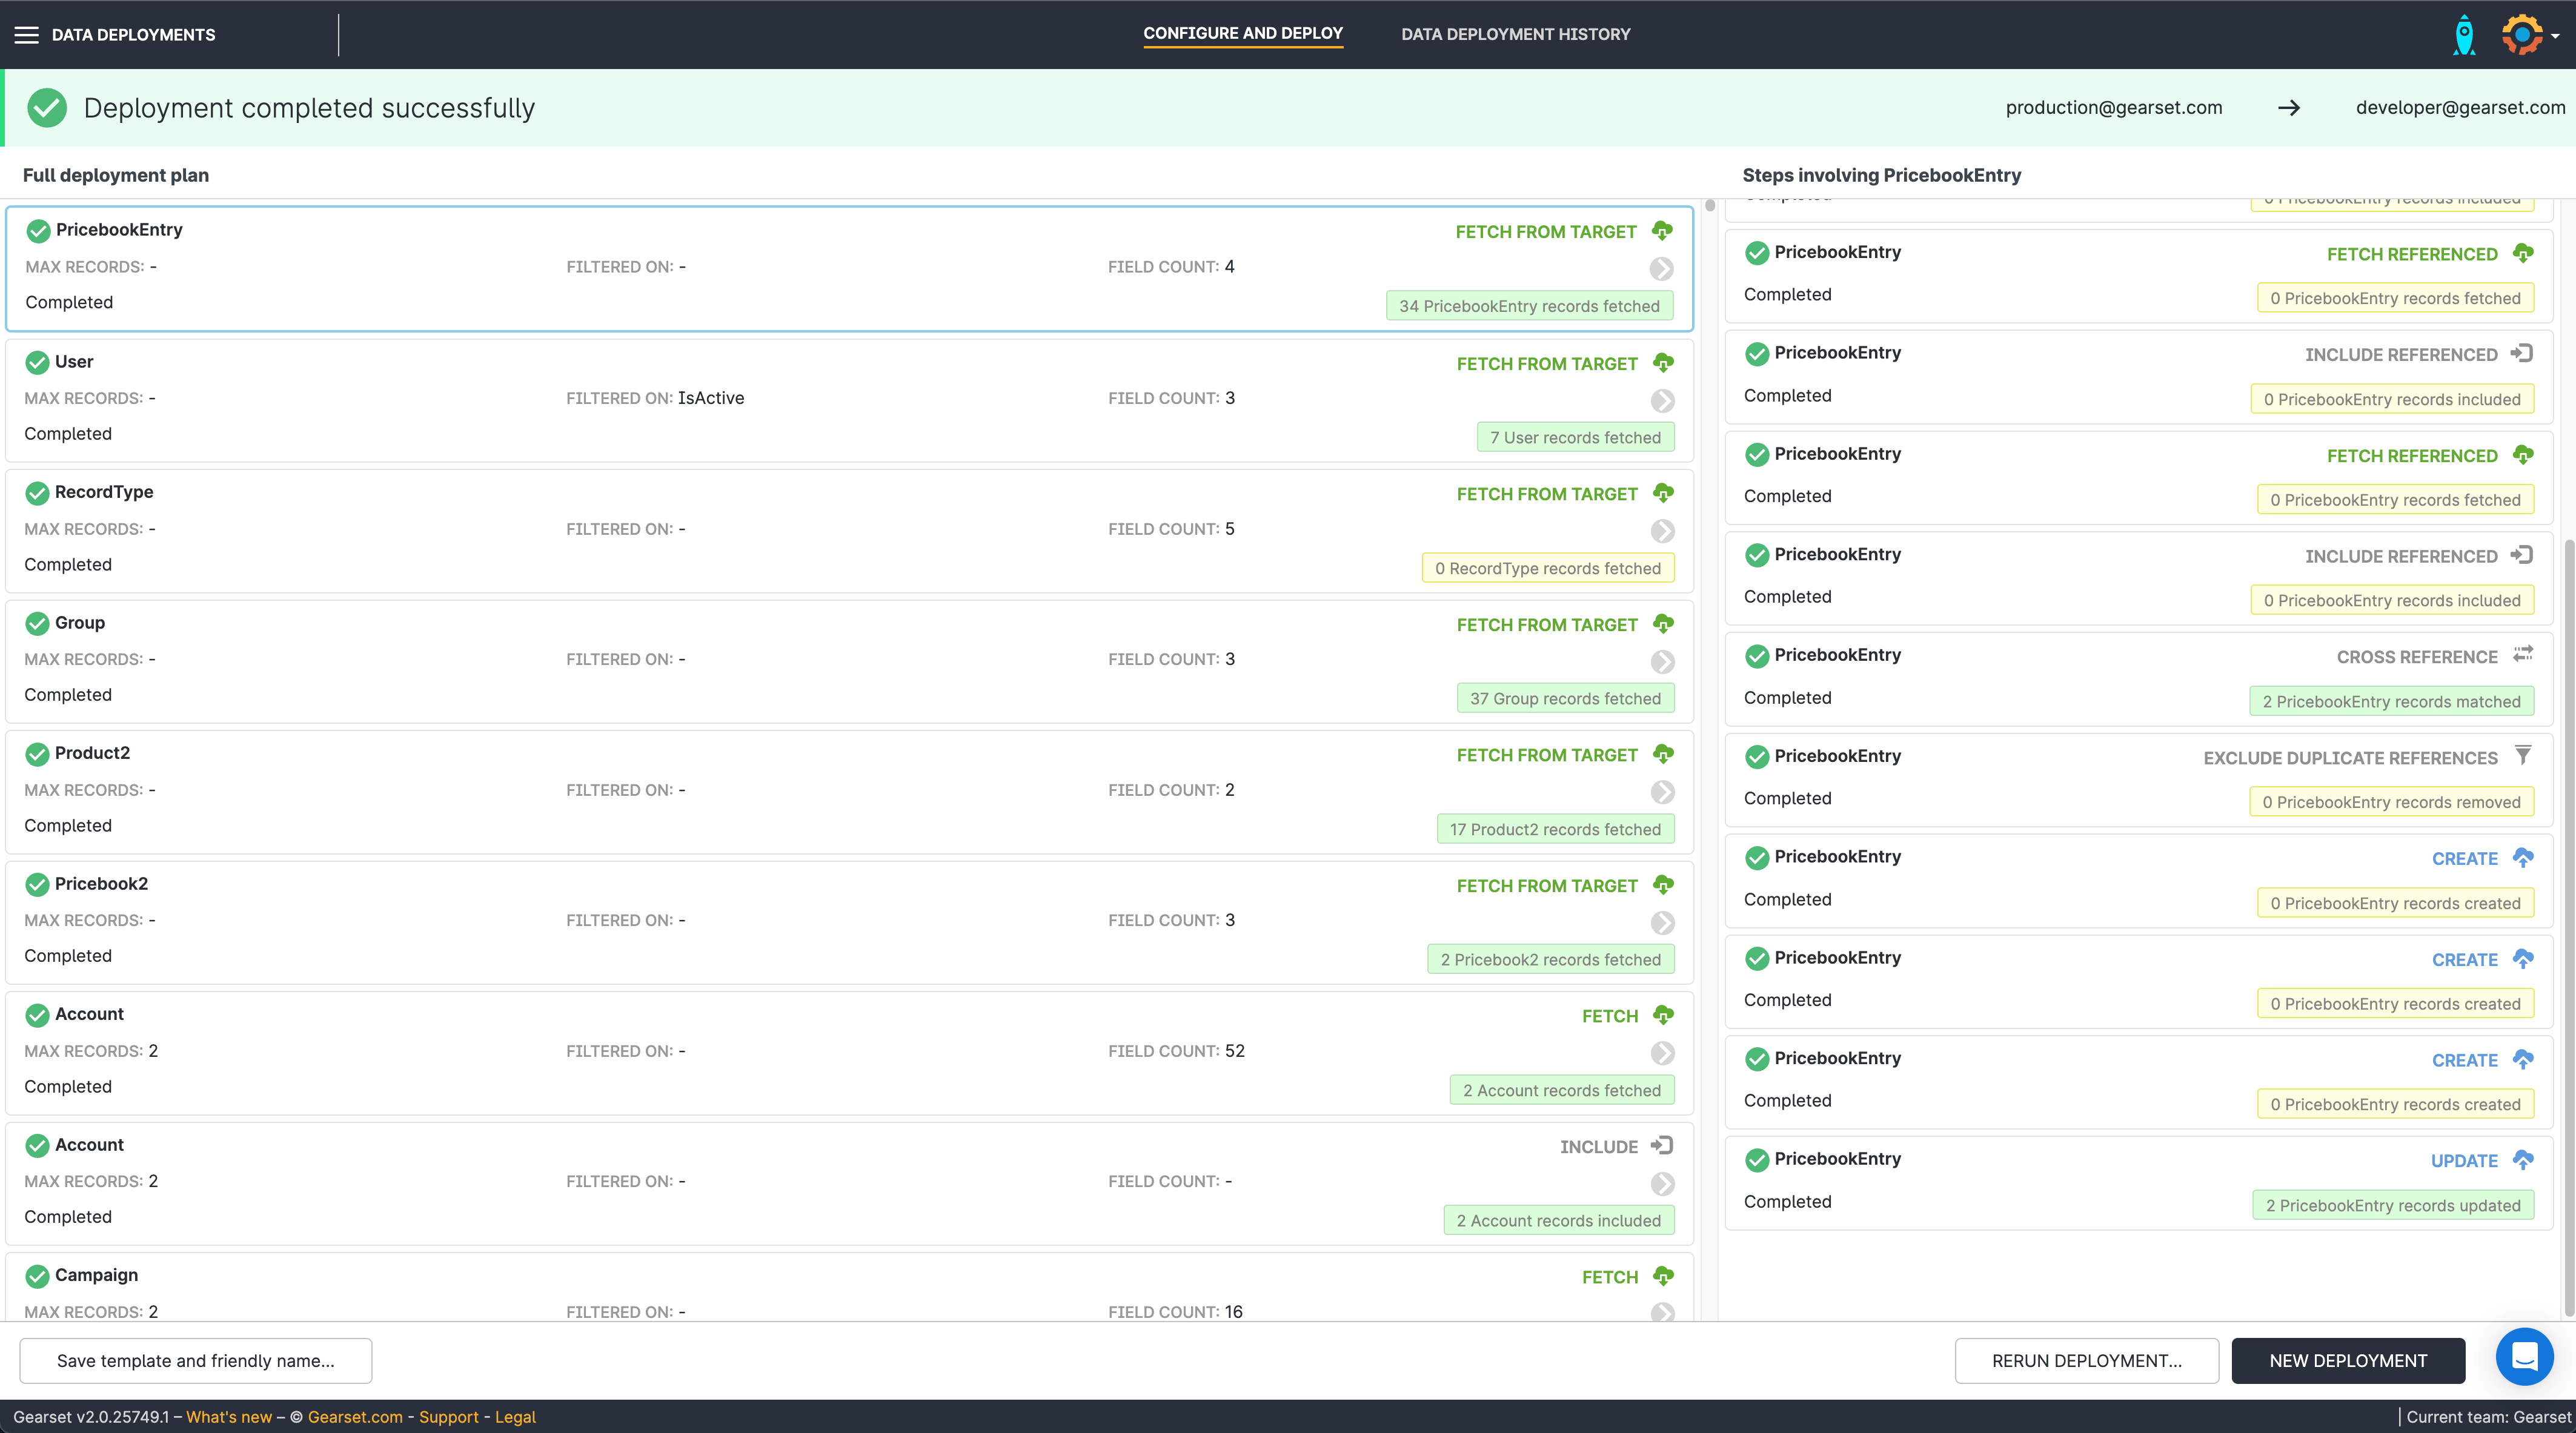
8. Deployment complete
Once the deployment is finished you can rerun the deployment or start a new one. You can see all your data deployments in the Data deployment history tab along the top of the screen.
With Gearset, you can deploy up to 100,000 records in a single deployment, across multiple objects. You can also save templates to easily replicate your data deployment across multiple orgs.
Deploy data quickly and securely with Gearset
However you use your sandboxes, it’s likely that at some point you’re going to want to seed them with real life data from production. Gearset’s sandbox seeding solution can help you deploy data as quickly as possible, while keeping your most sensitive data safe, and your team compliant with all the top security regulations.
You can try all of Gearset, including sandbox seeding, by signing up for your free 30-day trial today. If you’re already a Gearset customer, but haven’t purchased the sandbox seeding add-on, get in touch with us to arrange a trial or demo. For security reasons, your team owner must enable data deployments for the team, so make sure to keep them in the loop.
