
It’s not uncommon to have a multilingual workforce, especially if you have teams across the globe. If all employees are working out of the same production environment, you’ll likely need to add translations to your org, to ensure it’s equally as accessible to all.
In this article we’ll look at the language support available on the Salesforce platform, how to add custom translations, as well as how to deploy them natively with change sets and using Gearset.
Language support in Salesforce
Salesforce offers three tiers of language support on the platform:
- Fully supported languages. Translations are available for all features (including Help) for fully supported languages.
- End-user languages. Translations are available for standard objects and pages (excluding Help, Setup and admin pages). Some untranslated labels still appear in English.
- Platform-only languages. No default translations are provided. Labels and standard objects default to English (with some exceptions).
Salesforce provides a full breakdown of which languages are available in each level of support.
Platform-only languages are where translations come into play; with platform-only languages, you can customize your Salesforce org by translating your metadata — including custom objects, field names, most standard objects and more.
San Francisco, CA
Dreamforce
Adding translations to your Salesforce org
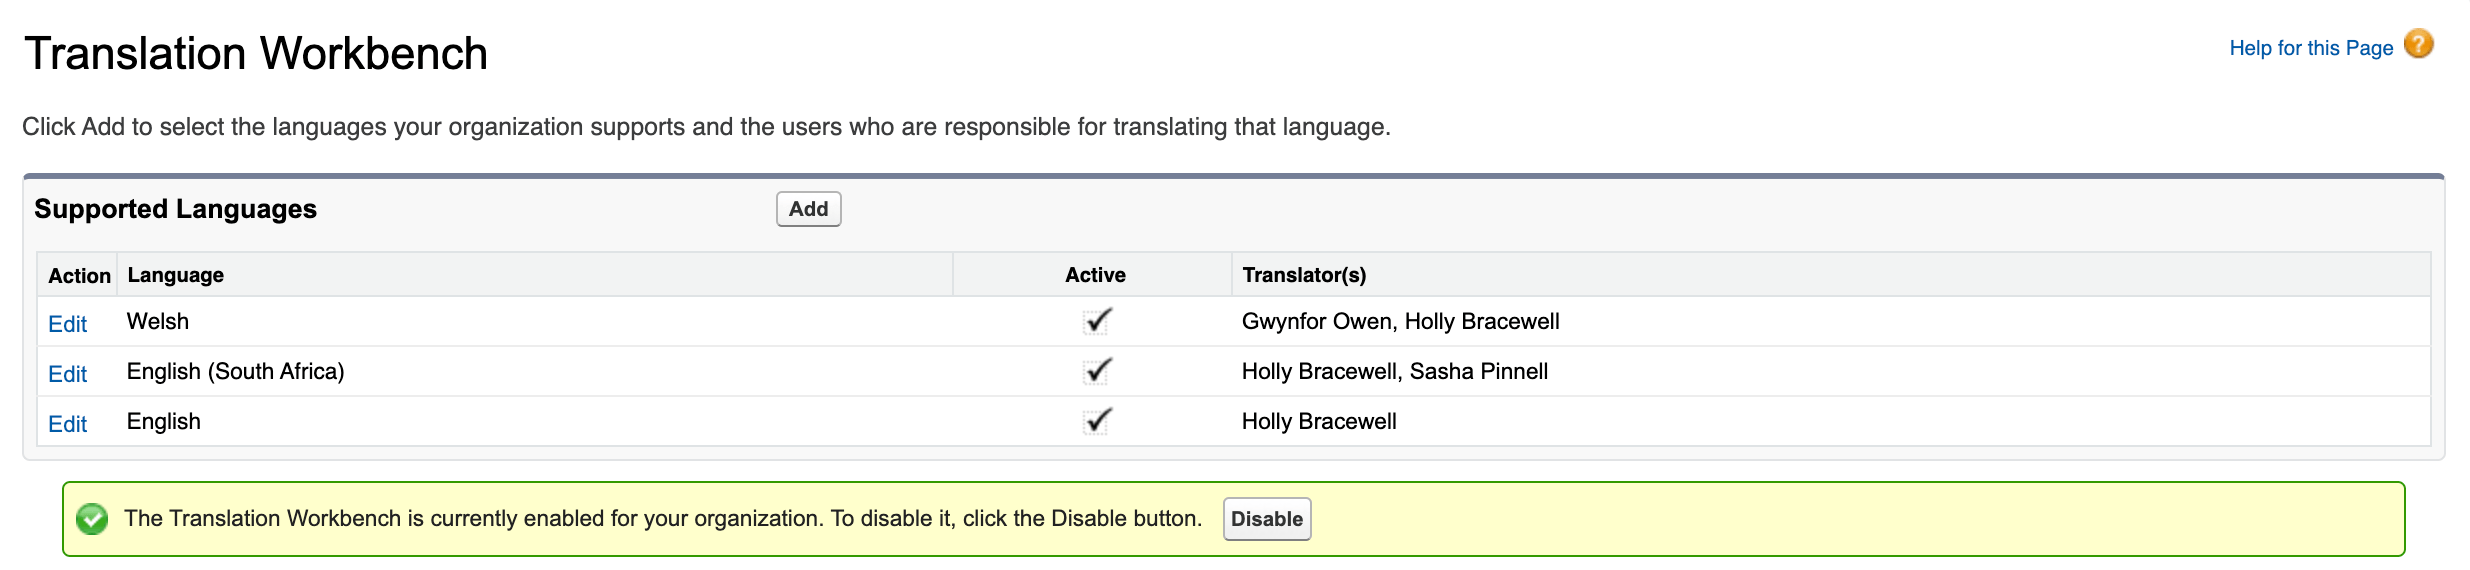
To start adding translations to your org, you need to enable the Translation Workbench. This functionality is free but not turned on by default.
To set up the Translation Workbench, go to Setup, search for “Translation Workbench” in the Quick Find box and click Translation Language Settings. On the Translation Setting page, press Enable to turn on the Translation Workbench.
Once enabled, press Add to begin adding the languages your users need. You’ll need to assign translators for each language too.
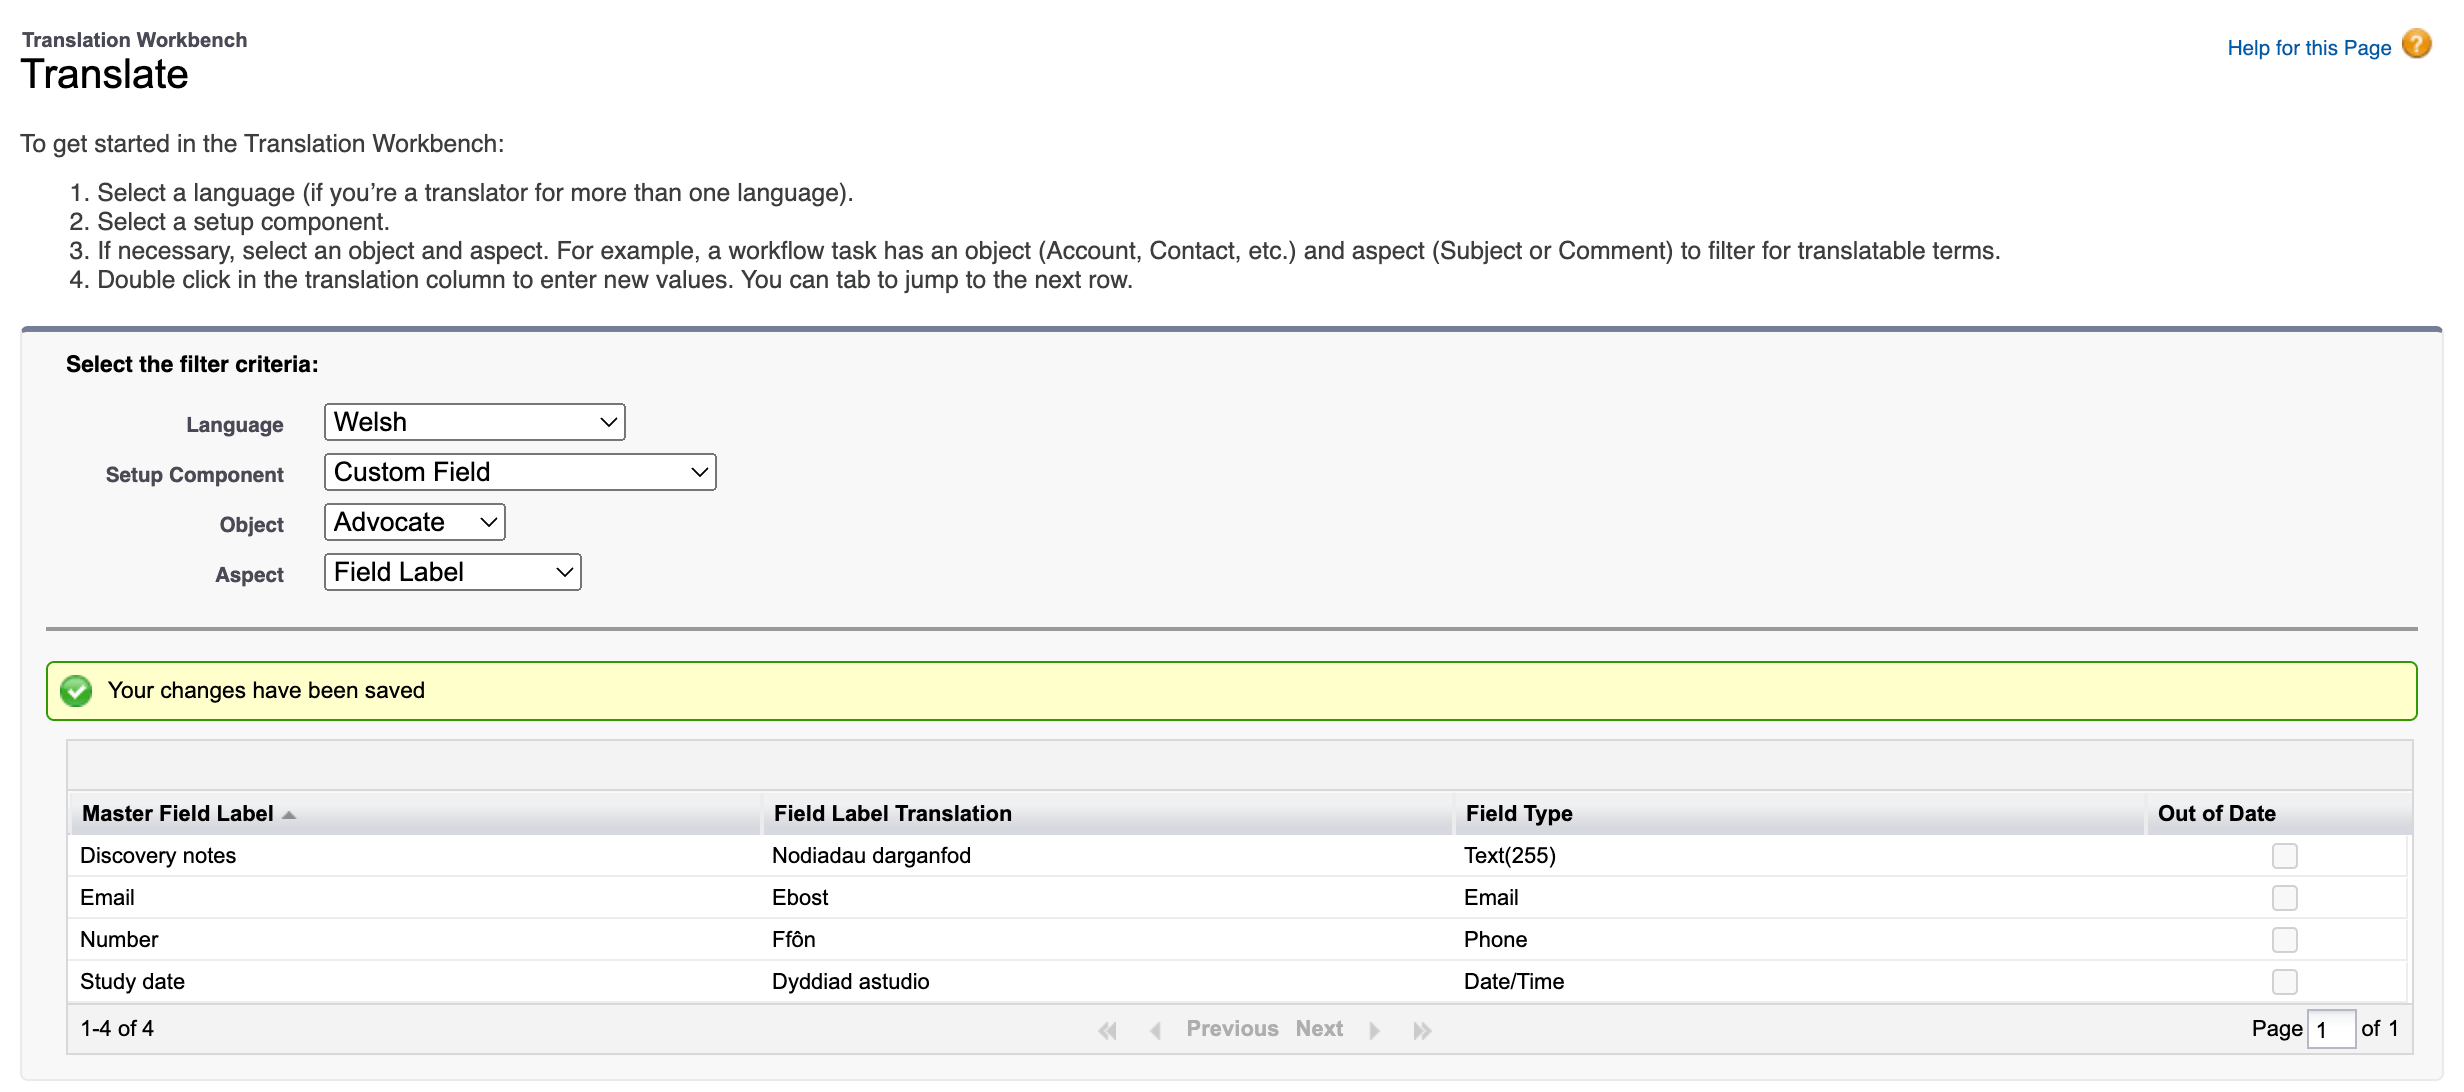
Now you and the assigned translators can get to work translating components in your org, by heading to the Translate page of the Translation Workbench.
In the example below, I’ve added custom field translations in Welsh for a custom object.
Many other key components can be translated in Salesforce too, including:
- Action
- App
- Button and Link Label
- Custom Report Type
- Field Set
- Flow
- Global Value Set
- Lookup Filter
- Picklist Value
- Record Type
- Validation Error Message
- Web Tab For a full list of all metadata types available for translation, you can visit the Salesforce website.
Deploying translations
As with any metadata changes, it’s key that you build the changes in a sandbox before introducing the changes to production. Making changes directly in production not only limits change traceability, it can have disastrous consequences for your business-critical Salesforce data if bugs are introduced.
To avoid introducing breaking changes to your live environment, build translations in your sandbox and test them before deploying to production.
How to deploy translations with change sets
You can deploy translations using native change sets but there are a few things to keep in mind to deploy successfully.
Before you start, you’ll need to ensure that the Translation Workbench is enabled in the target environment and that the desired language has been added and marked as “Active”. If the language isn’t active, the deployment will still succeed but the translations will only show in the editor and not be visible to users.
Once those steps are in place, you can begin by building a change set as usual by going to Change Sets > Outbound Change Sets > New and add the translated components you want to deploy.
However, you need to include more than just the translations for the components to deploy successfully. If you upload the change set at this point, the deployment will probably run successfully but the translated terms won’t appear.
To overcome this, make sure that both the translation and the translated components are included in the change set. For example, if you’re looking to deploy a CustomObjectTranslation or GlobalValueSetTranslation you need to include both the custom object and global value set in the change set.
Once you’re happy with the package you’re about to deploy, you can upload the change set, then log into your target org to accept the inbound change set.
How to deploy translations with Gearset
Change sets isn’t the only way to deploy translations. With Gearset, you can easily identify new or changed translations and deploy translations with just a few clicks without having to worry about the associated components.
As with change sets, you’ll need to enable the Translation Workbench in your target org before starting a deployment. Unlike change sets, deploying a new translation will enable the language in the target environment and mark it as Active, so you don’t need to do that step manually in your target org.
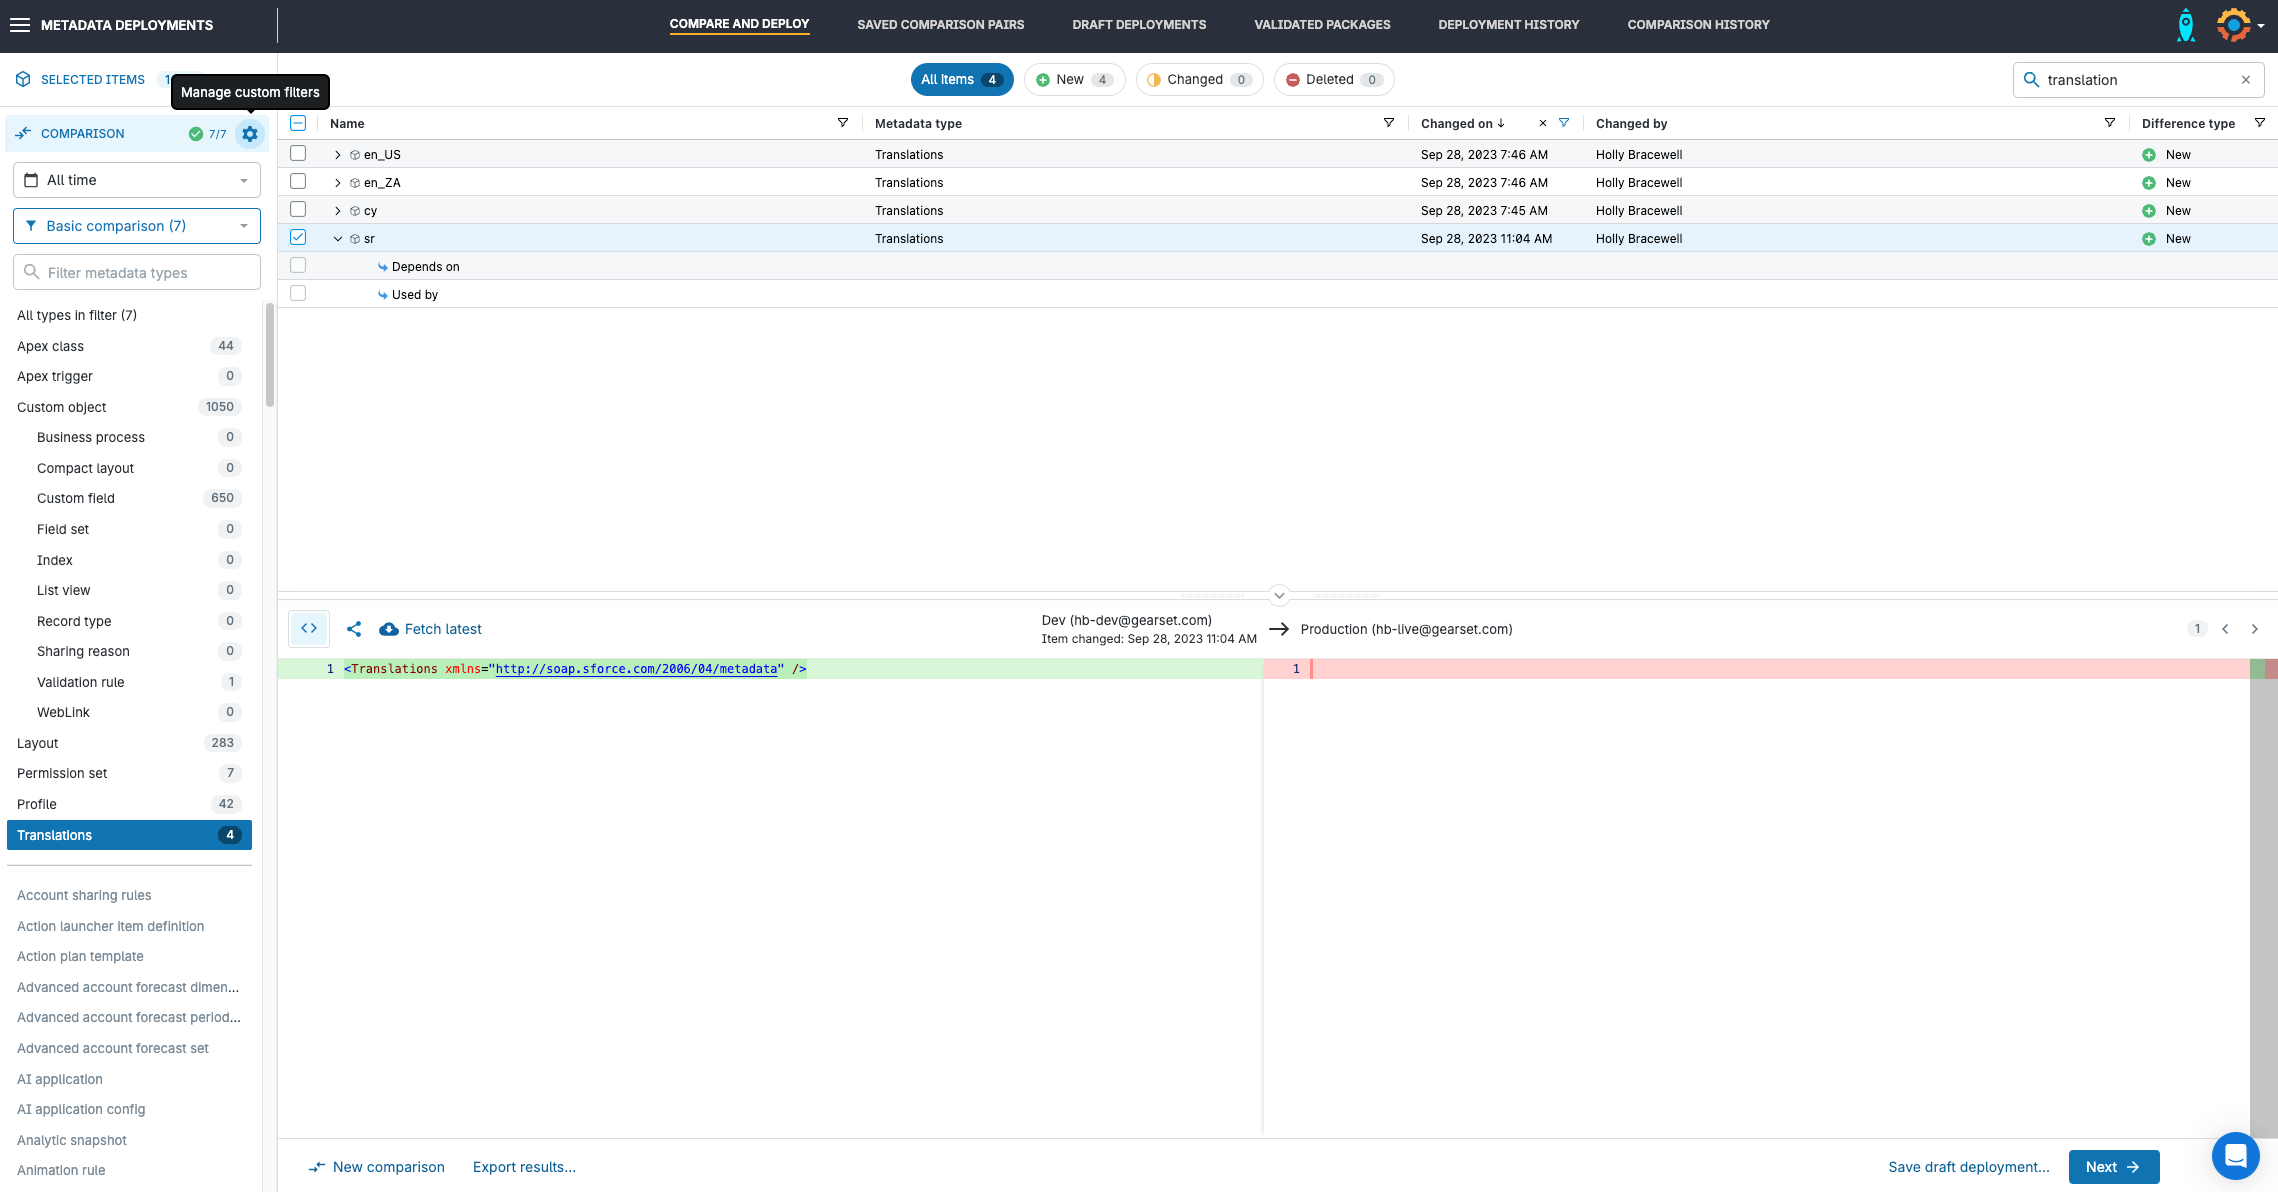
Let’s look at how to deploy the translation metadata type and translated components with Gearset. There are only a couple of steps you need to take from org comparison to successful deployment — you can sign up for a free trial of Gearset and follow along.
1. Configure your comparison
Select the source and target org for your deployment from the Compare and Deploy page. You can set up a filter on this page to include the translation metadata type — or add metadata types to your comparison in real time on the next page.
The translation, custom object translation, and global value set translation metadata types are included in Gearset’s default deployment filter but standard value set translation will need to be added.

Custom filters can be saved for easy use in the future.
2. Build your deployment package
Gearset will flag all the changed, new and deleted components between your source and target org, so you can easily browse and select the items you want to include in your deployment.
For custom object translations and custom field translations, Gearset’s precision deployments let you select individual translation entries to deploy. This allows you to update specific terms without deploying all translations at once, so you can deploy completed translations while holding back work that’s still in progress.
If you’re introducing a new translation language, you’ll need to specifically deploy the translation metadata type to your target org first before deploying translations. This will add the new language and mark it as Active in your target.
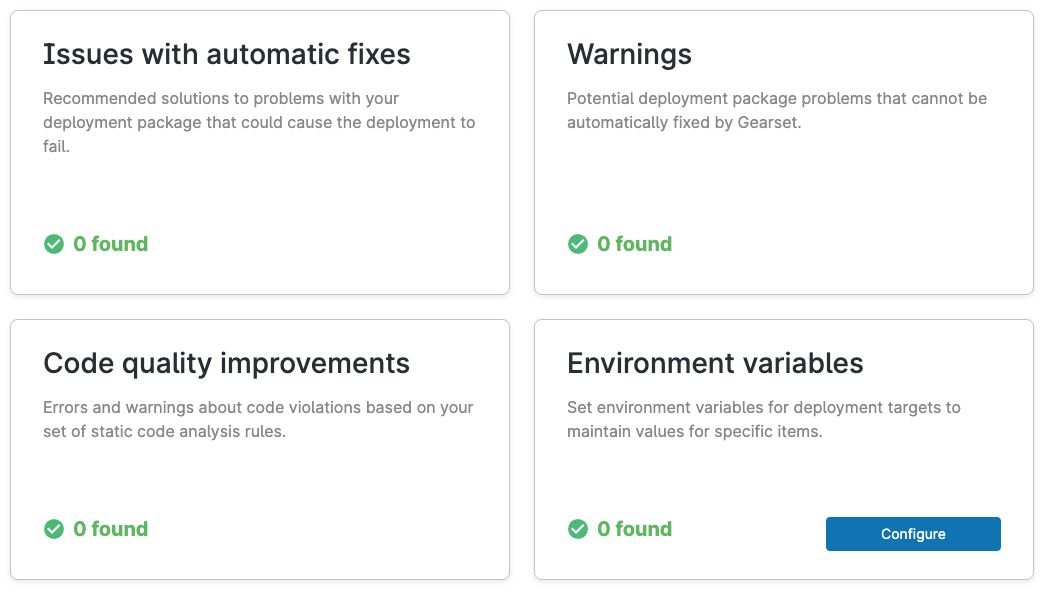
3. Resolve any flagged issues with your deployment package
Gearset’s problem analyzers will check your deployment package for any potential issues, such as missing dependencies, as well as offering one-click fixes to these issues, so you don’t have to rebuild your deployment package.
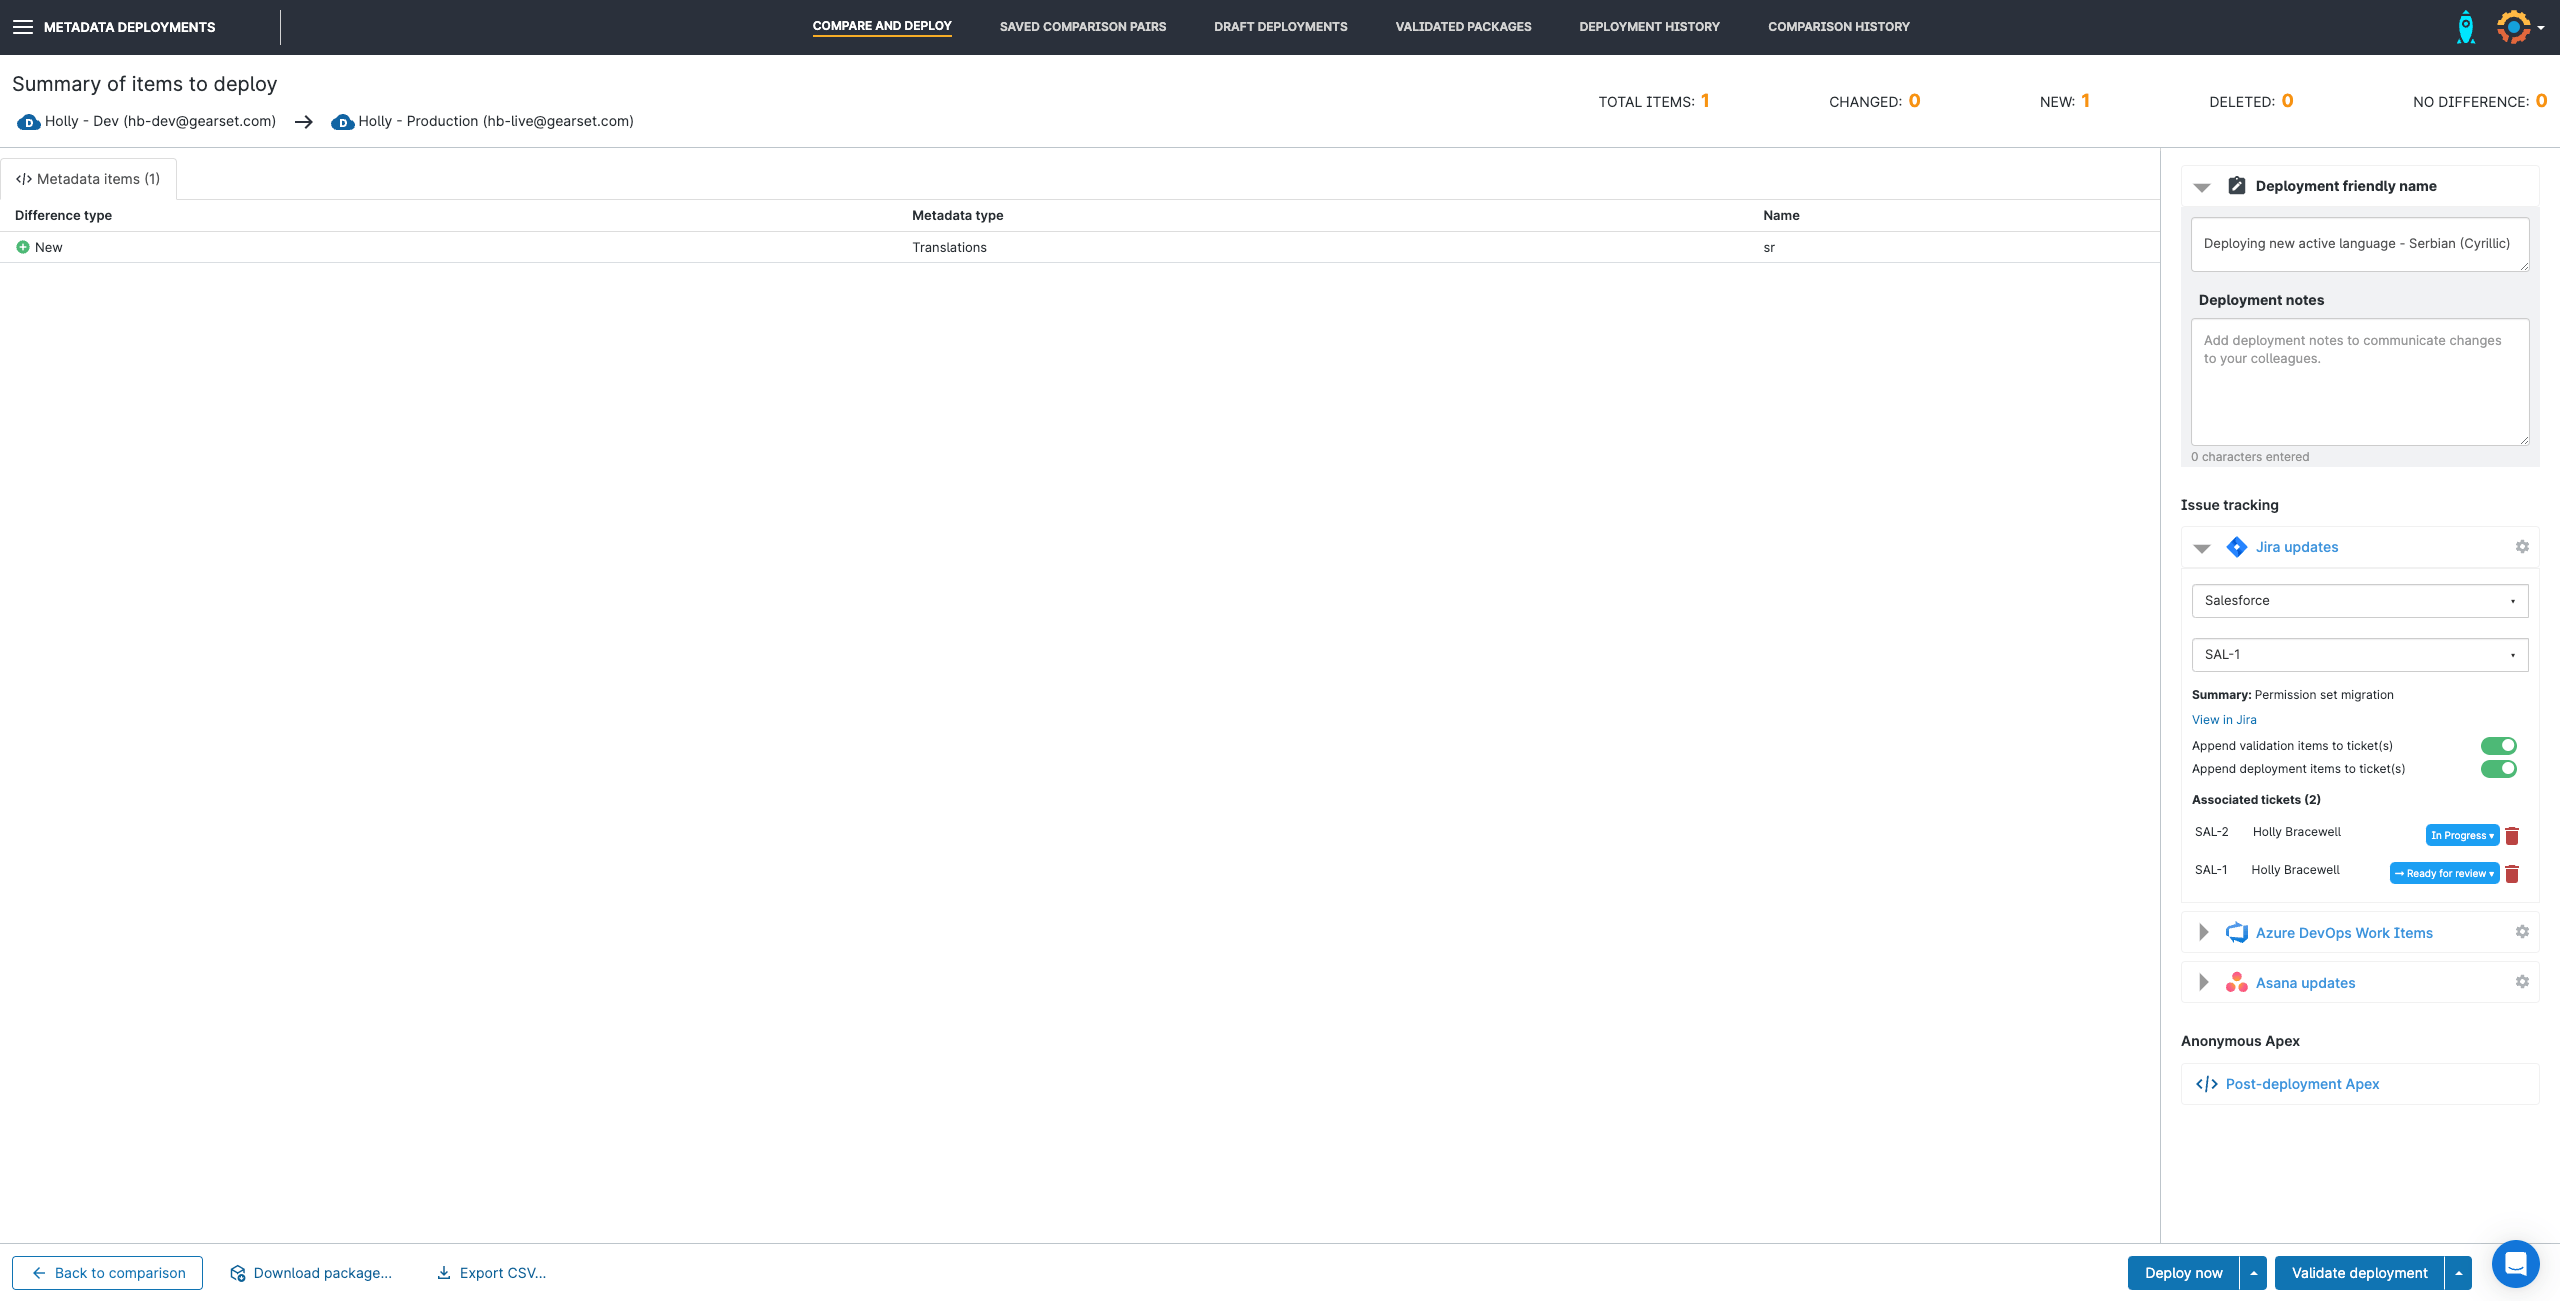
4. Add notes to your deployment
Help your colleagues understand what was included in your deployment by giving your deployment a name and adding any relevant notes.
You can also associate Jira, Asana and Azure DevOps Work Items to your deployment — this will add details on the deployment and what items were included. You can update a Jira ticket’s status on the kanban board from within Gearset’s UI, so you don’t have to bounce back and forth between platforms.
5. Deploy your translations
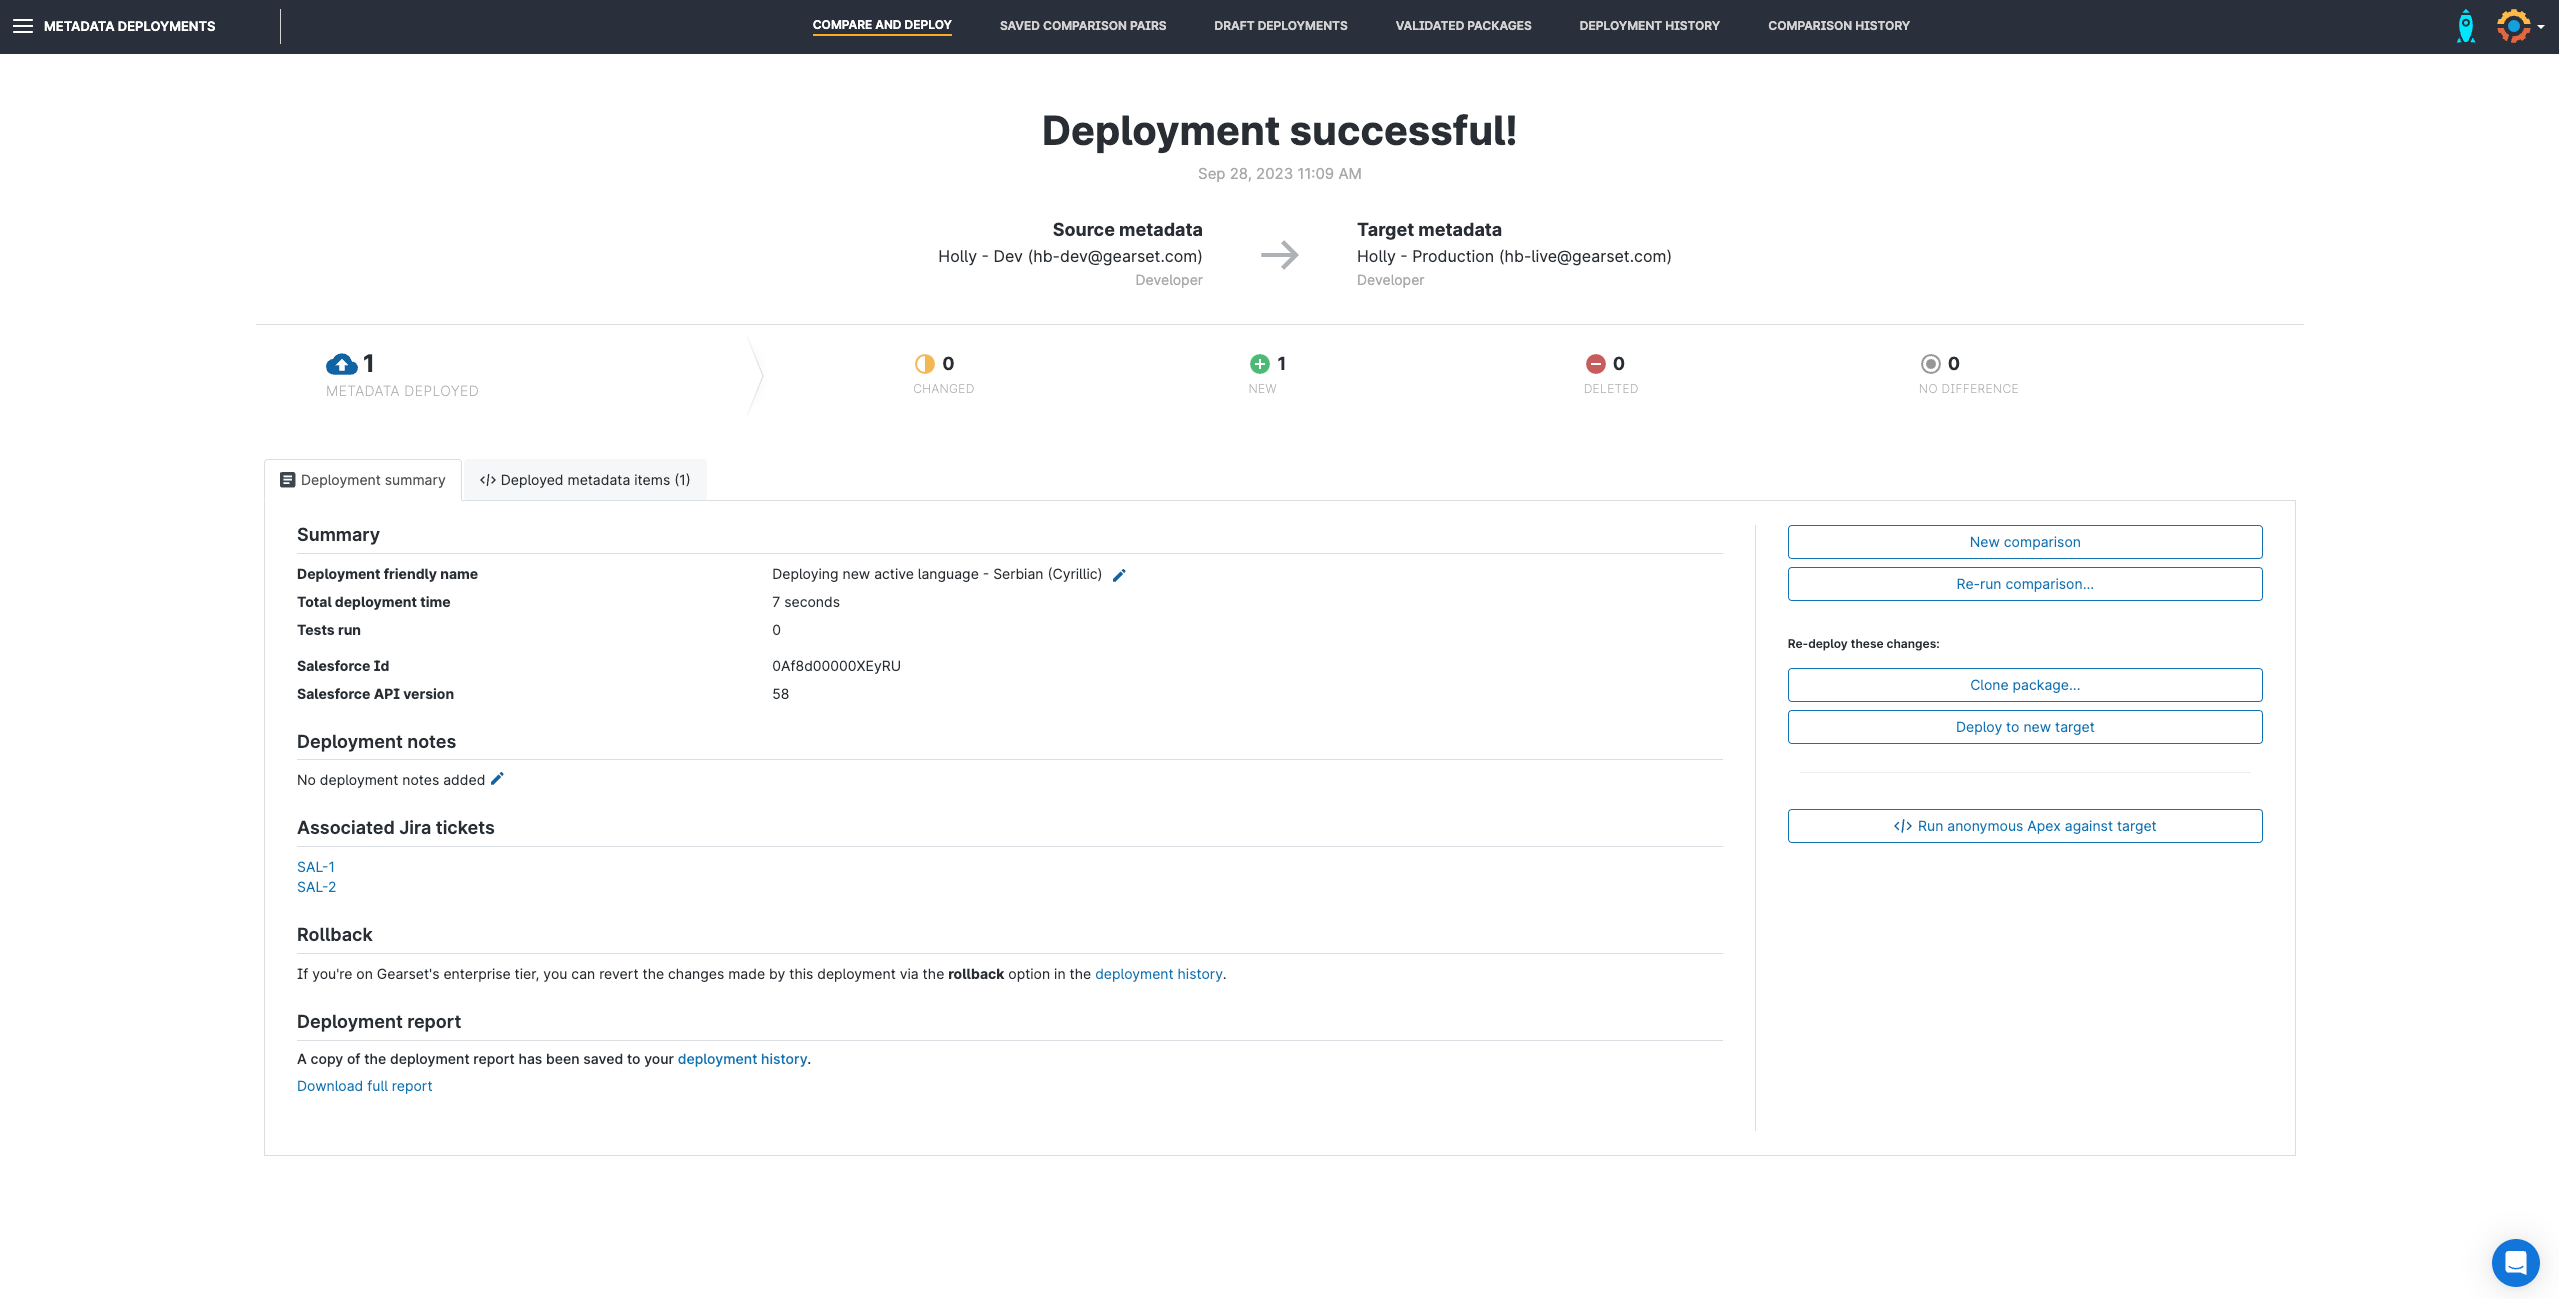
Once your package is ready to go, you can either deploy straight away or schedule your deployment to run automatically at a specified time. For example, you may want to avoid deploying to your live environment while end users are active in the org so you could schedule your deployment to run on a Saturday morning.
Details of the deployment are saved to the Deployment history page. From this page you can roll back deployments if something went wrong and download full deployment reports for easy auditing.
The deployment flow in Gearset is the same whatever metadata type you’re moving — such as Custom label translations — or whether you’re committing to source control, so you don’t need to learn a new process for deploying different types of metadata or moving metadata to and from source control.
Translate your Salesforce org with ease
Making your org accessible to all users is essential and it shouldn’t be a headache to set up. To try out intuitive and simple language translation deployments for yourself, set up a free 30-day trial with no credit card needed and nothing to install in your orgs.
