
Building an Agentforce agent is only half the job. Getting it safely from sandbox environment to production — with all its dependencies intact — is where a lot of teams hit friction. This guide walks you through the deployment process for Agentforce agent metadata, cleanly and confidently.
What are the Agentforce metadata types?
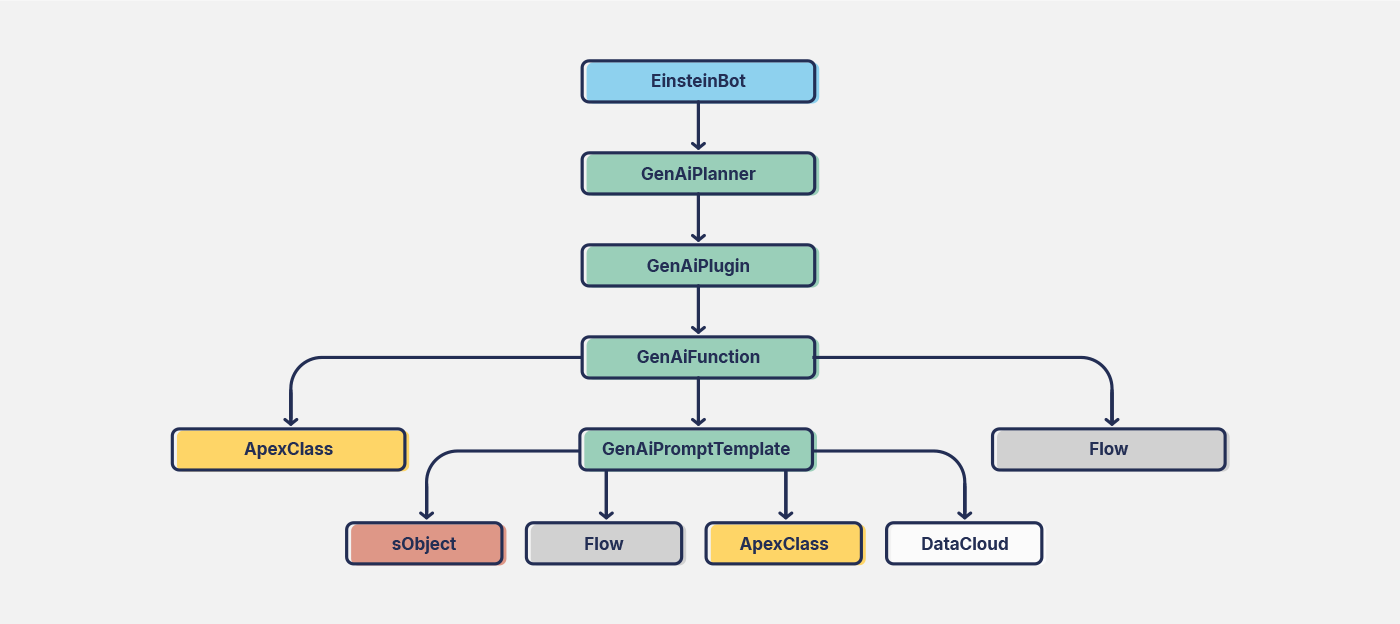
Agentforce is built on a structured metadata framework that enables the agents to function. Salesforce introduced Agentforce (GenAi) metadata types in the Winter ’25 release — these are supported by version 60 or higher of the Metadata API. These agent metadata types define how agents reason, retrieve data, and interact with users:
- GenAi PlannerBundle (Agent): Defines an AI agent’s reasoning strategy, breaking tasks into subtasks and determining the best actions to execute.
- GenAi Plugin (Topic): Topics are the related actions and instructions that guide the agents on their own specific subjects or job function.
- GenAi Function (Agent Action): Specifies individual actions AI agents can perform, including data retrieval, record updates, and external service calls.
- GenAi Prompt Template (Prompt Template): Structures AI-generated prompts to ensure consistency and relevance in agent responses.
- AiEvaluationDefinition (Agent Test Suite): Your agent relies heavily on data, so over time this can cause the agent’s responses to ‘drift’. Creating a test suite for the agent will check that it is performing exactly as expected.
TDX
How to deploy an agent using Gearset
The deployment process doesn’t need to be difficult — Gearset makes it easy. Log in, or sign up to your 30-day free trial to follow along with this Agentforce Service Agent deployment.
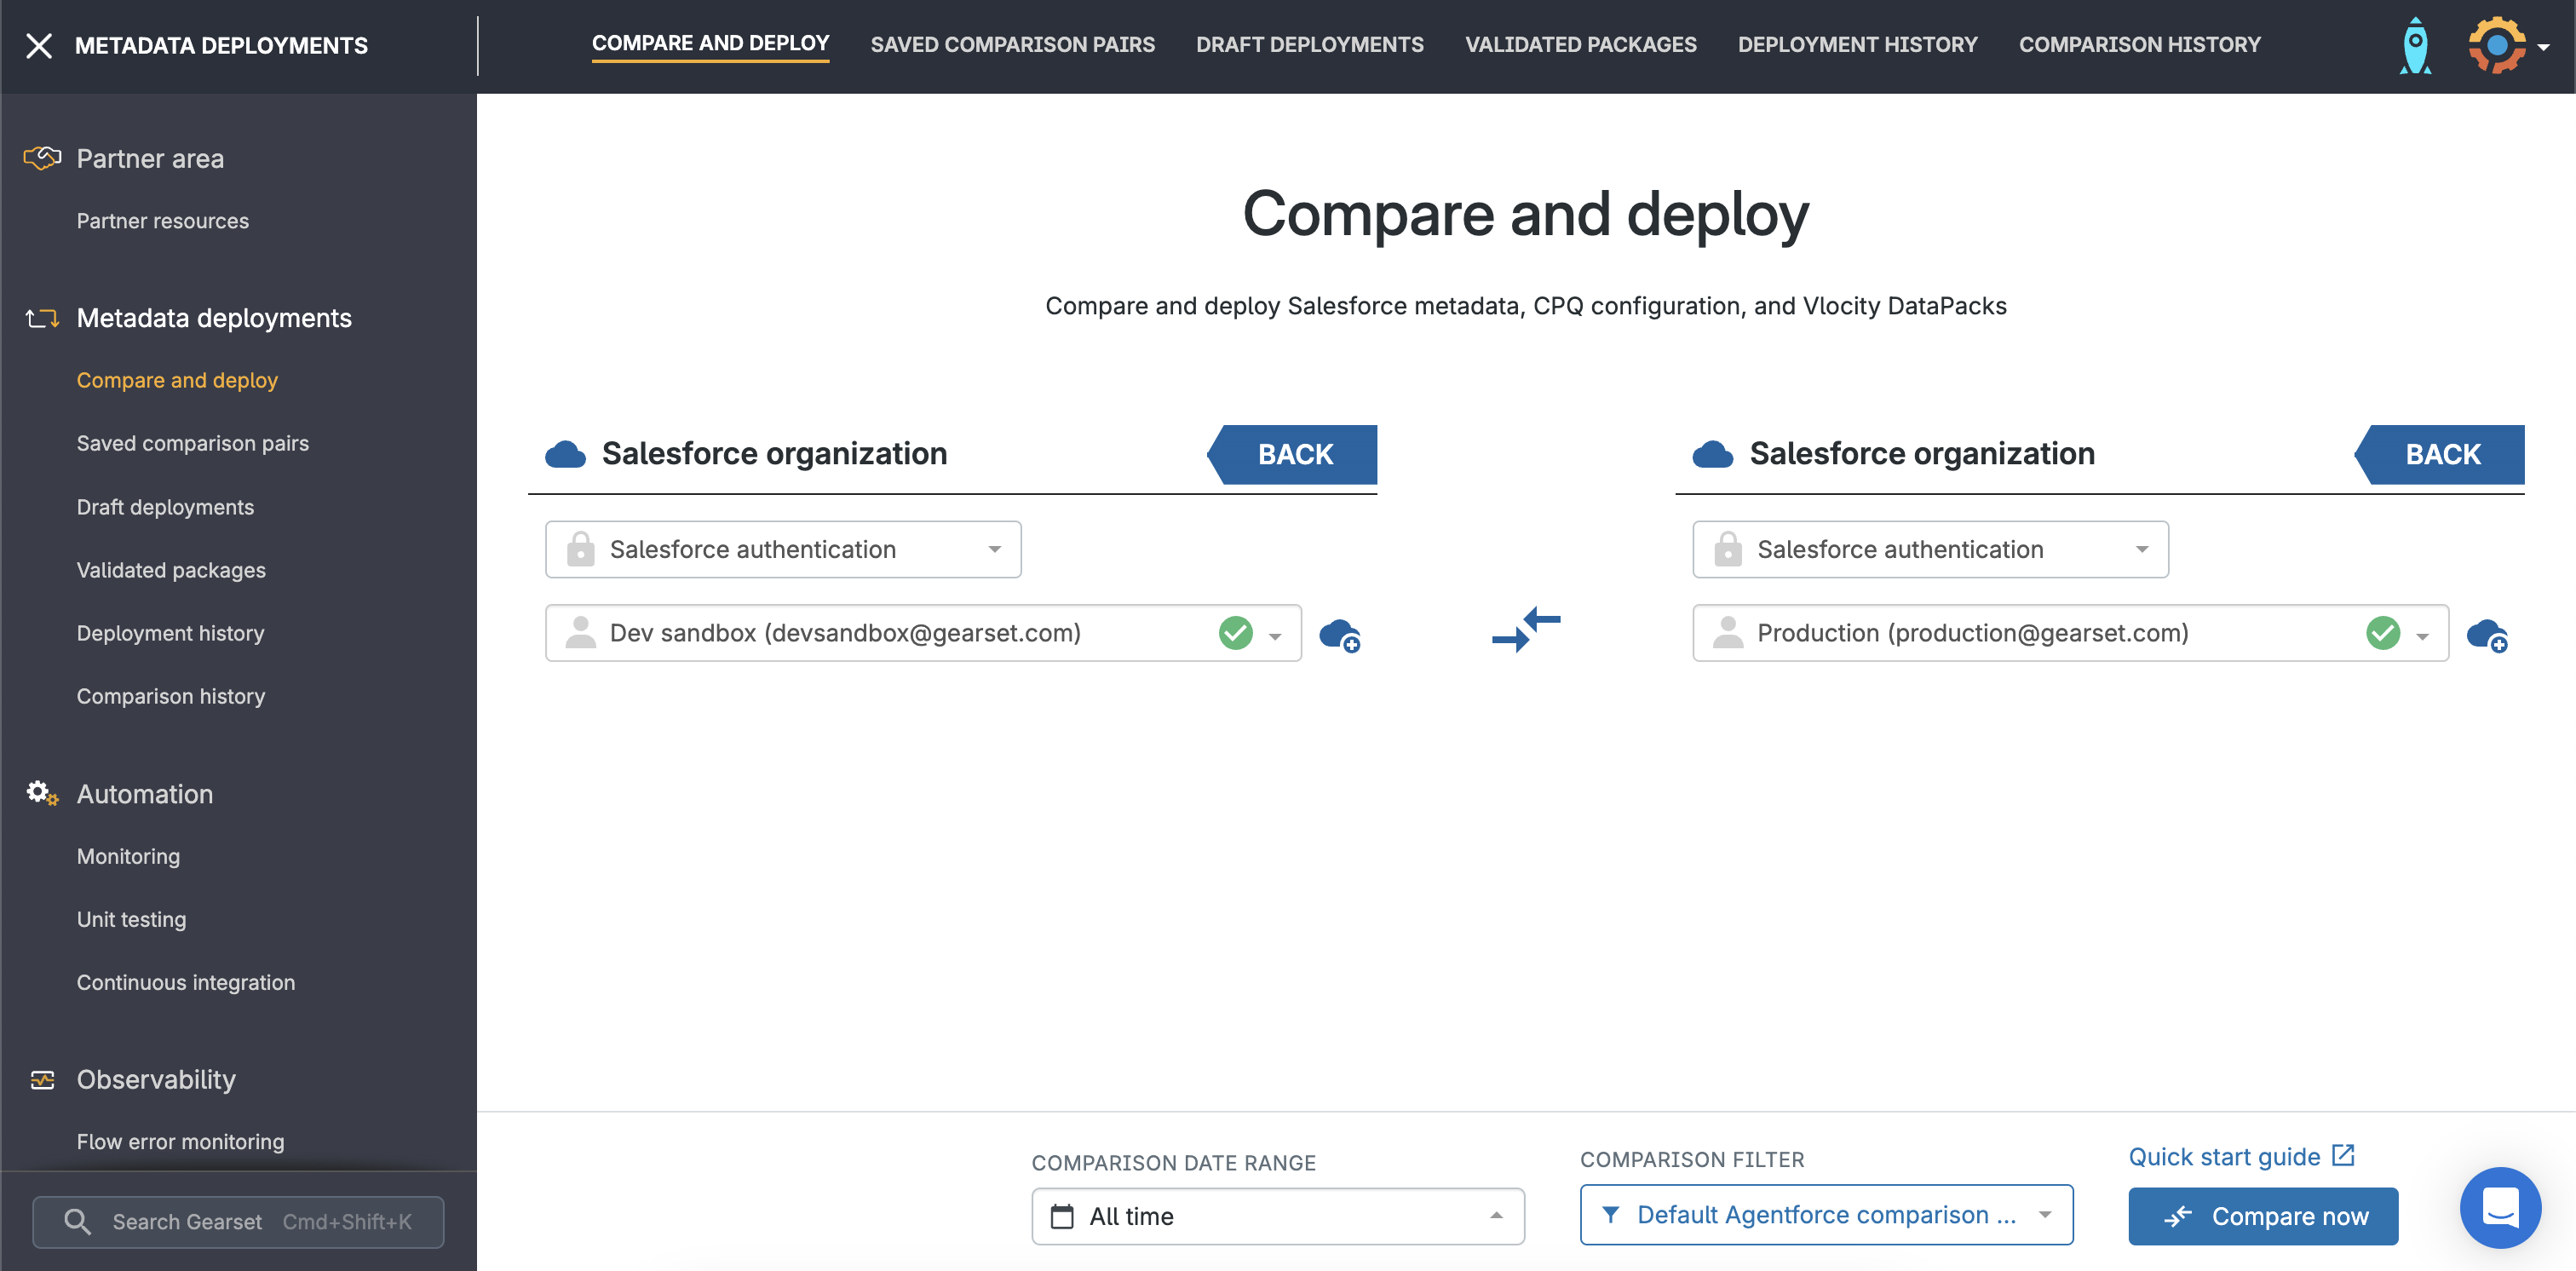
Select your source and target
Select your source and target and click Compare now. You can select the default Agentforce comparison filter or select your metadata on demand.
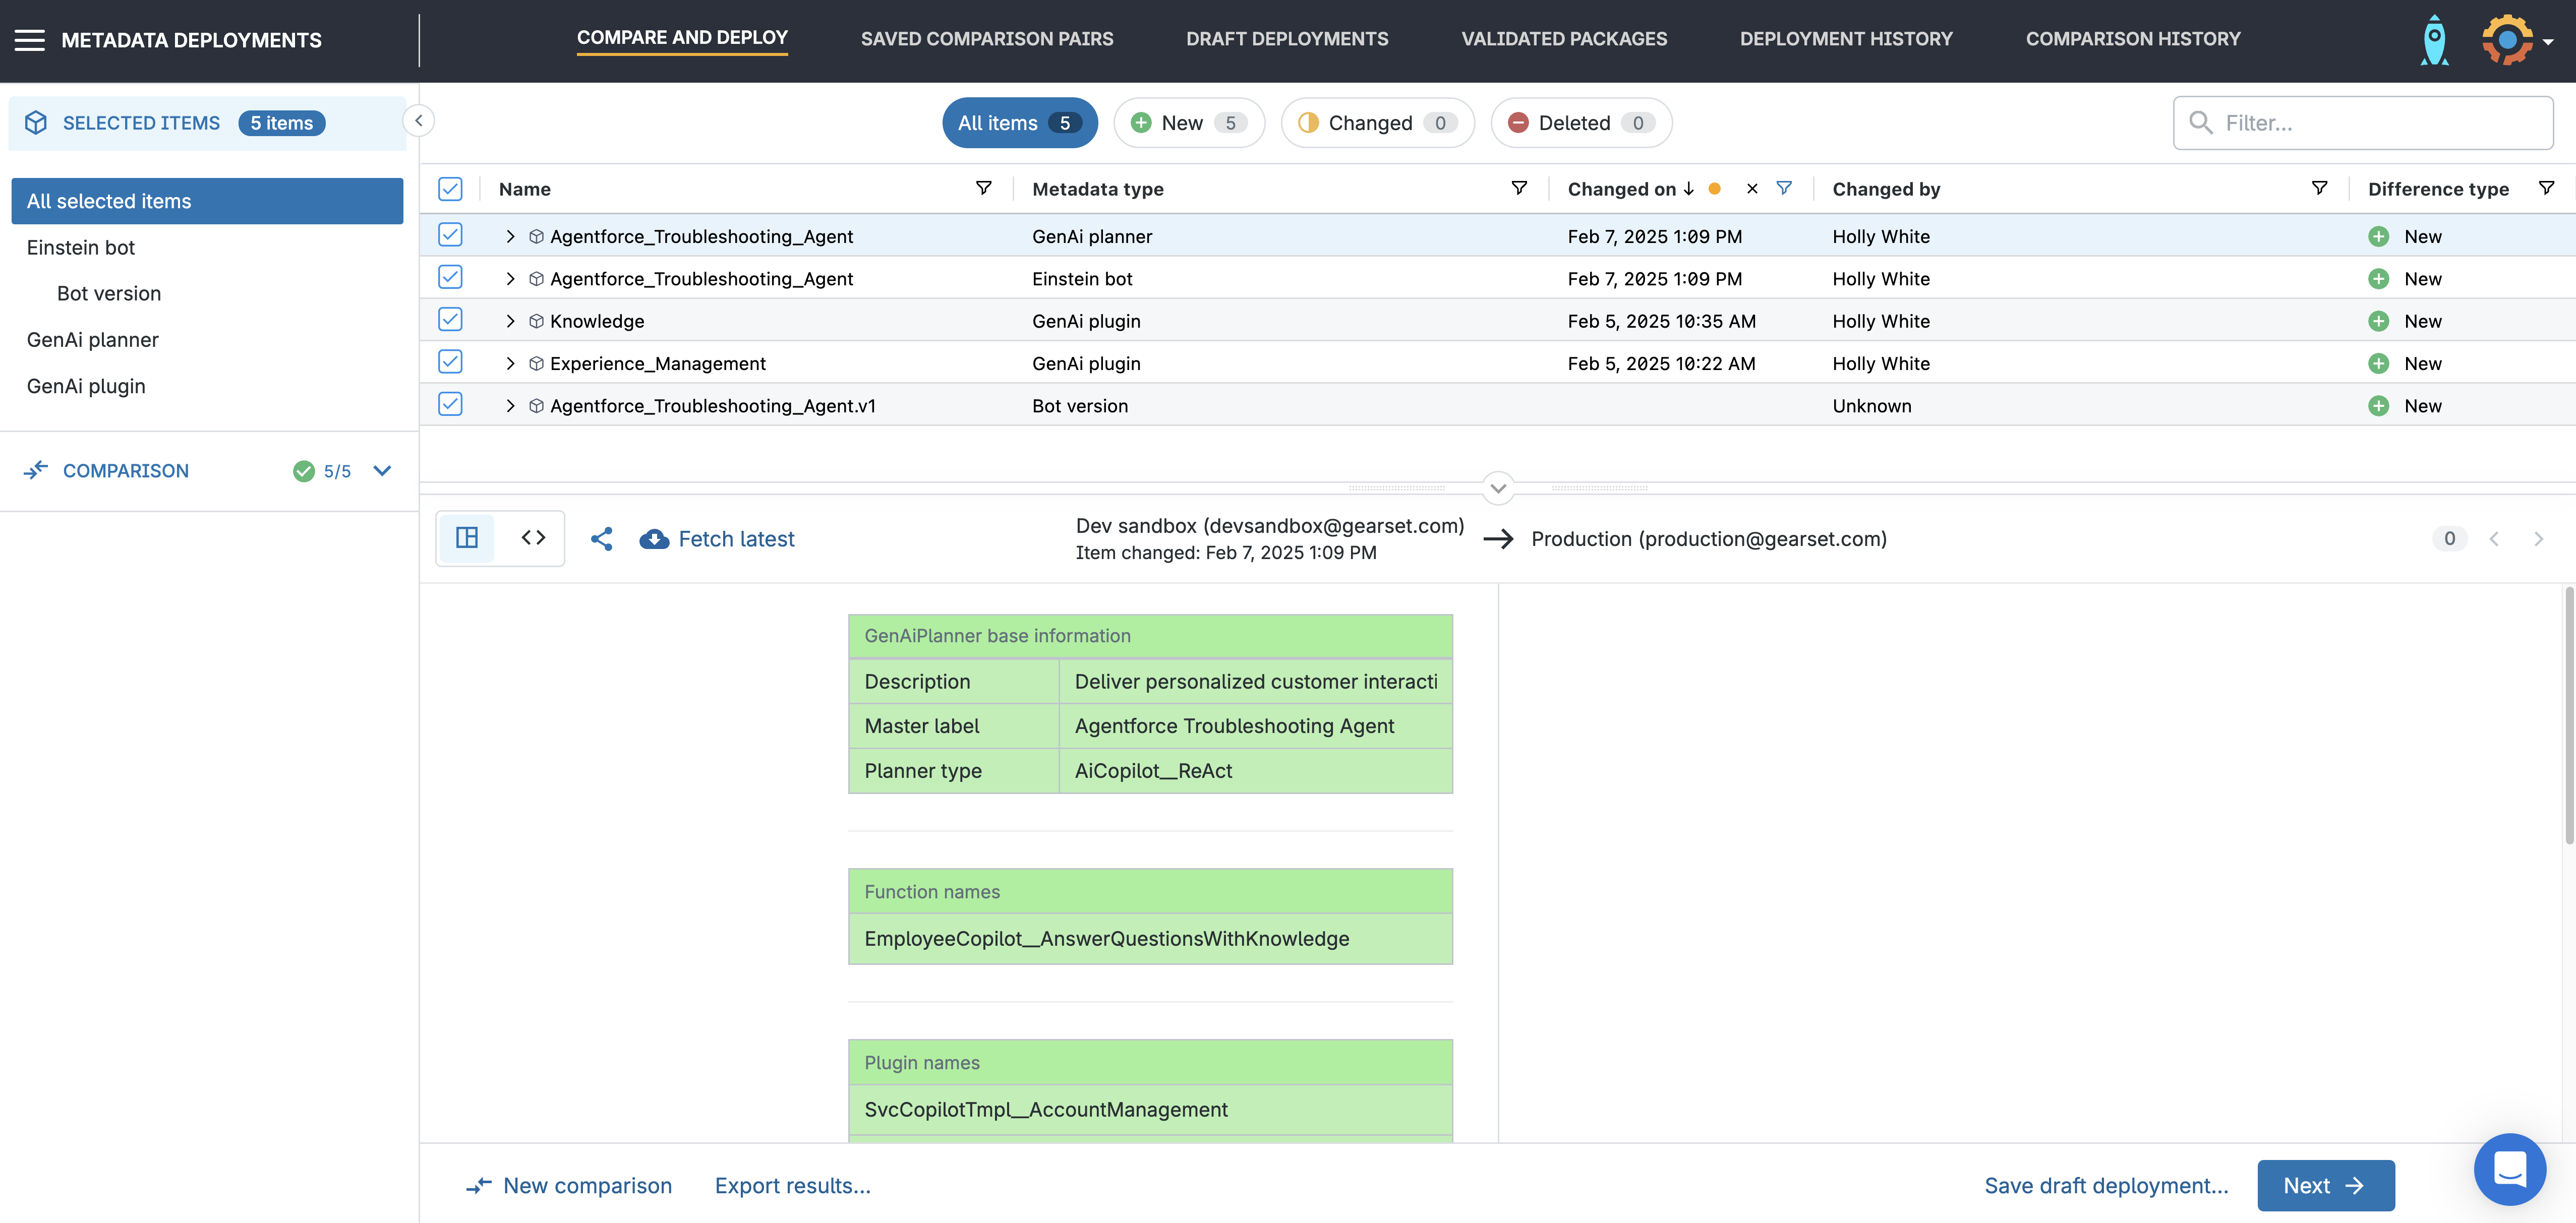
Compare your environments
Gearset will analyze the differences between your source and target org, highlighting all new, changed and deleted metadata items you’ve chosen in your filter. If you want to add any more types to the filter, you can choose them in the left-hand panel.
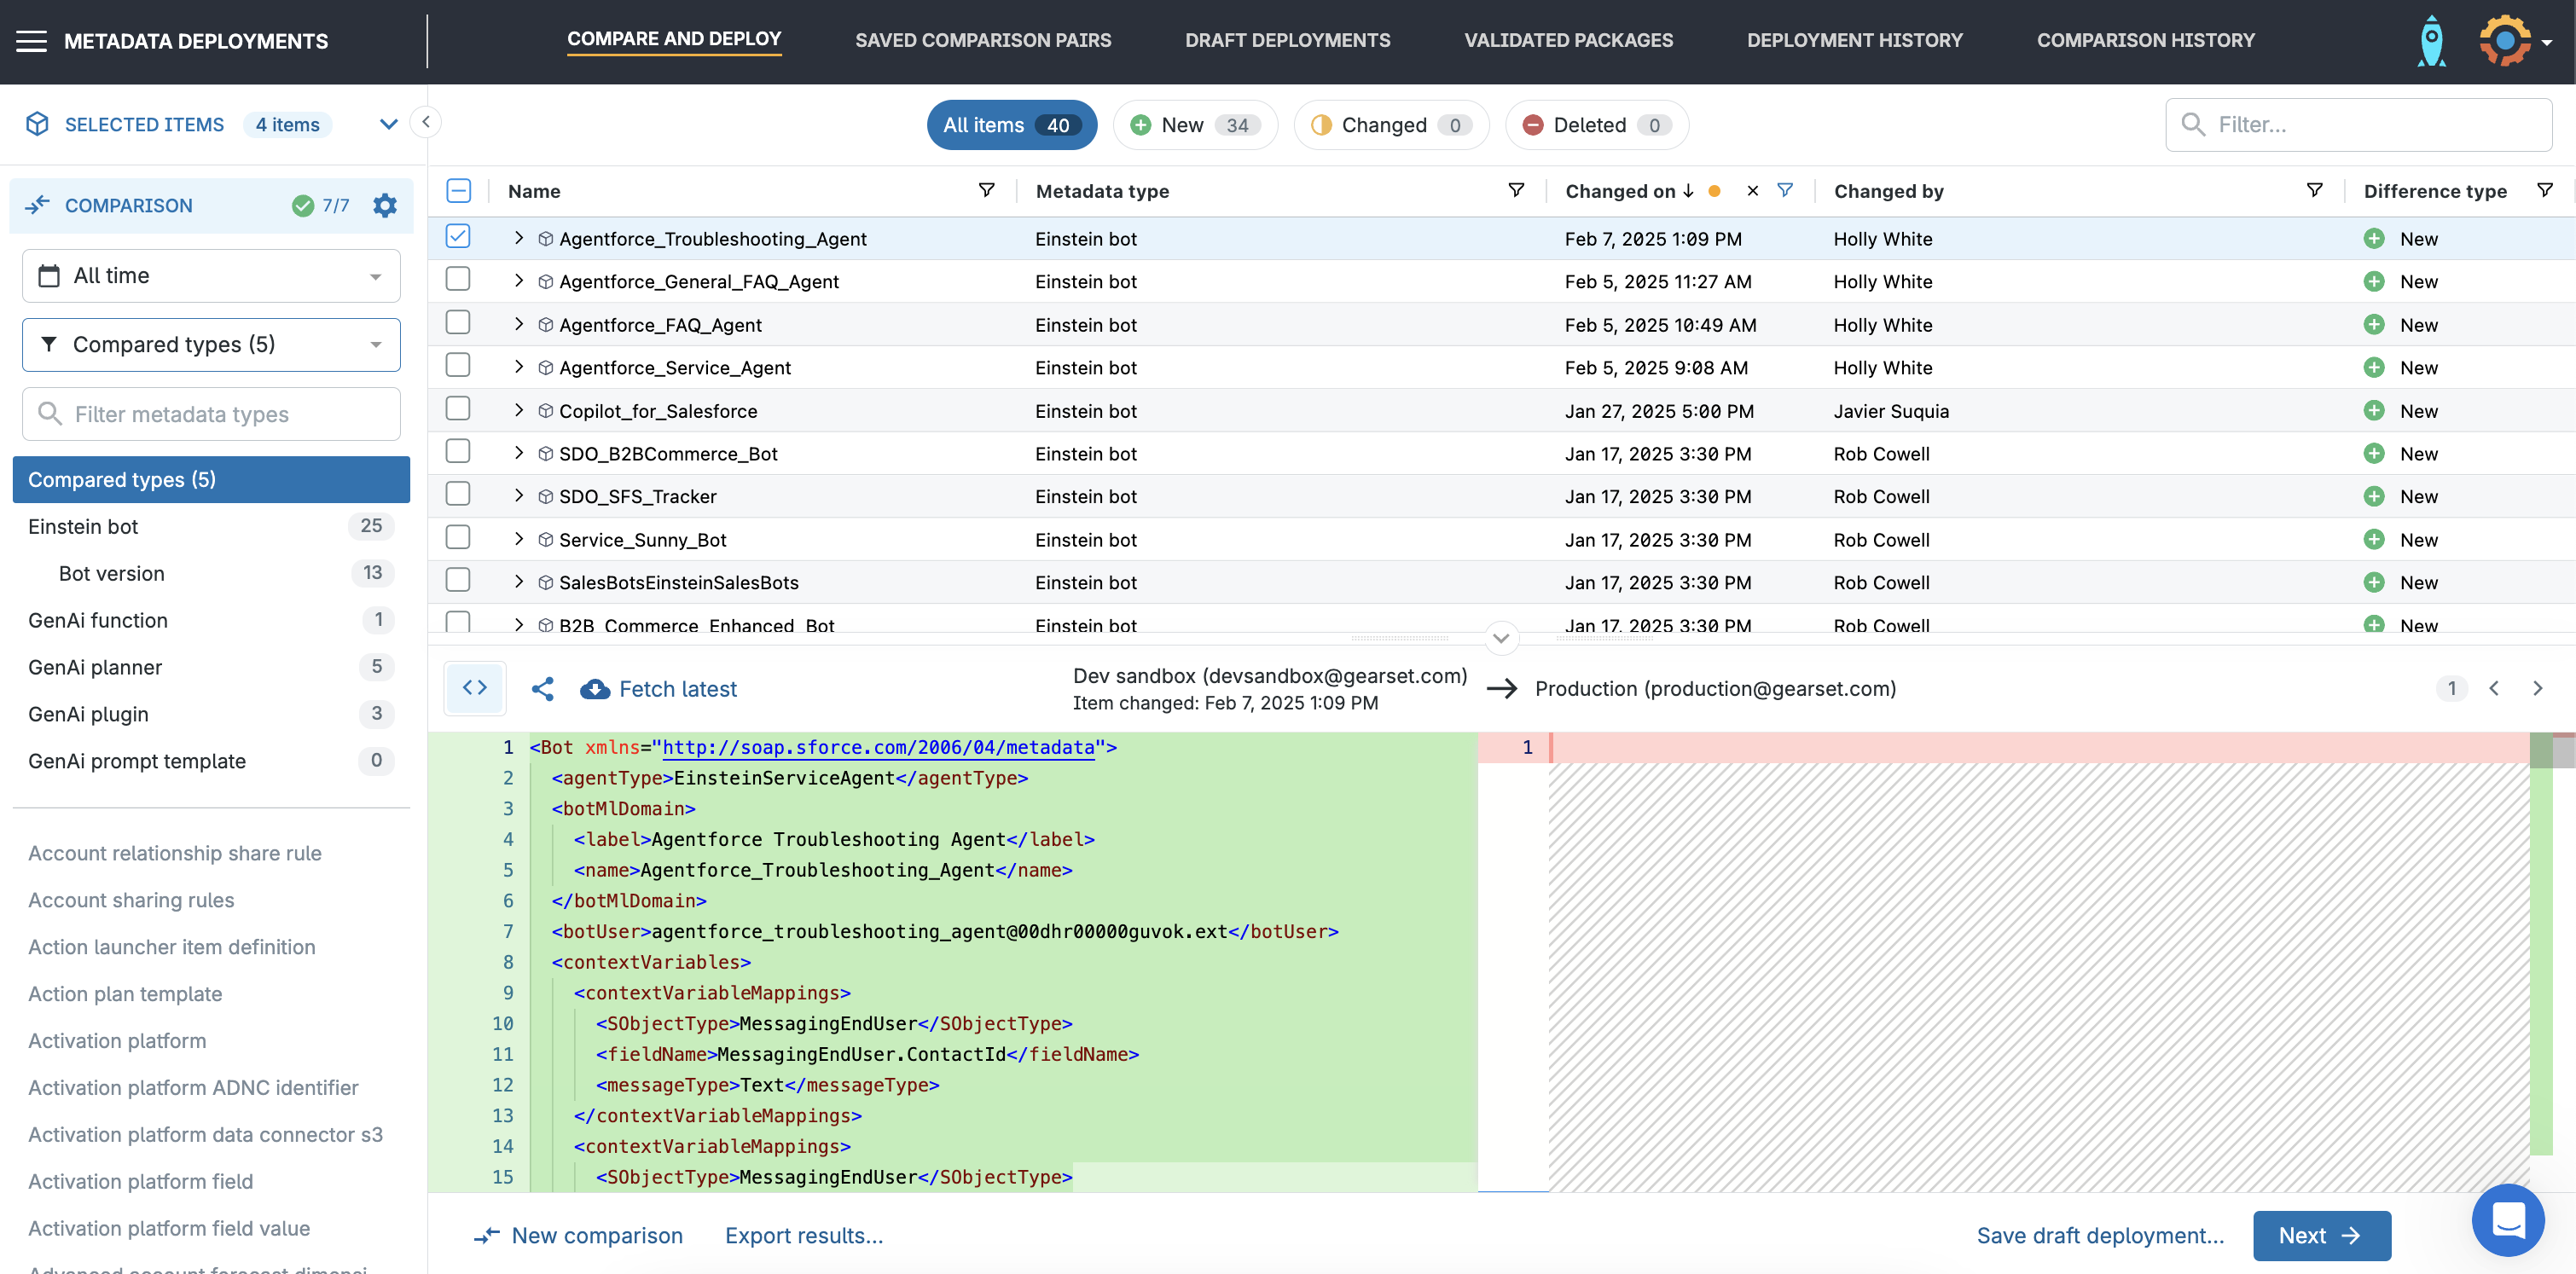
Build your Agentforce deployment package
Simply select the changes you want to include in your deployment and click Next. In this example, the package includes the:
- Agent (
GenAi plannerbundle) - Action (
GenAi function) - Topic (
GenAi plugin) - Einstein bot
- Bot version
You can also include any prompt templates or agent testing metadata (AiEvaluationDefinition) at this stage. Then click Next.
Check your package
Gearset runs problem analysis on every deployment package to look for issues that are likely to cause a deployment failure. You can accept recommended fixes to your package in one click, such as adding missing dependencies or related objects. On the deployment summary page you can give the package a friendly name for easy identification, include any deployment notes, and add the relevant user stories.
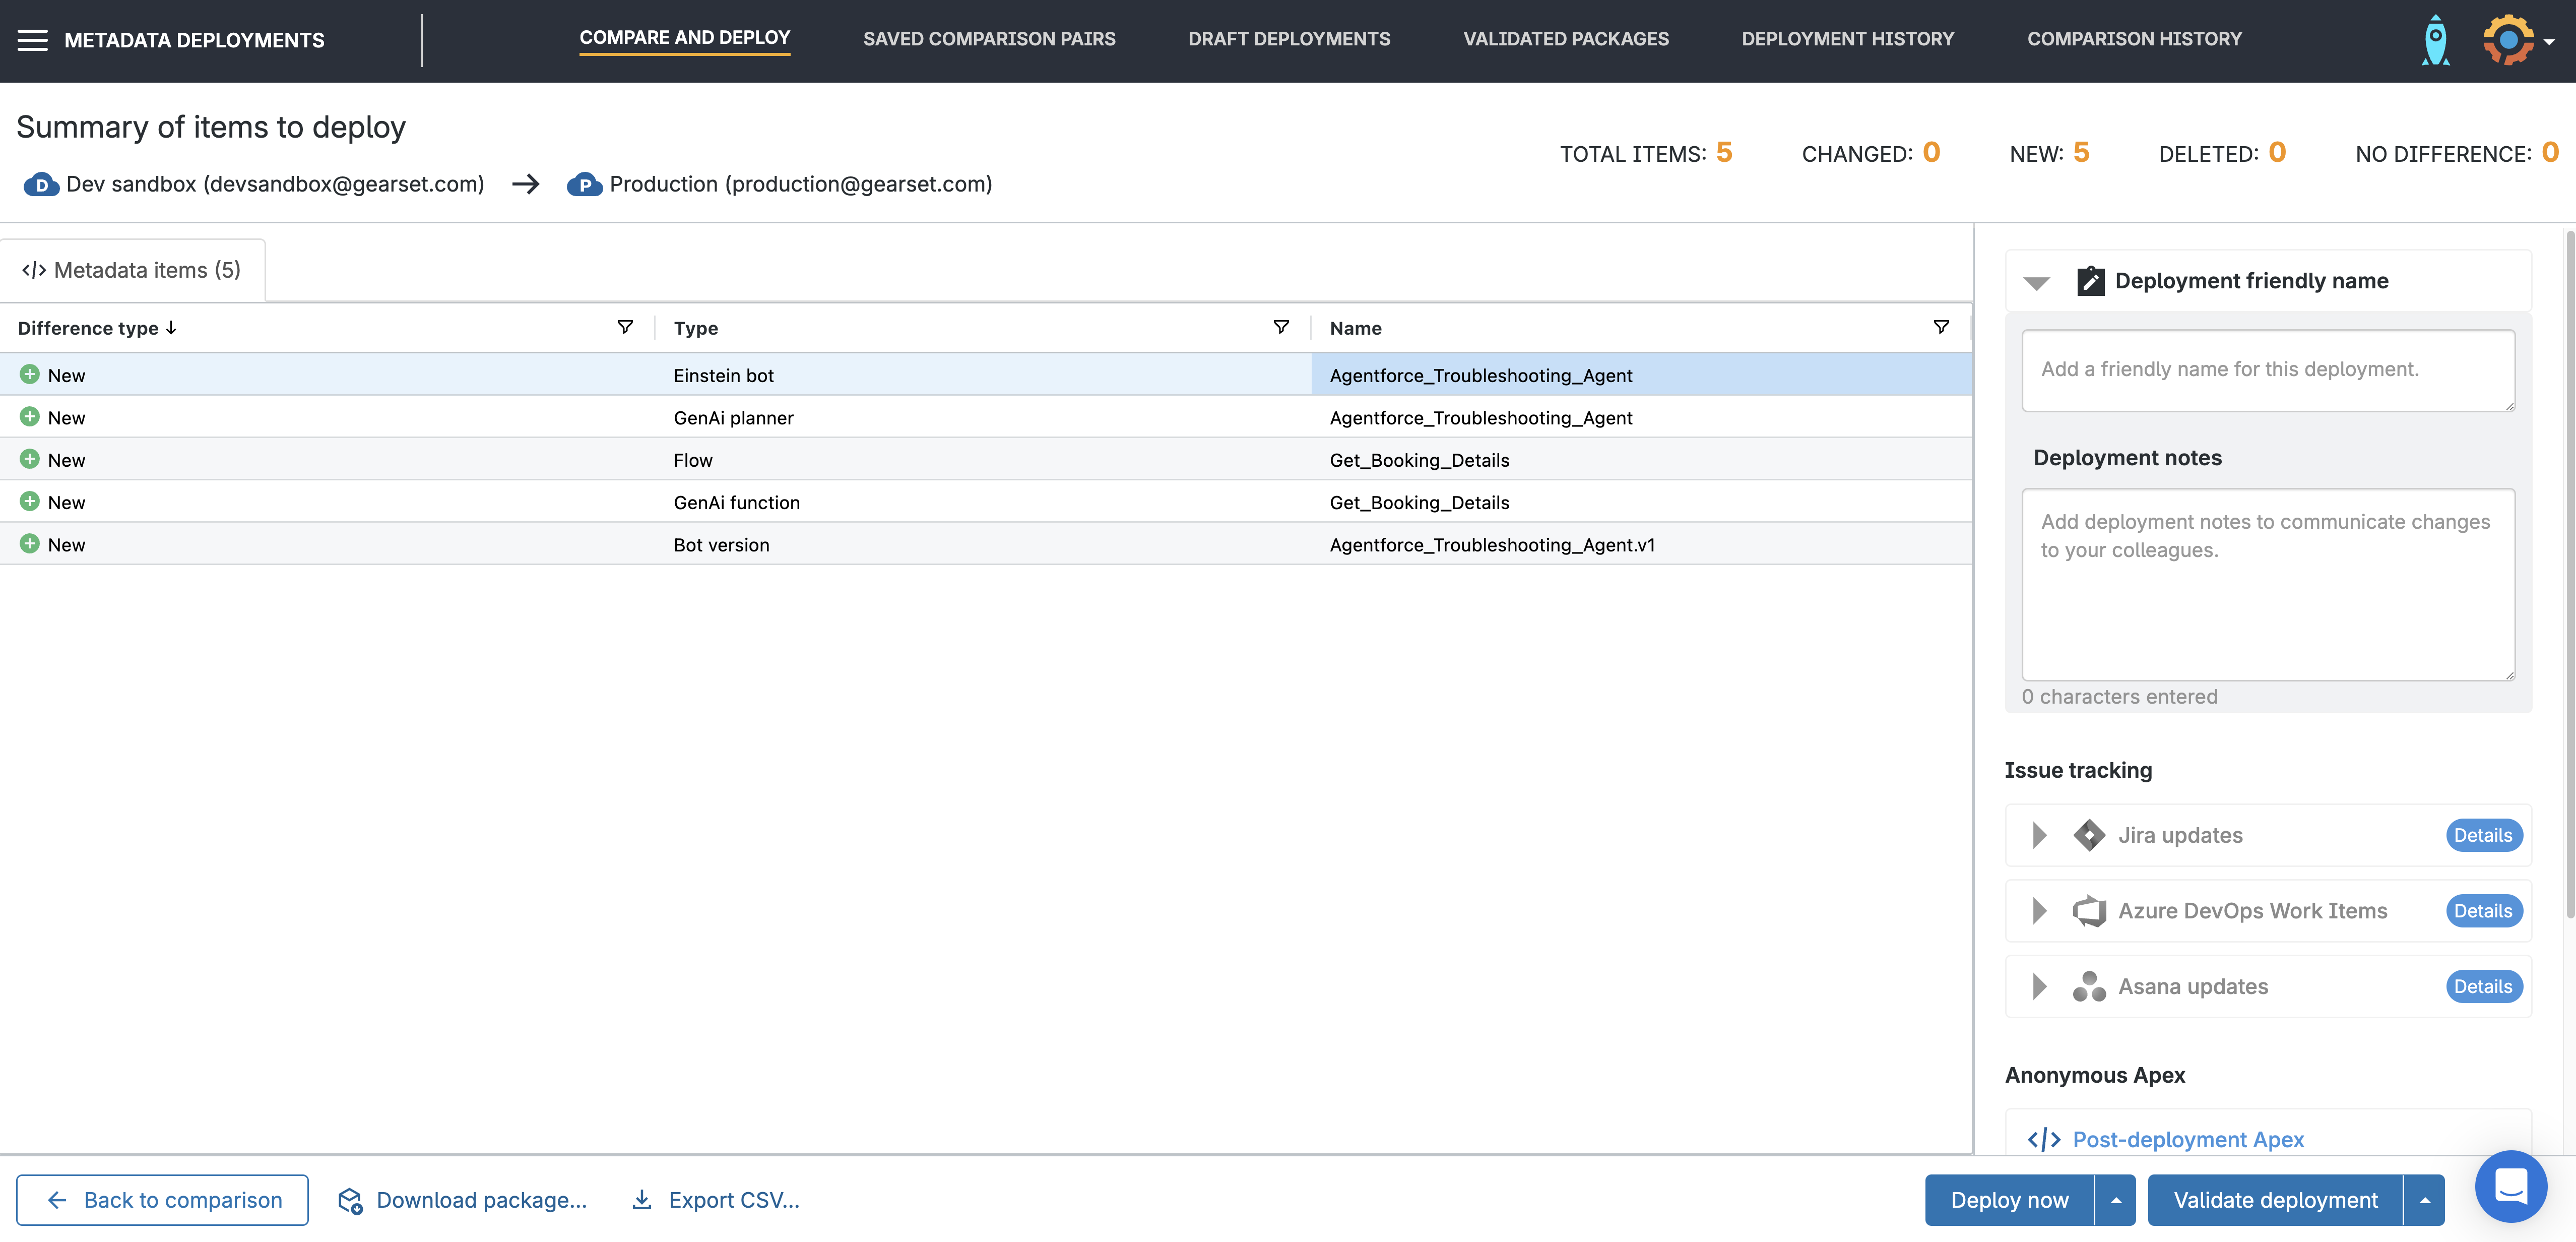
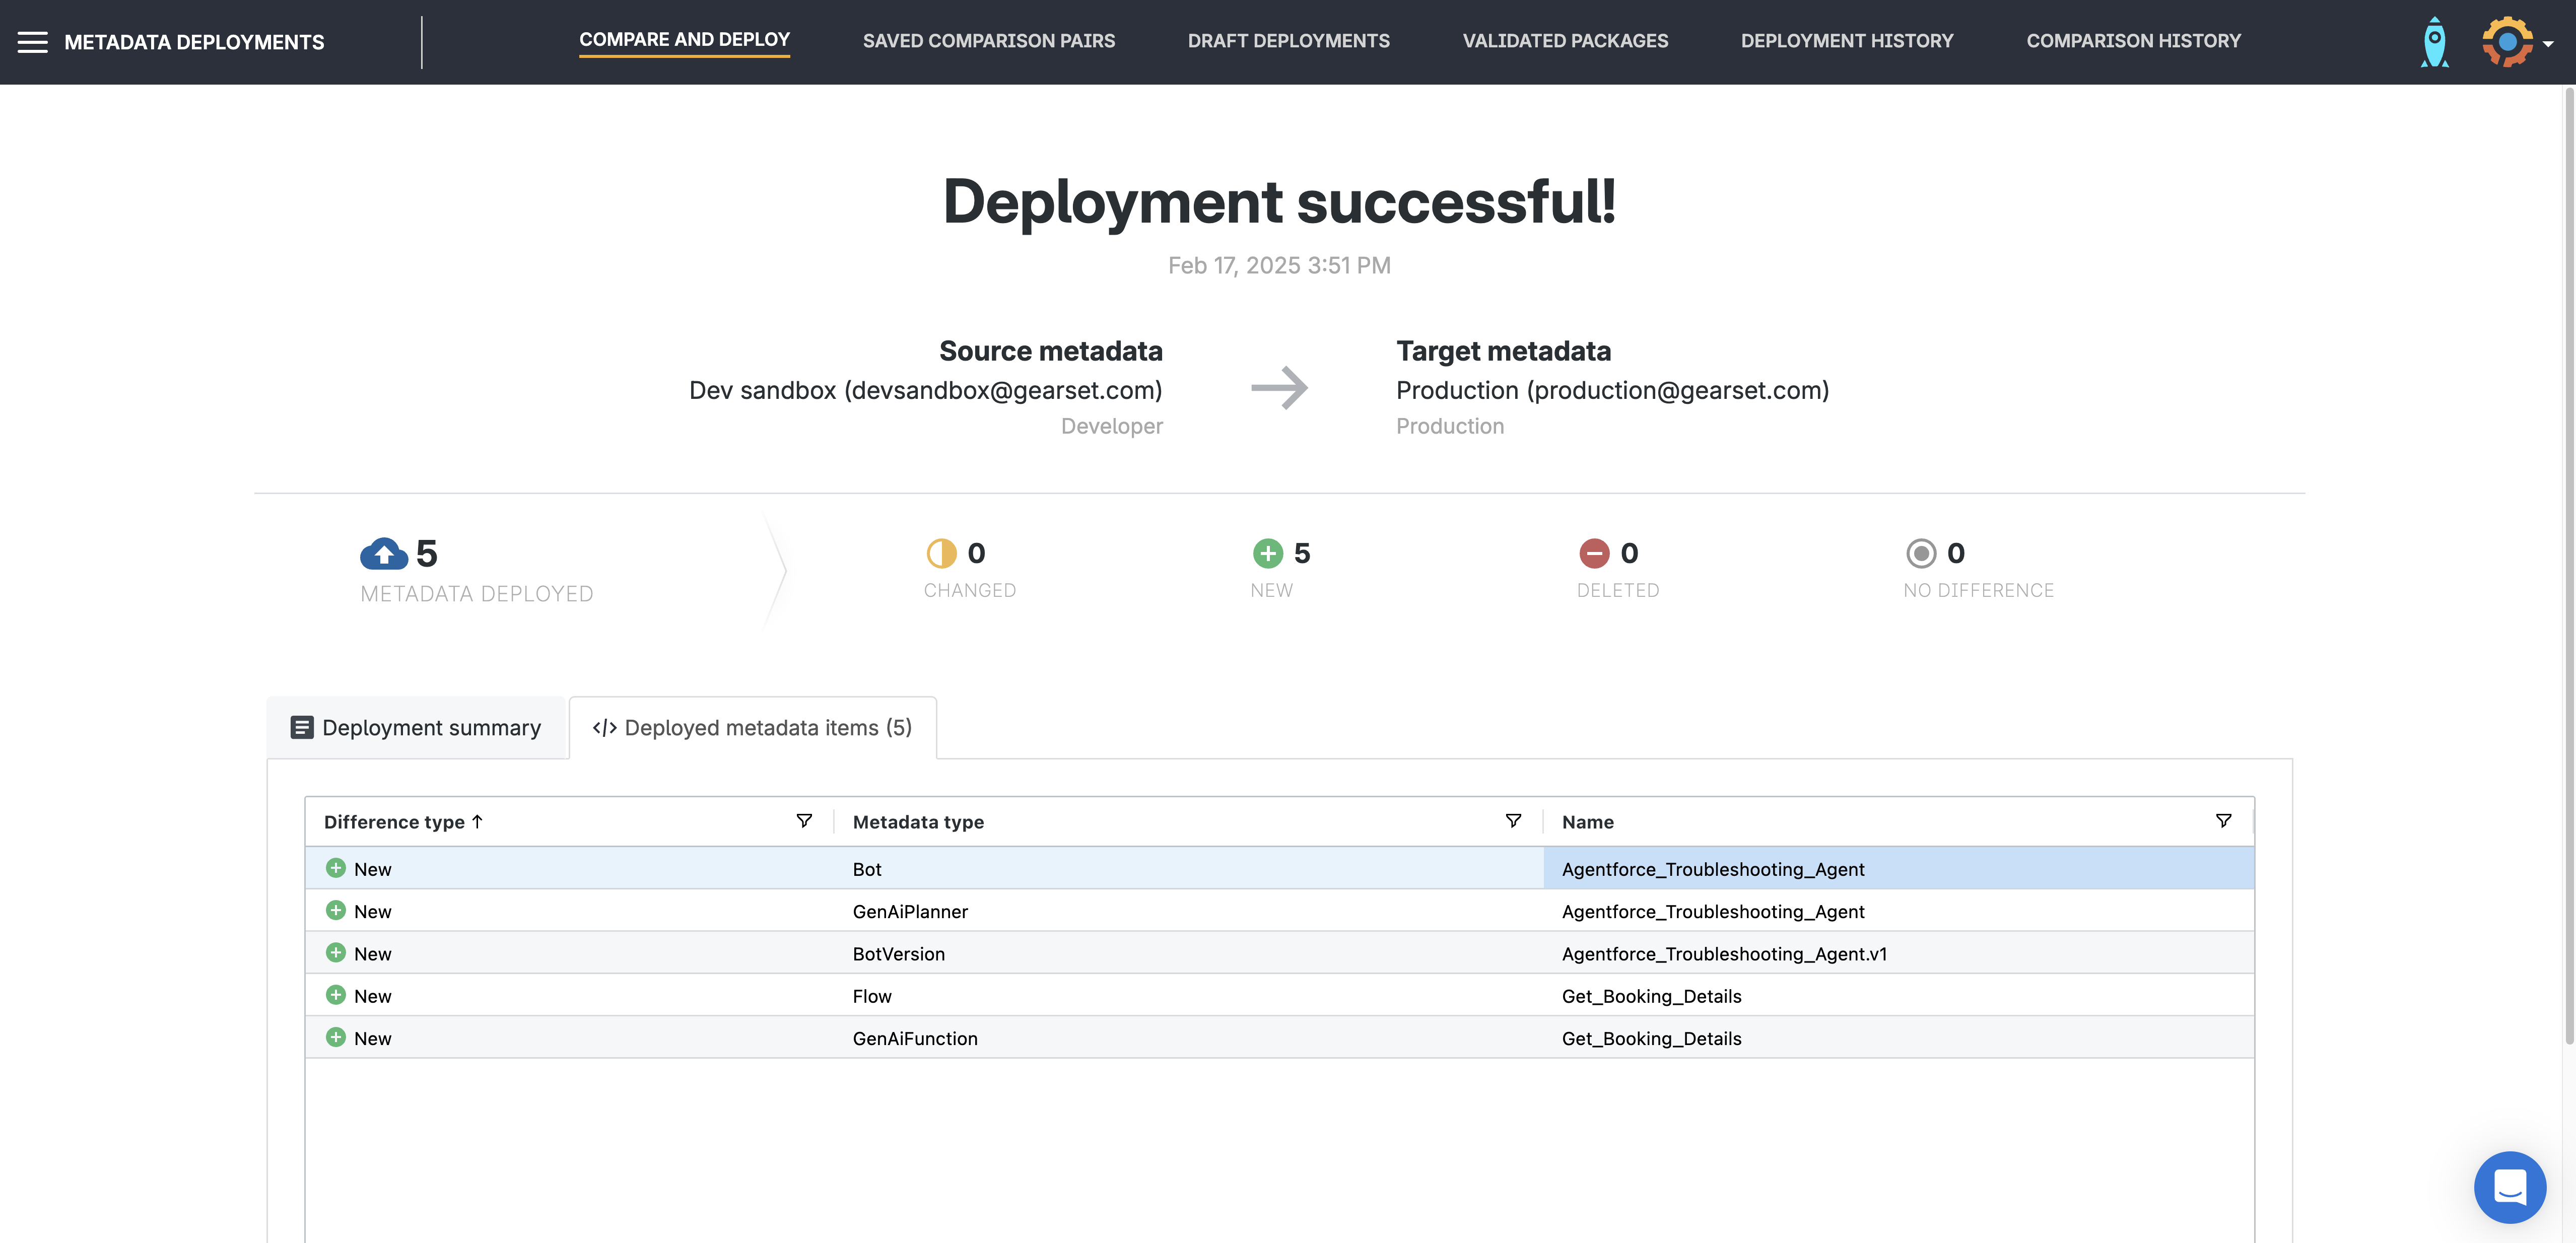
Deploy your agent
Validate your deployment, schedule it for later, or deploy it immediately — whichever fits your workflow. If you’re ready, hit Deploy now to complete your Agentforce deployment.
Troubleshooting common deployment gotchas
There are a couple of things to remember when deploying Agentforce metadata types:
- API version. You must make sure to use at least version 60 of the Metadata API for the comparison. Read the prerequisite section of the How to deploy GenAi metadata guide to find out how to do this.
- Bots and bot versions. The Einstein bot and bot version associated with your agent must exist in the target org otherwise the agent will not be visible. If the GenAiPlannerBundle is new then the associated Einstein bot and Bot version will also need to be deployed to the target org. If not, the deployed GenAiPlannerBundle will not be visible on the target org.
Monitoring and optimizing the performance of your agents
Keeping your Agentforce agents running smoothly is key to delivering a great experience for both your sales teams and customers. Here’s how to monitor and optimize their performance:
- Track key metrics. Keep an eye on response accuracy, customer satisfaction, and conversation completion rates. These insights help you understand how well your agents are handling customer queries and where they can improve.
- Analyze conversation data. Dig into conversation logs to spot trends and identify areas for improvement. Fine-tuning responses based on real interactions helps your agents better meet customer needs.
- Adjust configurations as needed. Optimize your agents by refining their knowledge base, actions, and guardrails. Small tweaks can make a big difference in their effectiveness.
- Continuously test and refine. Regular testing — including manual testing of key scenarios — ensures your agents stay aligned with business goals. Running your agent test suite in the Agentforce Testing Center will help catch any drifts in performance.
- Leverage Agentforce analytics. Use built-in analytics to gain deeper insights into agent performance and customer behavior enabling you to make data-driven decisions about how to optimize your agents.
- Automate workflows where possible. Use automated workflow triggers alongside your agent configuration to make agents more proactive — reducing the need for manual intervention over time.
By following these steps, you can keep your Agentforce agents performing at their best — delivering accurate, helpful, and efficient responses at scale.
Effortlessly deploy Agentforce agents with Gearset
With Gearset, you can confidently move and test your Agentforce agents, from sandbox to production, in just a few clicks, delivering value to users and customers rapidly and safely. Want to give it a try? Sign up for a free 30-day trial now.
