

Data is the lifeblood of your Salesforce org. While Salesforce metadata is valuable and powerful because it describes the shape and behavior of your org, all of the customizations your team makes are ultimately intended to improve data handling processes. That being the case, it’s essential that you have data and metadata backups so you can keep access to your data at all times — even during a Salesforce outage.
Keeping access to data ensures business continuity and compliance
Ensuring constant access to your data is necessary both for business continuity and compliance. Data loss can and does happen, but so do Salesforce outages, which also cut off your access to business data. For example, we’ve seen a number of occasions when issues relating to DNS servers caused downtime, including a significant incident earlier this year when most of Salesforce’s products were unavailable for several hours and even its Trust site was affected.
Losing access to data often means that business processes grind to a halt. In the middle of a Salesforce outage, the normal processes in your org can’t be replaced by manually accessing records from backups. That said, if you can access the data from backups, at least that affords your team the opportunity to support any critical processes that might arise as an urgent matter. If it’s going to take you days or even weeks to retrieve essential data that’s required by your company immediately — your backup solution isn’t fit for purpose.
Even more importantly, having the tools and processes in place to guarantee that your company has access to its customers’ data at all times is a requirement for compliance. Most enterprises must now comply with data protection regulations such as CCPA and GDPR. Under the GDPR, for example, users have the right of access to the data you hold for them. You must be able to tell them information about the data you have, what you’re doing with that data and why. And you must be able to correct or delete their data on request.
Store your backup data separately
A robust backup strategy should guarantee constant access to your data, but don’t make the mistake of assuming any backup process will do this for you. It’s a basic rule for backups that they shouldn’t be stored on the same servers where the original files are kept. For this reason, your backups shouldn’t be stored on Salesforce’s own infrastructure. If you’re relying on a sandbox org as a backup for production, think again! Any Salesforce-wide issues will affect both environments, leaving you stranded.
In 2019, Salesforce users discovered that the metadata describing their permissions models had been corrupted, with the result that all users were able to access all the data in their business’s orgs. Salesforce chose the least worst option and took its affected instances offline. As a result, users were left without access to their data, and needed to rebuild their permissions models (metadata). In such moments, having a comprehensive backup and restore solution means keeping access to data and being able to restore corrupted metadata and any lost data quickly.
Effective data governance for Salesforce
Data access is a core concern of data governance. Businesses must design and implement an effective data governance framework for data compliance and security. Within Salesforce, the practical outcome of data governance is your permission model, controlling which profiles or permission sets grant the ability to see and change the records in different data sets. Your permissions model makes sure that users can access the data they need to perform their role, while protecting sensitive data from unnecessary access and unauthorized alteration.
Data governance principles apply to your backup data as well as the data stored in Salesforce. You need to strike the same balance for data access and data security in your backups, making sure that your dev team don’t all have access to backup data all the time, but can be given the power to restore from backups when needed. What happens if a data loss incident occurs while the person in charge of your backups is on vacation? As with the records held in your Salesforce orgs, the solution is to build a permissions model for your backup data that can be configured to meet your needs.
Permissions models for Salesforce backups
Like Salesforce, Gearset’s backup solution lets you assign permissions to different users — in this case, the members of your development team. Owners of backup jobs in Gearset can assign the following permissions to their teammates:
- View: see the backup job exists but not browse the data
- Browse: view the records in all backups
- Execute: run, reschedule, enable and disable the backup job
- Edit: change the backup job’s settings including which objects are backed up
- Delete: delete individual records or the entire backup job and its history
- Restore: deploy data and metadata from backups to an authorized environment
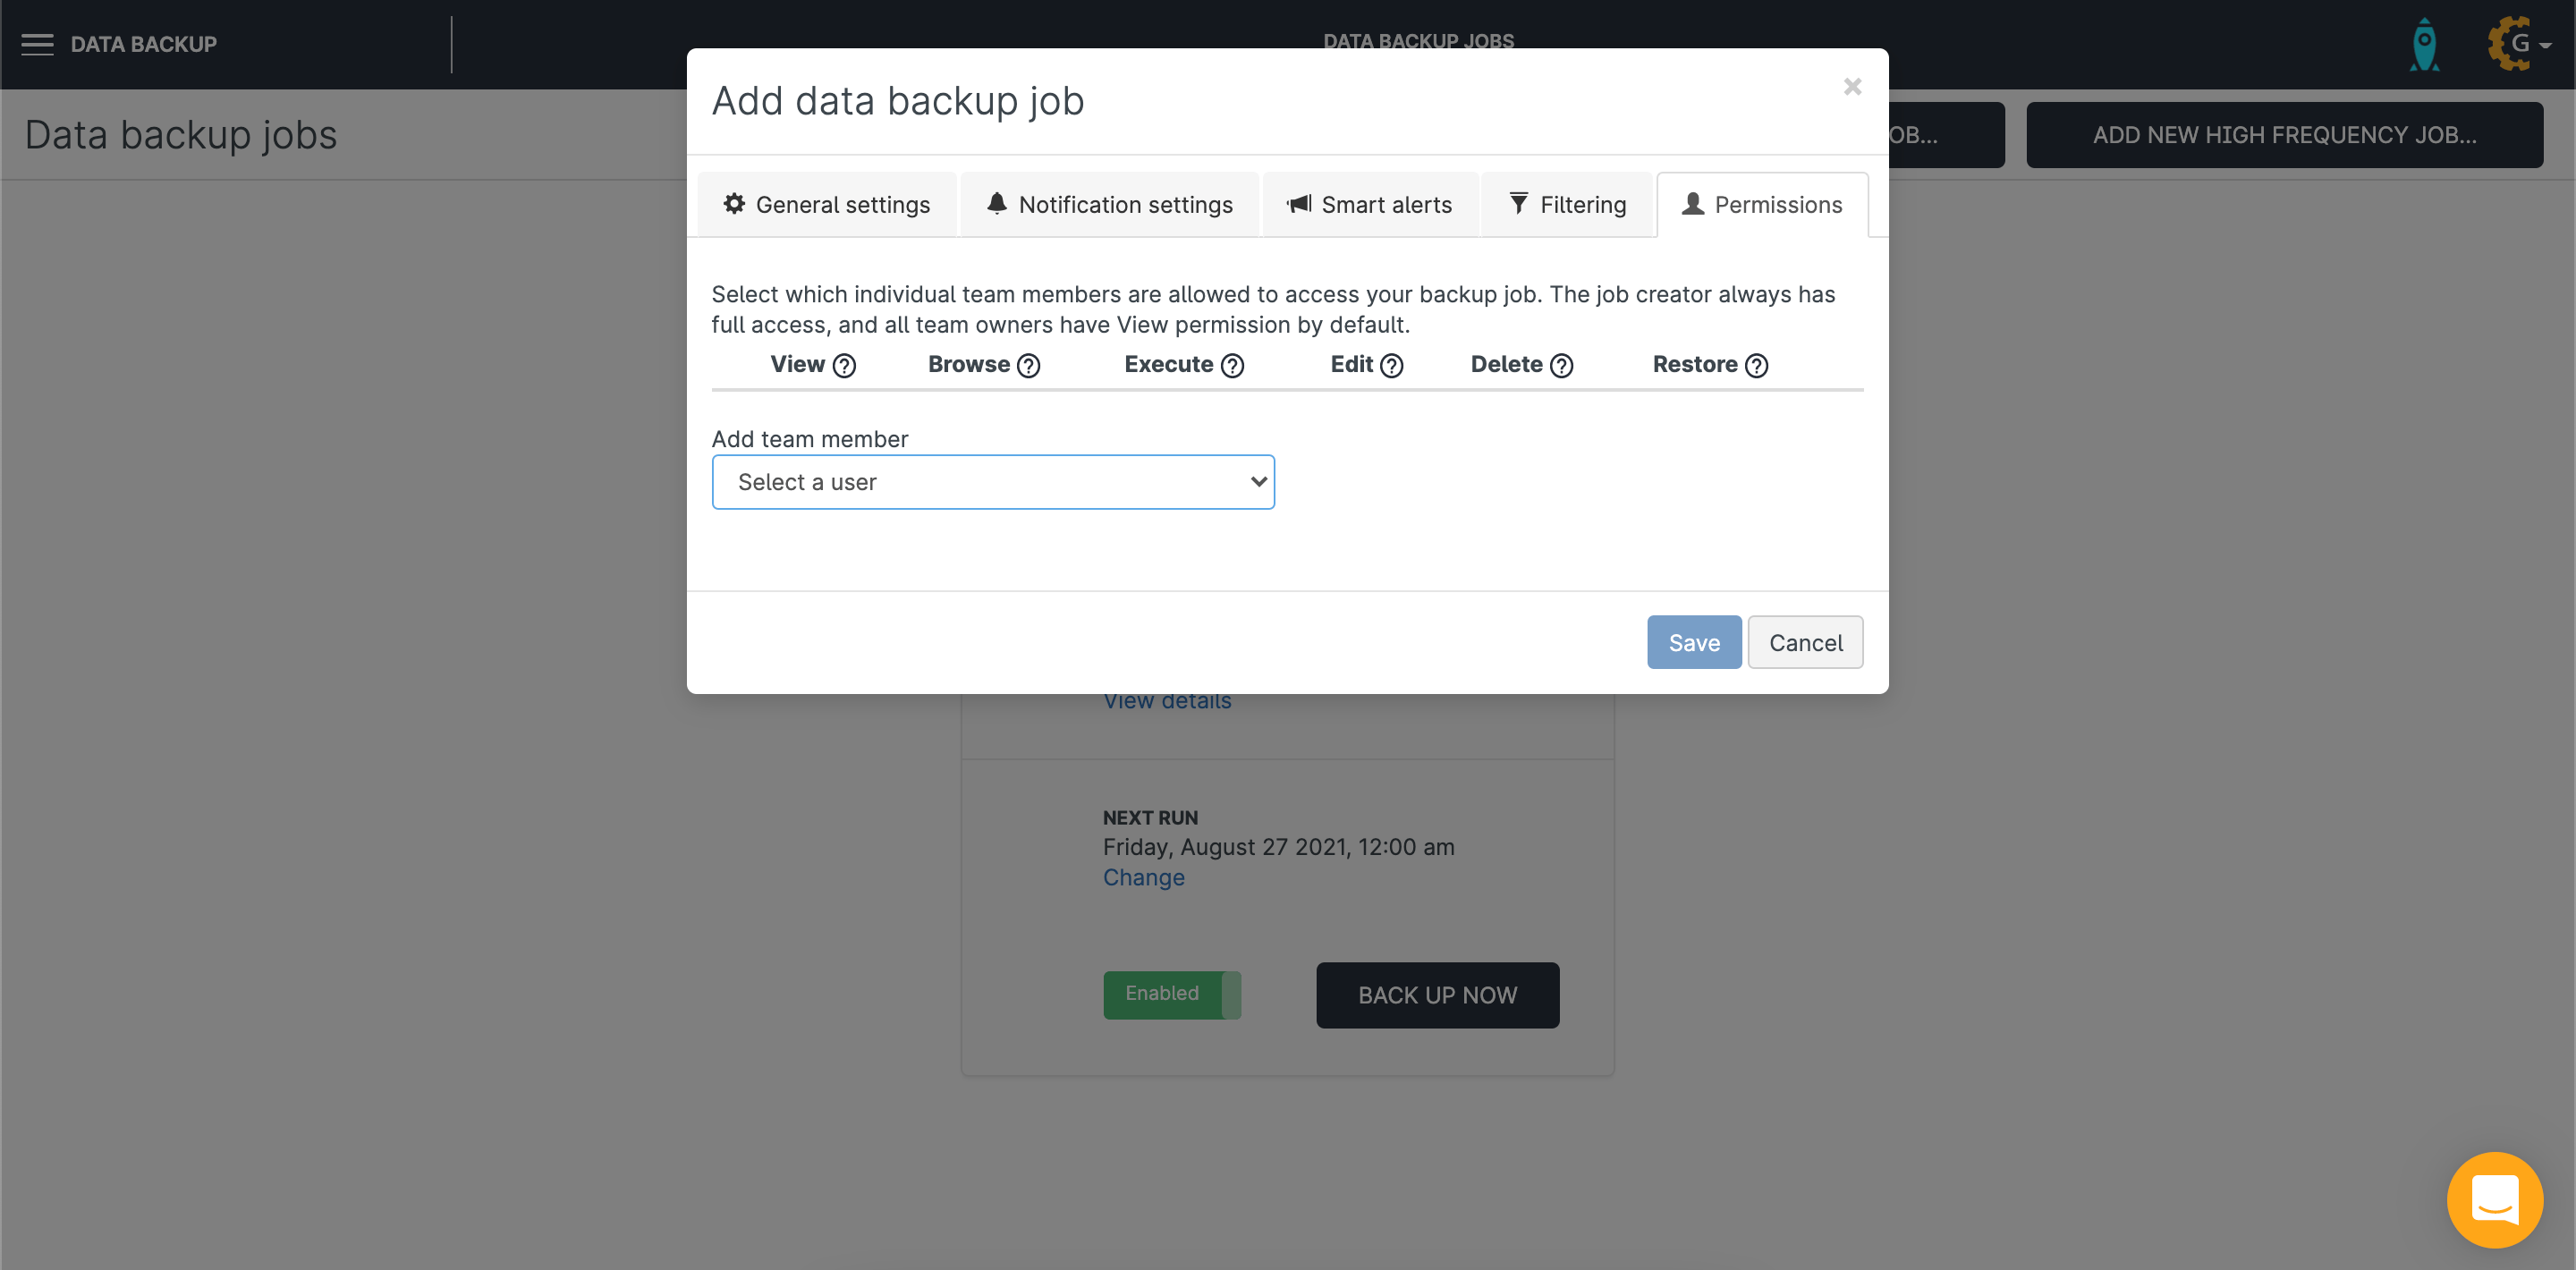
The owner of the backup job can reassign these permissions at any time. This means that backup data can be kept securely, with only minimal permissions granted by default. Then, as the need arises, access to backup data and the backup job’s functionality can be granted to anyone on the team with a Gearset license.
Teams using Gearset as a complete DevOps solution for both release management and backups are at a real advantage when it comes to data access. As the whole development team already have Gearset licenses, they can all be given access to the backup job when that is required. This setup avoids the scenario where just a small number of the team use a separate backup tool — and only they have access to the data and know how to use the tool. Integrating backups within your DevOps process brings many such advantages.
Prepare for every scenario
Data disasters come in all shapes and sizes: extended service disruption, accidental deletion, unauthorized access, malicious actions by disgruntled employees, and so on. Your incident response plan and disaster recovery plan should set out how your business would respond to any of these scenarios. But if you’re not in a position where you can catch an incident early, identify what’s going wrong, and then restore your org’s data and metadata quickly, then you’re unable to deliver on a meaningful disaster recovery plan.
Losing data when you don’t keep backups means losing control. You can’t identify exactly what’s been lost or misappropriated if you don’t have a backup solution that can tell you what’s missing. And you can’t be held liable for missing data when you have a copy safely backed up. Without guaranteed access to your data, you’re effectively powerless to respond.
Gearset’s backup solution automatically backs up data and metadata every day as a minimum, with on-demand and high-frequency backups also available. Your data and metadata are stored on the same AWS data centers trusted by Salesforce, but on Gearset’s separate servers. With enterprise-grade security and encryption in transit and at rest, your data is secure.
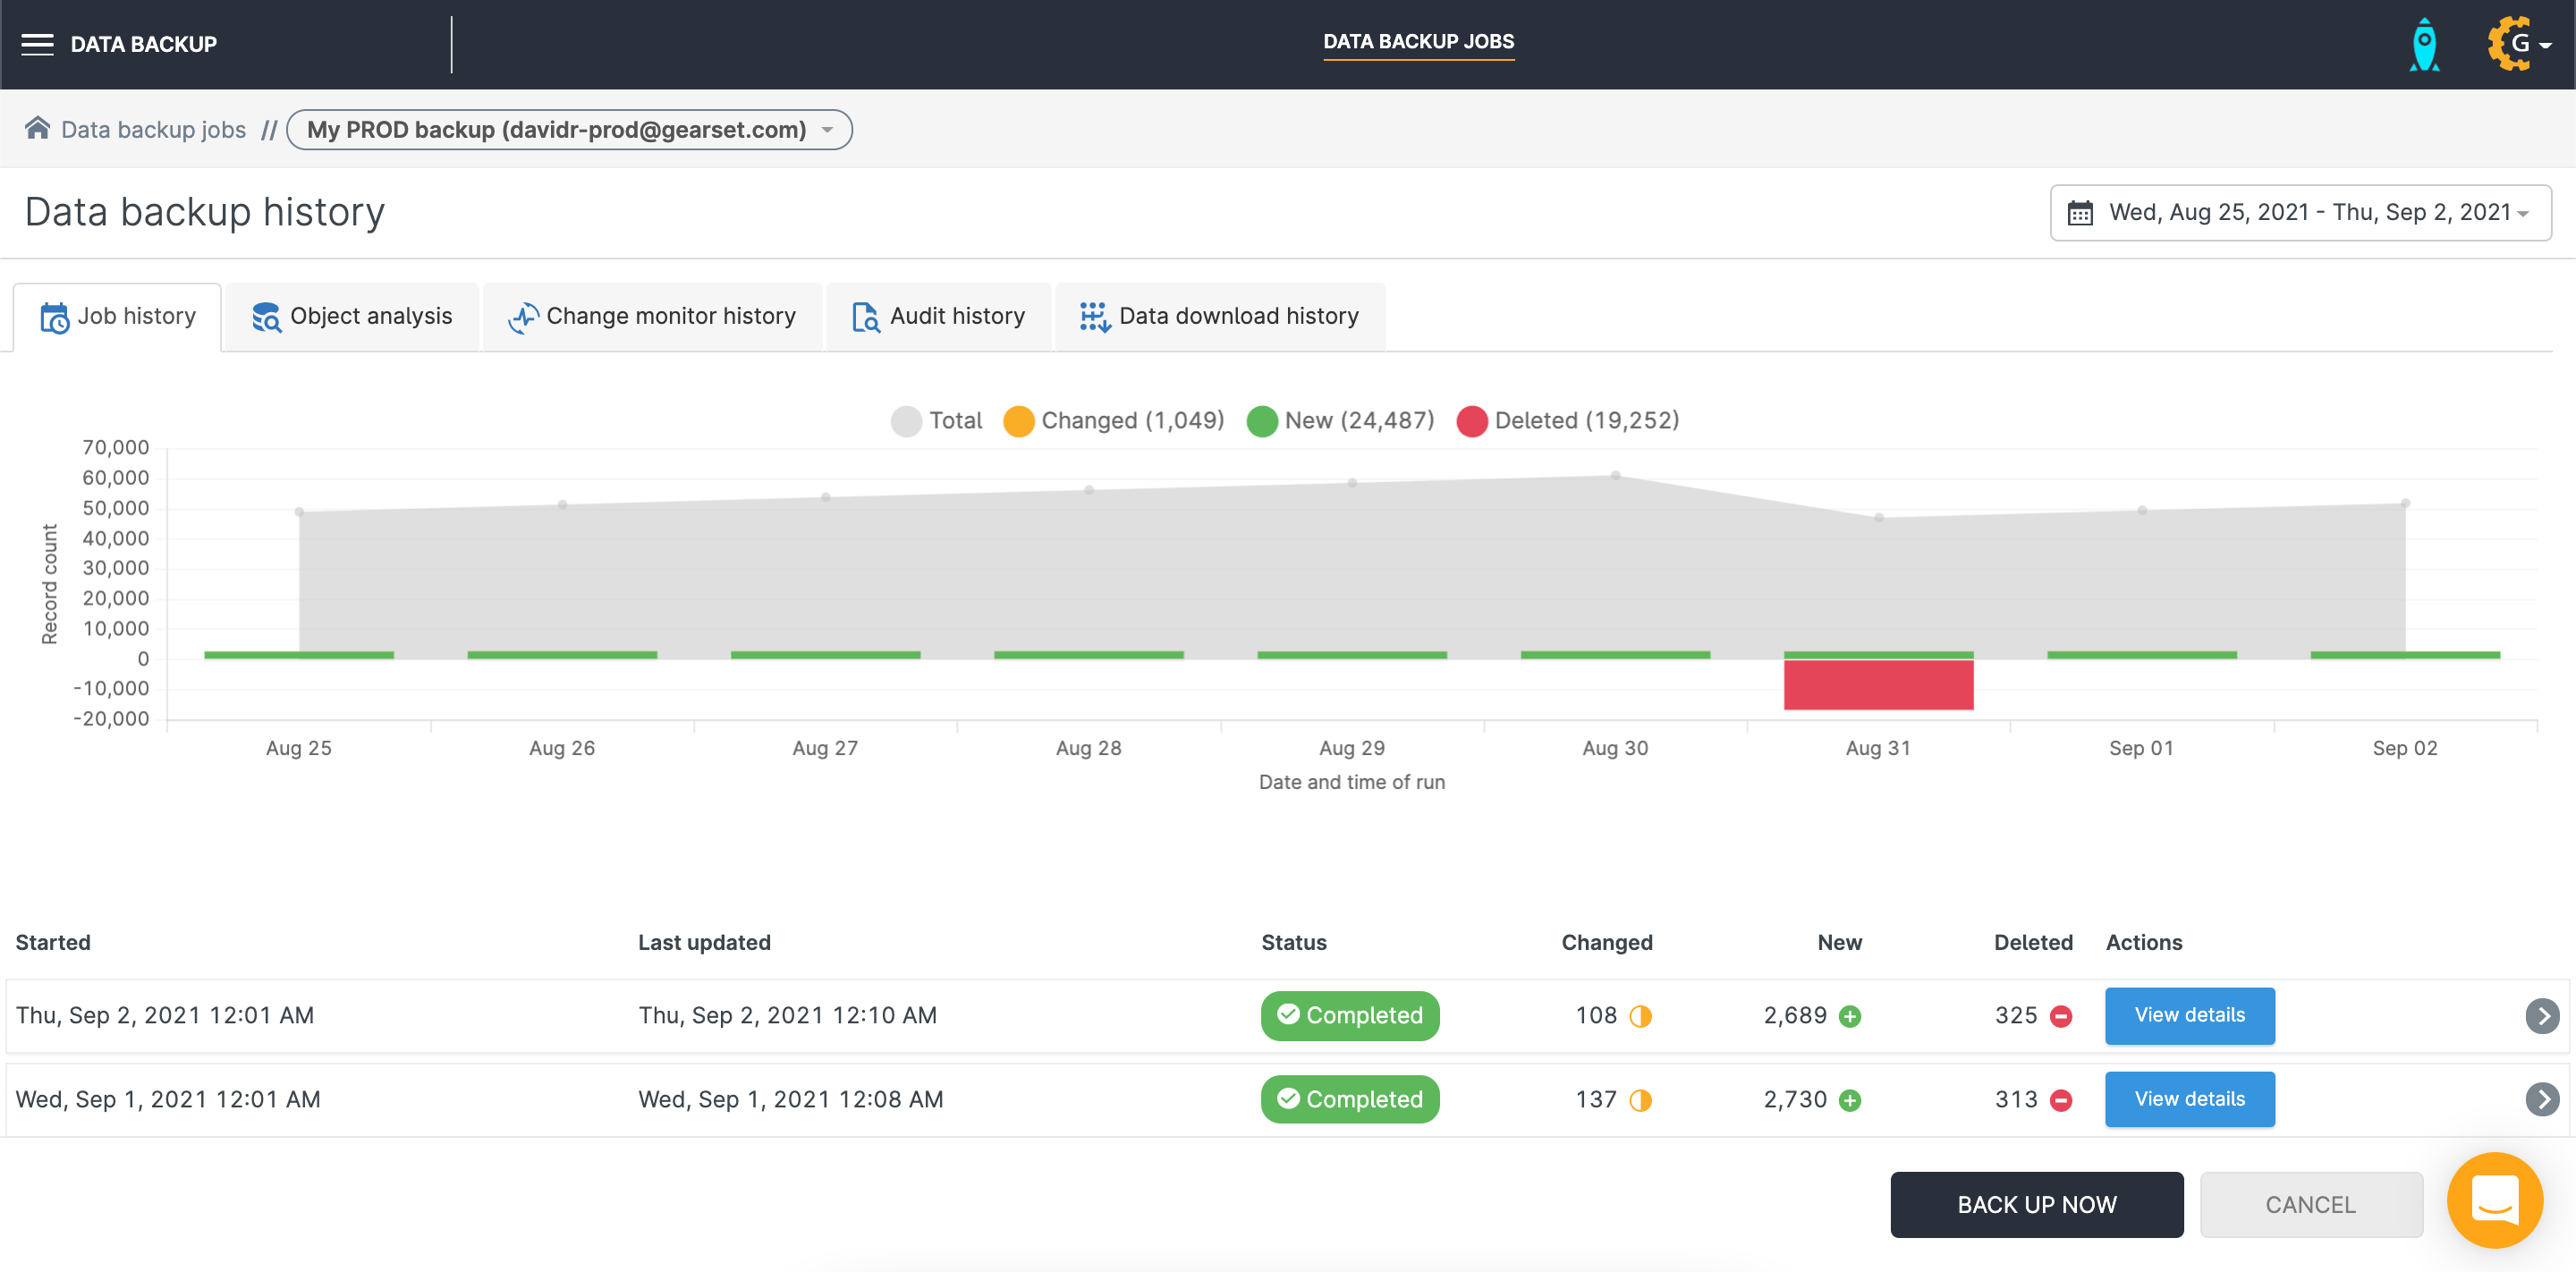
Smart alerts warn you of unusual changes to your datasets, and you can visualize the changing shape of your org’s data whenever you look at your backup job. When you need to restore data, metadata or both, you’ll be using the most powerful deployment tools for Salesforce, so you’ll manage to restore successfully in the fastest possible time.
Back up your org today!
Setting up a backup job with Gearset’s Salesforce backup solution is quick and easy — book a demo of Gearset today for guidance on getting started. Alternatively you can go ahead and begin your 30-day free trial, securely authorize your org using OAuth2, and set up your backup job in a few clicks. Guarantee data access at all times and put yourself in a position to recover from any disruption or data loss.
