

Testing new development is an integral part of any Salesforce release pipeline — deploying to production without thorough testing can put your org, and critical business data, at risk. But there can often be tension between wanting realistic data for testing and maintaining the security of your customer data.
In this article we’ll explore how data masking can resolve the security and compliance concerns associated with using production data in your testing environment. We’ll also look at how to mask data natively with Salesforce Data Mask, and how Gearset streamlines the masking process.
The importance of realistic test data
Salesforce teams can test their changes against different categories of data.
Creating basic, fictional data sets in your sandbox environments can be useful for testing simple cases, such as unit tests. But fictional data rarely captures the complex relationships that exist between records and the ways that users actually behave in the live environment. So using fictional data for all types of testing won’t accurately reflect how new changes will impact the data in your production environment.
To capture the complexity of your production data model, it can be tempting to seed sandboxes with data from your live environment. Having realistic data in your testing environment makes testing more reliable and helps developers find bugs before changes hit production. But using your production data for sandbox seeding isn’t always possible due to compliance and security concerns.
Salesforce teams need to comply with a growing number of frameworks: such as GDPR, CCPA, DPA, HIPAA, SOX and PCI DSS. These regulations set strict governance rules for personally identifiable information (PII) data — such as name, address, email, date of birth — which specify how data should be gathered, stored, accessed, processed and disposed of. As a result, compliance with these frameworks often doesn’t allow for sensitive production data to be deployed into testing environments. Plus, having sensitive data stored outside of your production org increases the risk of internal and external security breaches.
This is where data masking comes in.
Virtual Summit: Taking control of complex orgs
What is data masking?
Data masking hits the sweet spot between fake testing data and seeding sandboxes with production data — it lets you replace sensitive records with realistic imitation data while maintaining the complexity of the relationships between records.
Data masking is often confused with data encryption. Data encryption turns plaintext data into ciphertext using an encryption algorithm, making the data unreadable. An encryption key is needed to return the data to plaintext format. By contrast, data masking replaces sensitive data, hiding the original information with other realistic plaintext data. For testing purposes, sandbox data needs to be usable which makes data masking the right choice over encryption.
Masking data is key to getting realistic test data into upstream environments without the security and compliance risks of directly deploying production data. But how do you mask data in Salesforce? Let’s look at the native masking solution available as well as how Gearset can seed sandboxes with masked data in just a few clicks.
How to mask data with Salesforce
Salesforce offers a managed package, Data Mask, as a paid add-on that can be used to obfuscate or delete sensitive records.
Installation and setup of Salesforce Data Mask
Before you install Data Mask, make sure MyDomain and Lightning Experience are enabled in your orgs. Once you’ve installed the manage package, assign yourself the user profile System Administrator and the permissions Modify All Data and API Enabled. Finally, assign yourself the permission sets Data Mask User and Data Mask.
Data Mask will need to be installed individually in each sandbox that you already have — but be aware that it will automatically be enabled in all sandboxes created after installing Data Mask in production. To install Data Mask in your existing sandboxes, you need to take the URL from the Data Mask managed packaged link and manually change the subdomain from login.salesforce to test.salesforce.
This setup process is a bit convoluted, but upgrades and maintenance will happen automatically because Data Mask is a managed package.
How to use Salesforce Data Mask
You can configure a Data Mask job in production, then use it in any sandboxes you create or refresh afterwards. Or you can configure a job directly in an existing sandbox.
You’ll need to choose how to mask the data in your standard and custom objects. You can replace records with readable but randomly generated values, or you can replace them with records from one of these libraries: First Name, Last Name, Company Name, Email, Street, City, Country, Country (Abbr.), State, Postal Code, Phone Number, Social Security Number.
There’s also the option to specify any sensitive data that should be completely deleted. Case comments, emails and Chatter feeds, for example, are highlighted for you to consider masking or deleting.
Seeding masked records with their relevant relationships is the key to realistic test data, but Data Mask doesn’t always make that possible:
- It often skips over records with master-detail or lookup relationships, usually indicated by the error messages
UNABLE_TO_LOCK_ROWorunable to obtain exclusive access. You’ll need to reconfigure and run the masking job again to try and get these records deployed. - It doesn’t support checkbox, lookup and picklist field types, so records may come through incomplete or lacking fields.
- It can skip over records if there are multiple masking rules for that object. To overcome this, you need to configure an additional user that can bypass the duplicates and run masking from this profile.
Given the implications for security and compliance, it’s always a good idea to spot check records are being masked or removed as expected.
How to deploy masked data with Gearset
With Gearset, you can mask data in place (ideal after a refresh) or mask data as you deploy it from production to test environments as part of sandbox seeding. Here we’ll run through the process of masking during sandbox seeding.
Gearset makes sandbox seeding quick, easy, and reliable so you can mask and deploy data in just a few clicks.
For compliance and security purposes, data deployments aren’t enabled by default in your Gearset account. Before running your first sandbox seeding deployment, a team owner will need to go to My Account > Data management and select Enable data deployments to developer and sandbox orgs for my team. This is a one-time setup and won’t need to be repeated.
1. Select orgs for your data deployment
Once data deployments are enabled, you’re ready to get started. Navigate to Data Deployments > Configure and deploy to select the source and target orgs for your deployment.
For sandbox seeding, you’ll need production as your source and the relevant testing environment as your target.
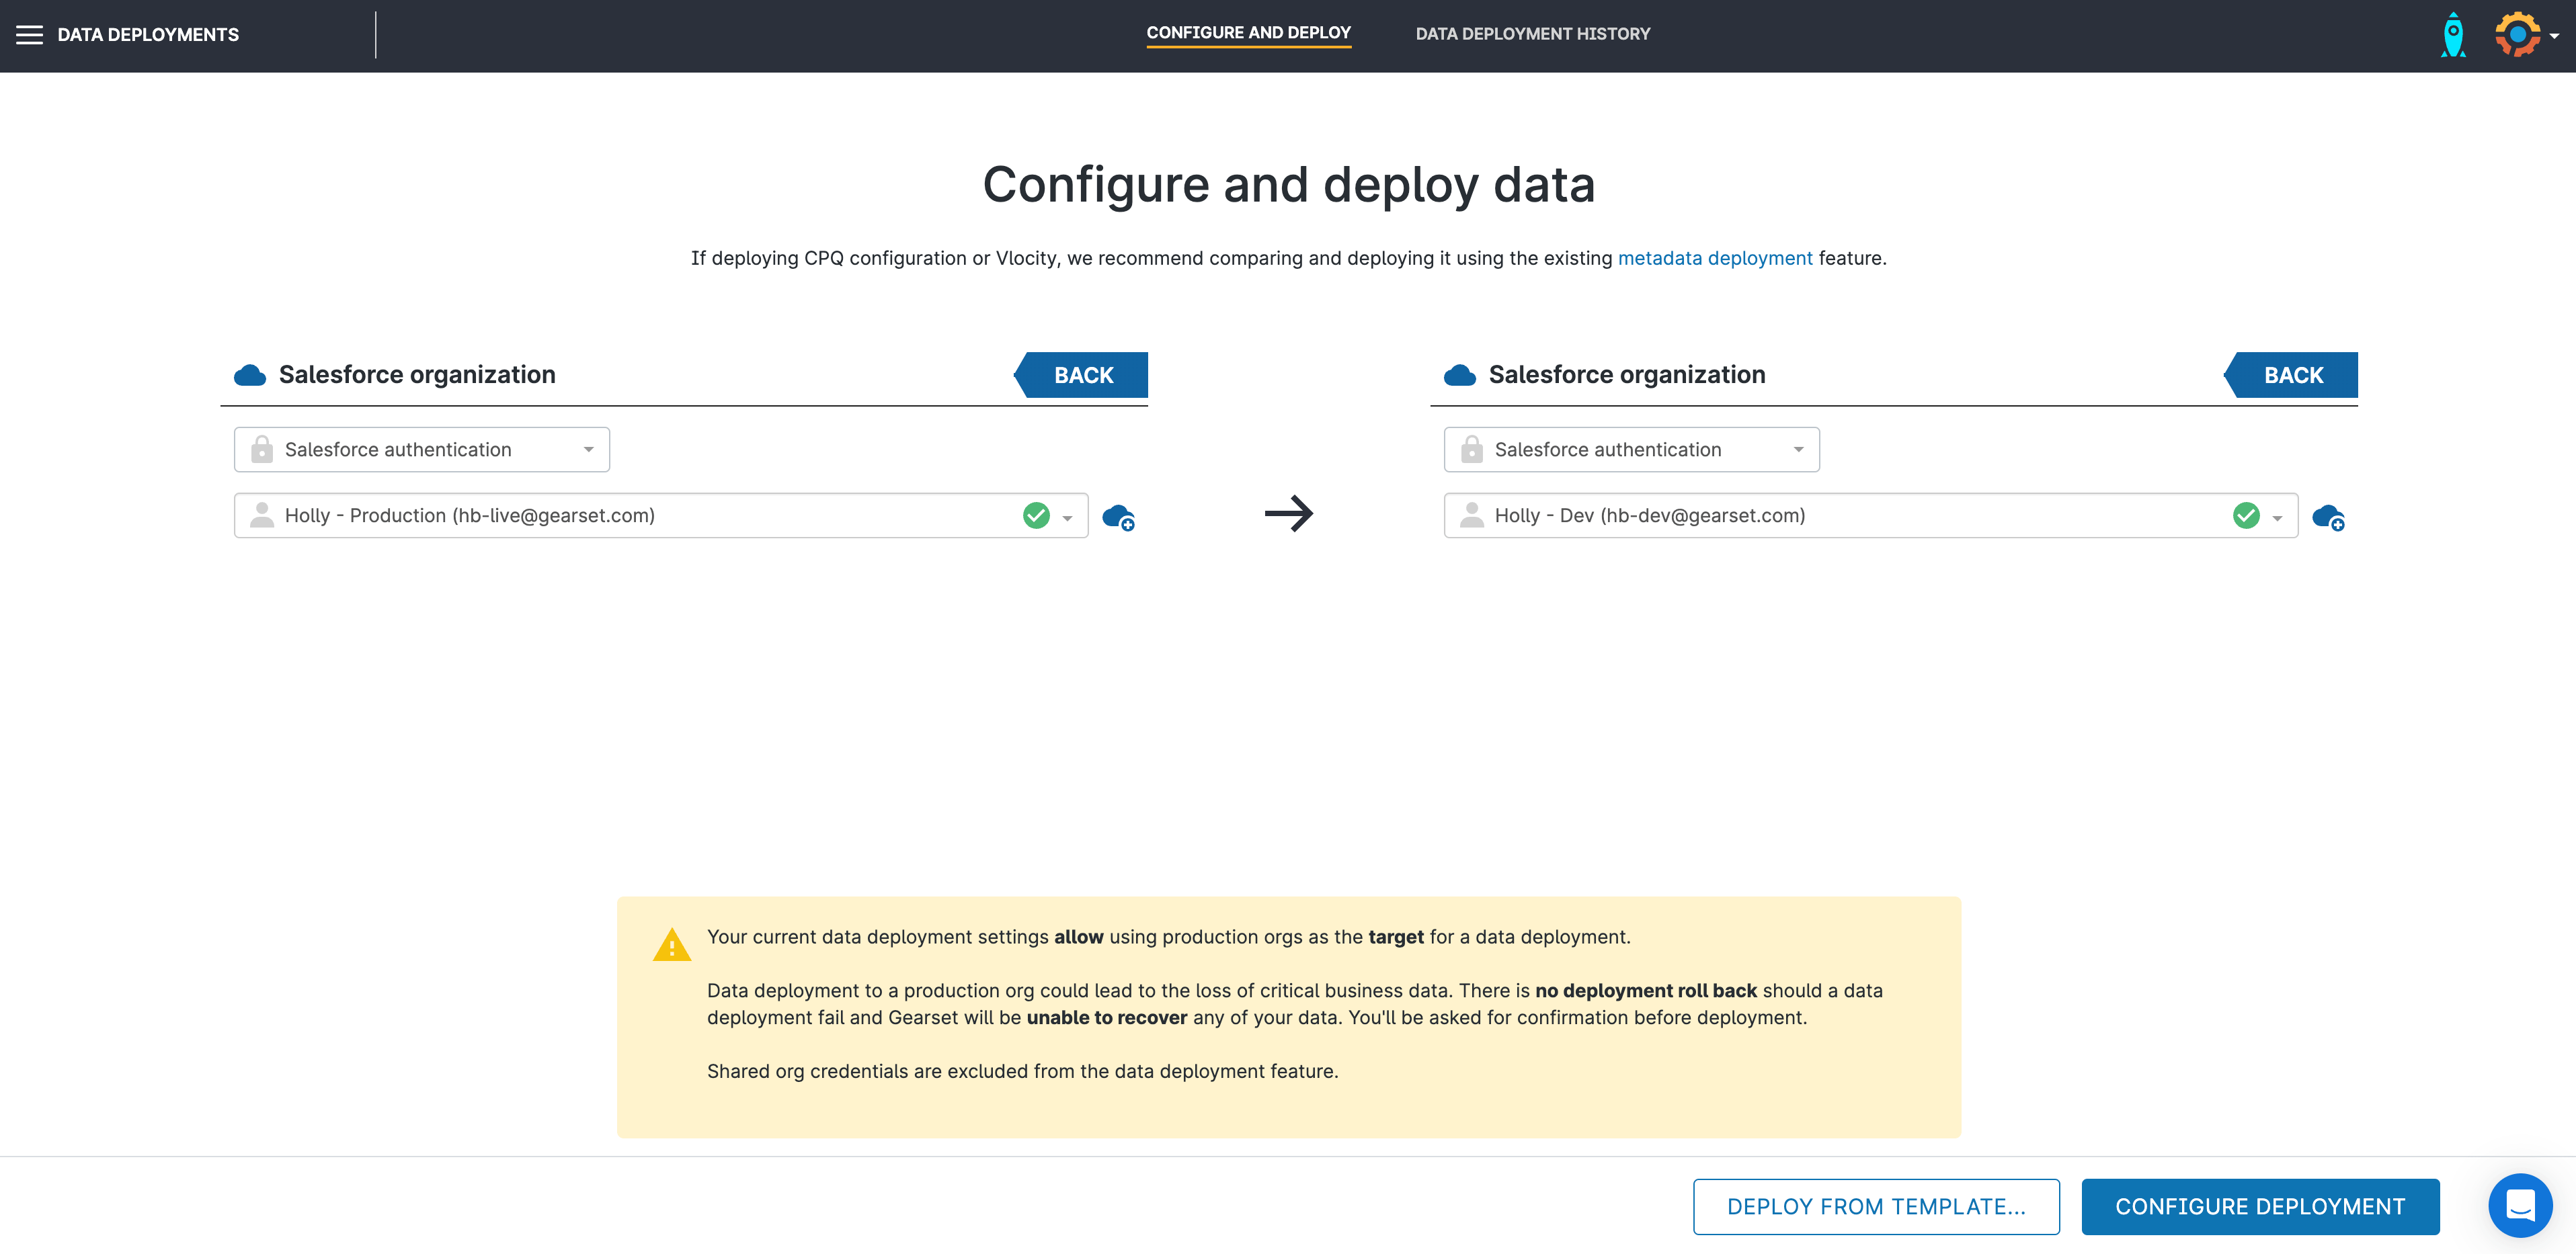
If you have data deployment templates saved, you can select them here or opt to configure your data deployment from scratch.
2. Configure your object settings
After pressing Configure deployment, Gearset will list all objects that are available in both orgs.
Here you can select all the objects you want to deploy to and specify the number of records to deploy for each object. You can also configure complex filtering — this allows you to focus on a subset of records to deploy, if you’re looking to populate your sandbox with a specific dataset.
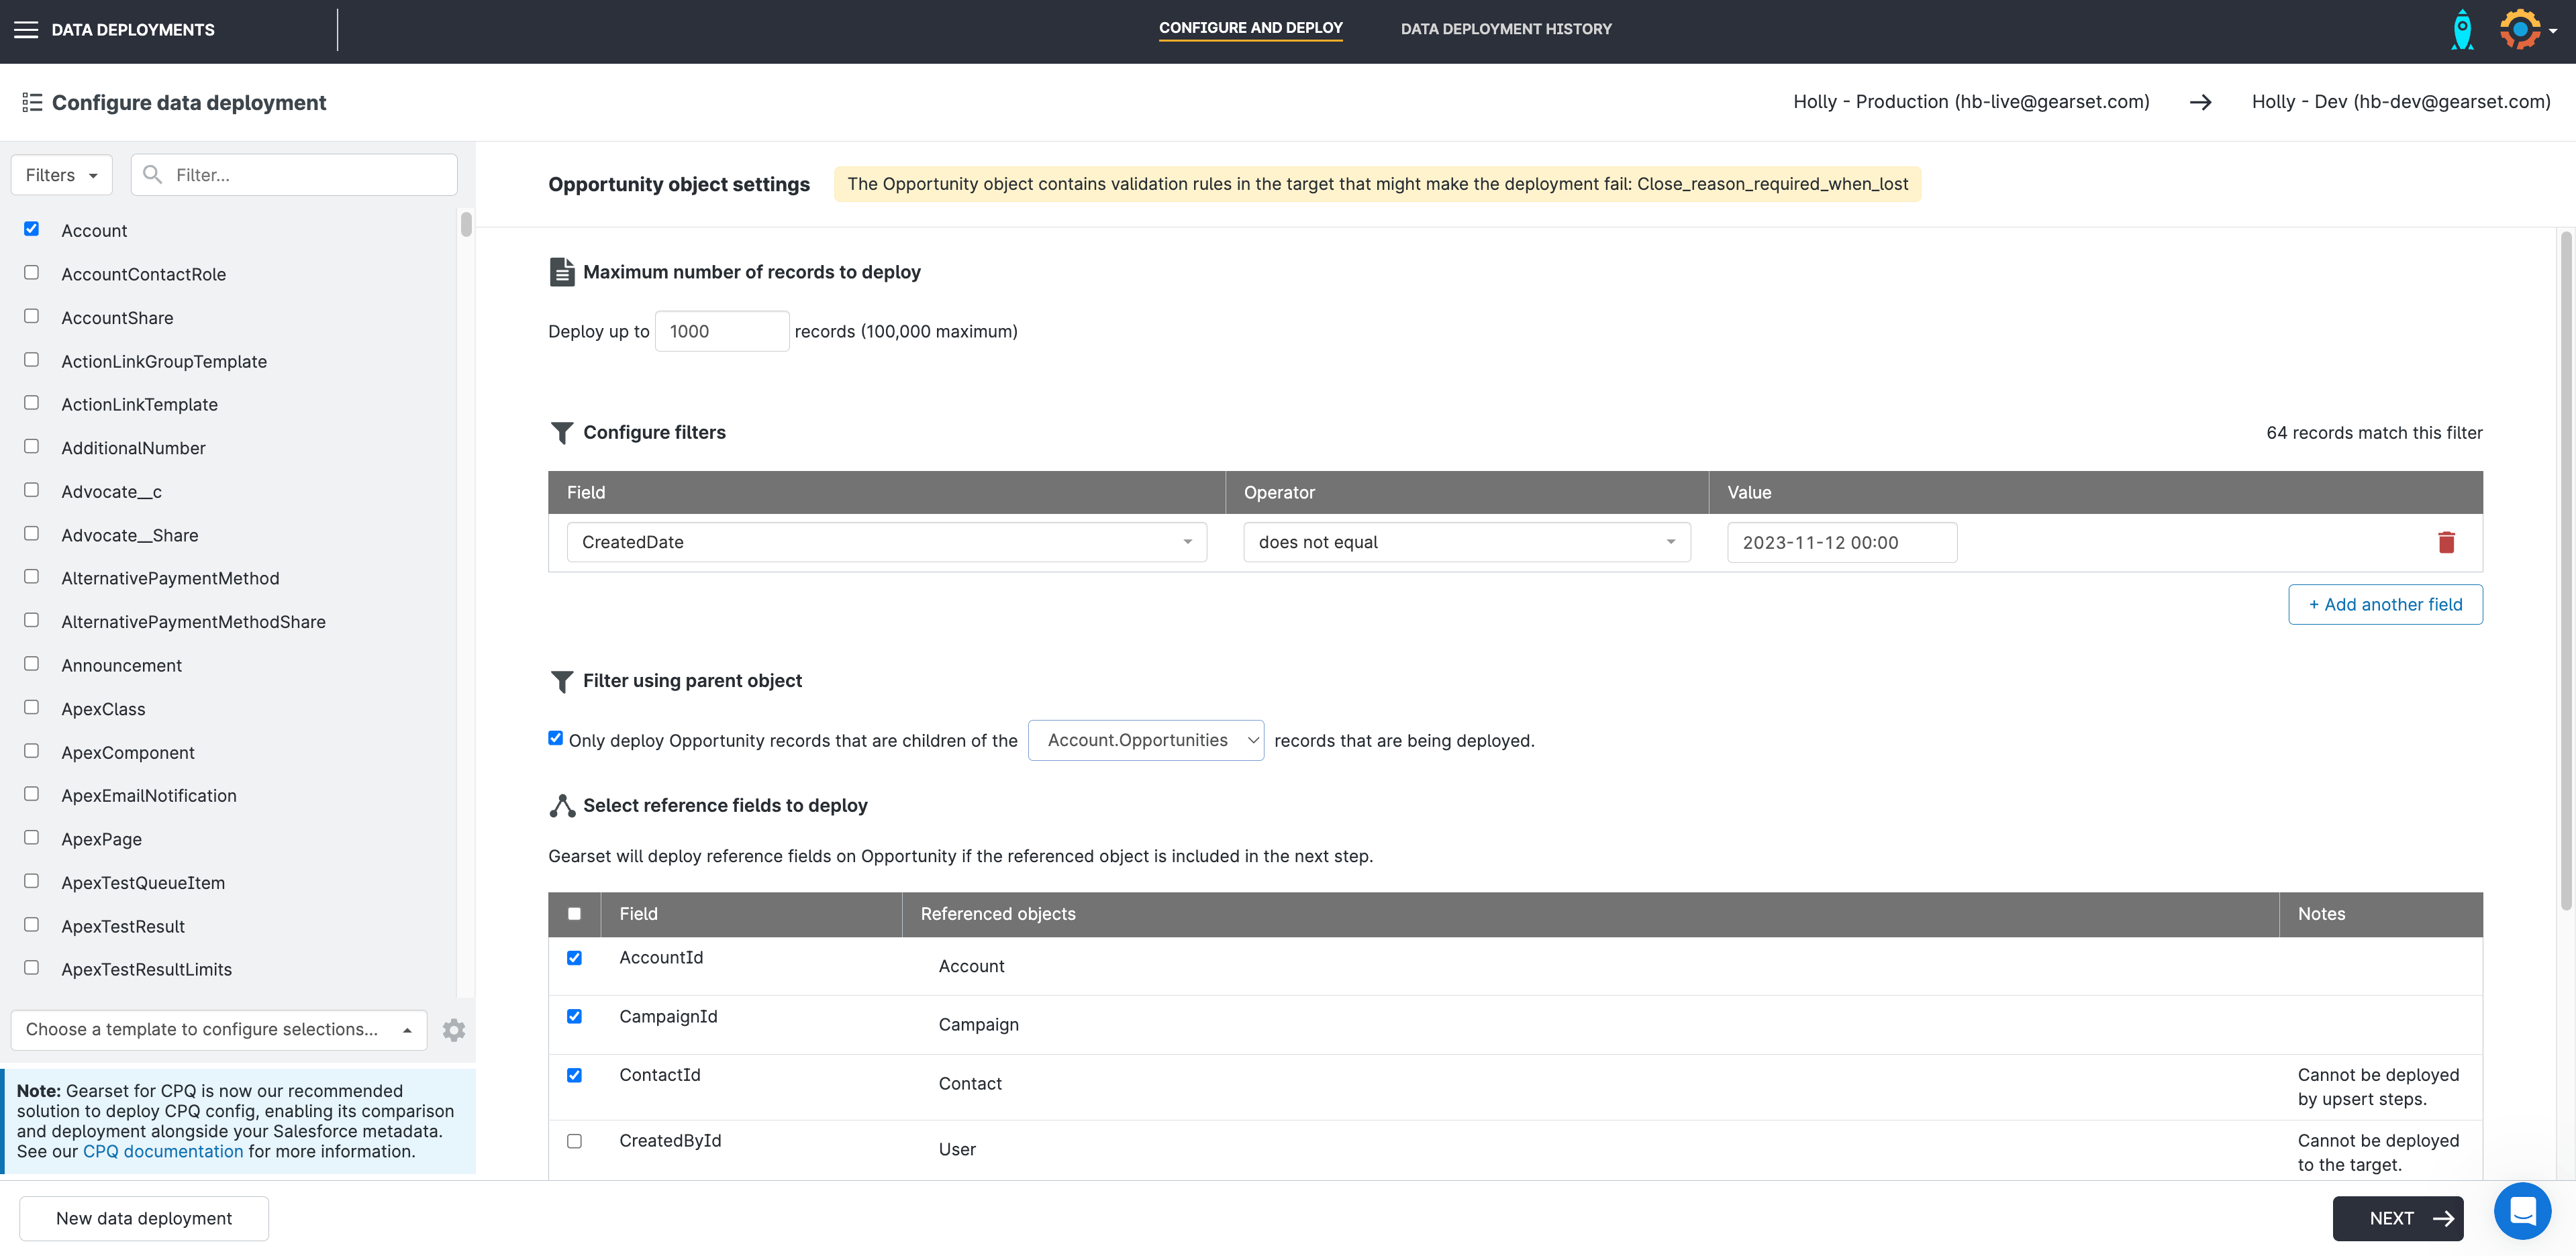
Select which reference fields you want to include and Gearset will maintain the relationships between the records during deployment.
If you can’t find the object you’re looking for in the list, make sure it’s deployed to both the source and target environment — Gearset can’t deploy data for objects if the metadata isn’t present in the source or target.
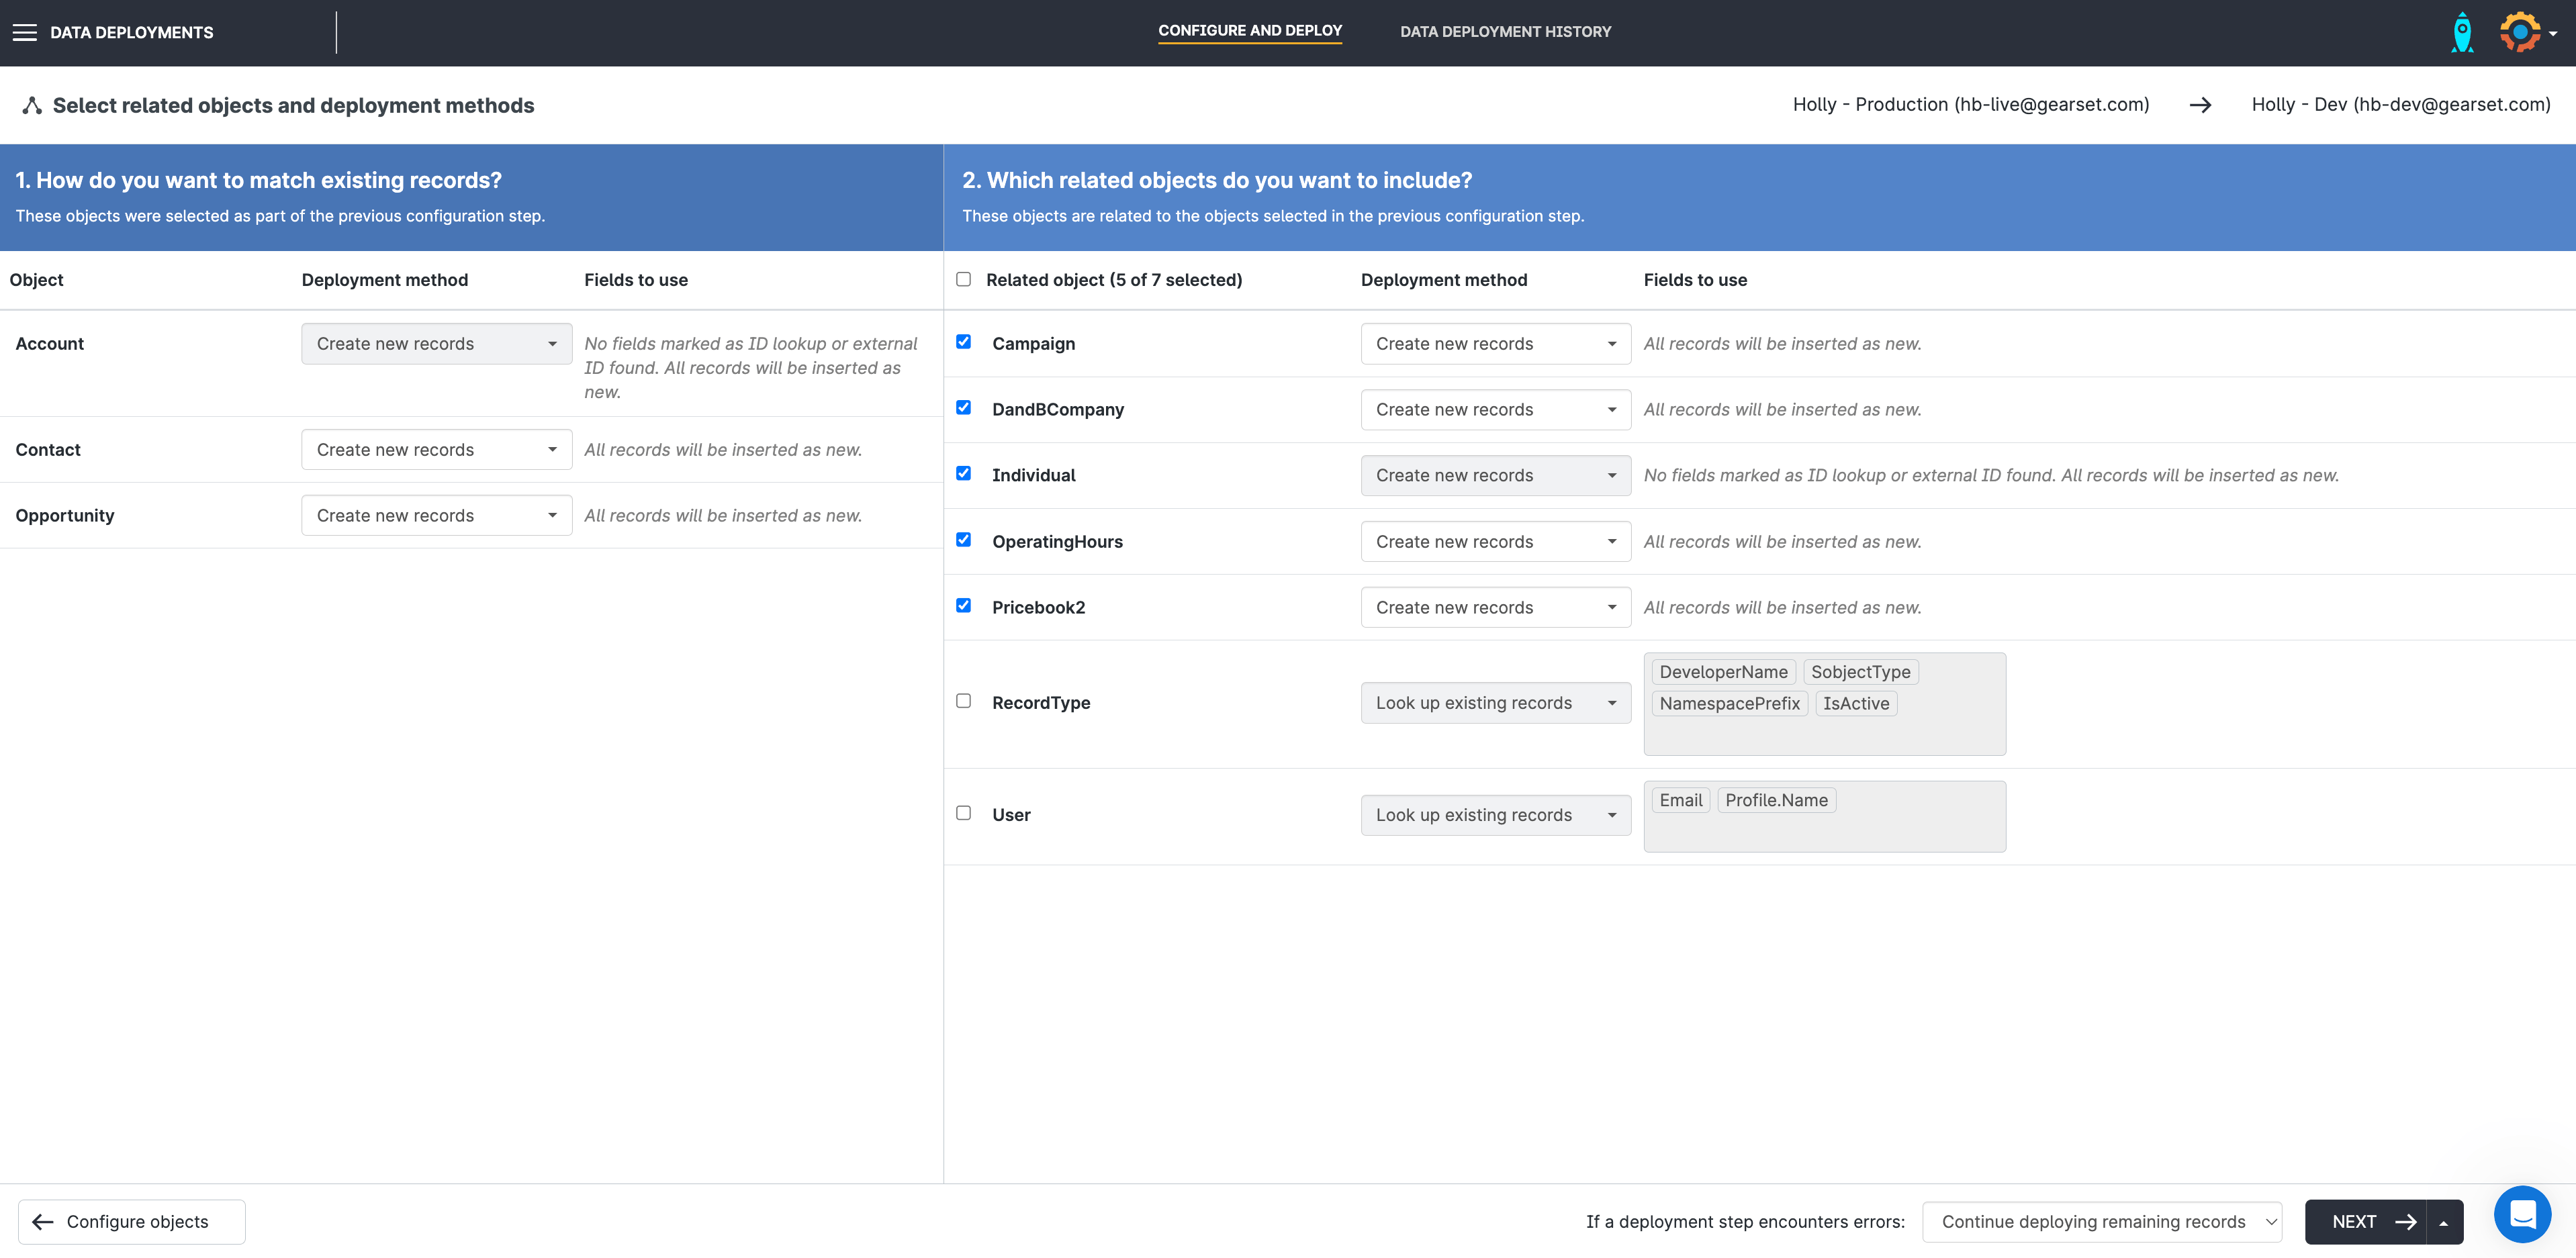
3. Specify how records will be added
Next, you’ll need to select how you’d like the data for each object to be deployed. The options for deployment are:
- Create new records
- Upsert records
- Update existing records
When seeding sandboxes with masked data, Create new records is the most suitable option as Gearset won’t be able to match and update records if the reference field has been obfuscated.
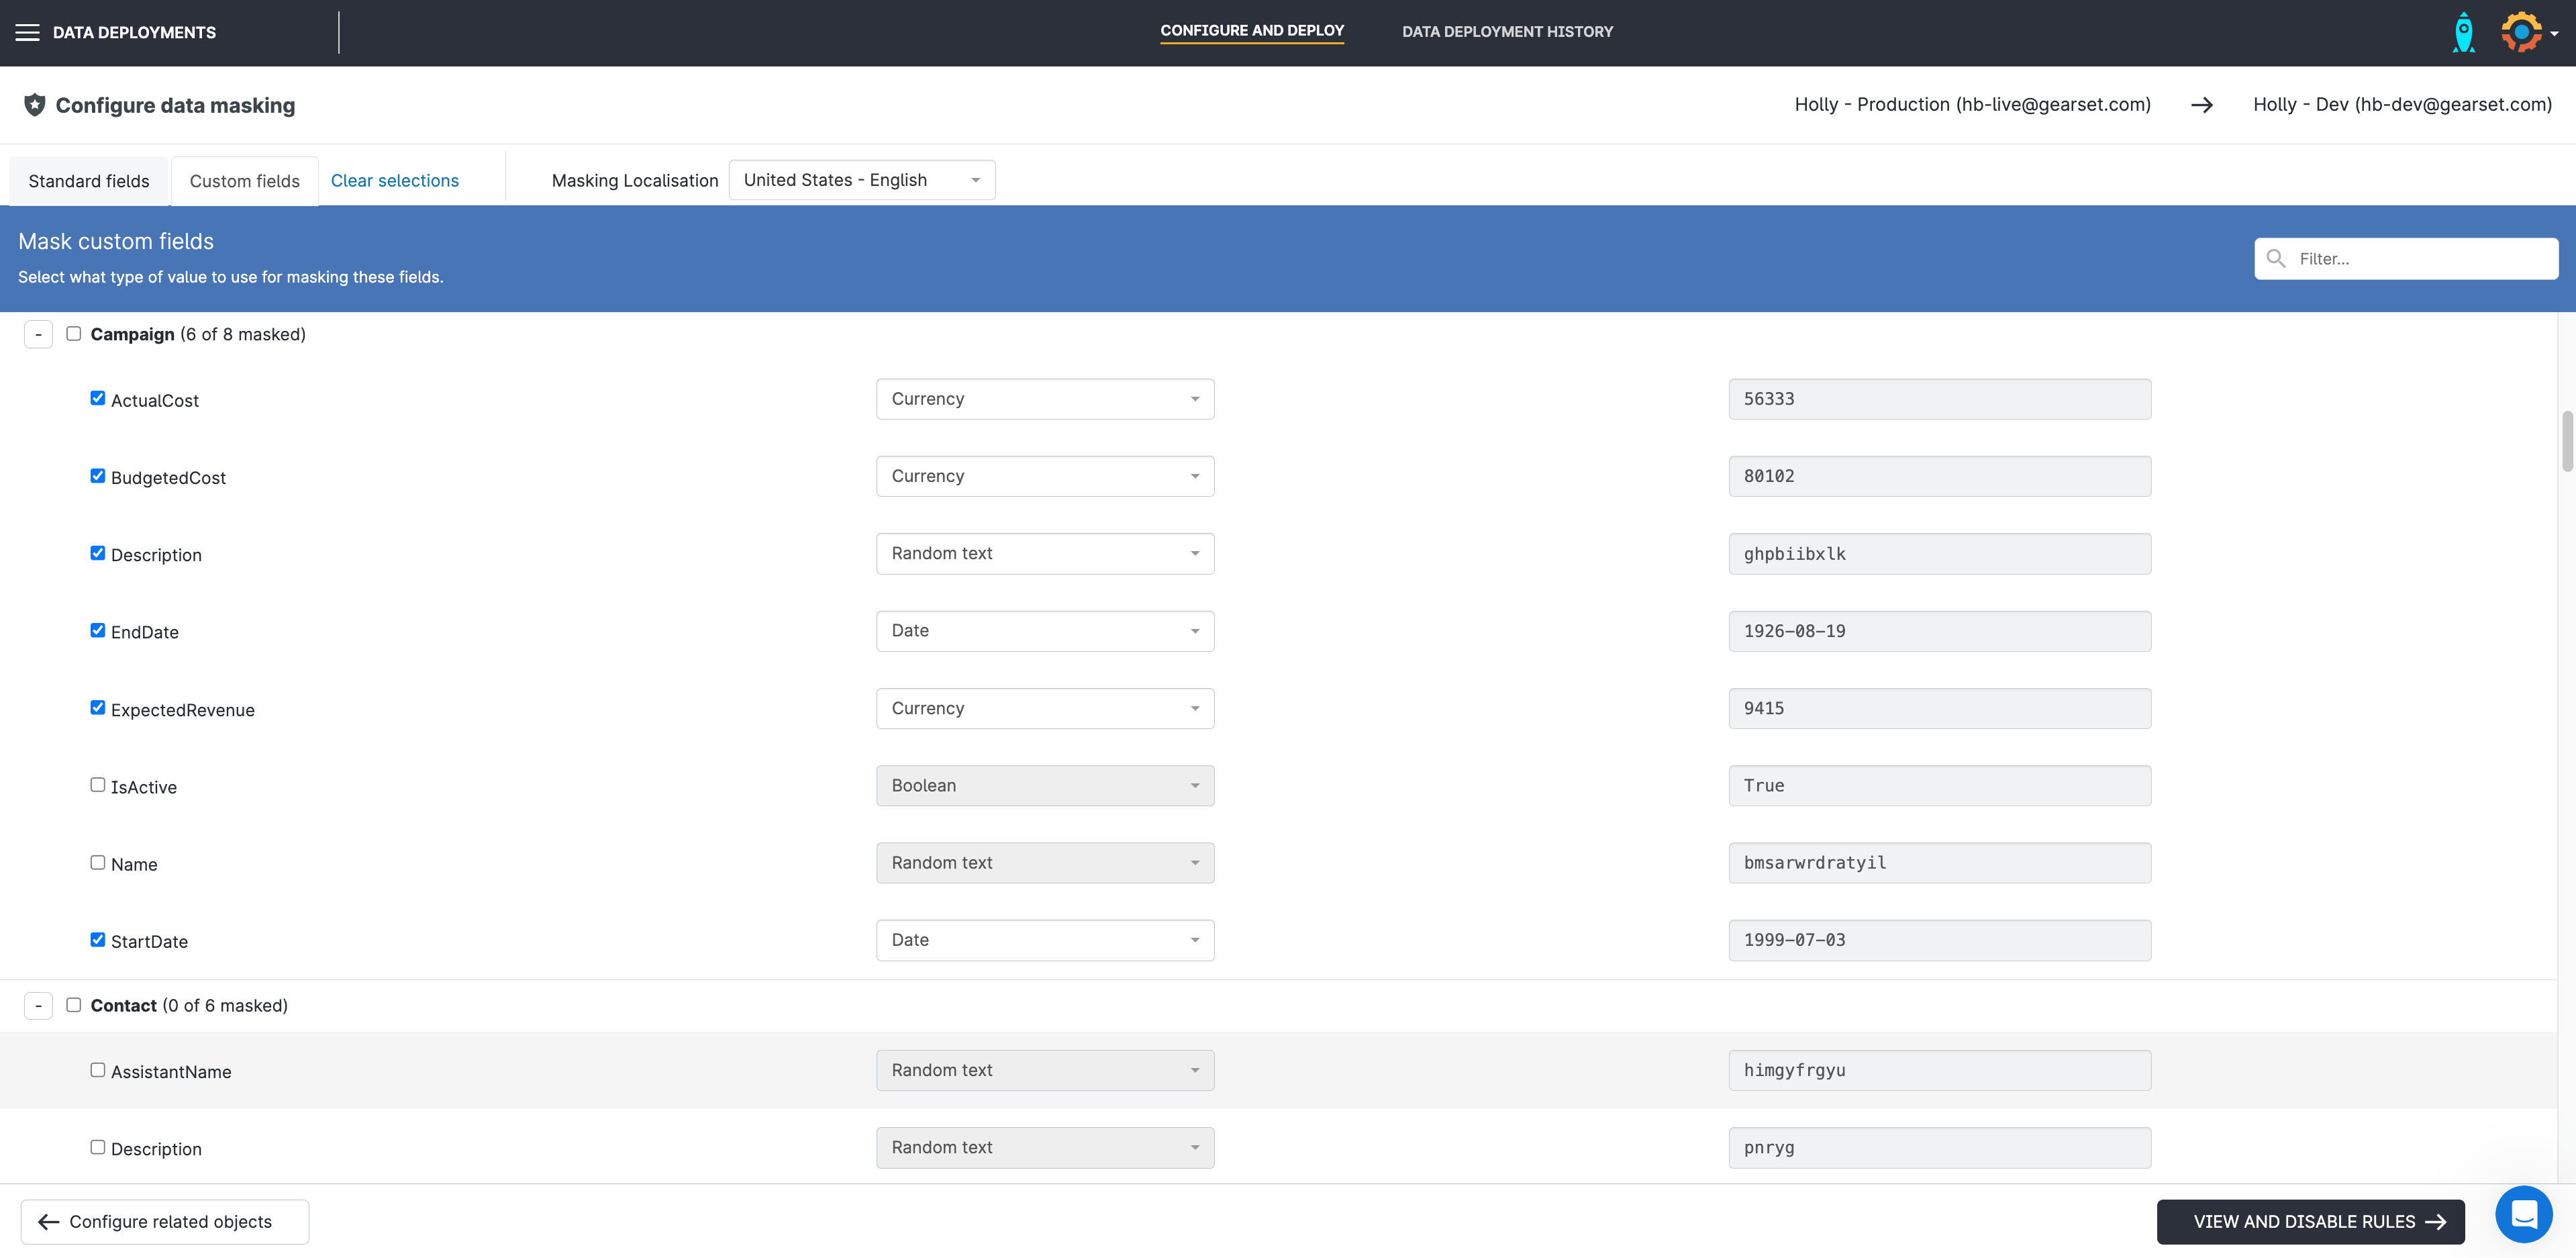
4. Configure your data masking settings
Next you can set your data masking configuration, and select the fields for Gearset to mask. You can choose to mask objects entirely or just specific fields from the object. For standard fields, Gearset provides localized masking options to make sure the data is as accurate and representative of your production data as possible.
For example, you can choose to mask phone numbers in US format or UK format — Gearset will then automatically use the correct country code and number of digits.
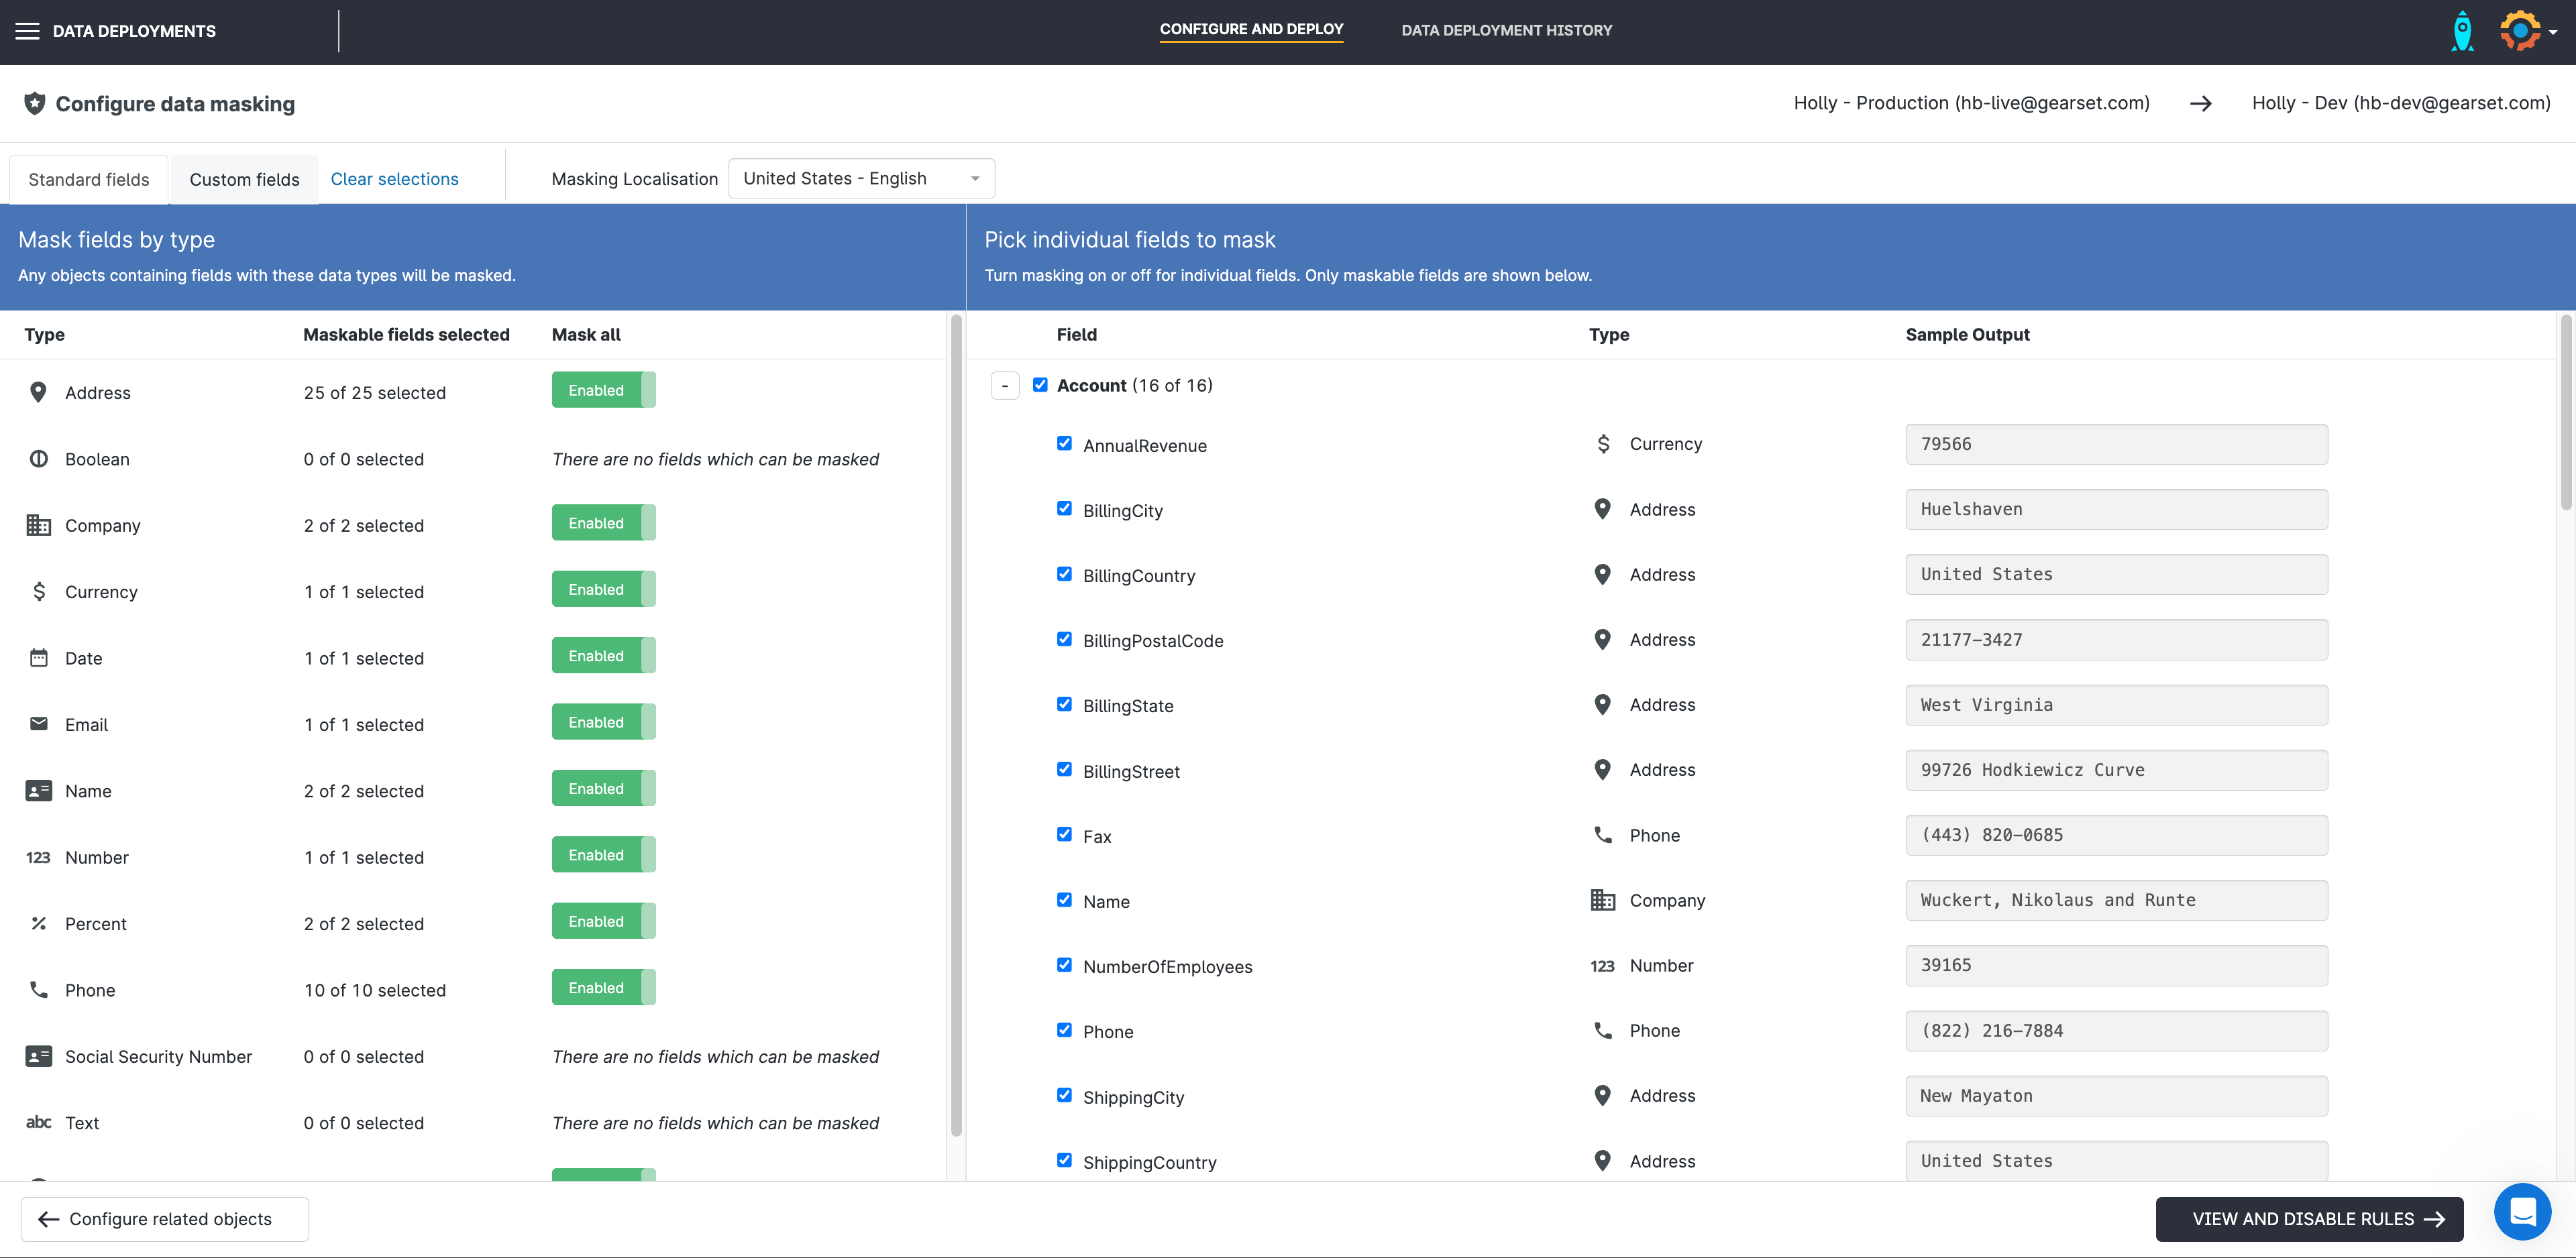
To mask custom fields, you can select what type of data you want Gearset to input into those fields rather than random characters that might not reflect the data the field usually houses.
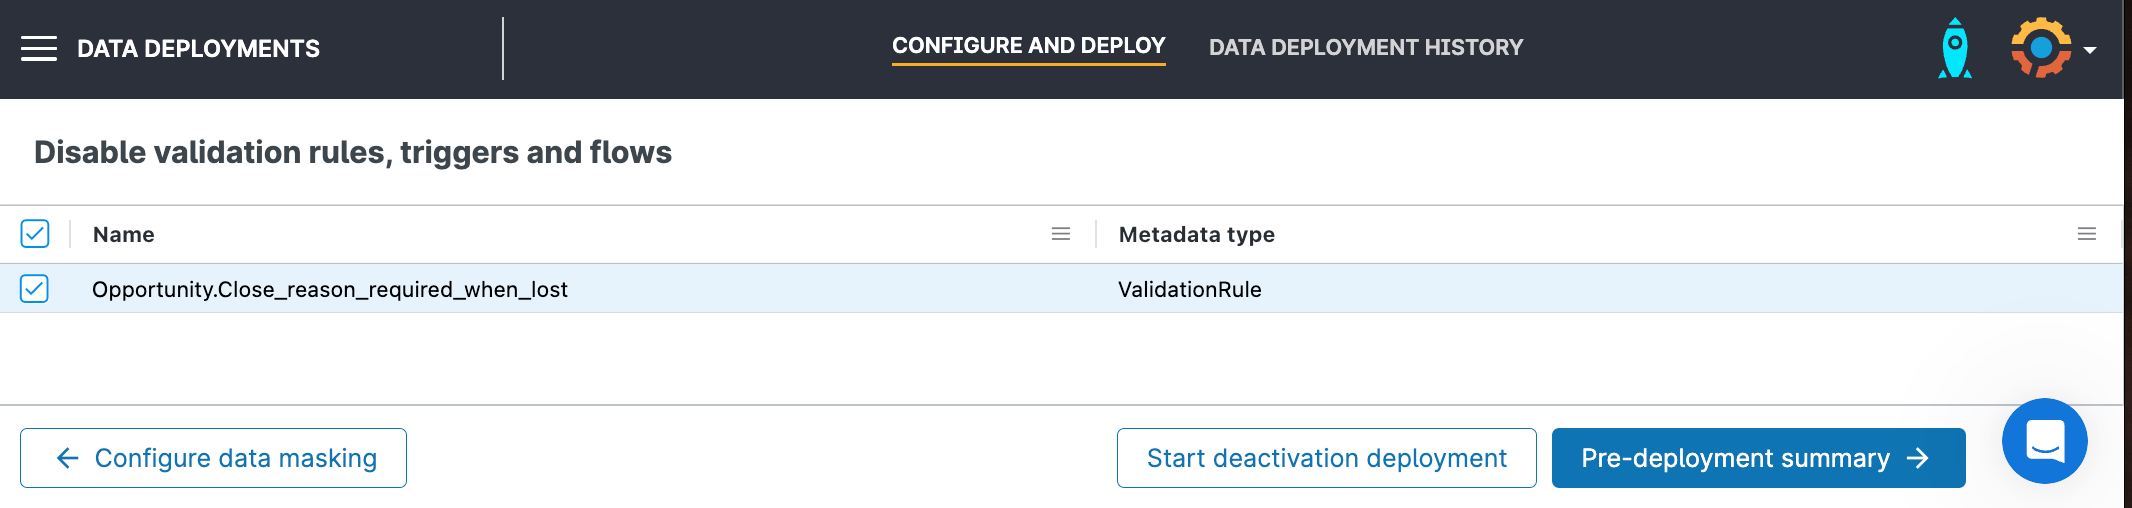
5. Disable rules, triggers and flows
Gearset will automatically flag any active rules, triggers or flows in your target org. You can disable these to avoid accidentally triggering them with the deployment. They can be reactivated in just a few clicks after the deployment.
6. Review your deployment summary
Gearset will list every step taken in the deployment for you to review before the deployment goes ahead. When you’re happy to continue, press Deploy now.
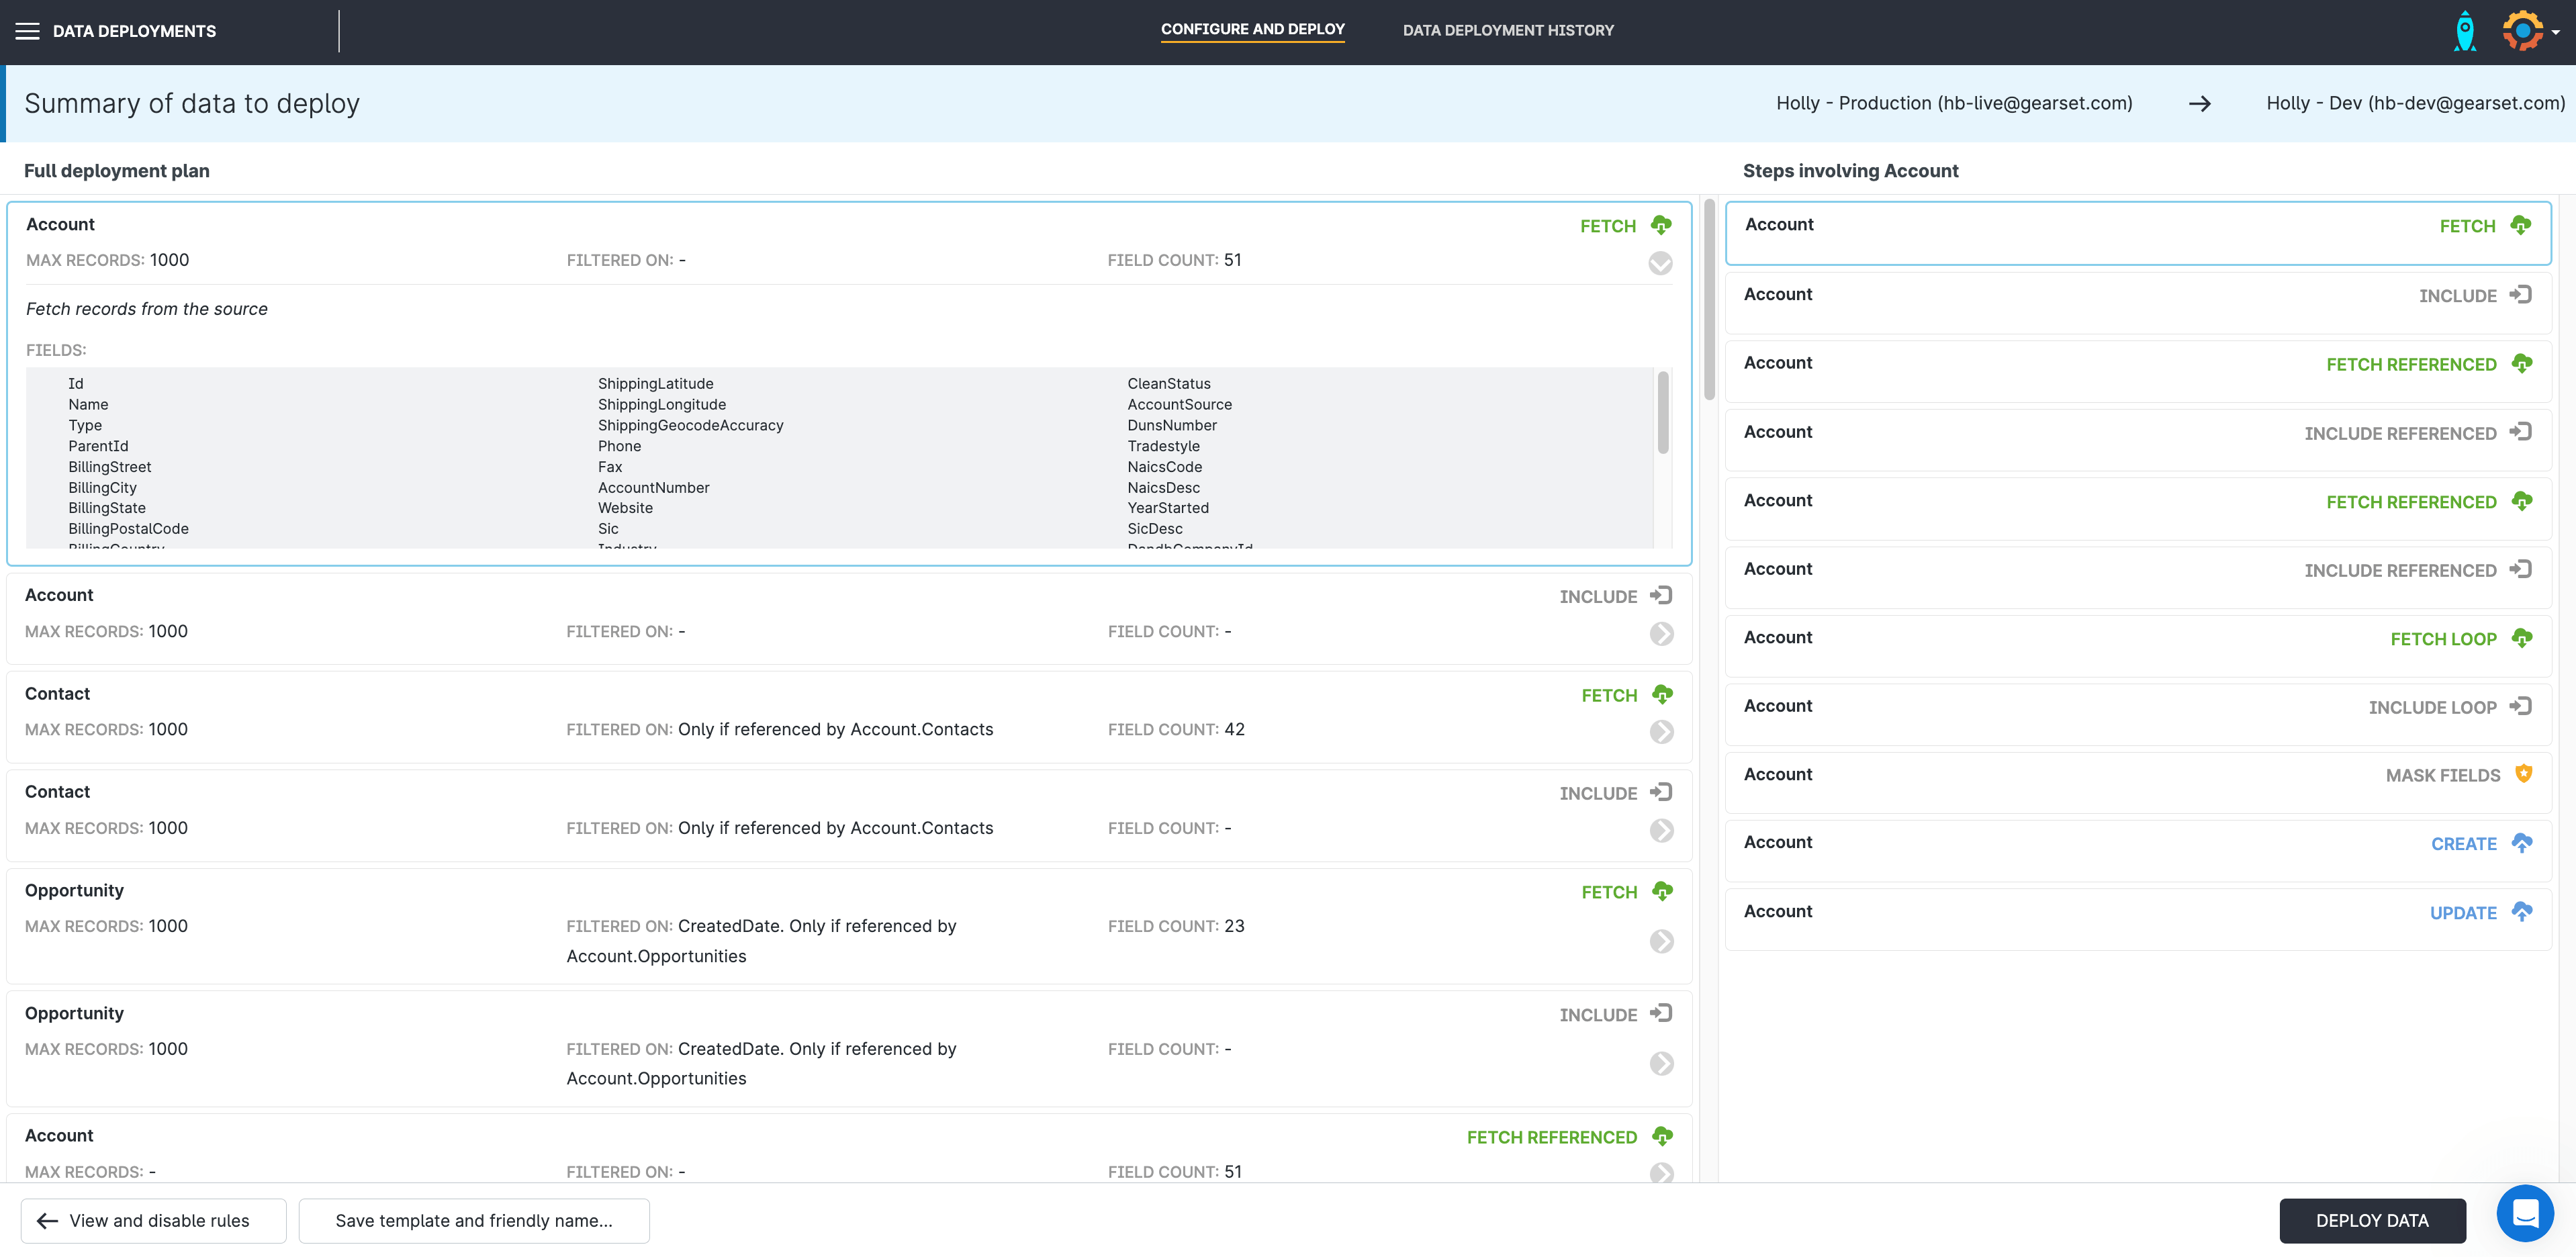
Once the deployment has run, your testing environment will be ready to go with masked test data.
Quality testing without the risk
Your sandbox seeding process should never lead to compromising on the quality of testing to protect sensitive data. The more accurate the data, the more reliable the testing will be and the less likely you are to hit issues on release day. To try out Gearset’s data masking for yourself, start a free 30-day trial with nothing to install in your orgs.
