
Salesforce offers a wide range of options for automating business processes. In this post we take a close look at schedule-triggered flows: what they are, when to use them, and how to build them.
What is a schedule-triggered flow?
Schedule-triggered flows are a type of Autolaunched Flow that run at specific times and frequencies. They’re a huge benefit for teams looking to automate repeatable tasks they carry out on a set cadence.
Schedule-triggered flows vs. scheduled batch Apex
Schedule-triggered flows are pretty much equivalent to scheduled batch Apex, except they’re built with clicks not code. There may be use cases where Apex batch jobs are still needed because schedule-triggered flows have lower limits:
- A schedule-triggered flow can query up to 50,000 records. Each record retrieved represents an interview, and you can’t exceed 250,000 interviews a day with schedule-triggered flows (or 200 x your number of user licenses if that’s greater). By contrast, batch Apex can query up to 50 million records.
- The maximum batch size for schedule-triggered flows is 200; for batch Apex it’s 2,000.
Schedule-triggered flow vs. scheduled path
There are a couple of different scheduled flows available in Flow Builder, each suitable for different use cases. Schedule-triggered flows run at the time and cadence you set. Scheduled paths are triggered by records — but you choose when the automation runs, relative to the time the record changes. For example, a schedule-triggered flow might run at 2am every day. A scheduled path might run 24 hours after a case is created, or two weeks before a renewal date.
What to consider when setting up a schedule-triggered flow
Salesforce offers a handy list of schedule-triggered flow considerations. Most are fairly intuitive, but there are a few important gotchas to watch out for:
- If your flow stops working, check whether it’s been deleted on the Scheduled Jobs page in Setup. If it has been removed as a scheduled job, deactivate and reactivate the schedule-triggered flow to get it back in action.
- A schedule-triggered flow can’t make callouts unless it includes a Wait element first.
- A schedule-triggered flow will fail if it invokes Apex and you’ve enabled the update
Require user access to Apex Classes invoked by flow. - A schedule-triggered flow will also fail if you have an Update Records element that tries to write values to read-only fields. You need to switch on the process automation setting
Filter inaccessible fields from flow requests. - If your flow has a trigger, you’ll need the
View All Datapermission.
When errors happen, having an effective strategy for Flow error monitoring and troubleshooting is essential to minimize disruption to your automated processes.
Virtual Summit: Taking control of complex orgs
How to build a schedule-triggered flow in Salesforce
Let’s build a schedule-triggered flow and explore options for deploying it between two environments. The example we’re using comes from Trailhead’s module on schedule-triggered flows. We’re creating a flow that runs daily, checking for missing contact records and alerting contact owners of data gaps.
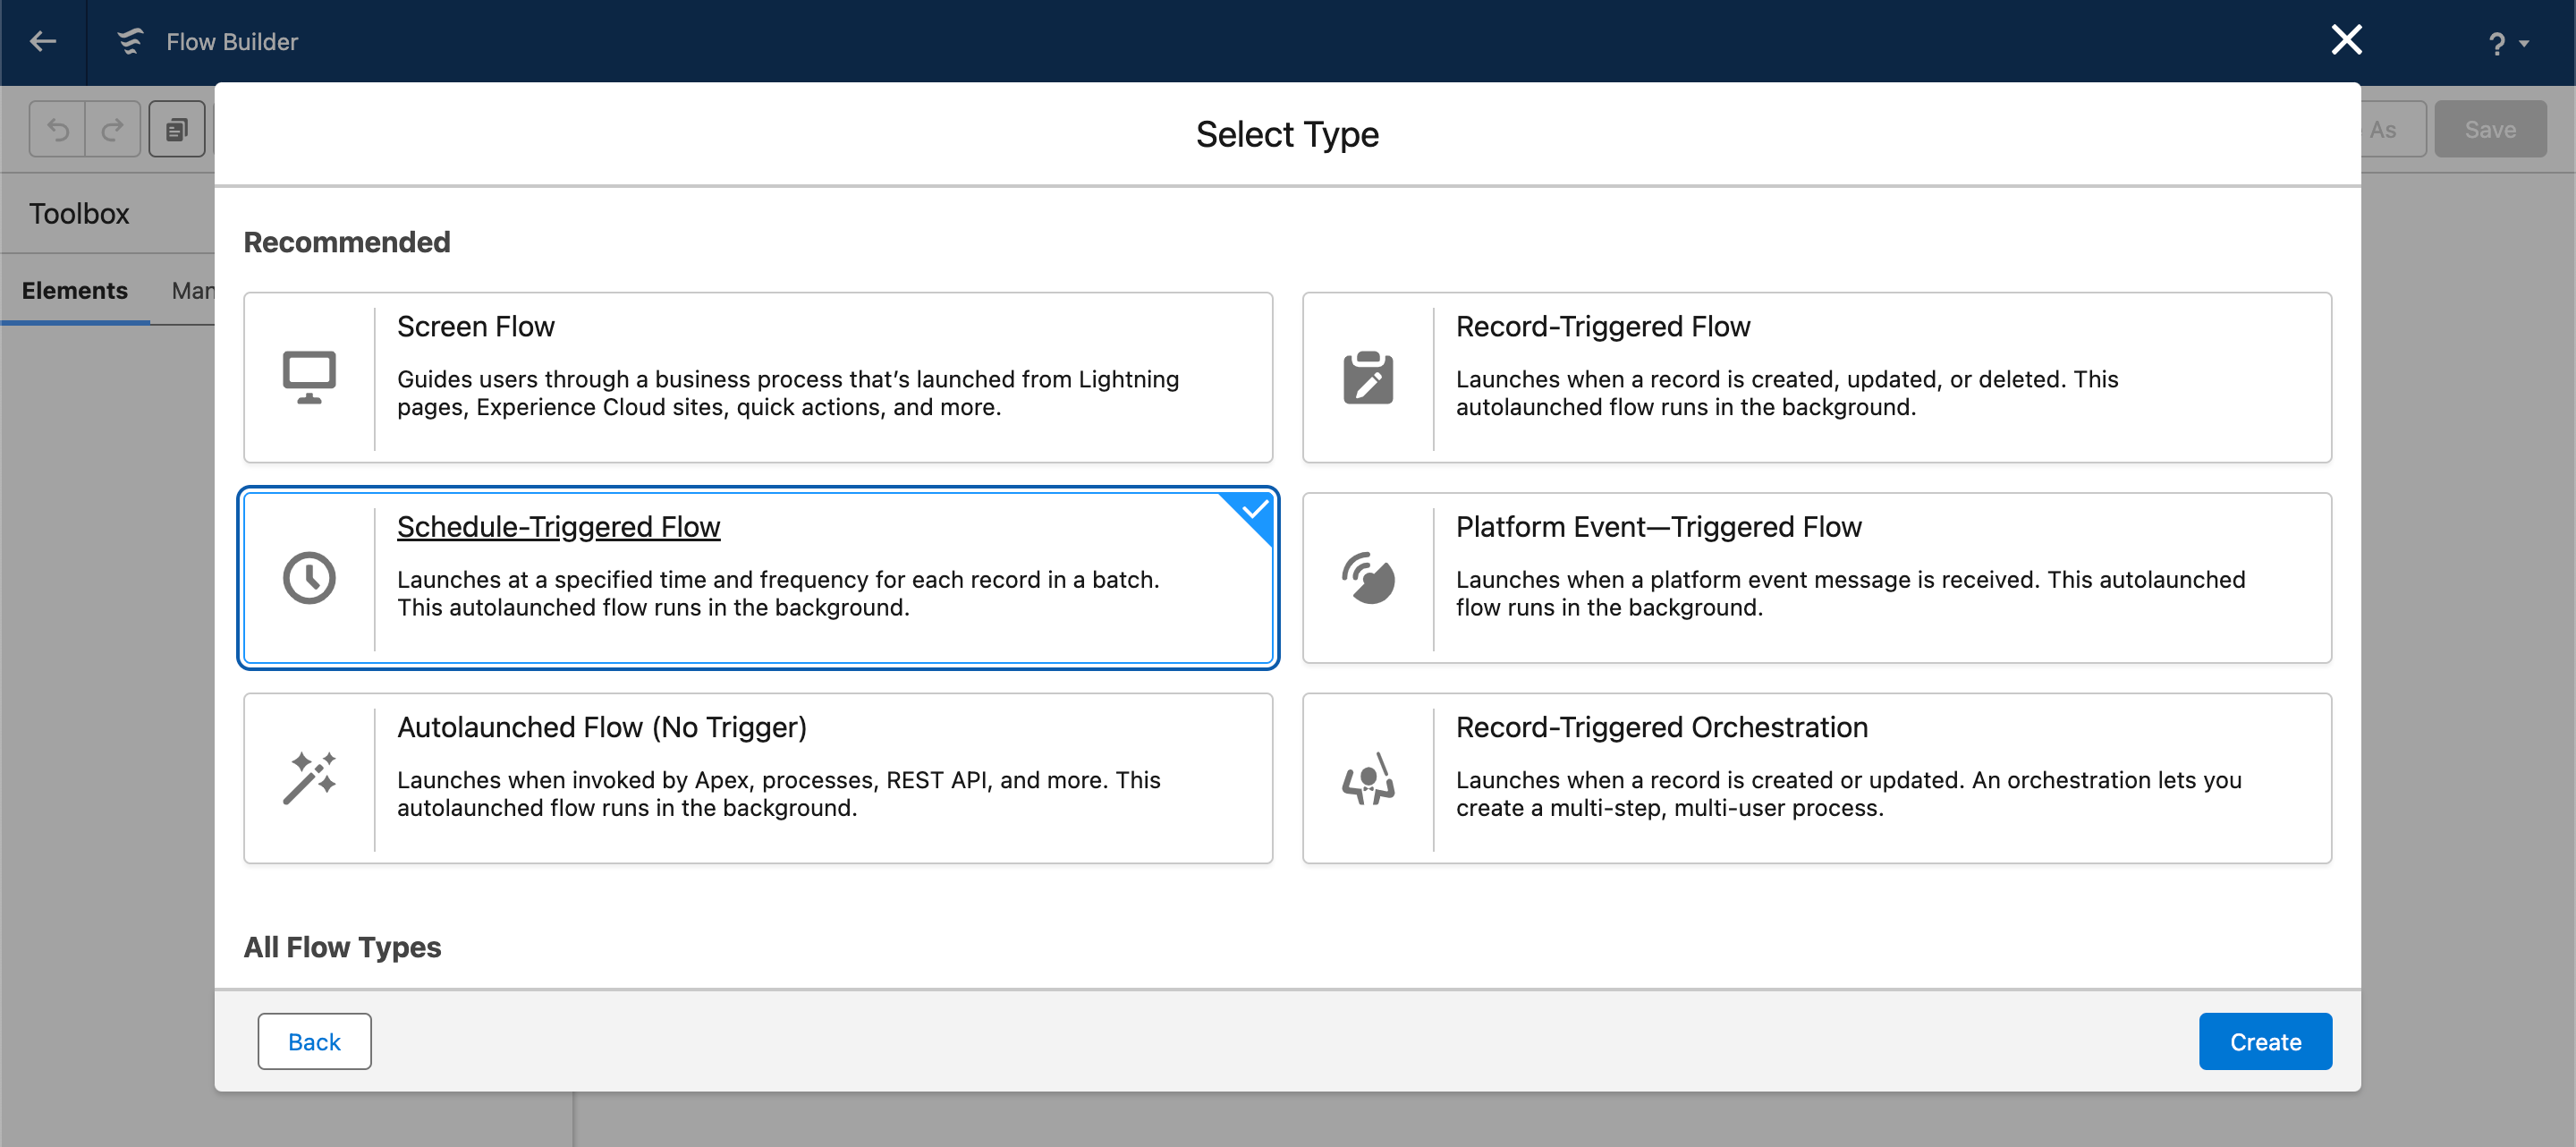
From the Flows section in Salesforce’s setup view, click New Flow. Select Start From Scratch, then Schedule-Triggered Flow.
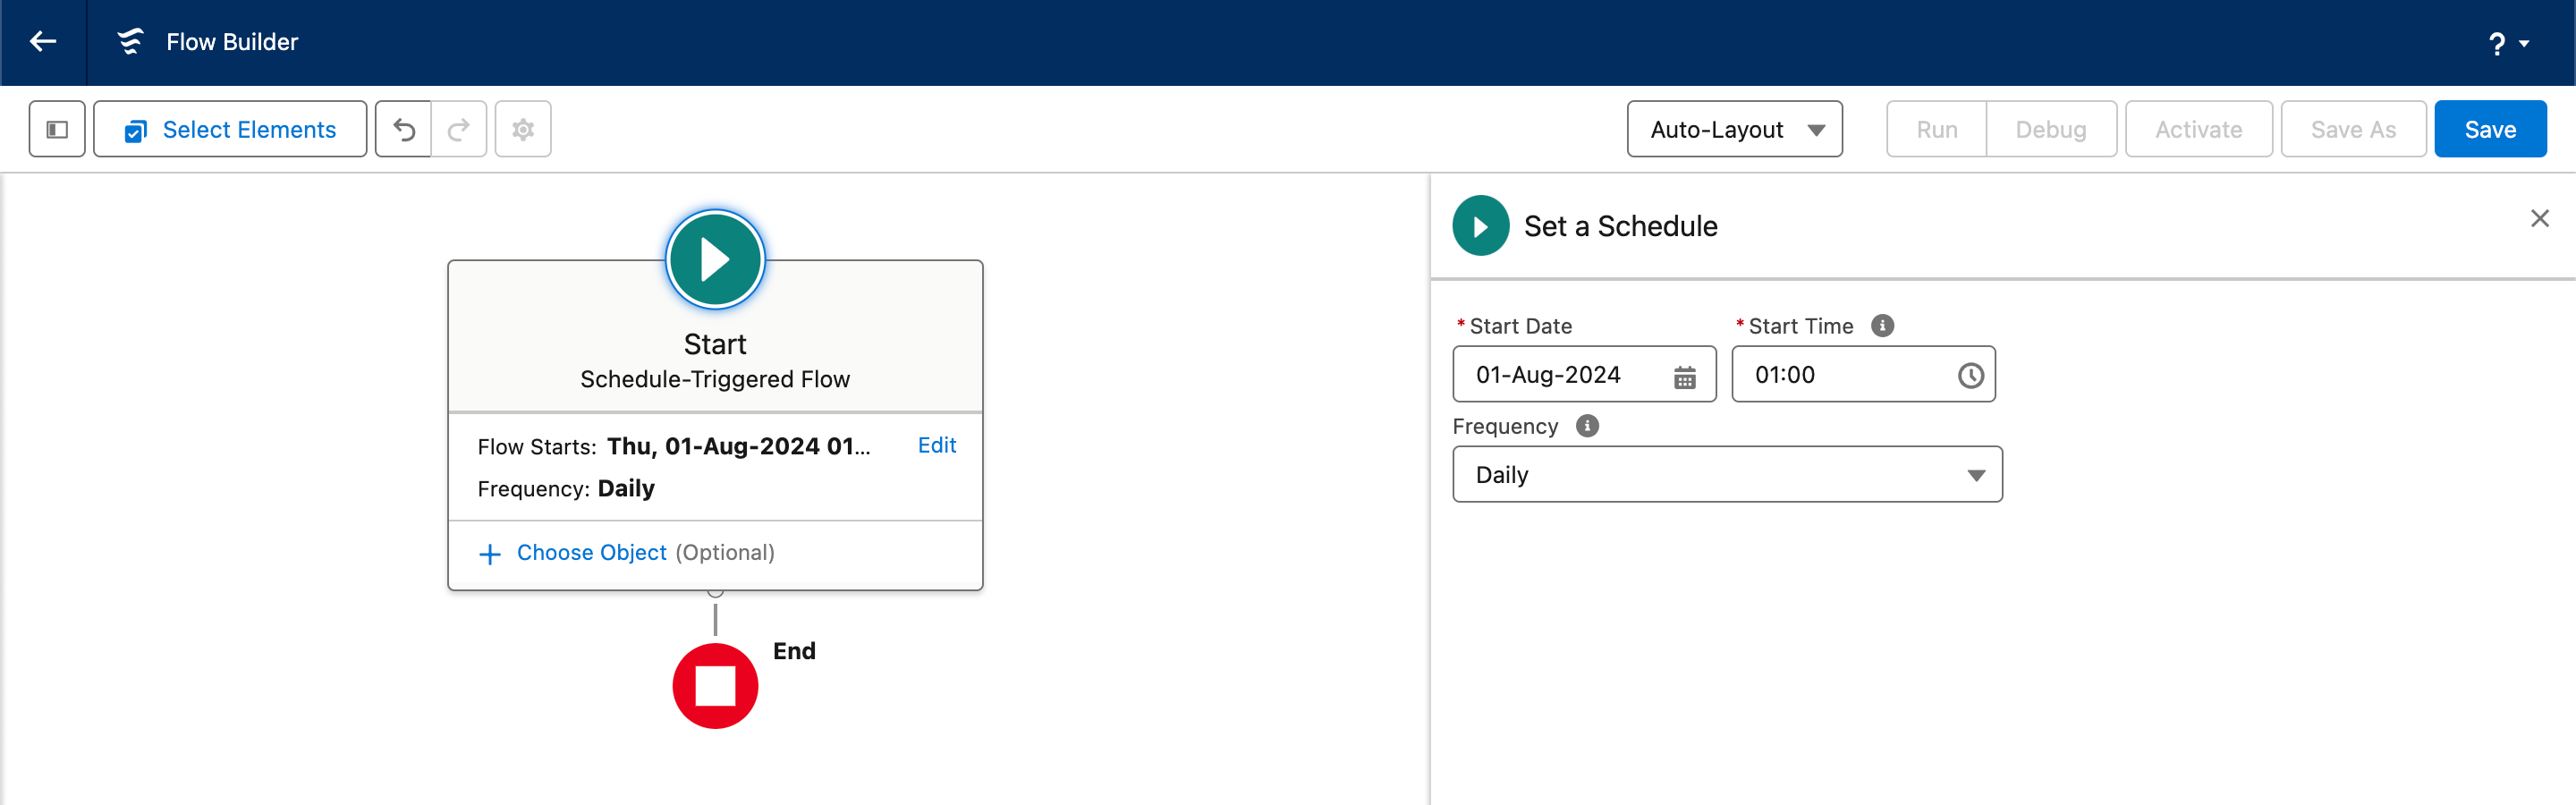
Choose a start date, start time and frequency for the schedule-triggered flow.
Now create the logic to determine whether any data is missing from contact fields.

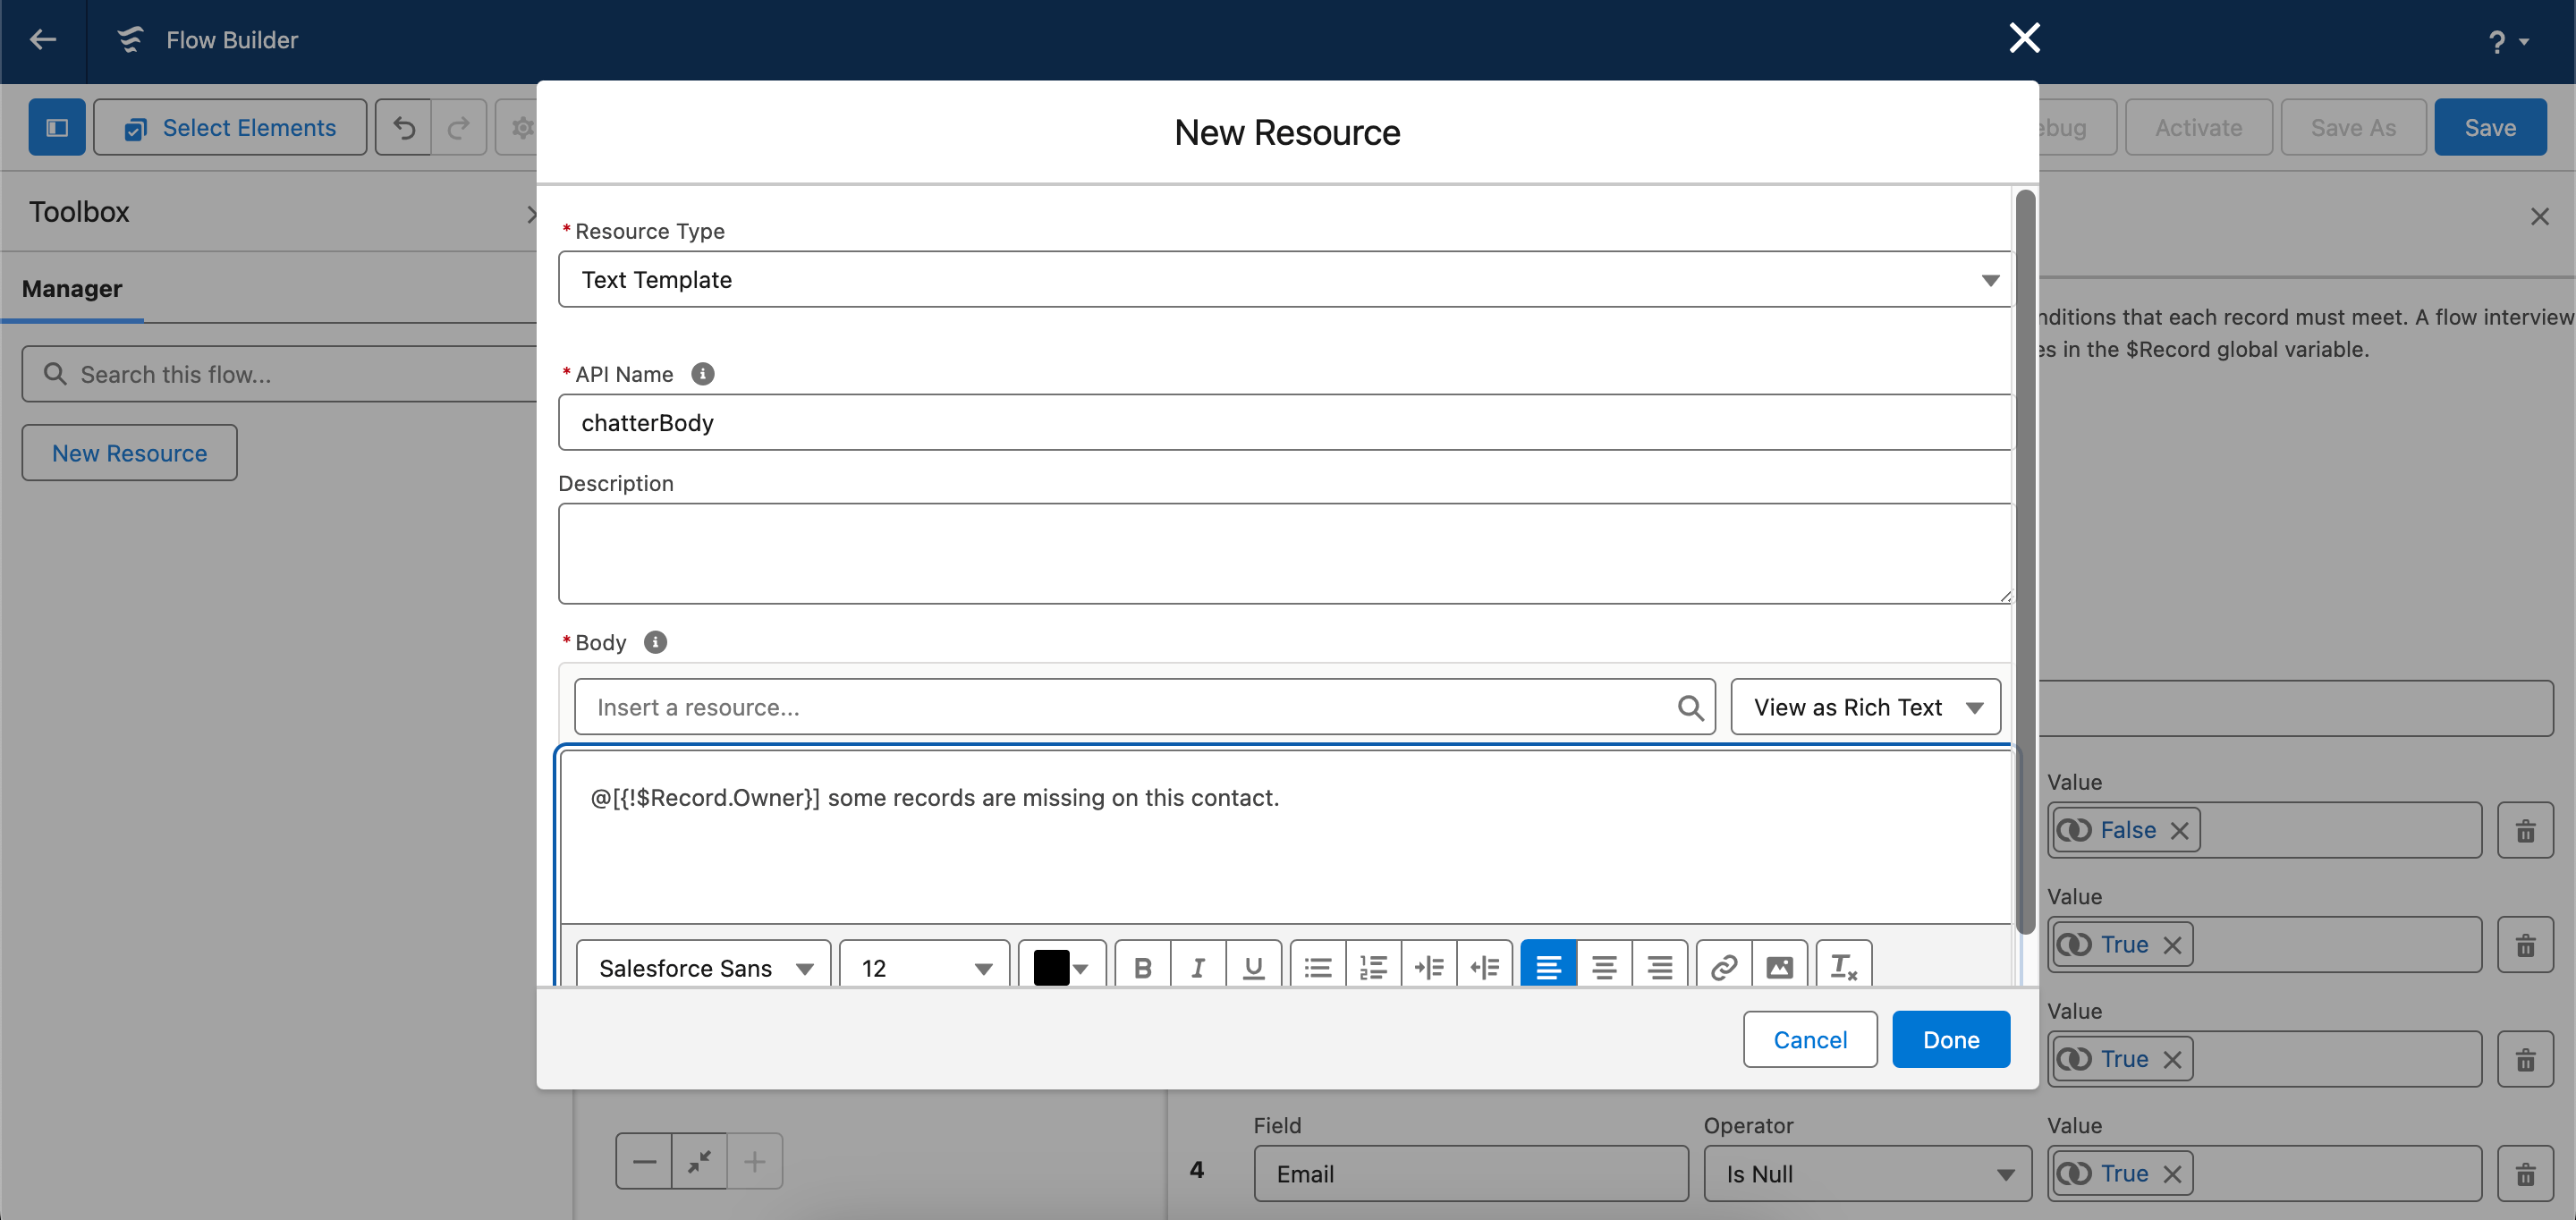
Add a new text template, with a message that will be sent to relevant contact owners.
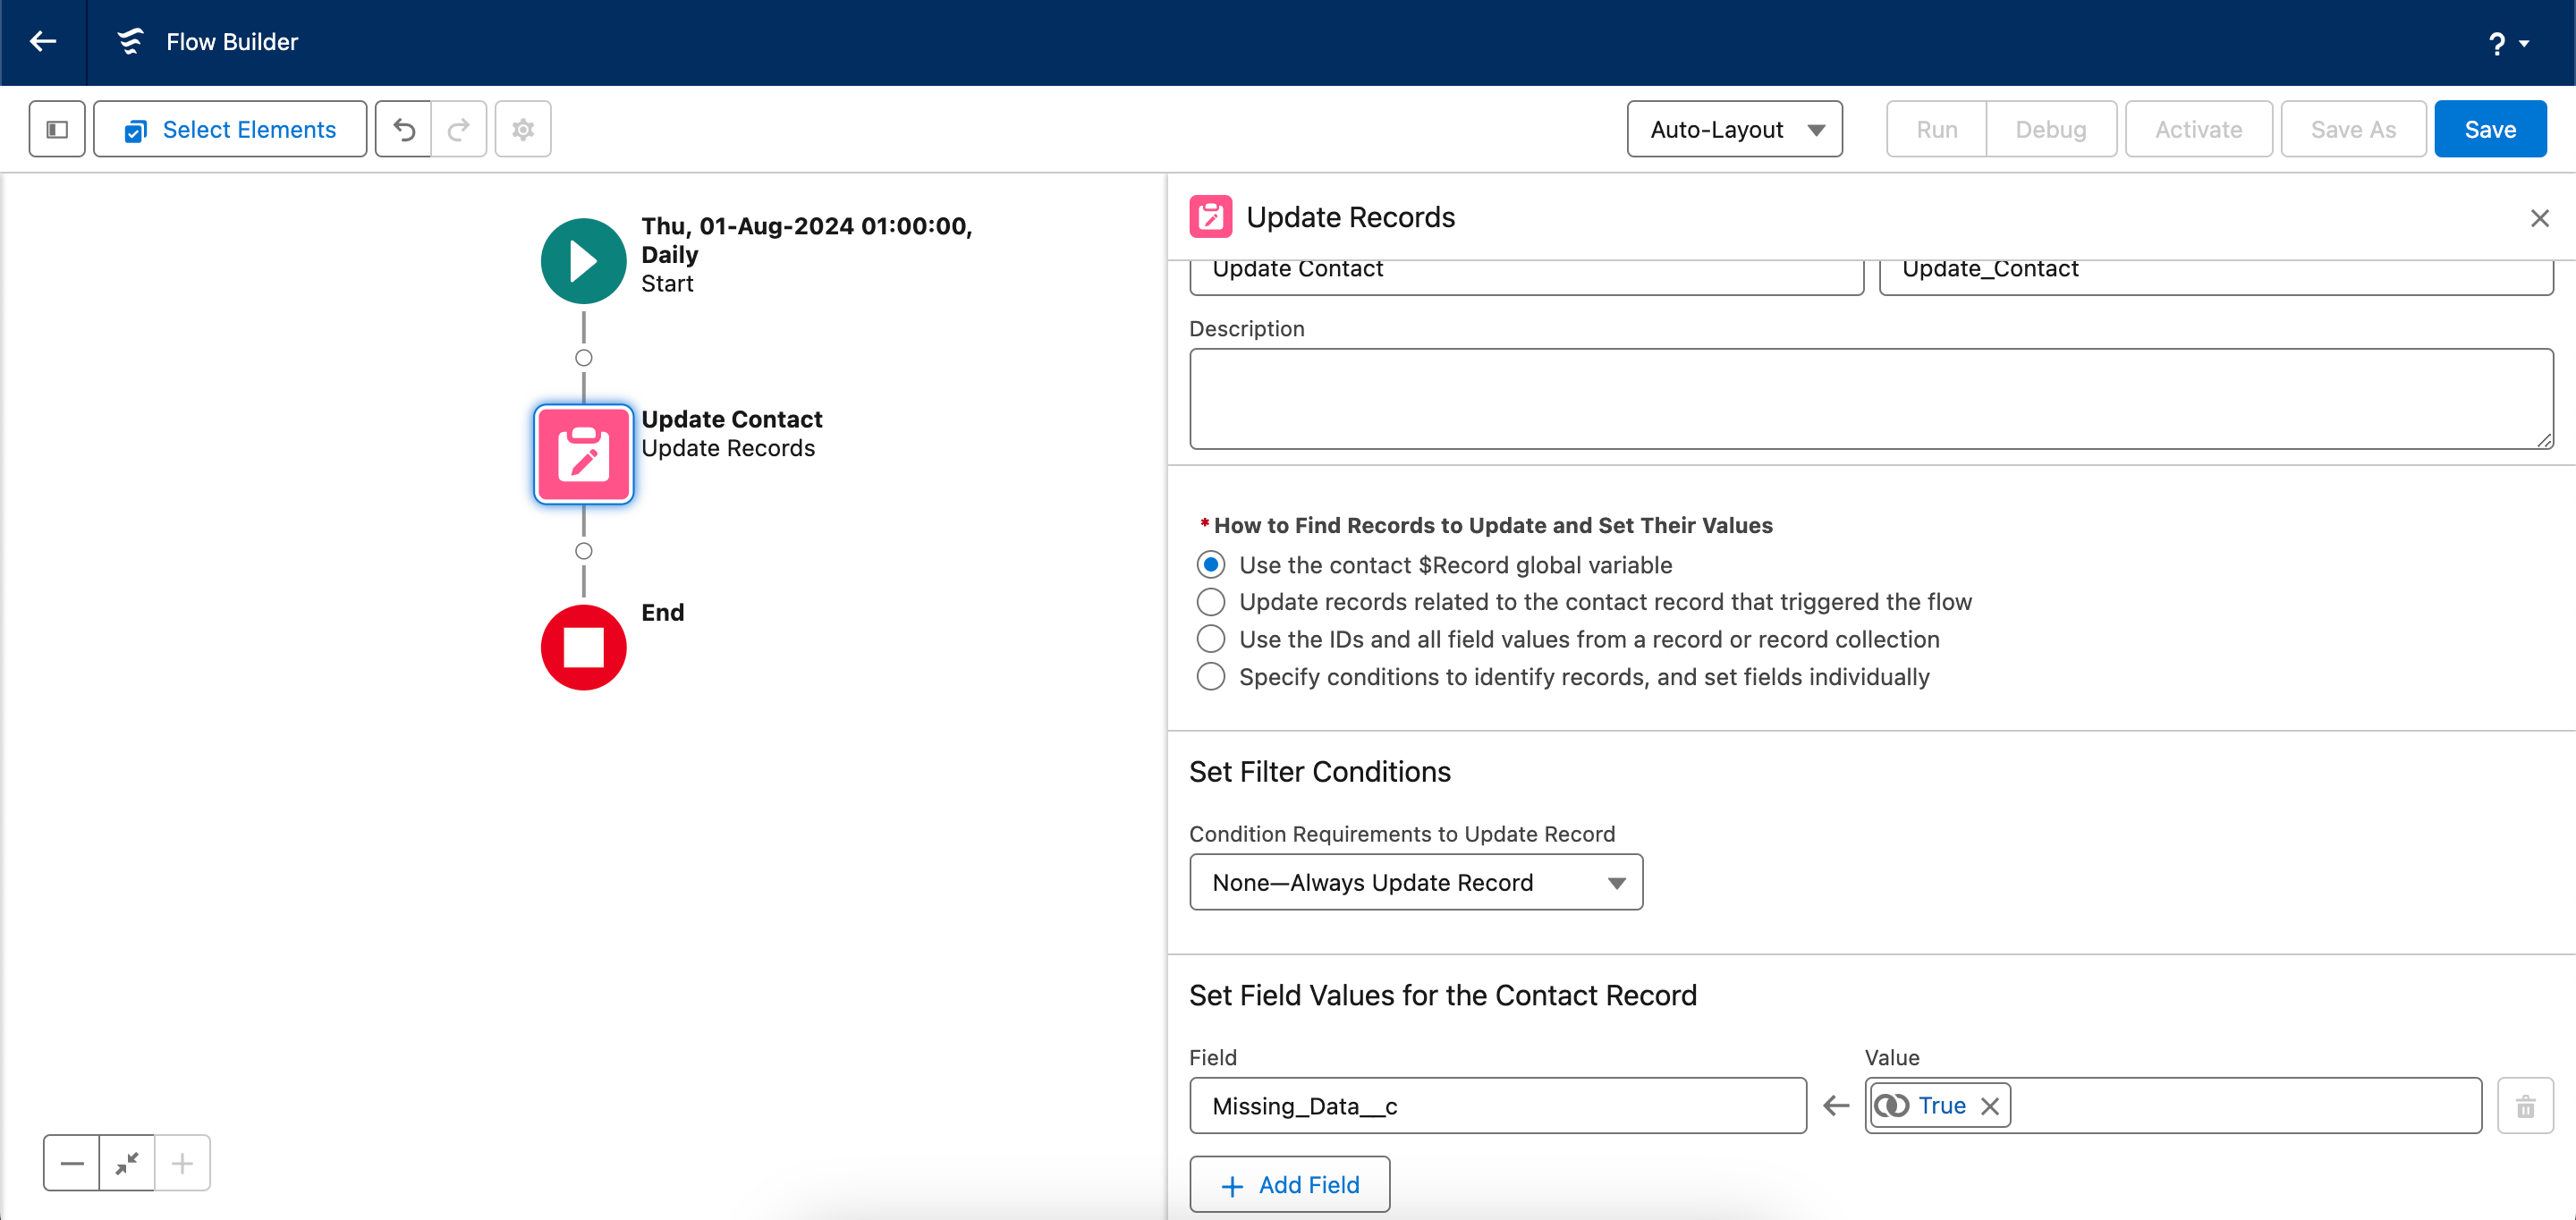
Add an Update Records element to highlight the missing data.
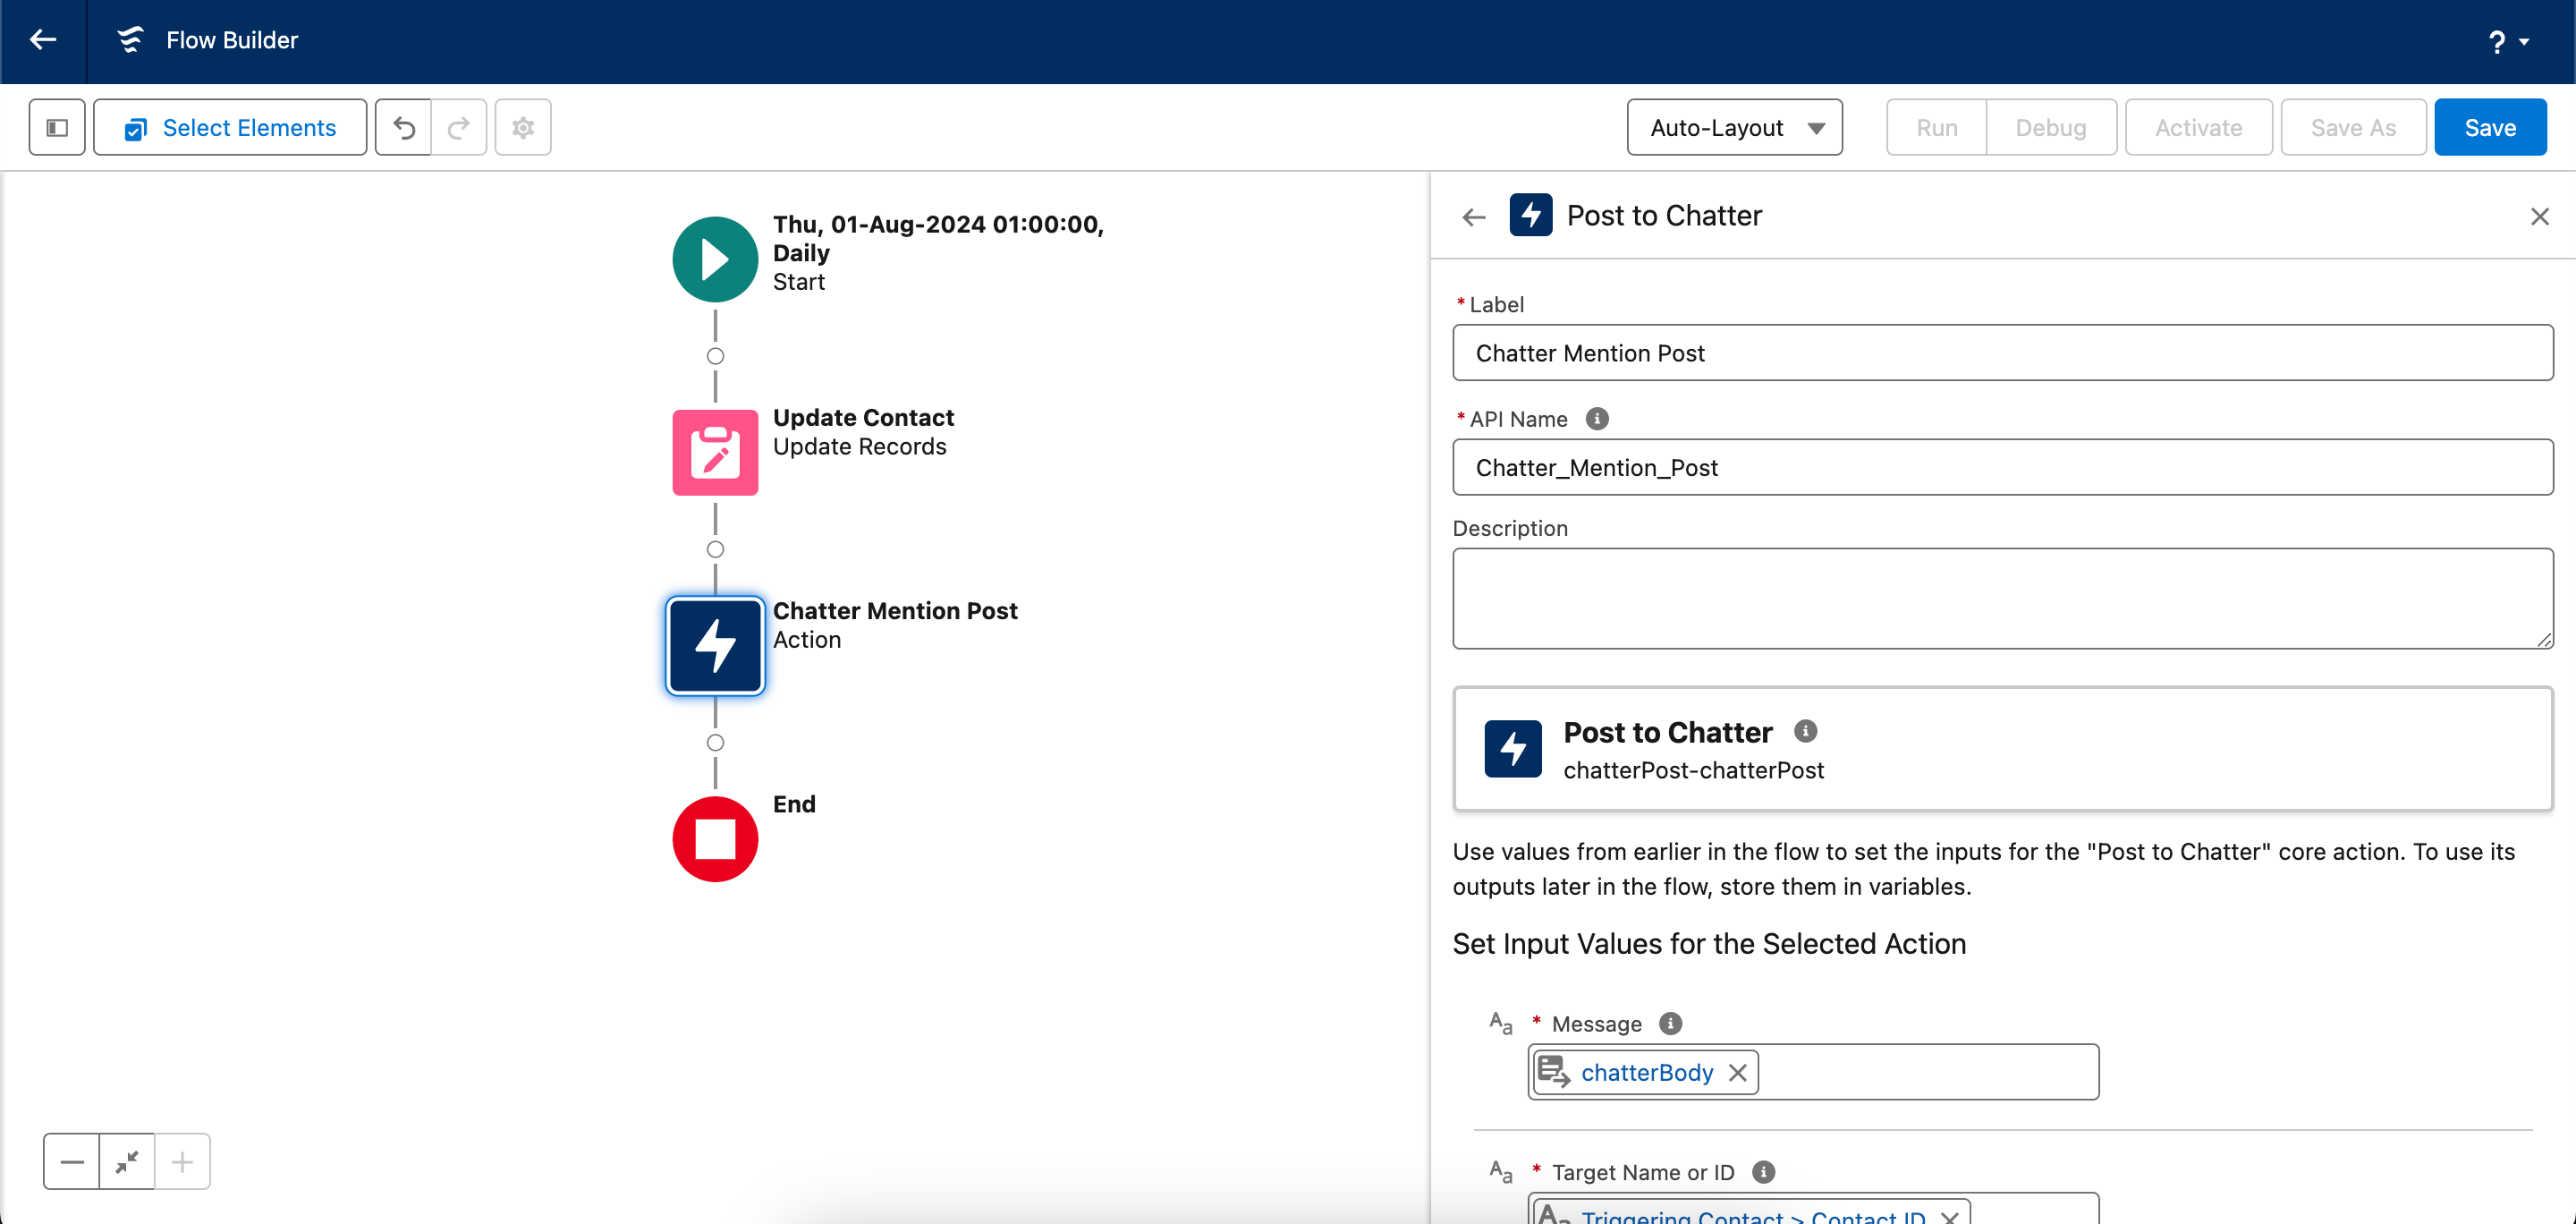
Finally, create an Action element that will post a message to the contact owner via Chatter.
How to deploy a schedule-triggered flow using change sets
It’s possible to deploy flows using change sets, but there are some key challenges:
- Flows have a lot of dependencies, and you’ll need to include all of them in the deployment. With change sets, it isn’t easy to identify those dependencies. As you’ll see, Gearset gives you visibility into the process.
- There are a number of issues with flows that cause deployments to fail, particularly around flow versions. Gearset offers automatic fixes for those problems.
- You can’t deploy any destructive changes (deletions) using change sets. So if you need to remove a flow, you’re left to do that manually from production — which is obviously risky. Even with tools that do support deploying destructive changes, flows can still be tricky. Gearset has some unique functionality so you can delete flows easily and safely.
How to deploy a schedule-triggered flow using Gearset
Deploying your schedule-triggered flow along your release pipeline is nice and easy with Gearset. If you want to keep following along with this walkthrough, and you’re not already a Gearset user, you could start a free trial — it doesn’t take long to get set up.
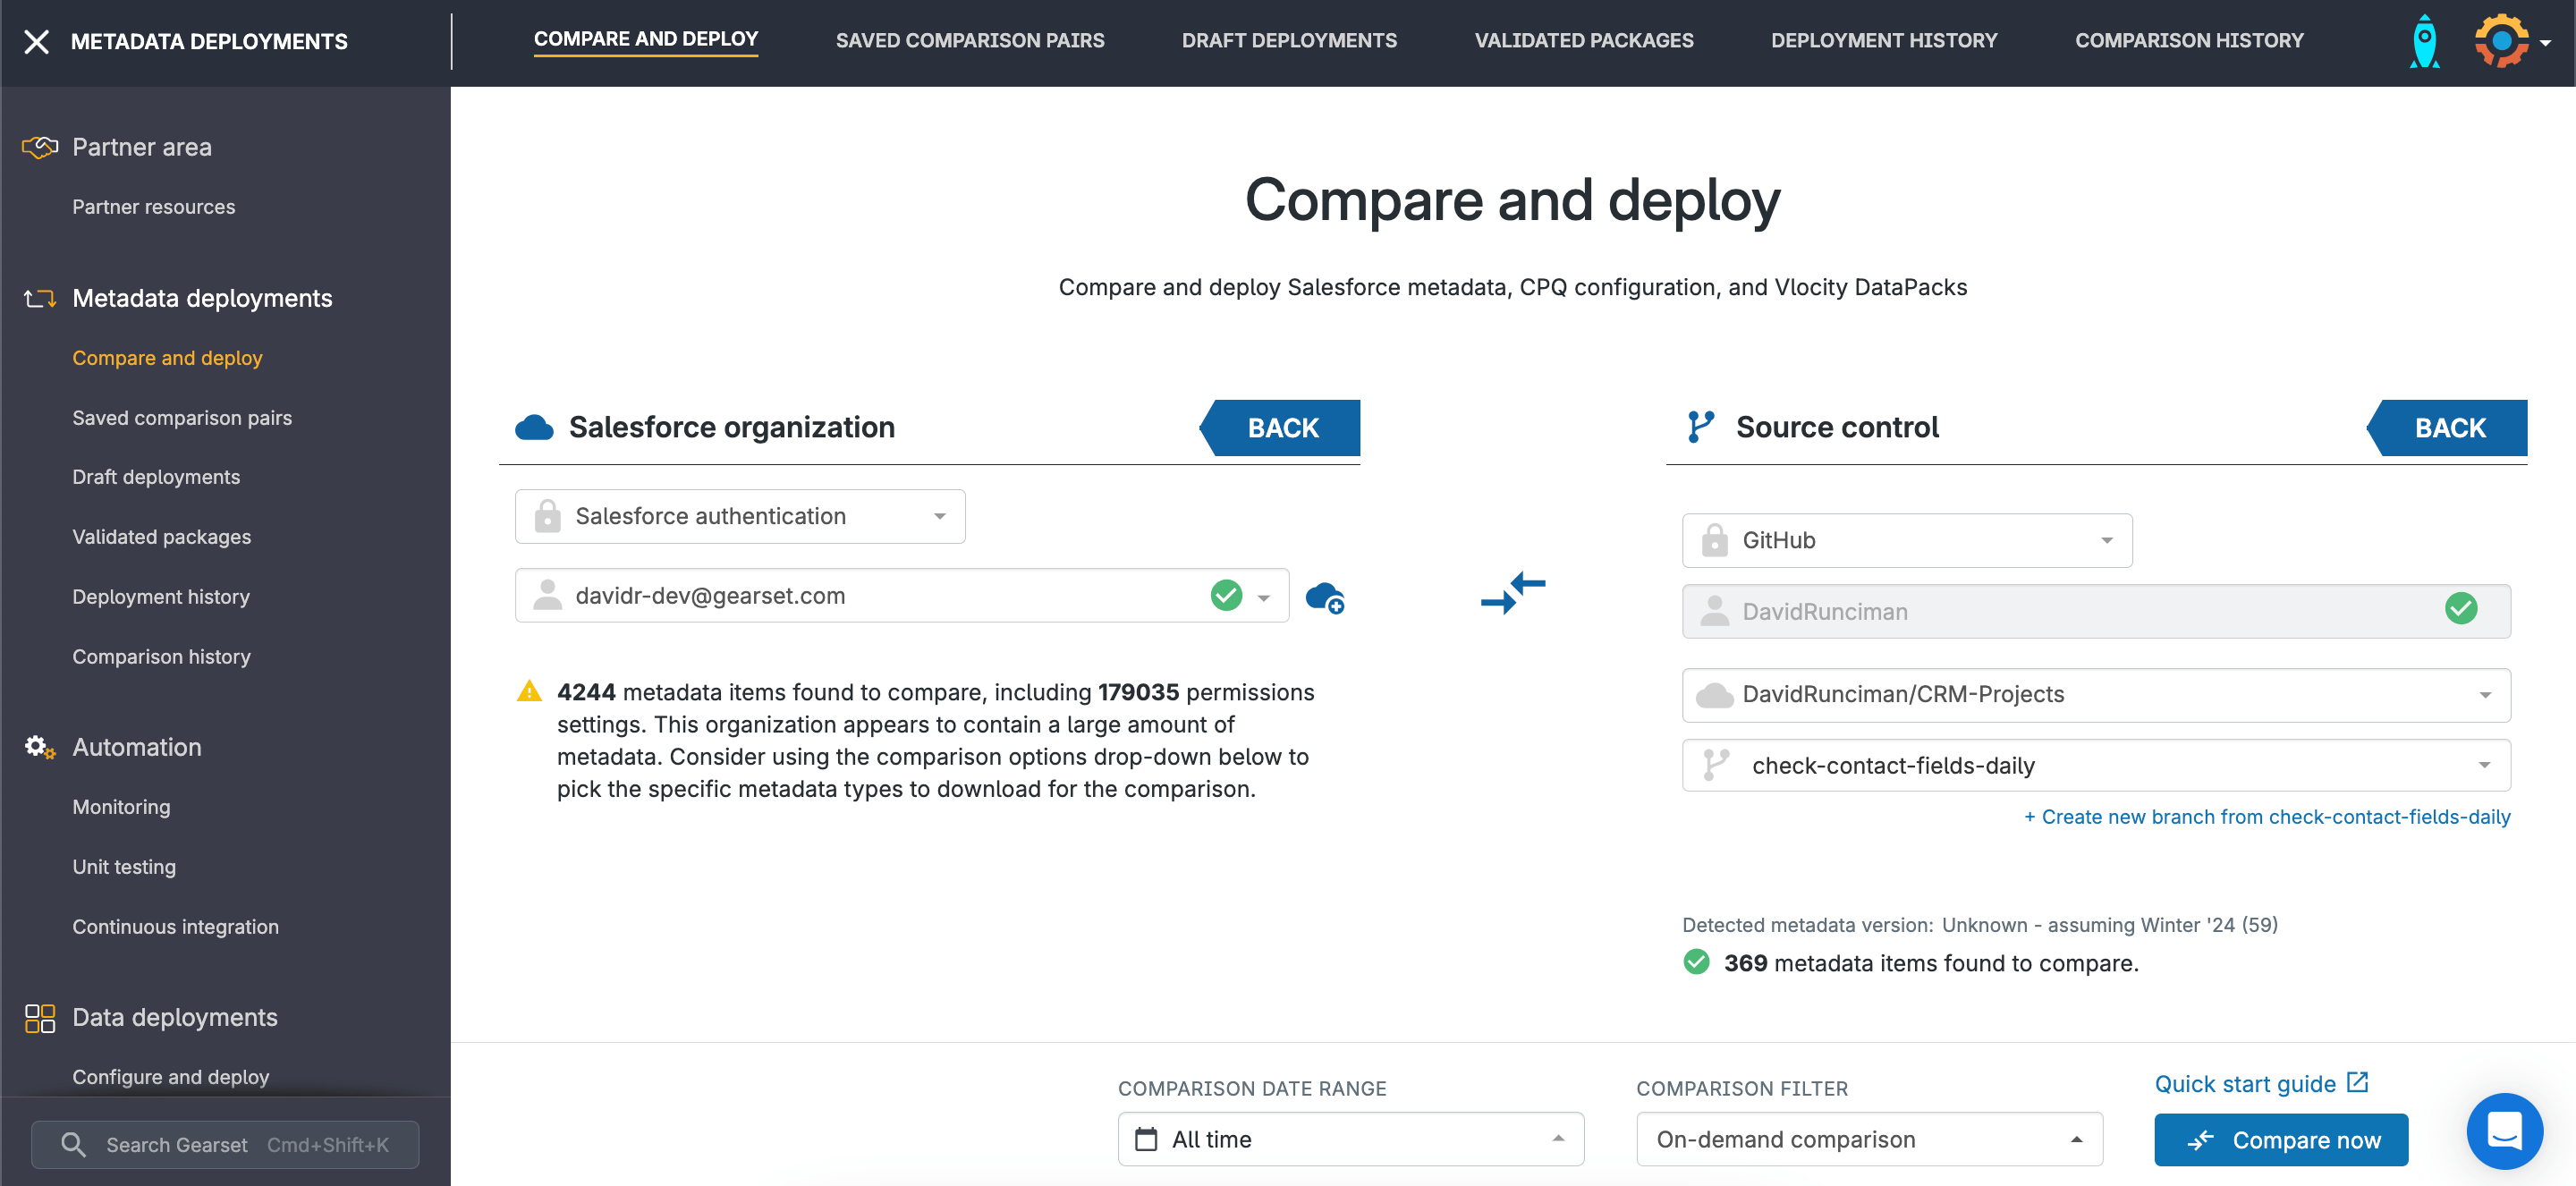
1. Compare the source and target environment
Rather than deploying in the dark, with Gearset you can see how a flow (or any other change) compares between the source and target environments — whether those are Salesforce orgs or Git branches. In this example, we’re going to deploy our new schedule-triggered flow from a developer org to a feature branch. Once we’ve selected those environments, we click Compare now.
On the next screen, we can bring flows into the comparison results from the left-hand menu along with any other metadata types we need.
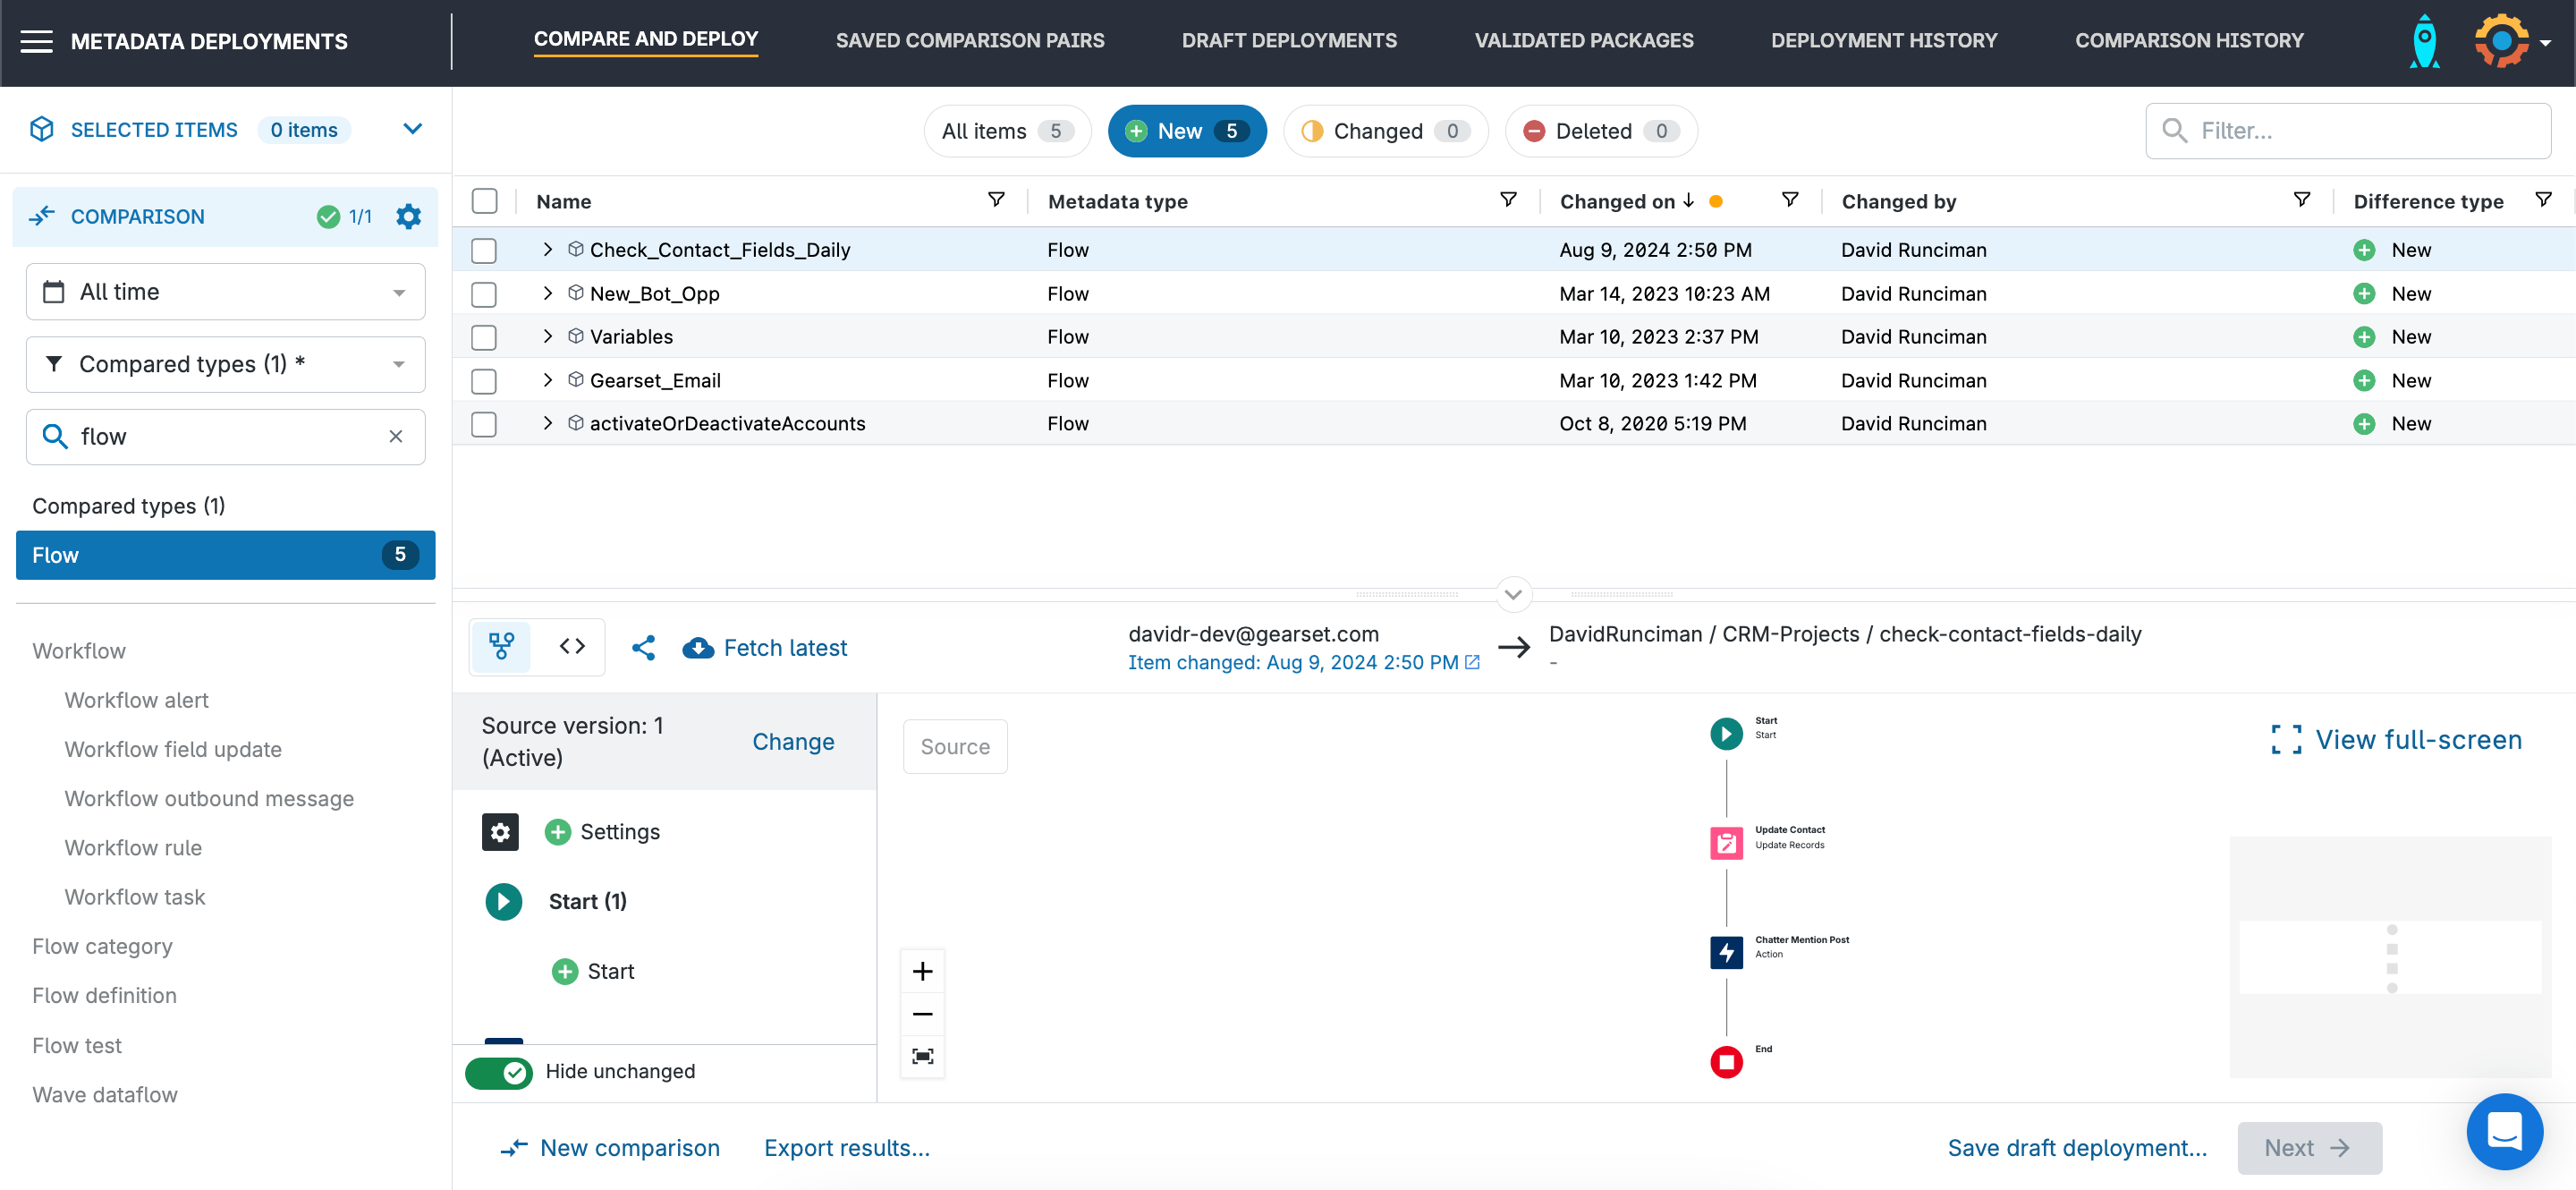
2. Select items to deploy
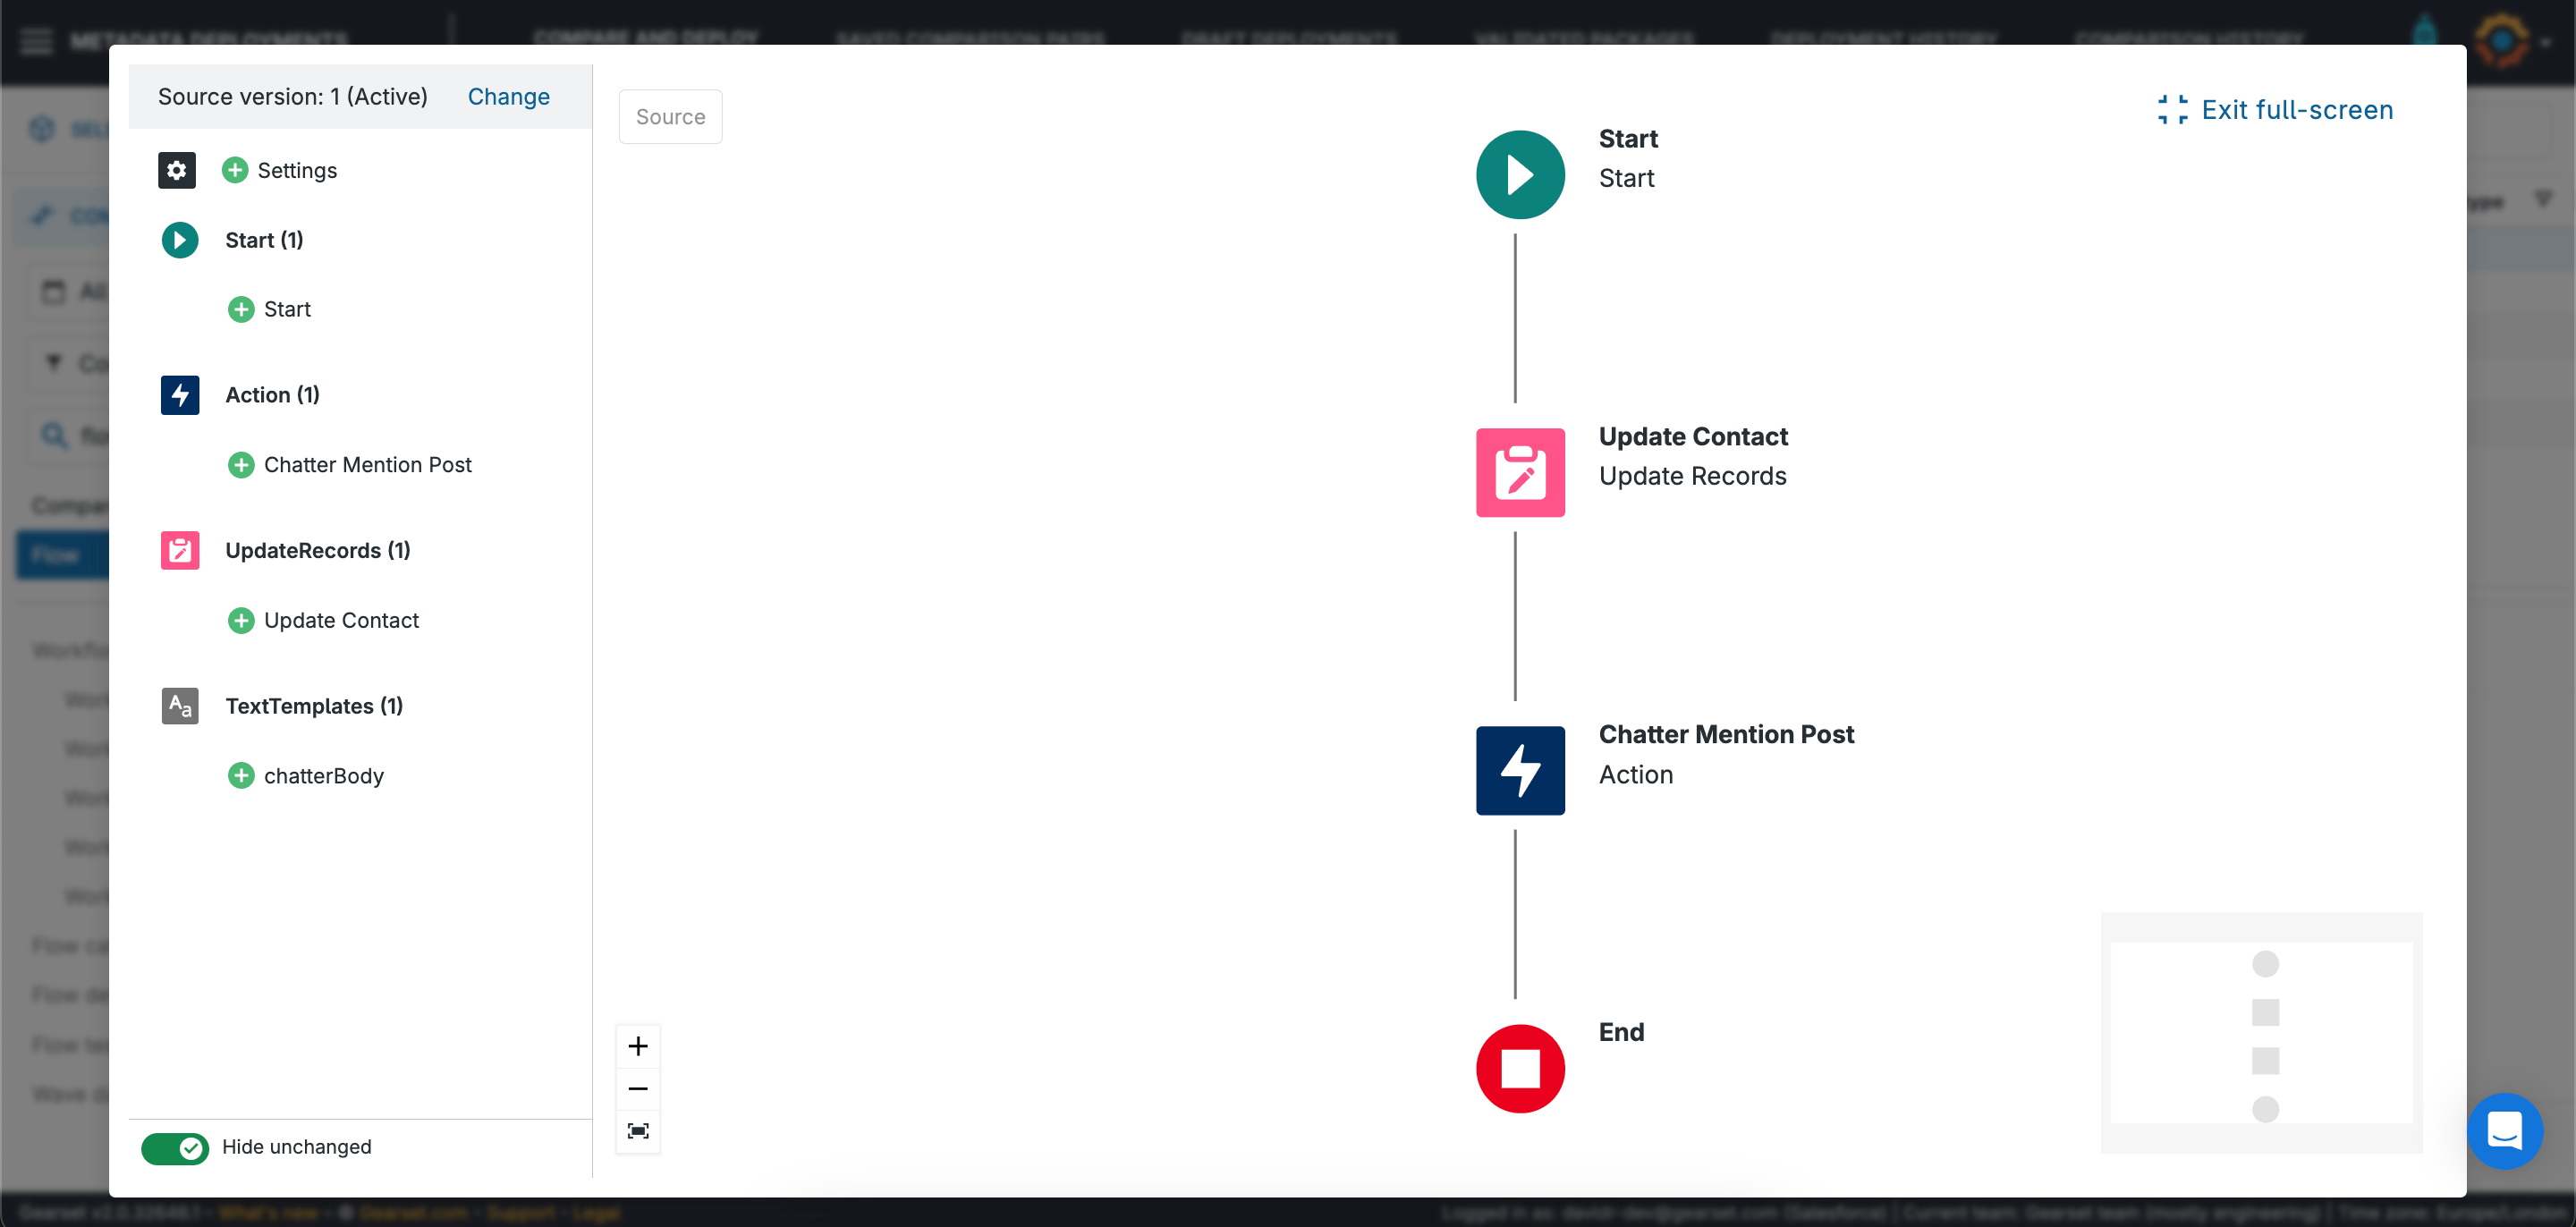
When we select a flow in the comparison results, Gearset will show us what that flow looks like — just as it looks in Flow Builder. We can see any elements that are different between source and target, and we can select different versions of the flow to deploy.
We can see our new flow in the results, so we’ll select that and click Next.
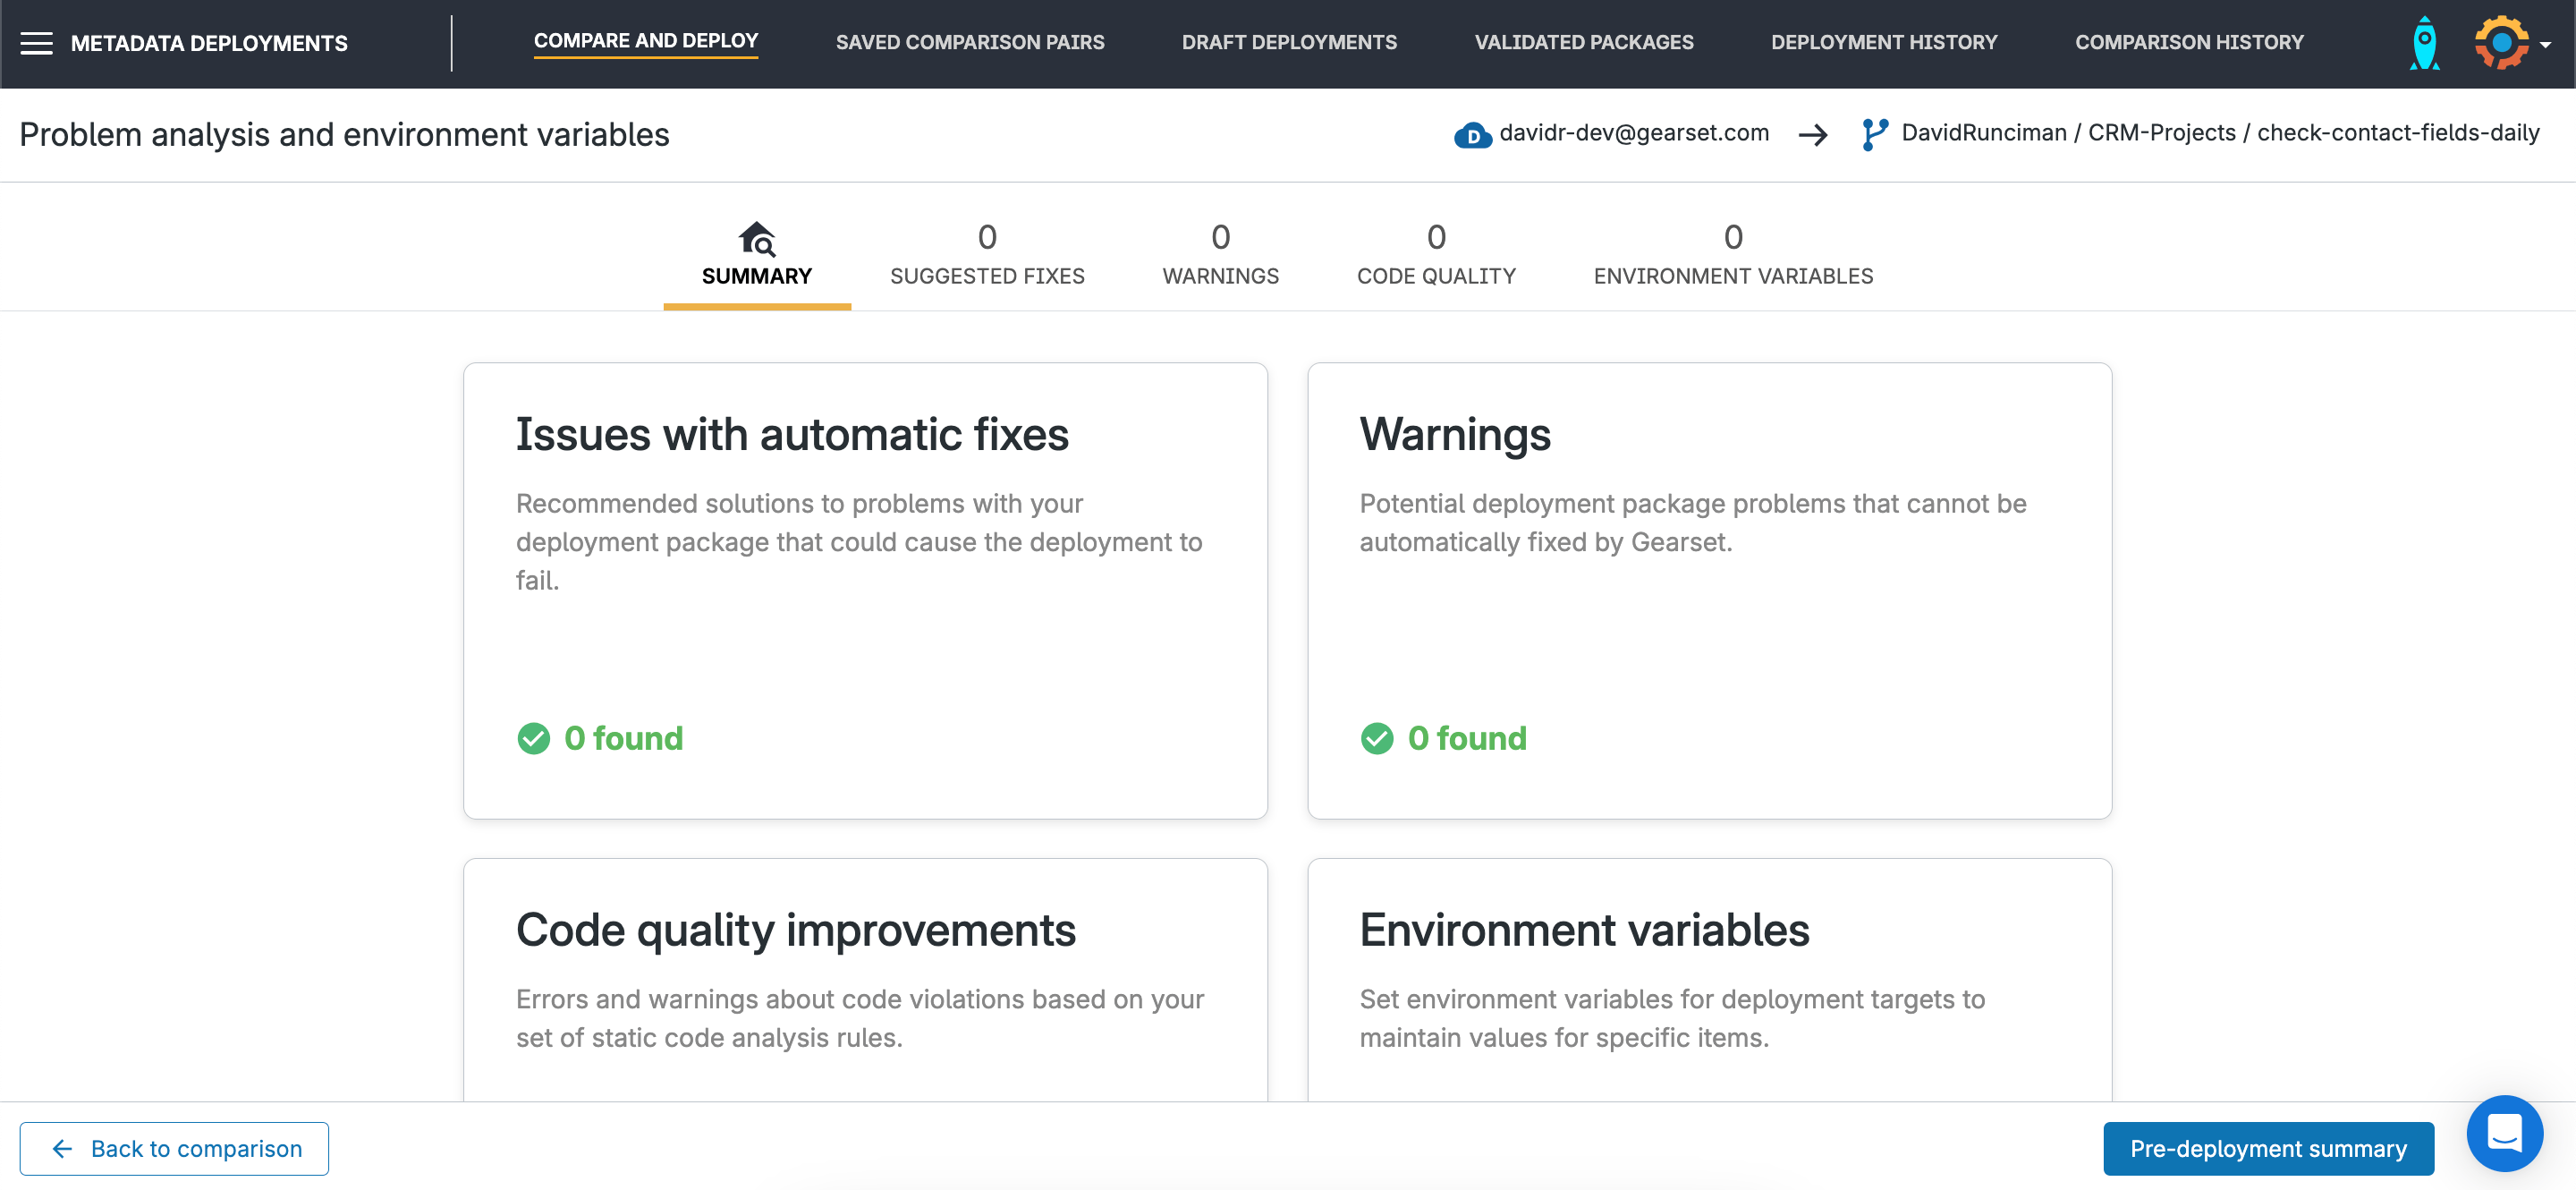
Gearset will flag any issues with a deployment, such as a missing dependency that will cause the deployment to fail. This deployment looks fine, so we can go ahead and click Pre-deployment summary.
3. Commit changes
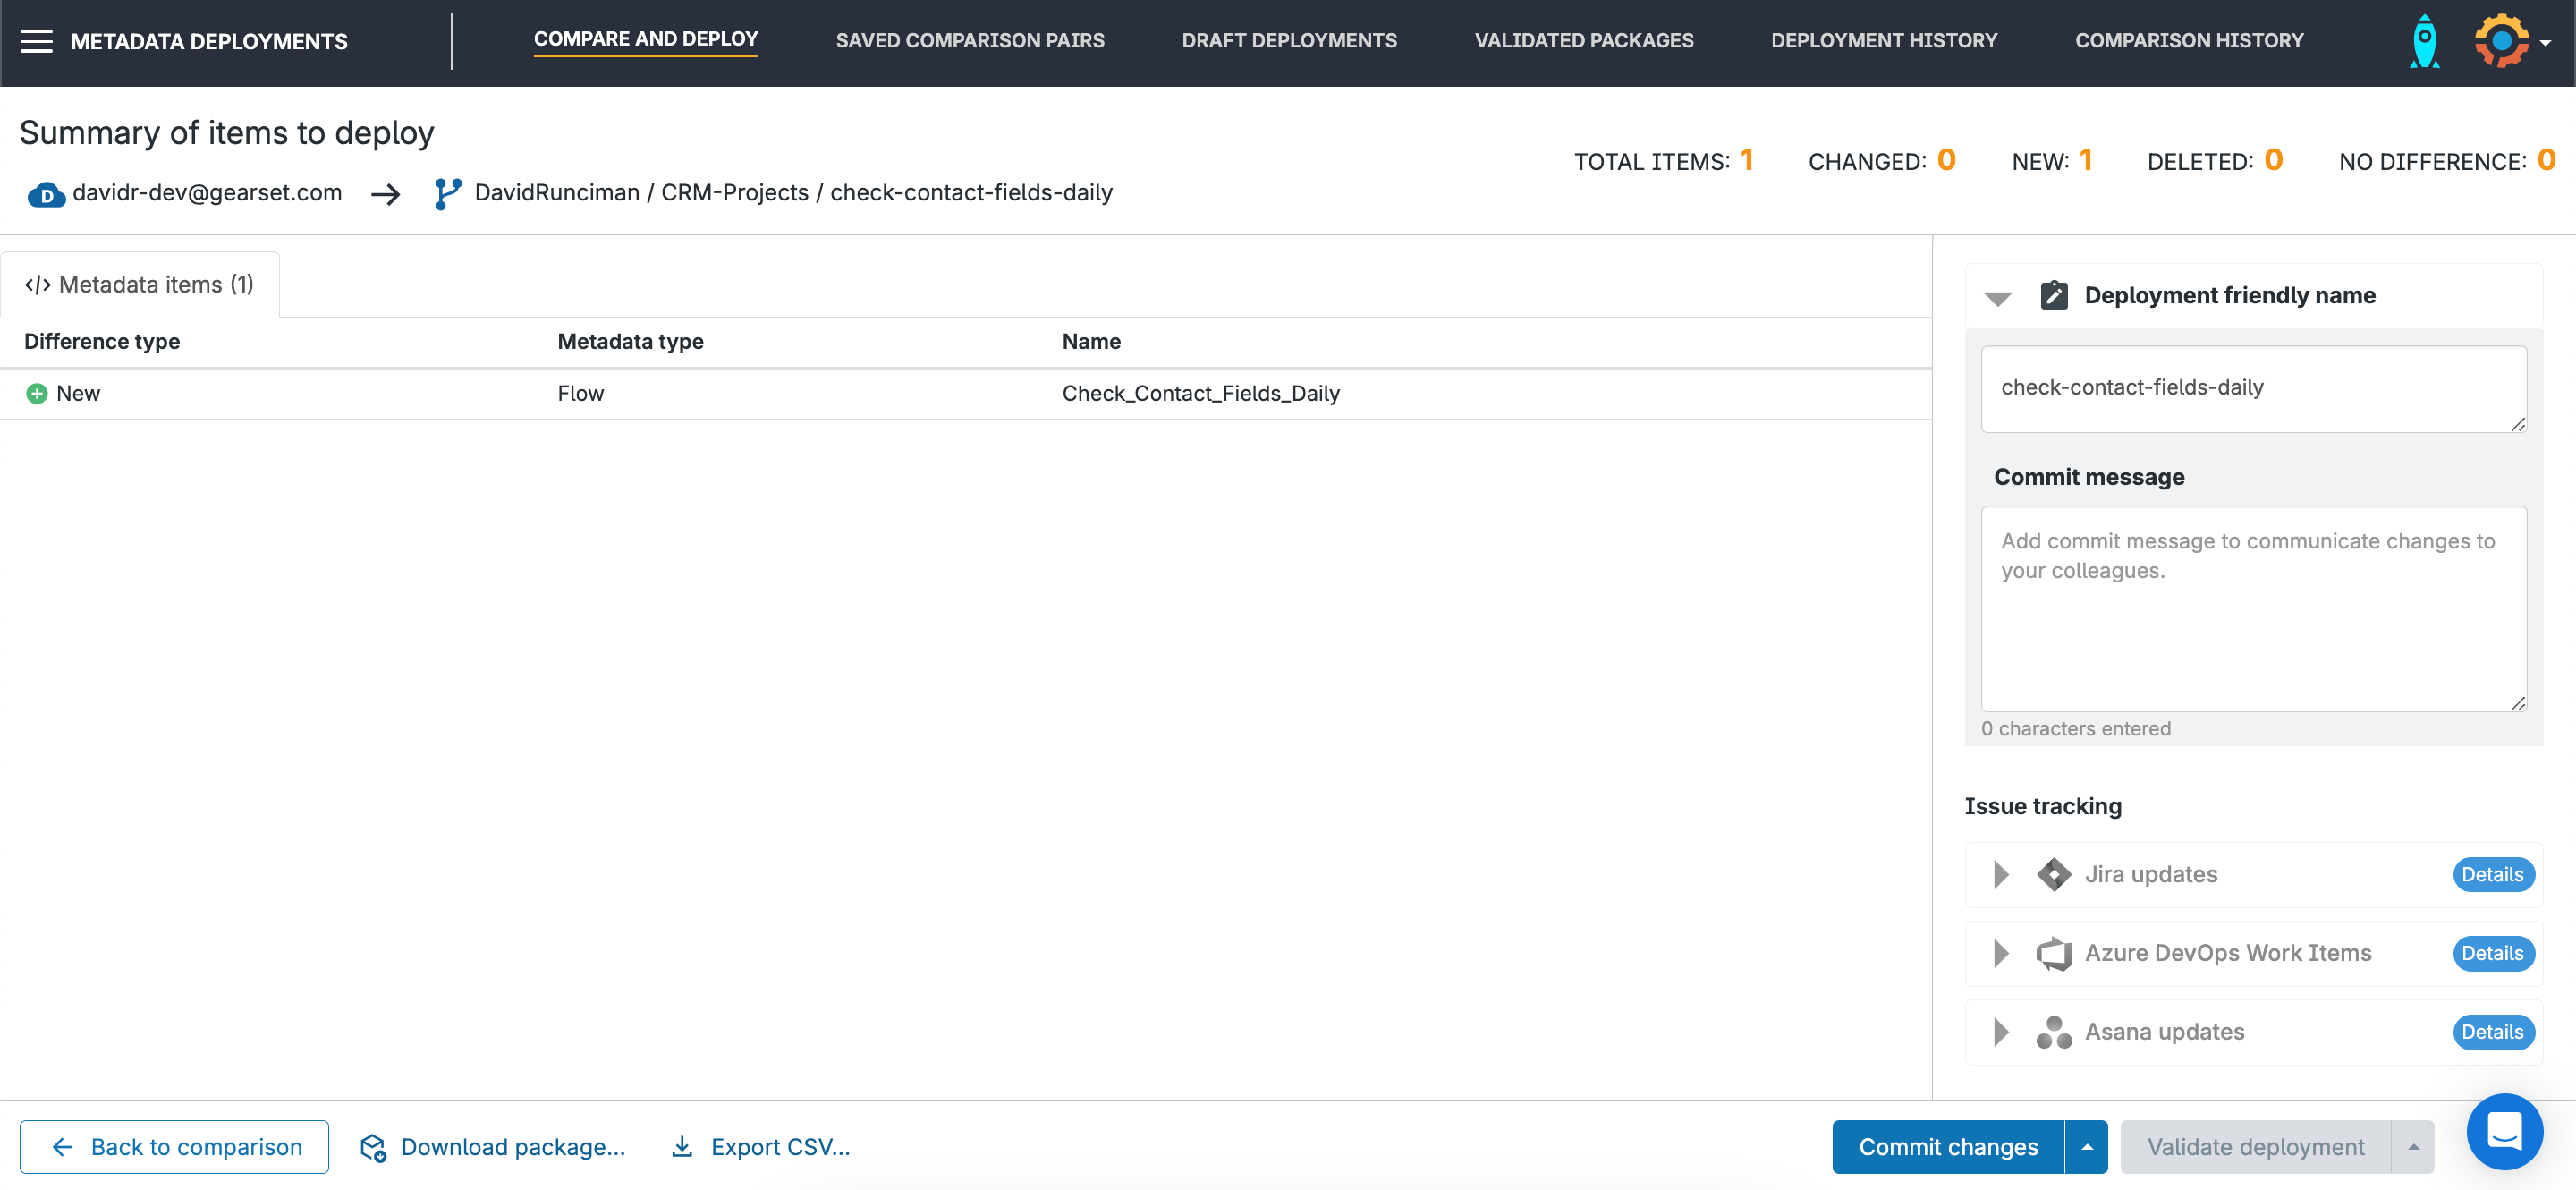
We’ll name the deployment so our team has the context when they’re browsing the deployment history. We can update a ticket in whichever tracking tool we’re using, and then click Commit changes.
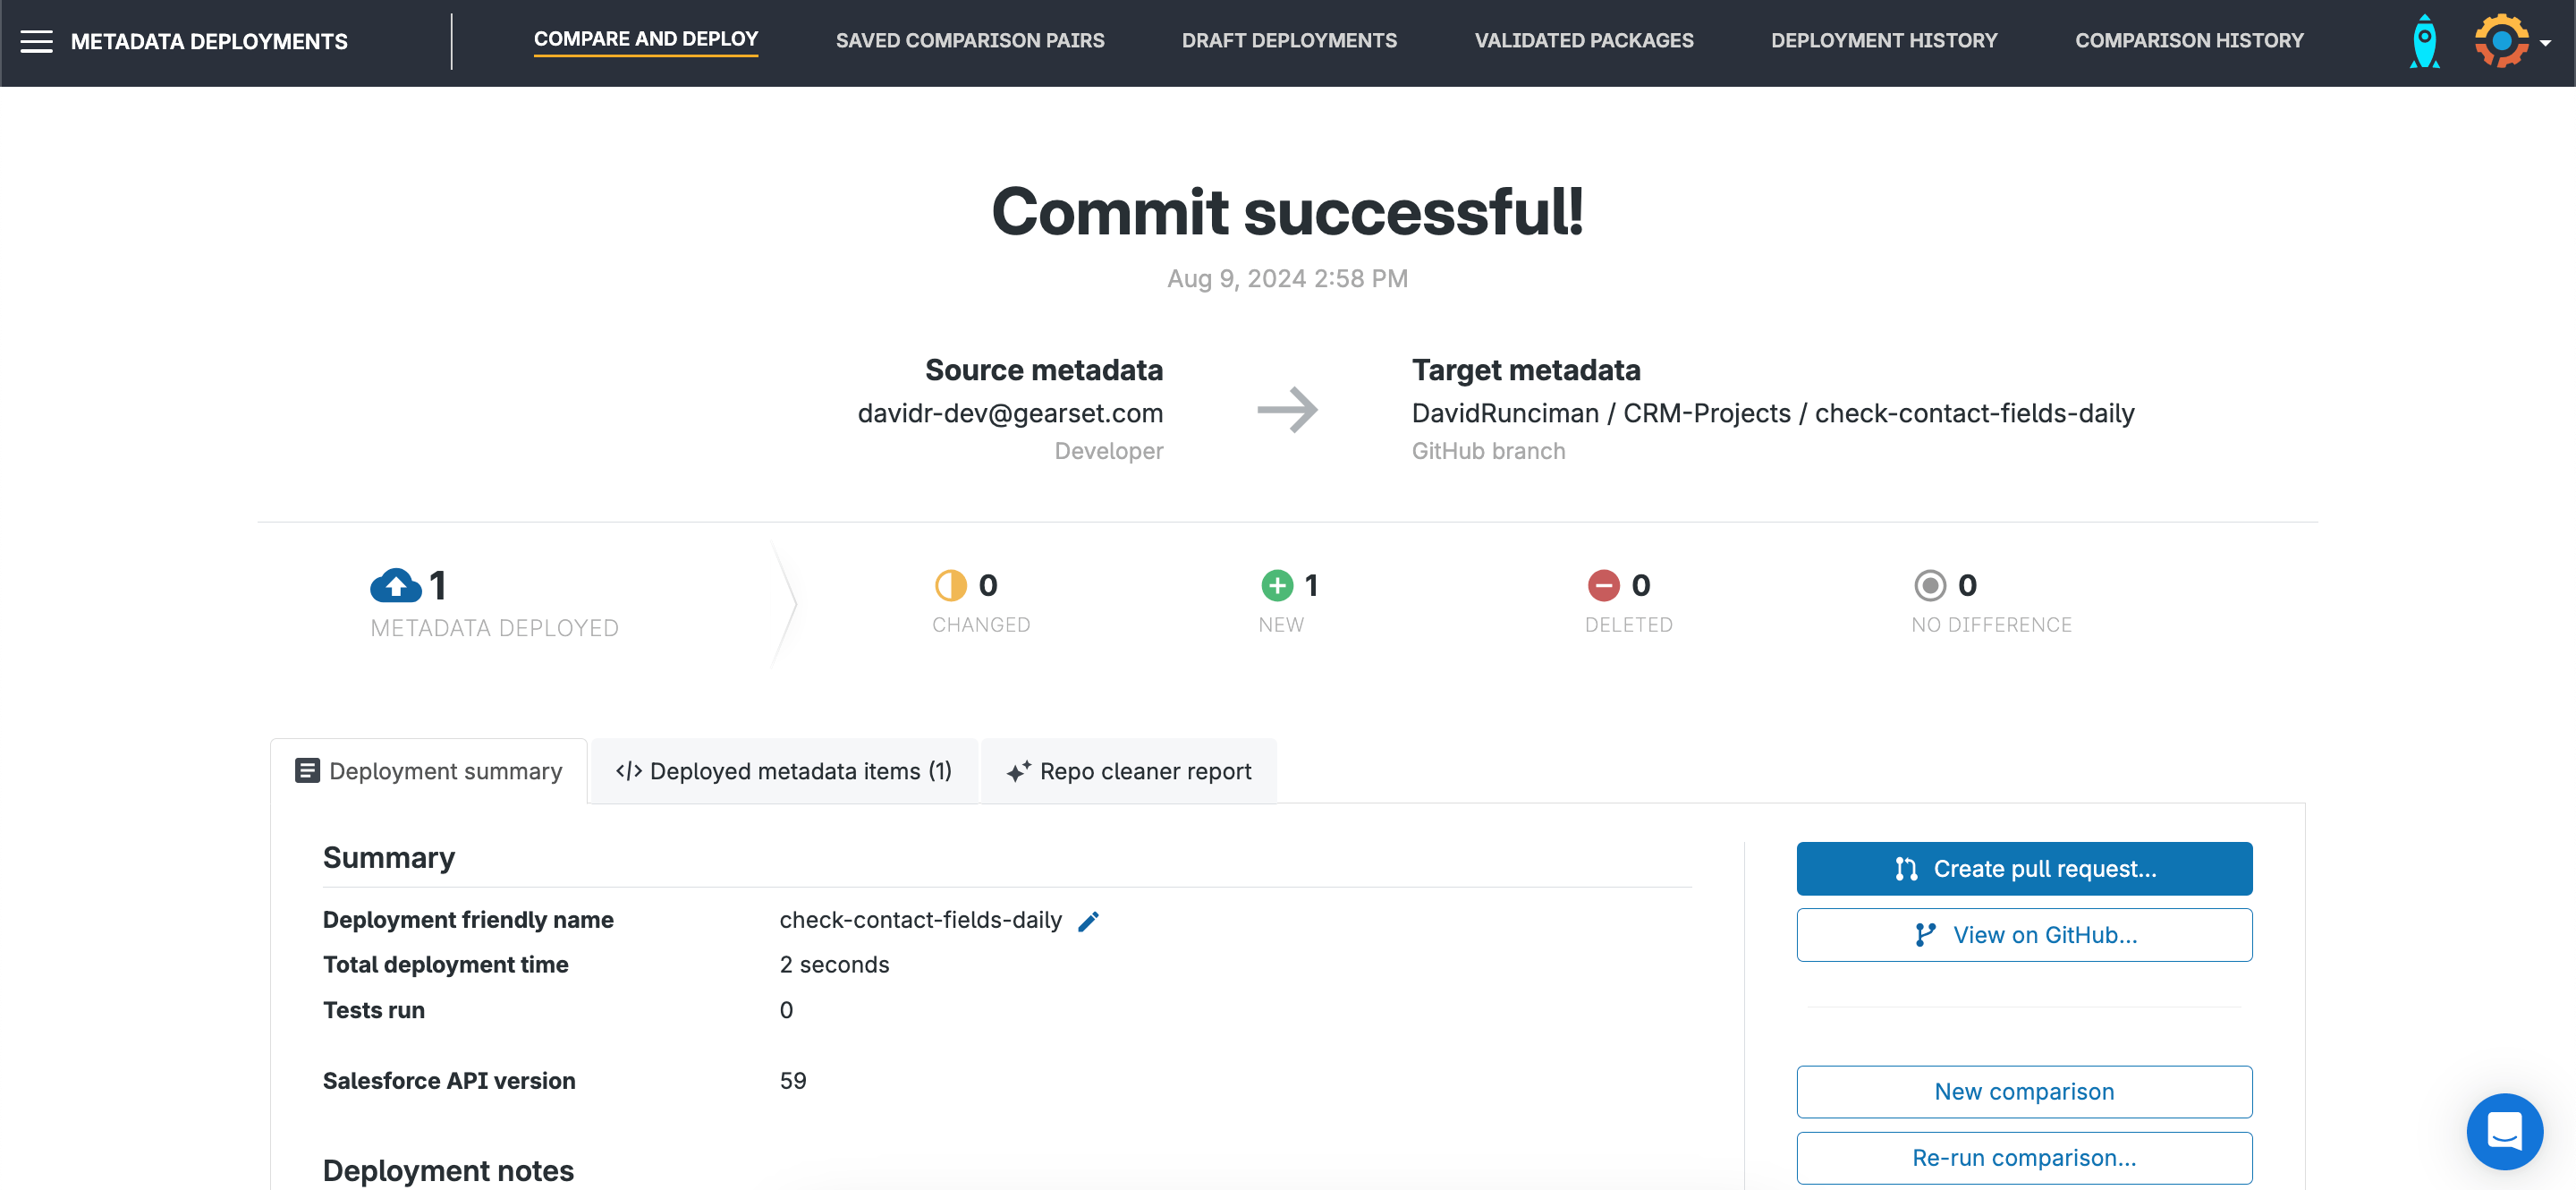
We’ve successfully committed the flow to our feature branch. From here on we can open a pull request, and then promote the change along the release pipeline.
Catch Flow errors before they impact your end users
Anyone working with Flows will know that Flow errors are inevitable. Sifting through emails from Salesforce can cause frustration. Flow error monitoring makes it easy for teams to stay on top of failing Salesforce Flows — before they impact your users or disrupt workflows. Gearset captures Flow errors in real time, giving you complete context: which Flow failed, why, what record triggered it, and when it happened. Alerts land immediately, and the Gearset UI presents a detailed, easy-to-navigate error log.
Designed with busy teams in mind, it helps admins and developers resolve issues faster and with more confidence. No more digging through debug logs or relying on user reports. Instead, you can spot patterns, monitor automation health, and keep your org running smoothly, day in and day out.
Go with the flow!
Building and deploying flows can be tricky, but with help from the community and a metadata deployment solution like Gearset, you can build and release a flow that works for you. To try deploying your schedule-triggered flow, or any other metadata for that matter, definitely give Gearset a go on a free 30-day trial. Or book a demo to get a guided tour of the whole platform.
