

Paths are great for adding context around a business process. At a glance, your end users can see where a record is in its lifecycle and exactly what actions are needed to move it forward to the next stage.
In this post we’ll look at how you can create a path for an object in Salesforce and easily deploy it to your production org using Gearset.
What is a Salesforce path?
Salesforce paths are a handy feature that can be found on Lightning Experience. Paths show as a progress bar on record pages, allowing end users to see a simple visualization of a record’s journey and quickly identify the right next steps for the record to be taken forward. For example, a sales team will want to know how close an opportunity is to closing or a customer support team might need to know when a new customer has completed a number of onboarding stages.
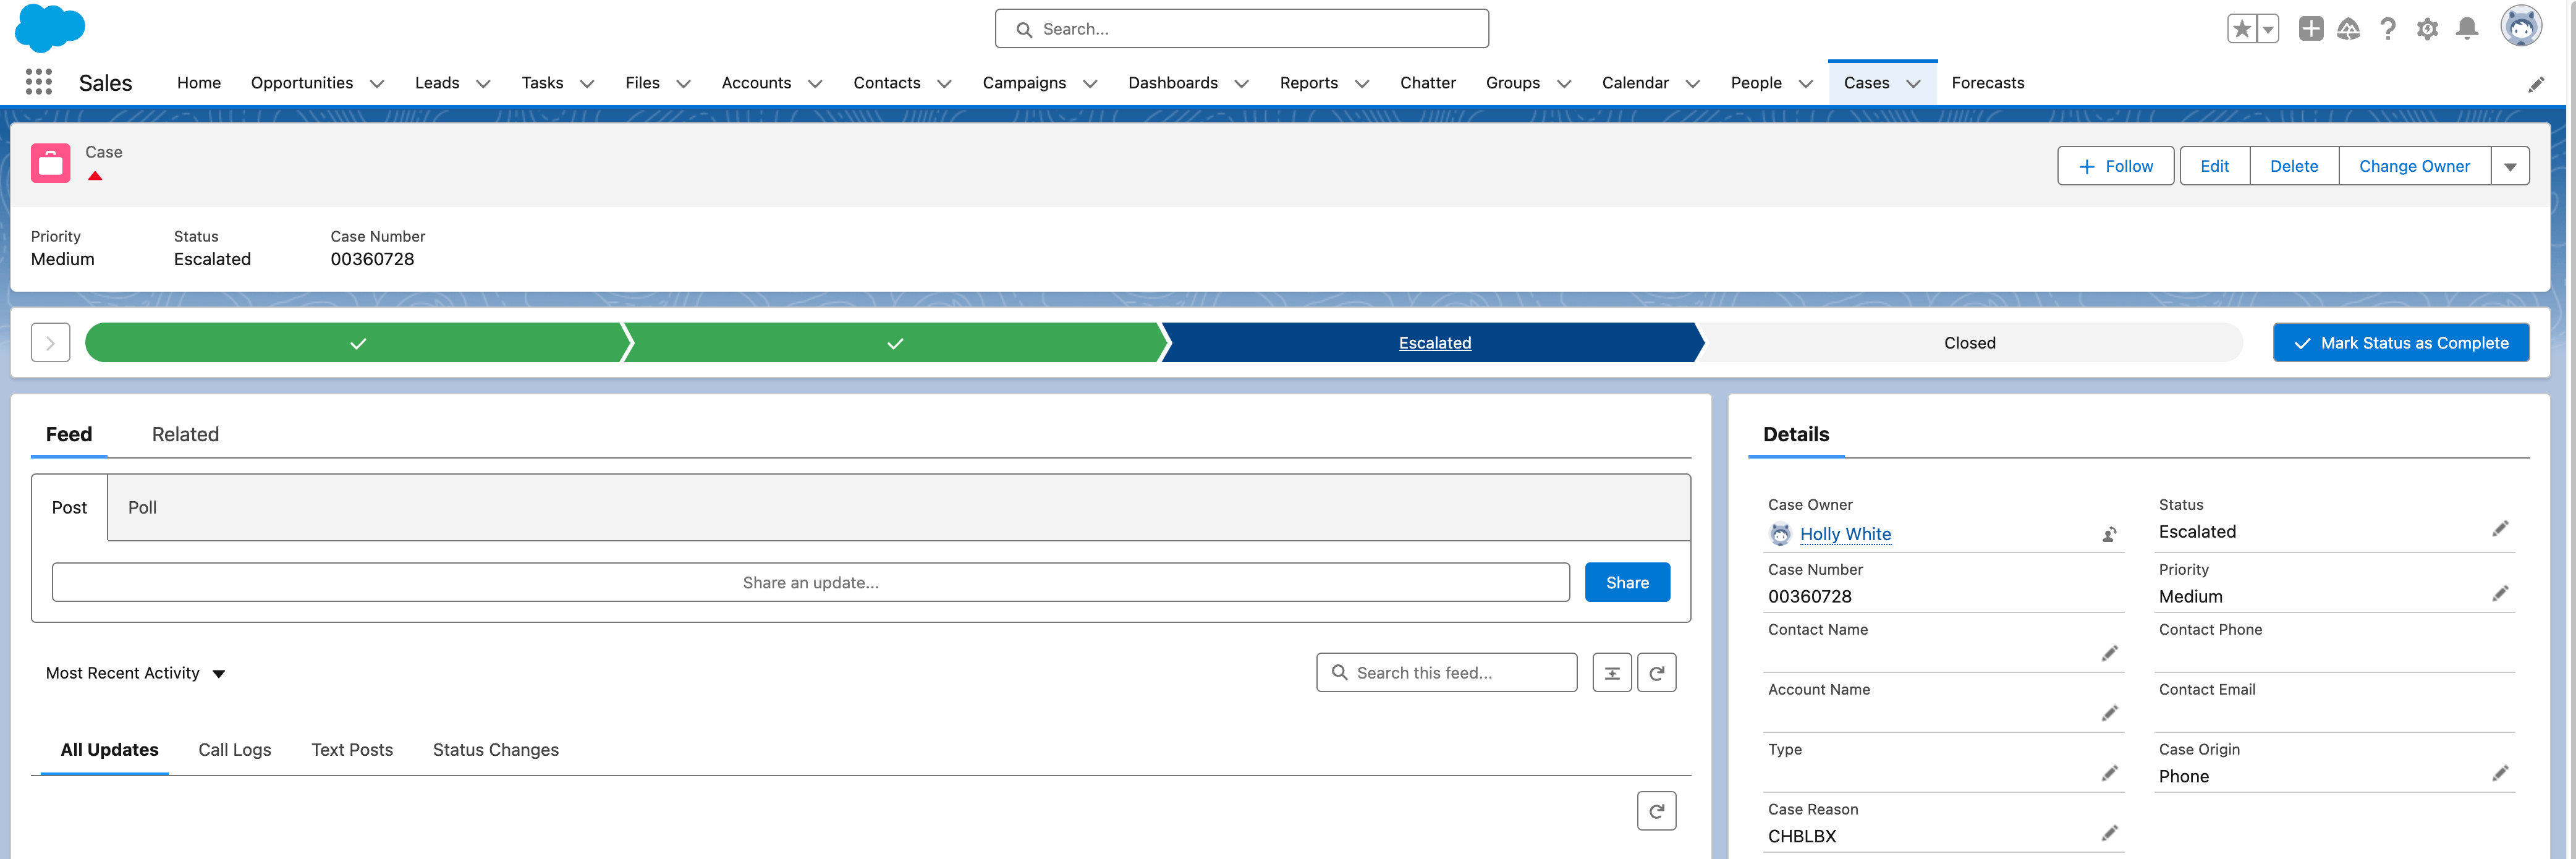
The path feature is available on a bunch of objects including accounts, cases, leads and custom objects.
The great thing about this feature is that paths are completely customizable and easy for low-code admins to configure path settings and add or change stages.
London, UK
Agentforce World Tour London
What’s a Salesforce path setting?
Path settings are the different customizations you can make to your sales path. You can add key fields and extra guidance at each stage to make sure the end user knows exactly what’s happening with a particular record at that stage. Things like who owns the opportunity or whether the record is a priority can all help save time when it comes to closing a lead or pushing a customer’s order to dispatch status.
How to create a Salesforce path
Creating a path in Salesforce is a relatively simple process. Let’s look at the steps:
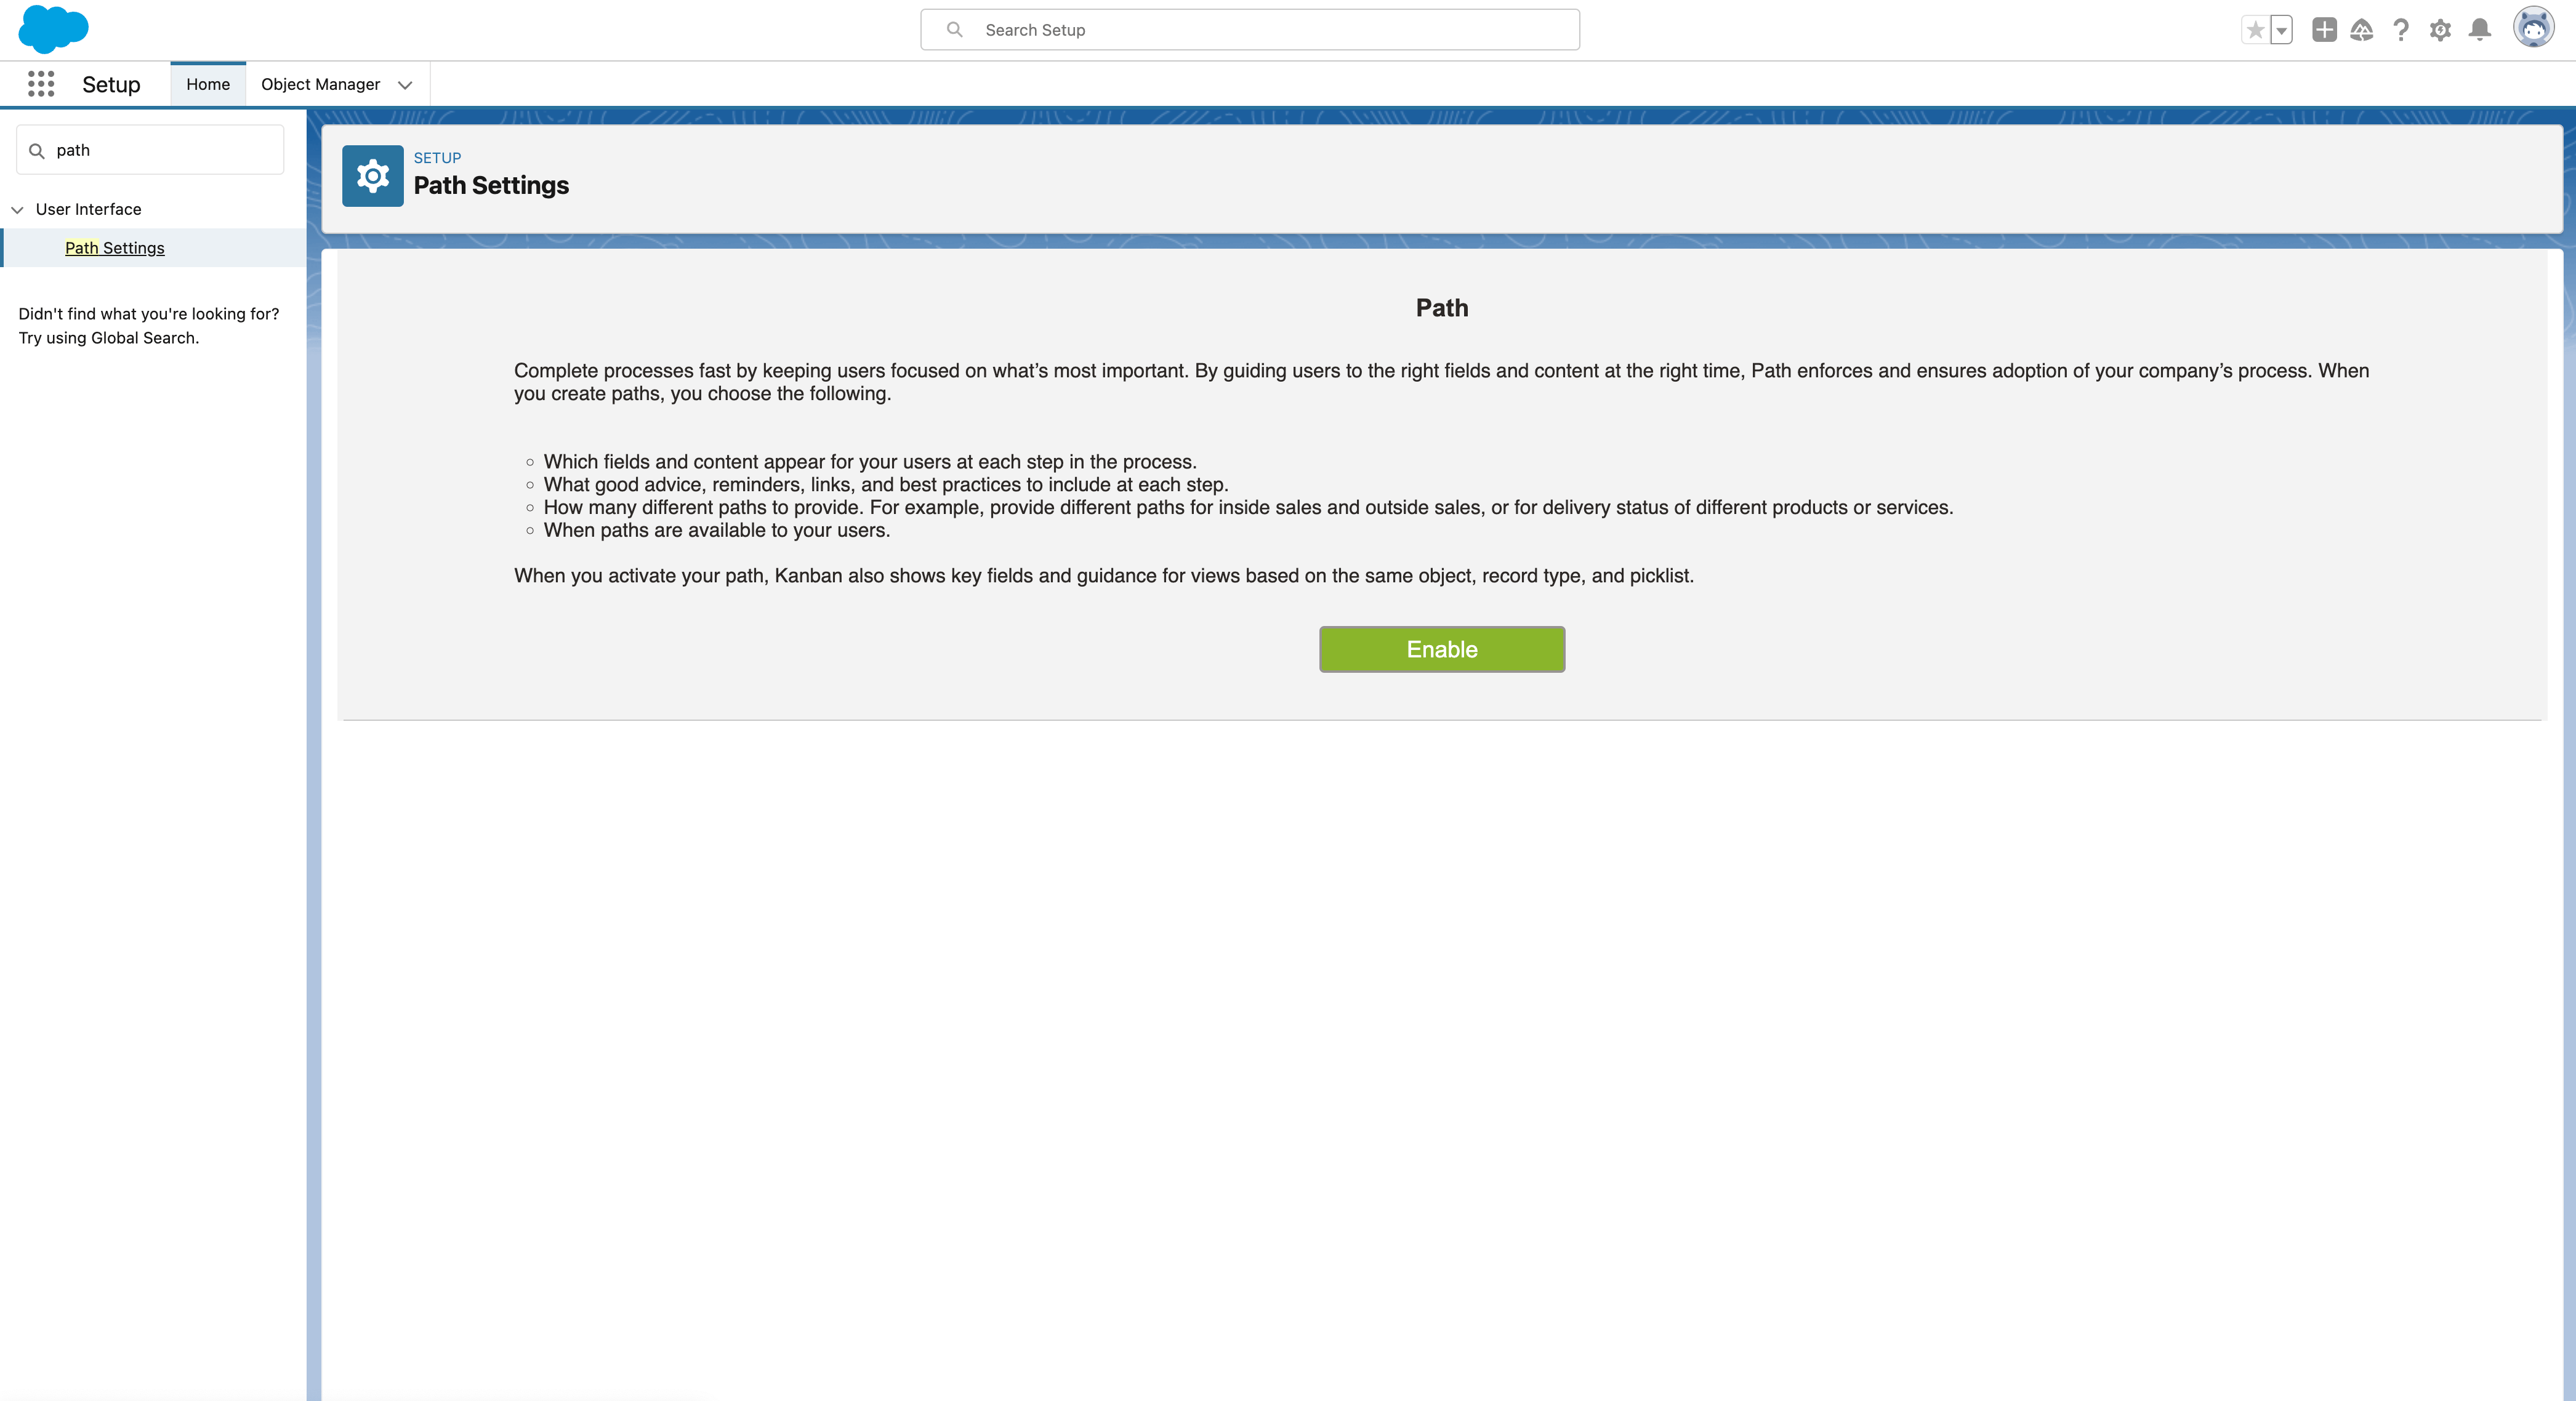
Navigate to Path Settings using the quick find box and enable your path feature.
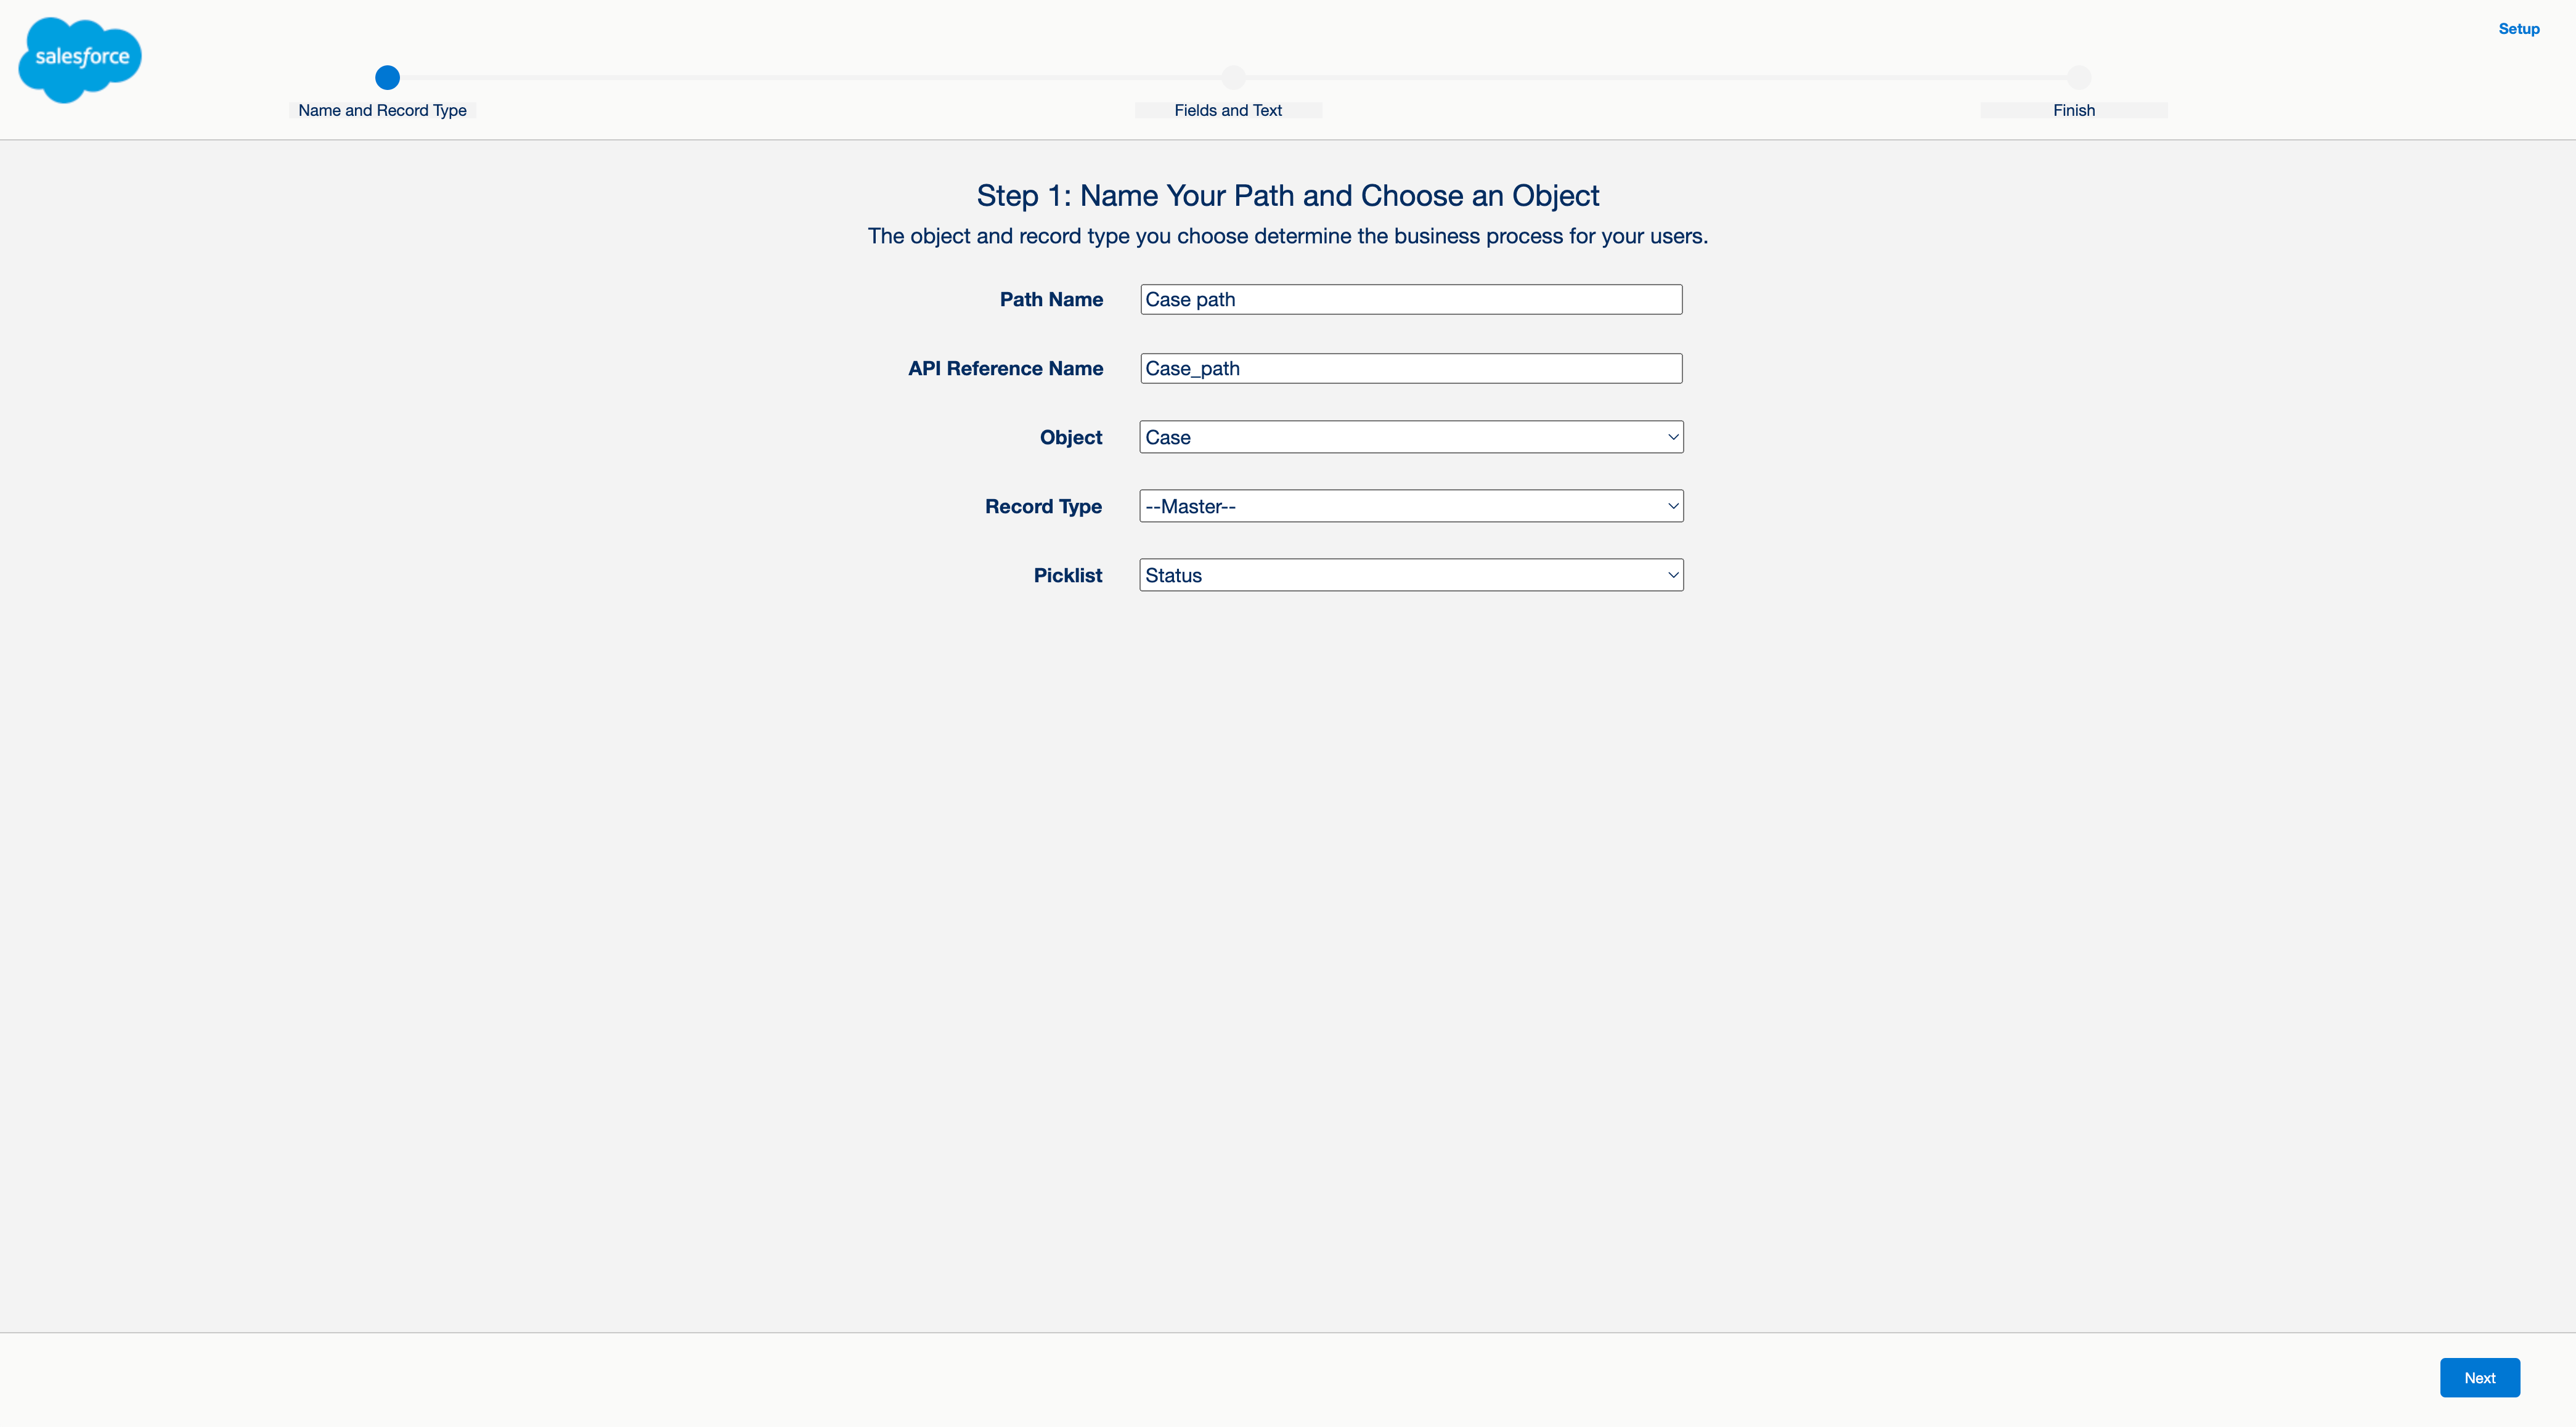
Click New and give your path a name. Choose the object you want to add your path to, and select the case, record type and picklist. Click Next.
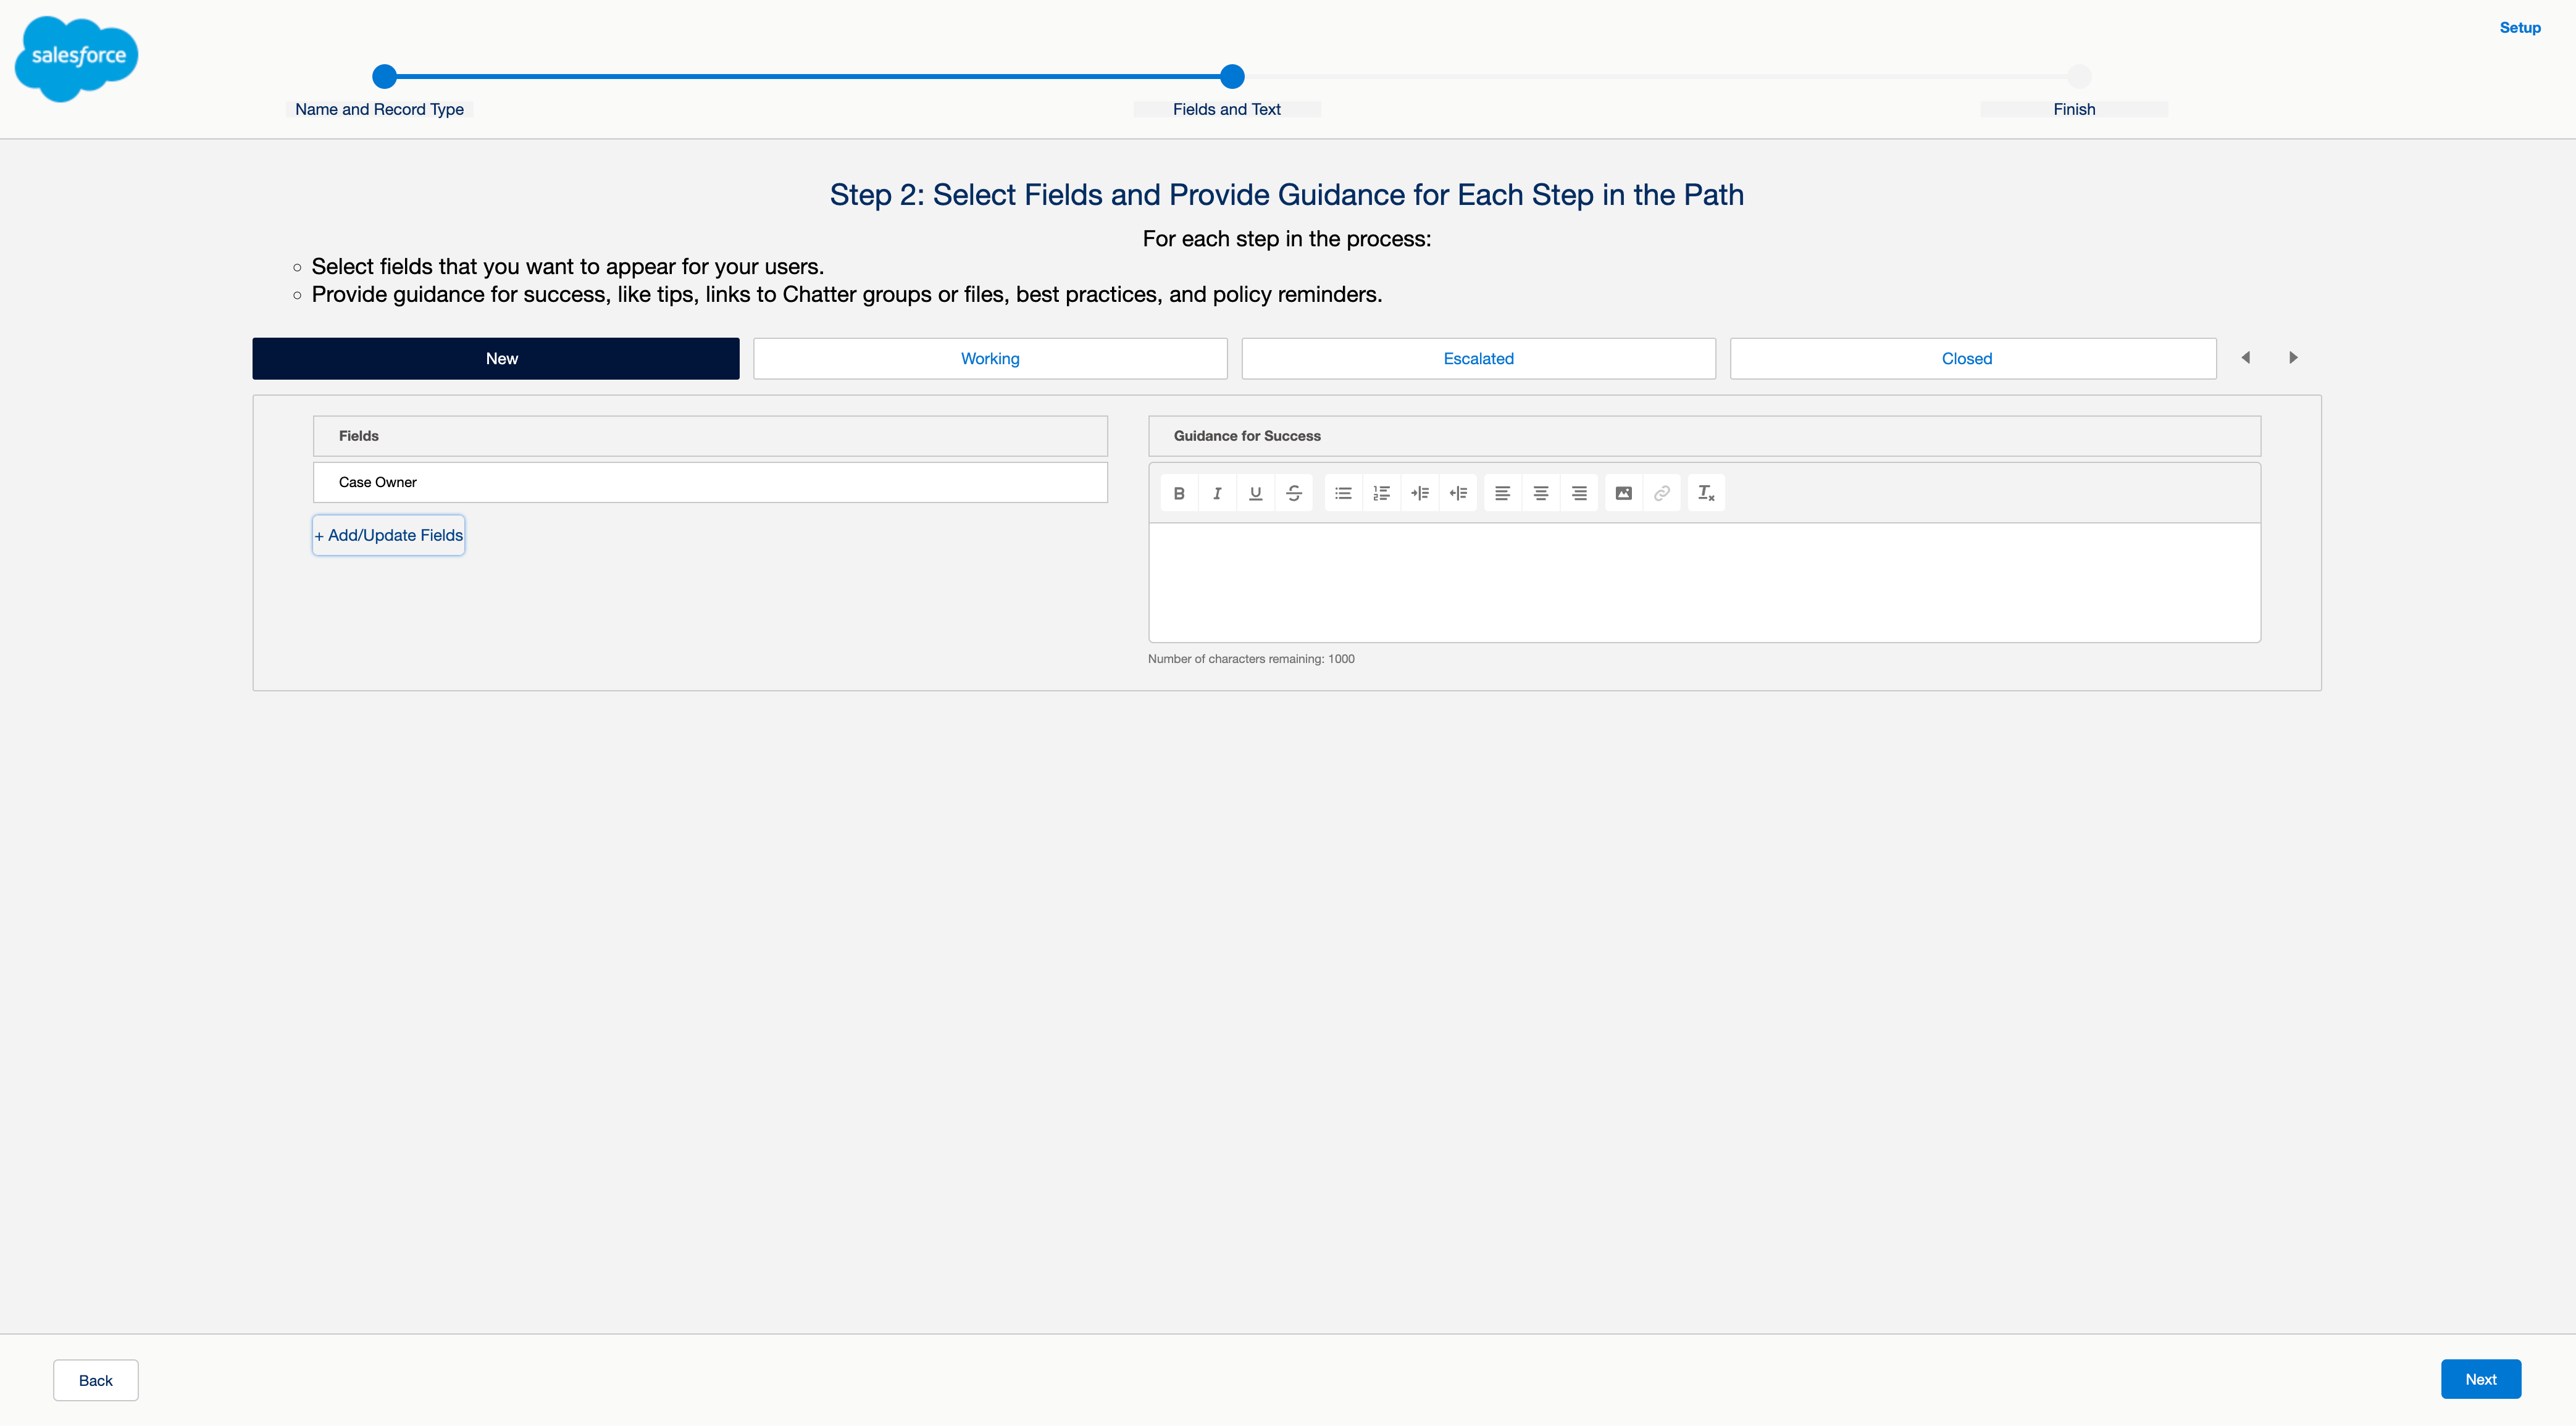
Select the fields you want to add to each stage and any guidance you want the end user to see. Click Next.
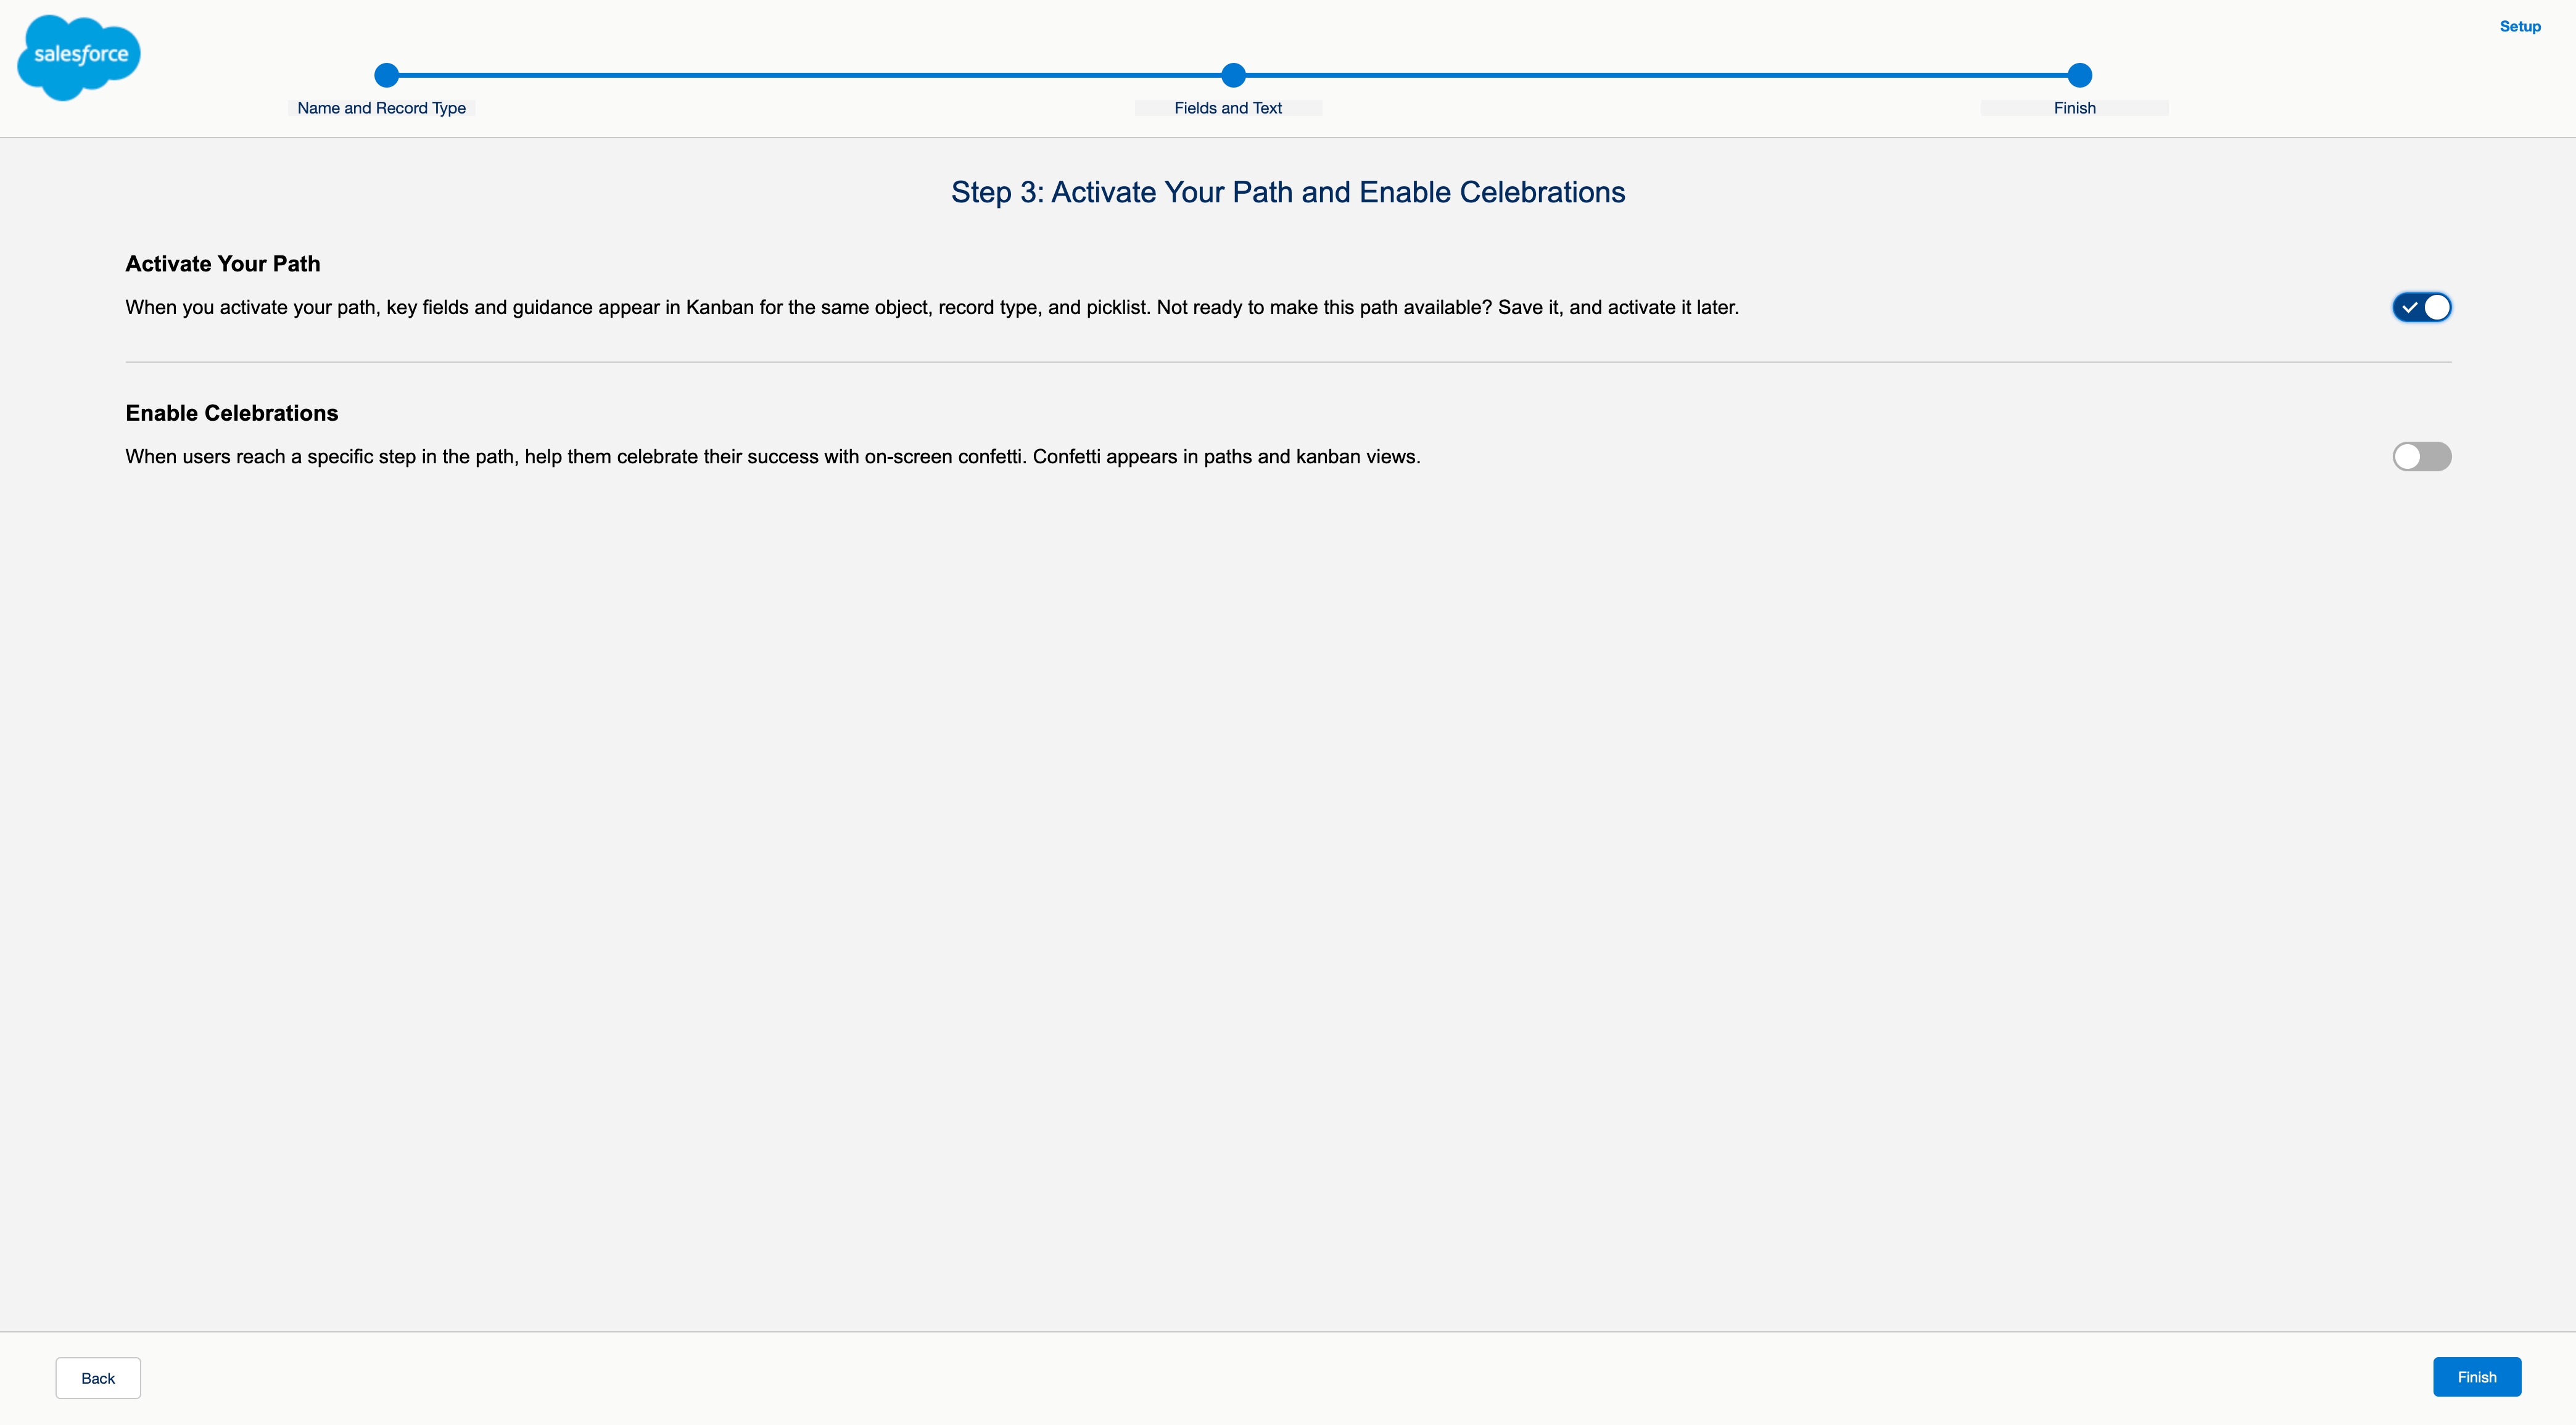
Use the toggle to activate your path and add any confetti celebrations to perk up your end users when they complete a path! Your new path will now be listed in your path settings.
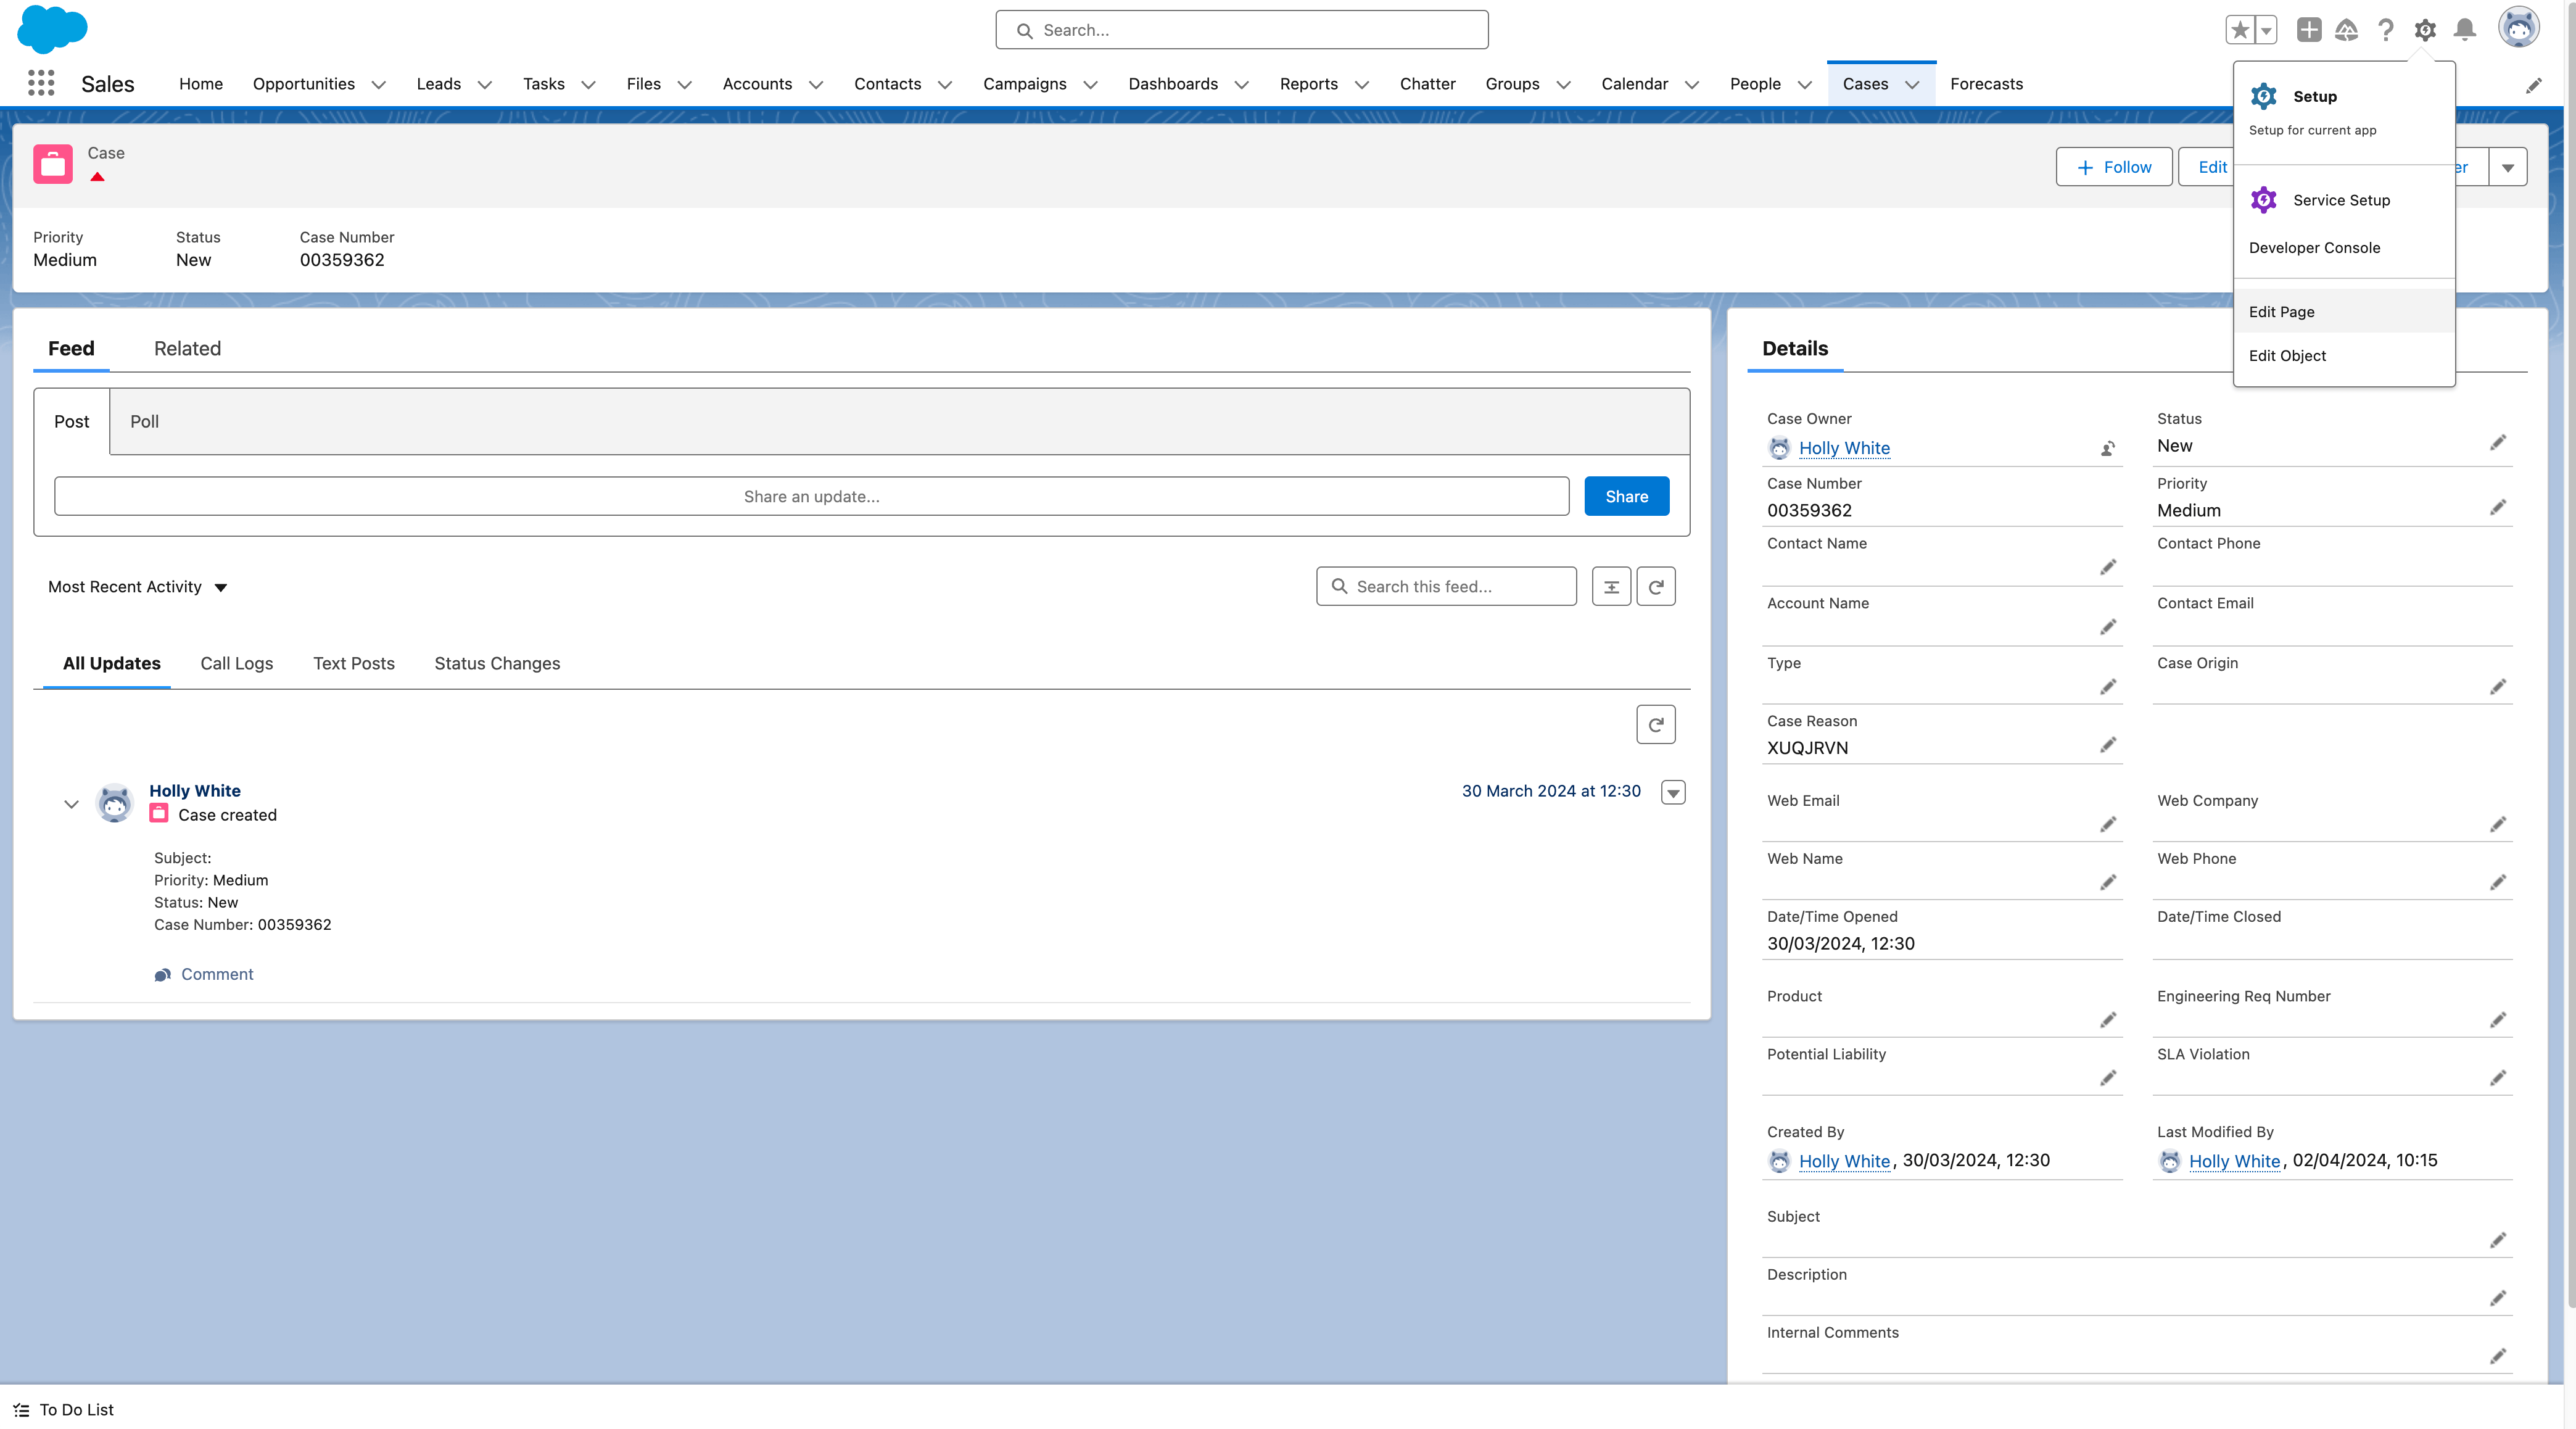
Next, we need to make our path visible in the UI using a flexipage. Navigate to your object page that you created the path for. Click the set up cog in the top right and select Edit Page. This will take you to the Lightning App Builder.
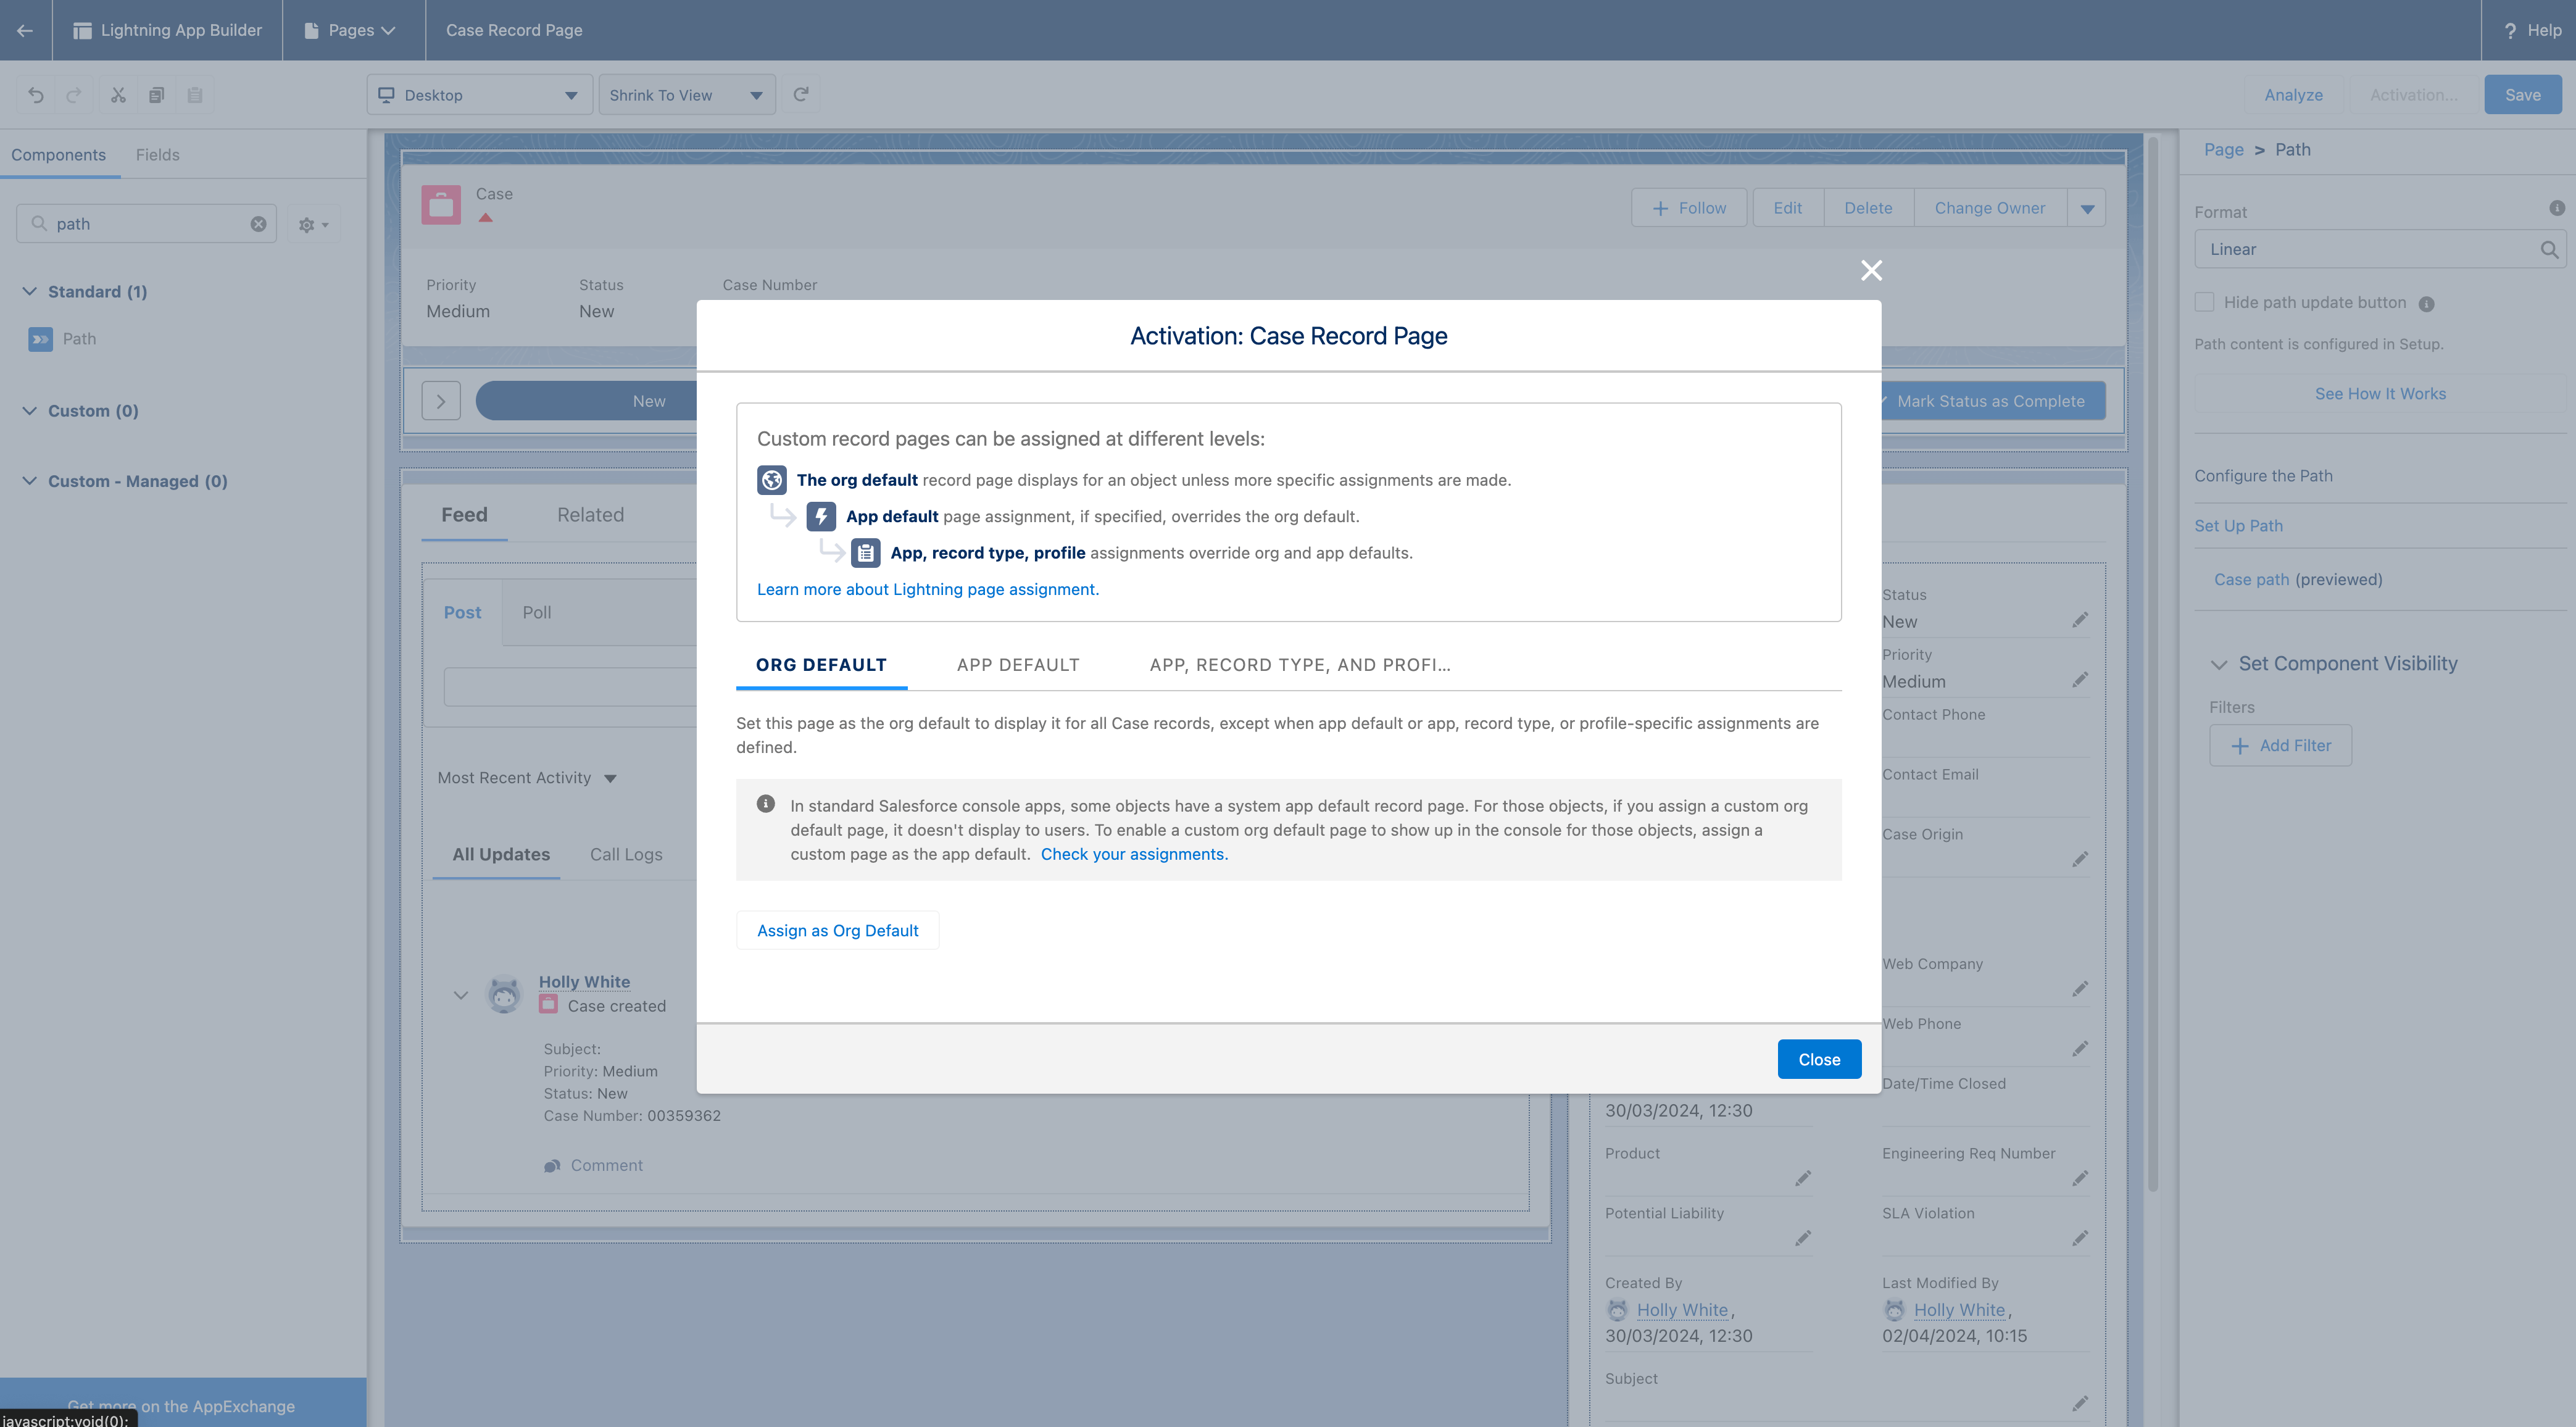
Type Path into your left hand side components search and drag and drop it where you would like it to go. Click Save.
Choose whether you want your path to appear as the default across your org for the chosen object.
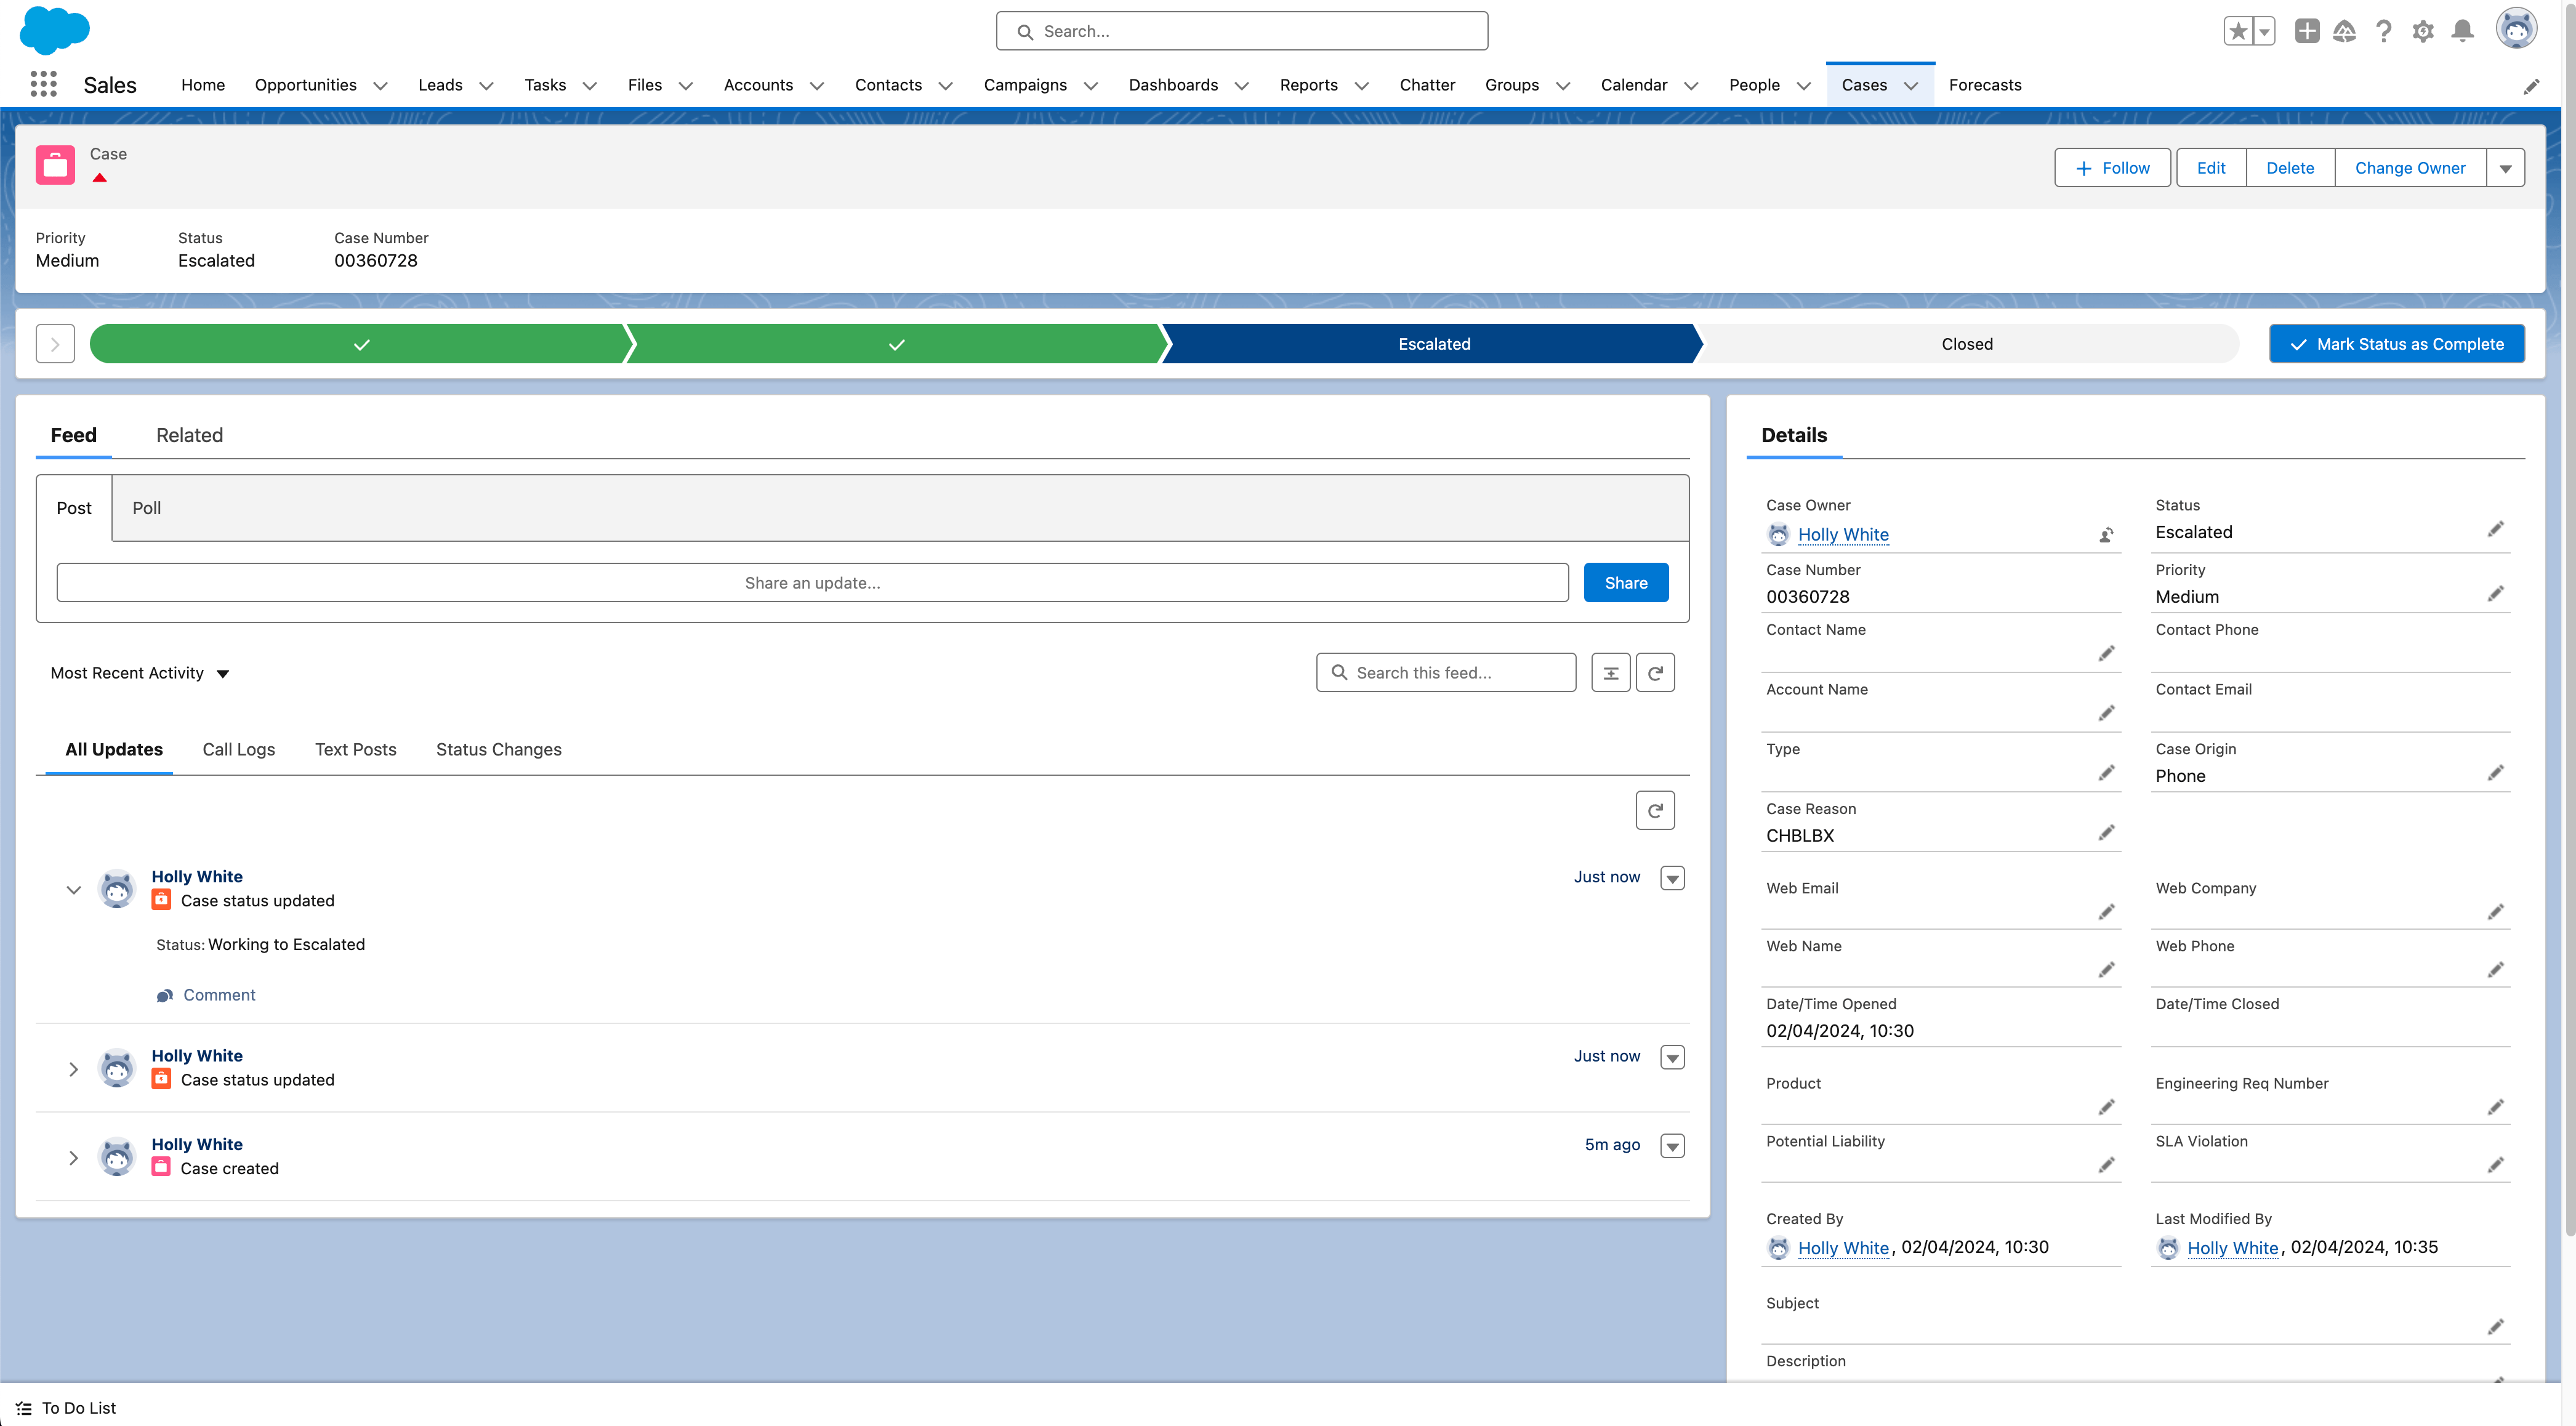
Check your path is showing in your Salesforce UI and test it to see if it works as expected.
Now we’ve created the path in our test environment, we’ll need to deploy it to our production environment.
How to deploy your path in Gearset
You can deploy paths using change sets, but they’re tricky to manage, especially when deploying from a sandbox — some bypass change sets all together to replicate the entire path in the production environment.
Thankfully, this isn’t necessary. Deploying your paths is really easy with Gearset. You can sign up for a free trial of Gearset now, and follow along this walkthrough.
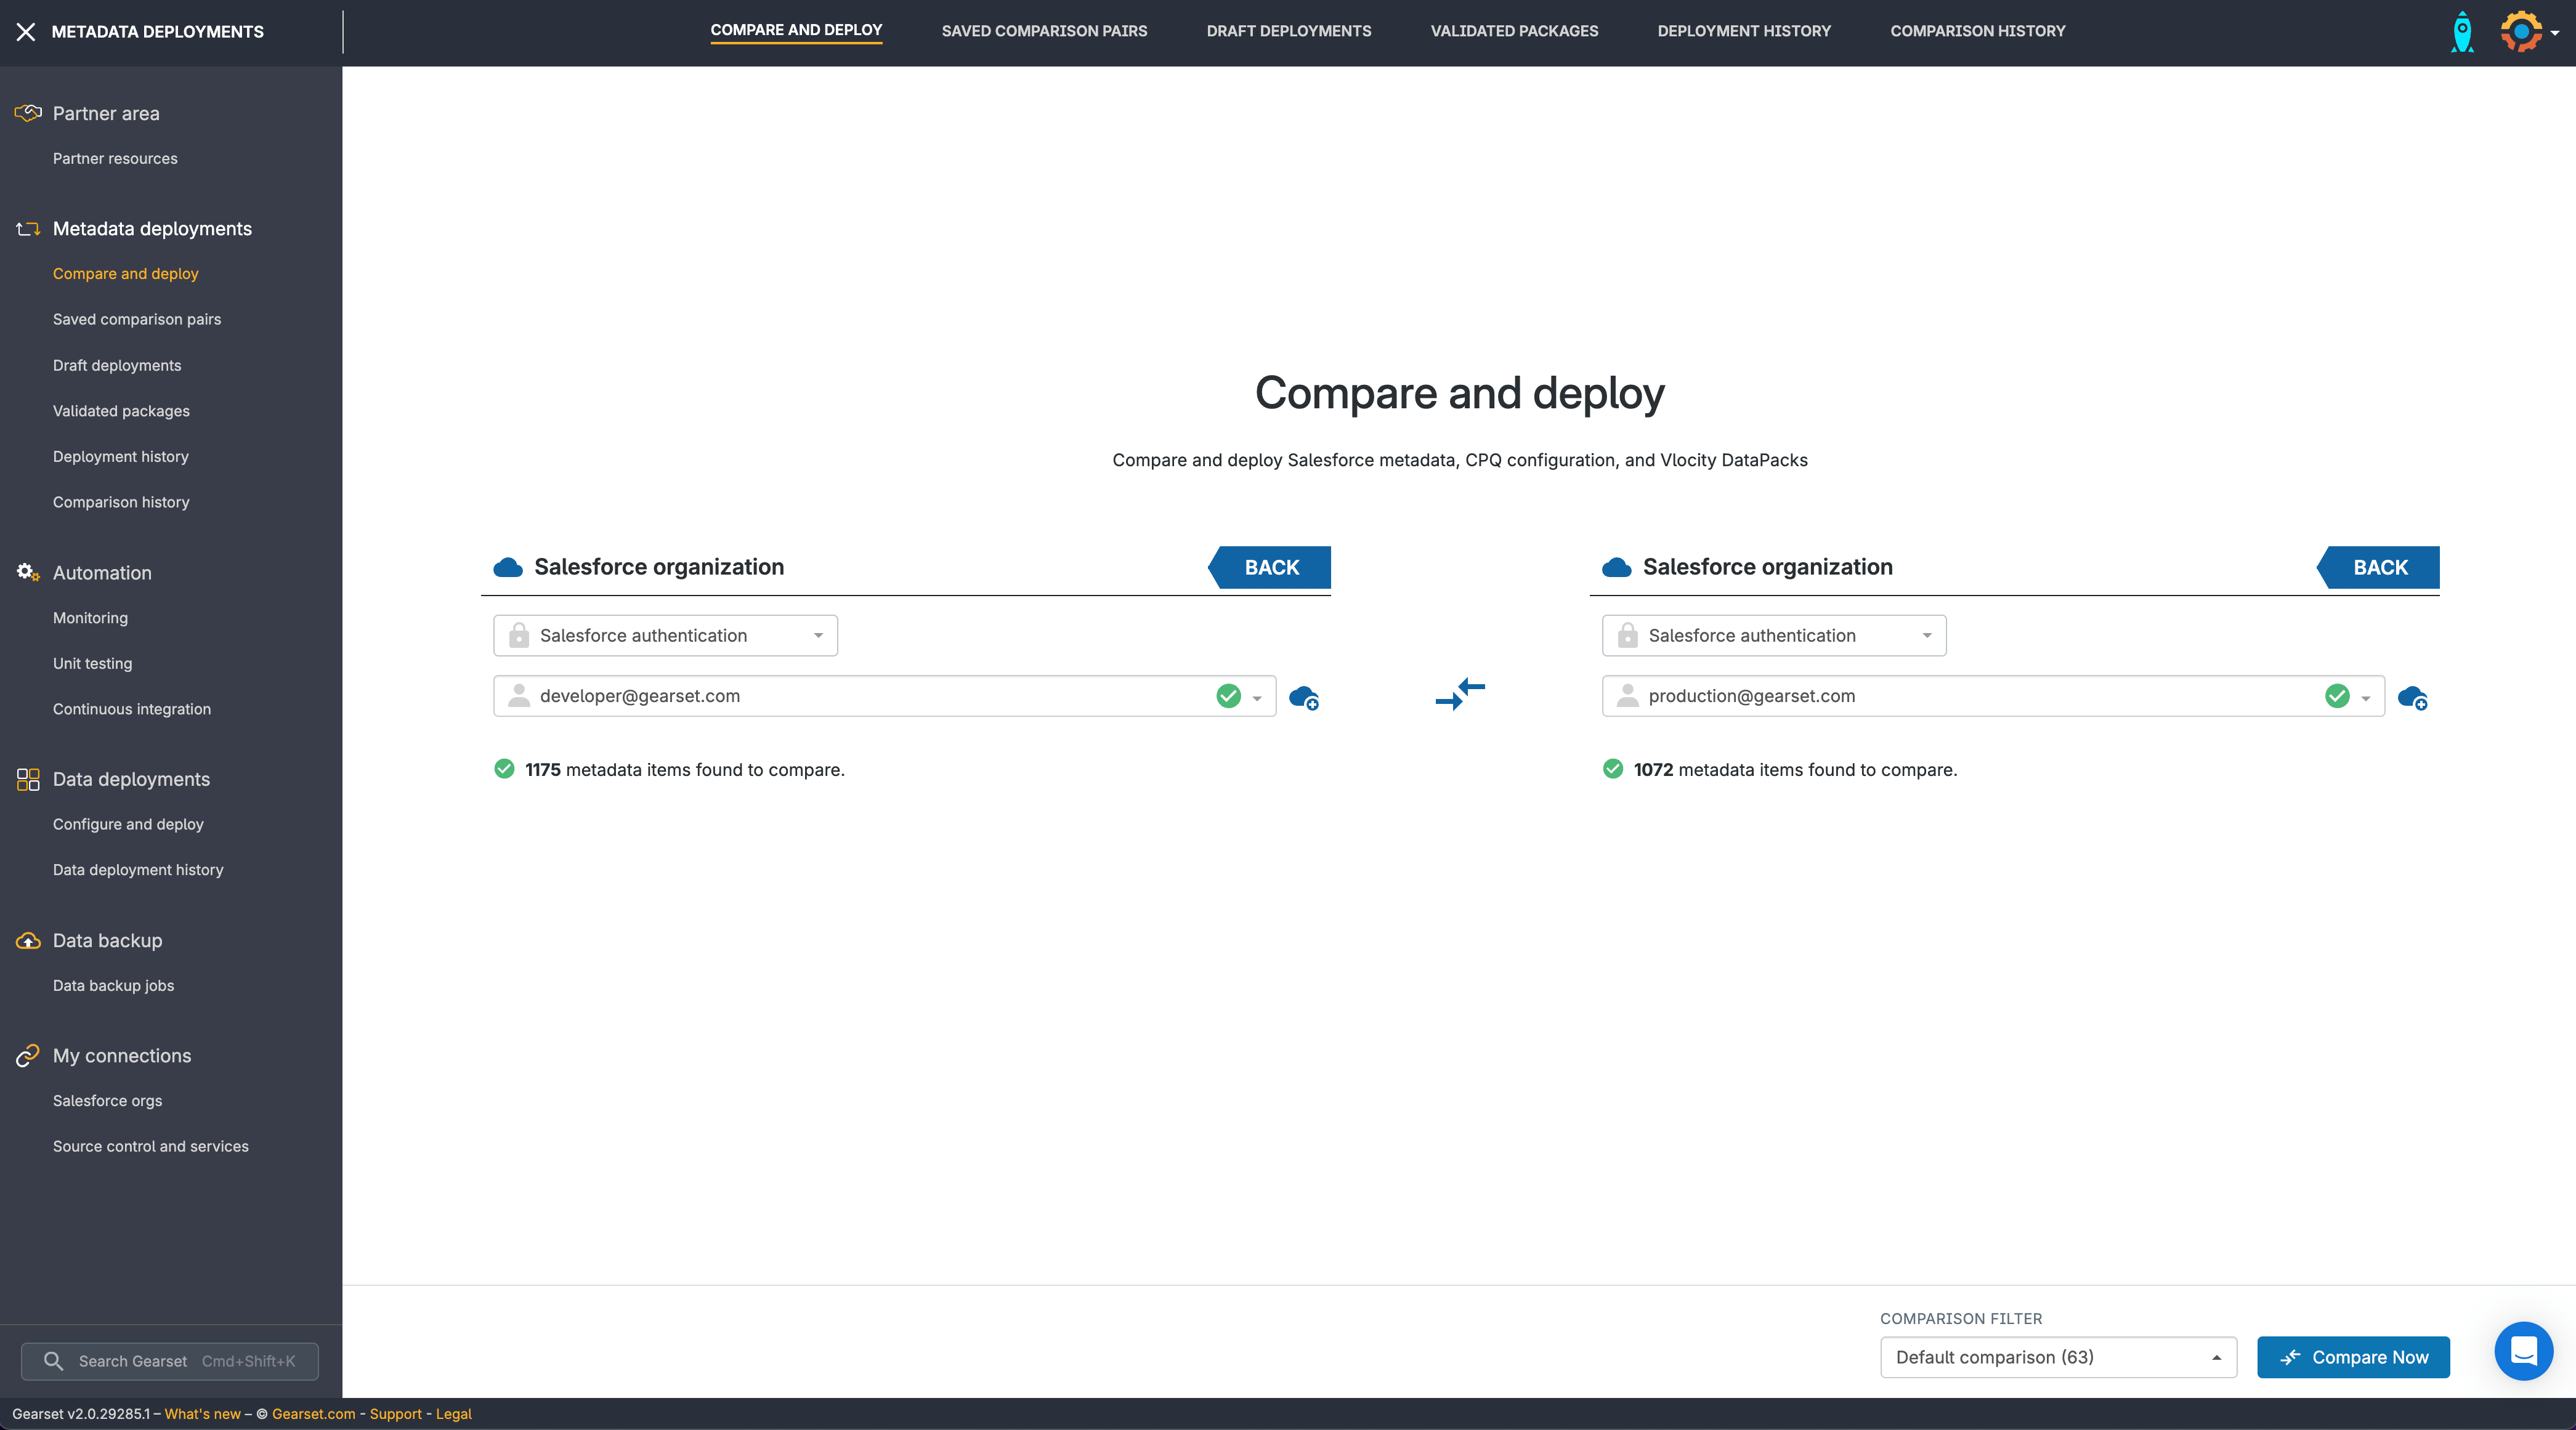
Select your source and target orgs
From the Compare and deploy page, select your source and target orgs – in this case, the org we created our path in as the source and our production org as the target. Click Compare Now.
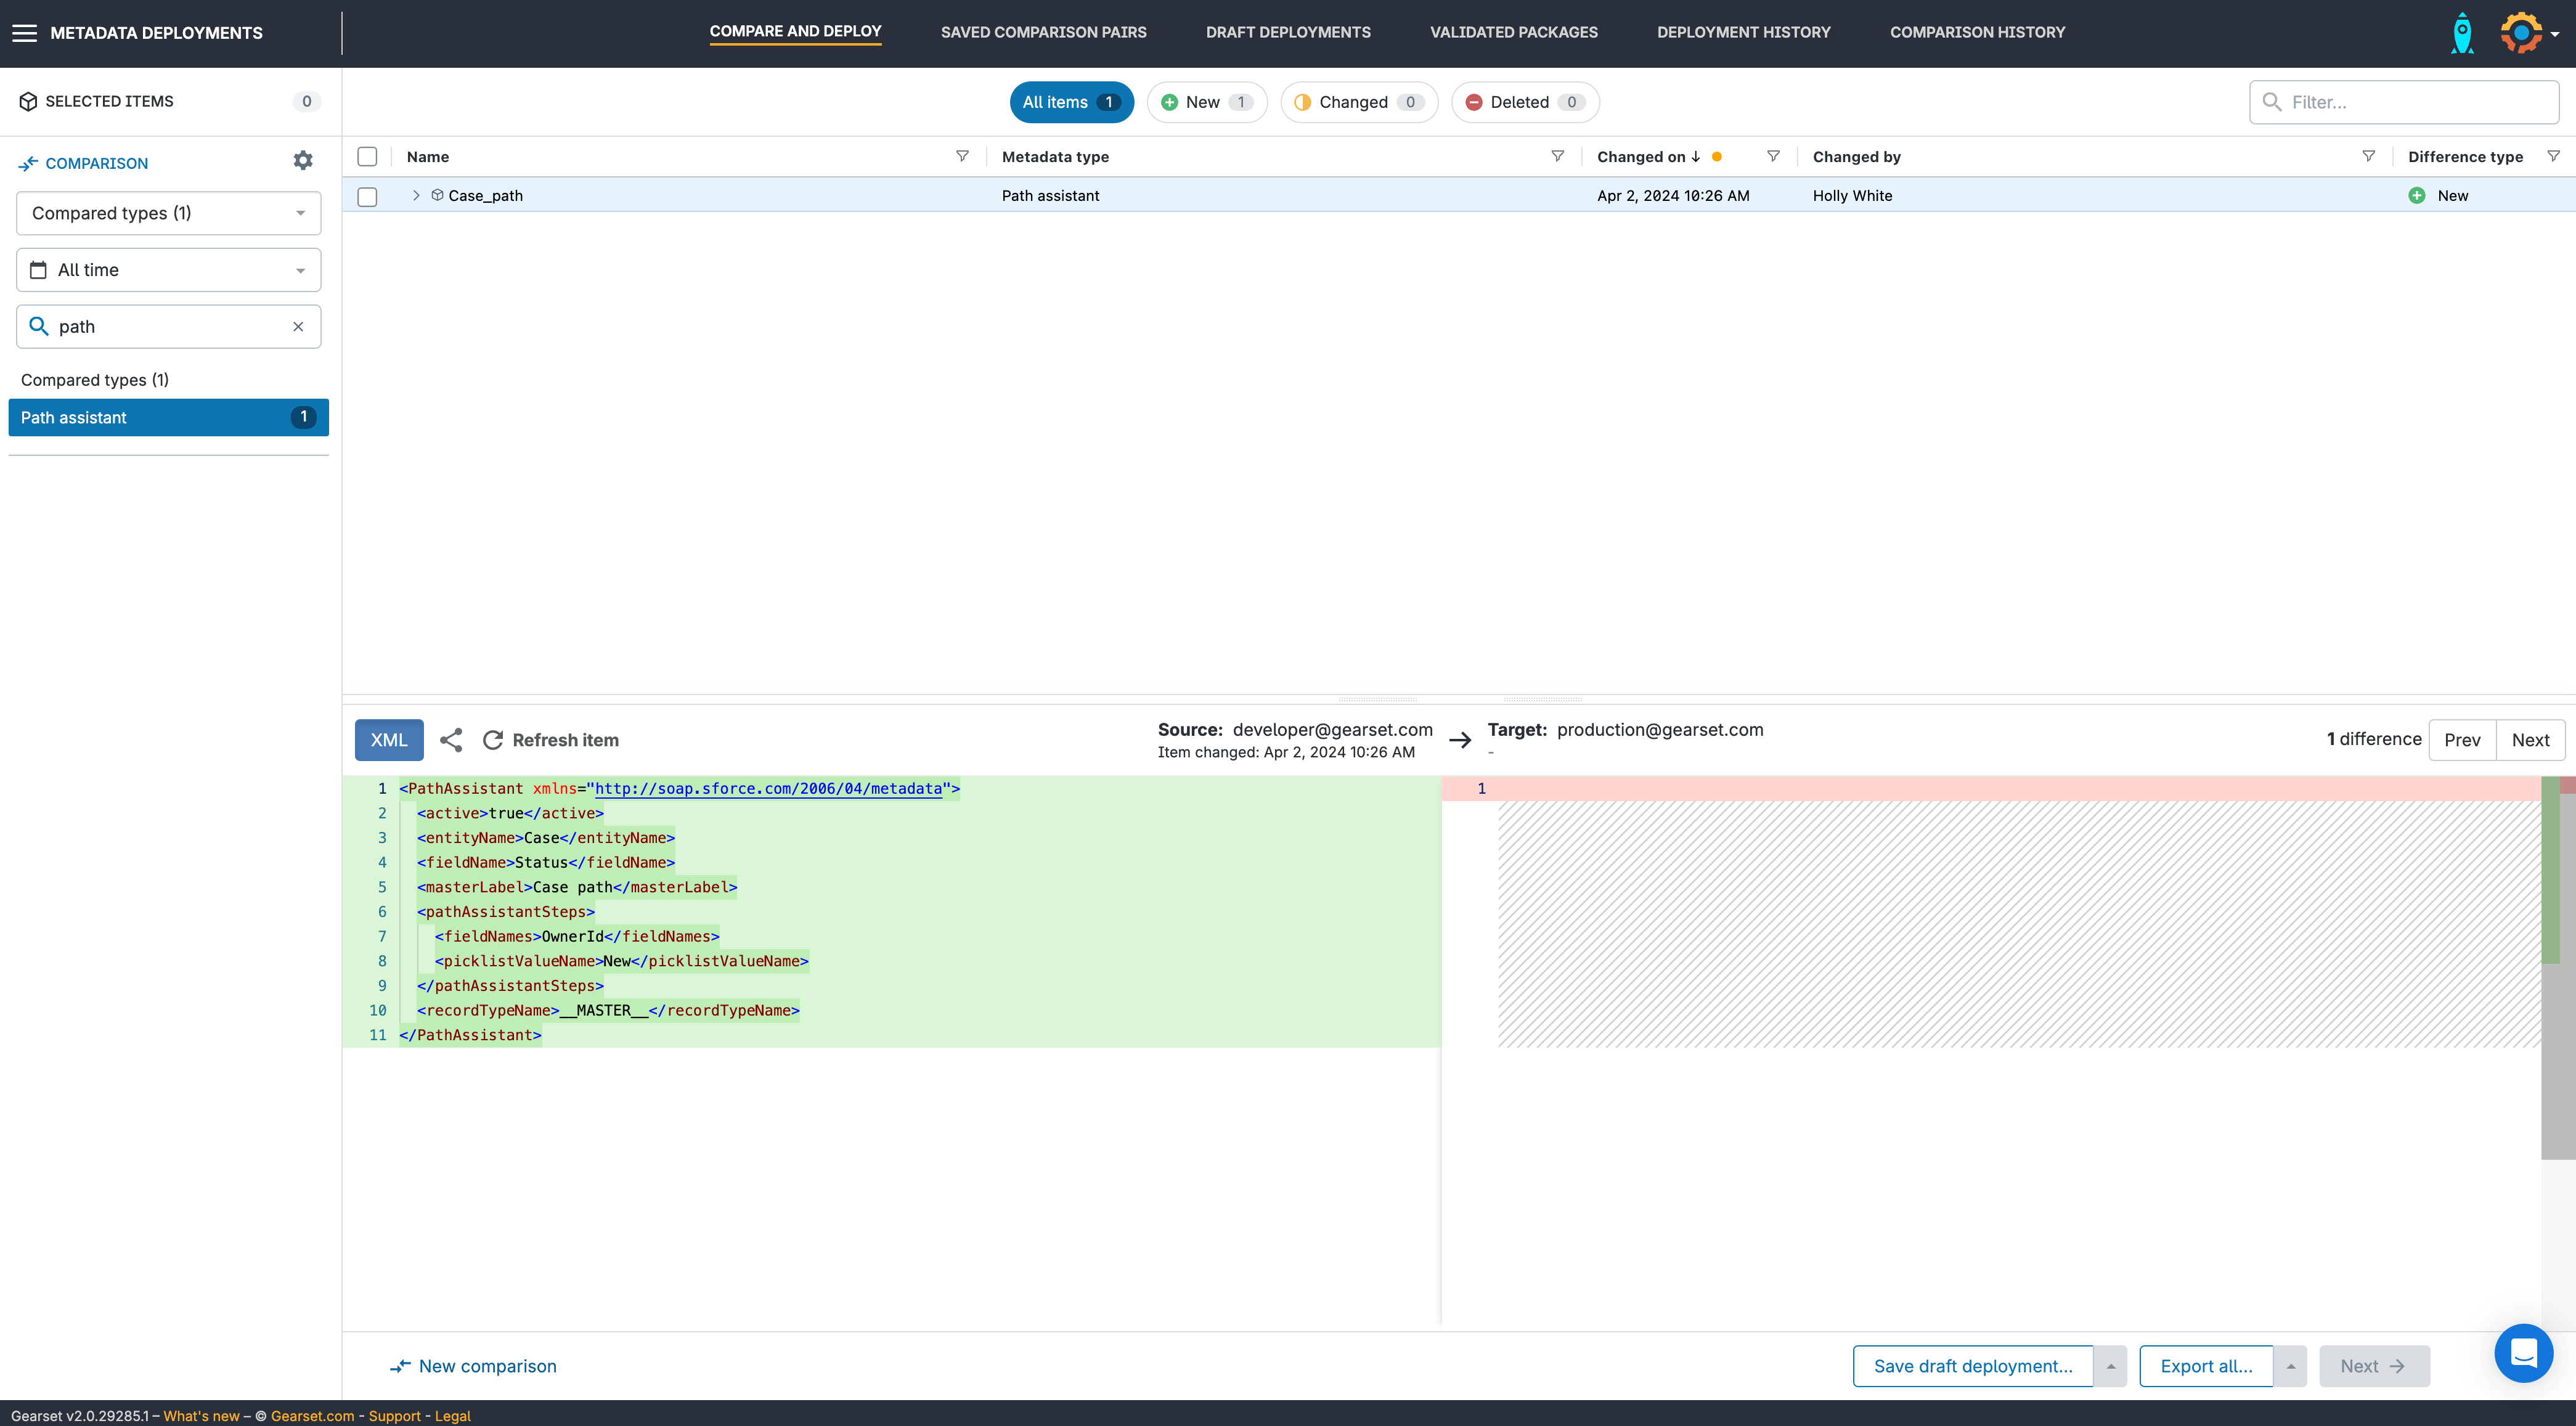
Find your path
Search for your path using the metadata filters on the left hand side. Your path component will be there as the metadata type Path assistant.
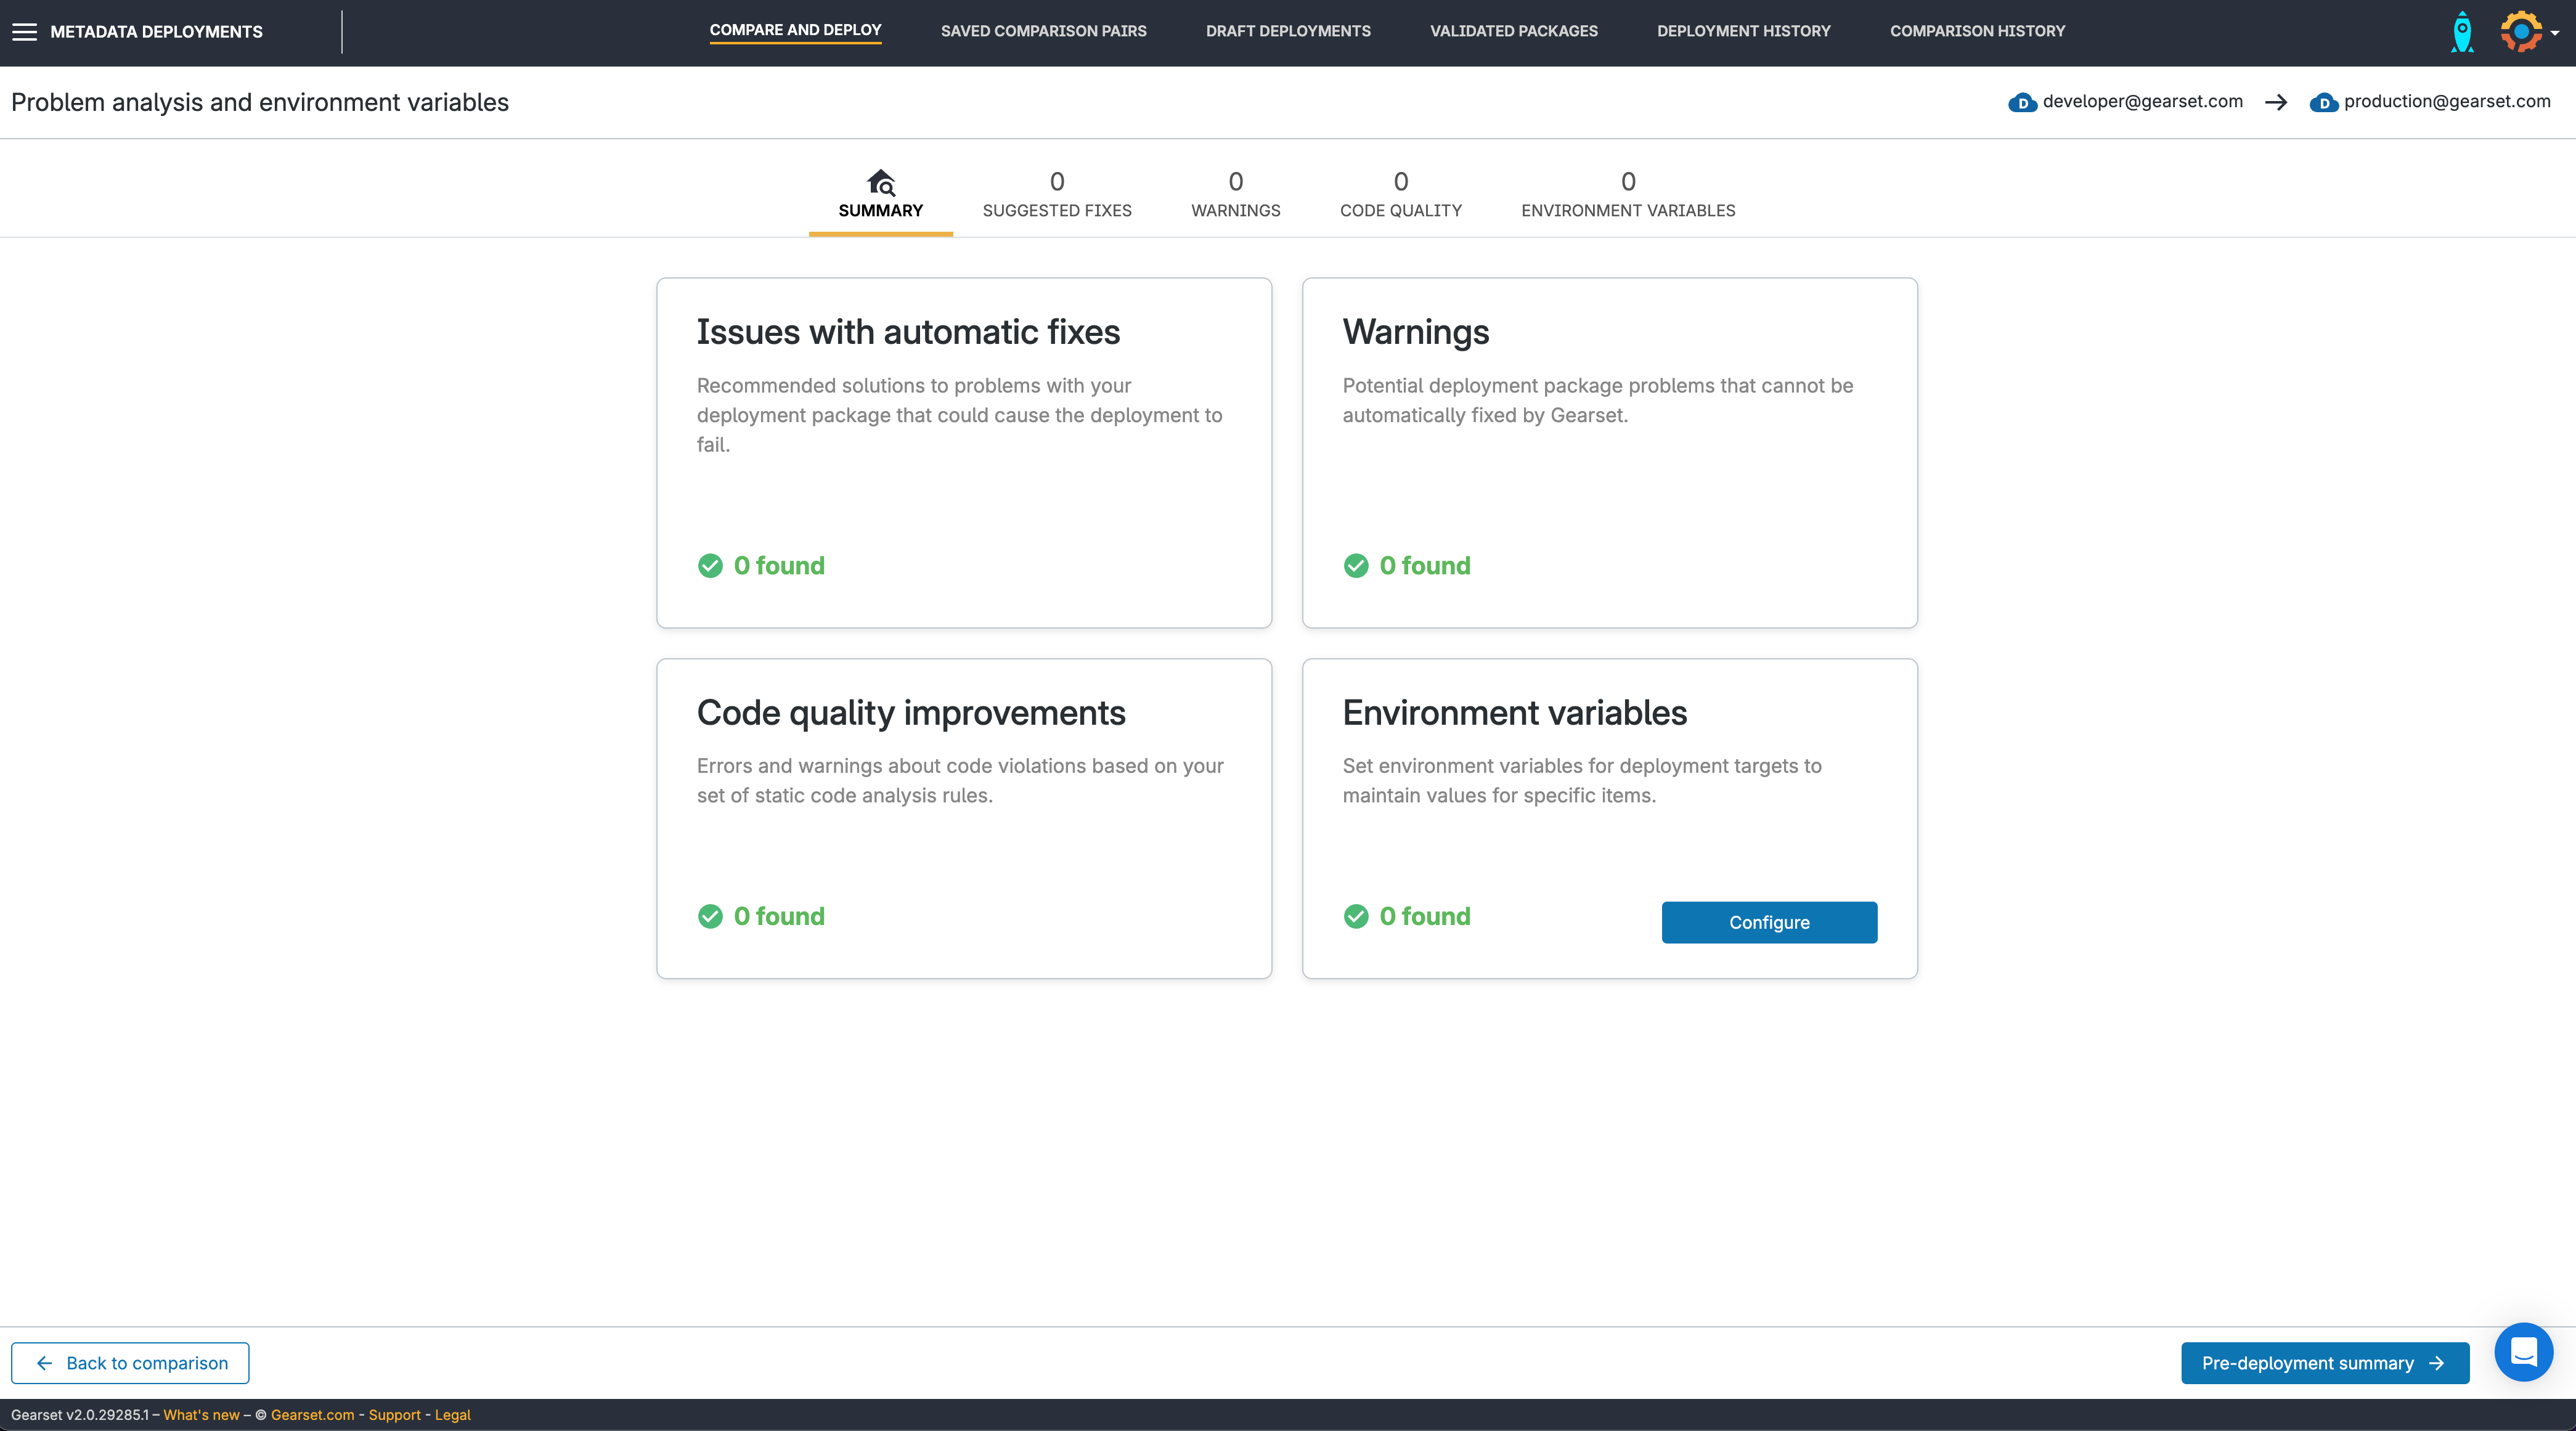
Run the problem analyzers
Gearset’s problem analyzers will pick up any missing dependencies or flag any other issues that could cause the deployment to fail, as well as suggesting a fix. Gearset will also run static code analysis on your deployment package, to highlight any violations. Once you’re happy, click through to the Pre-deployment summary.
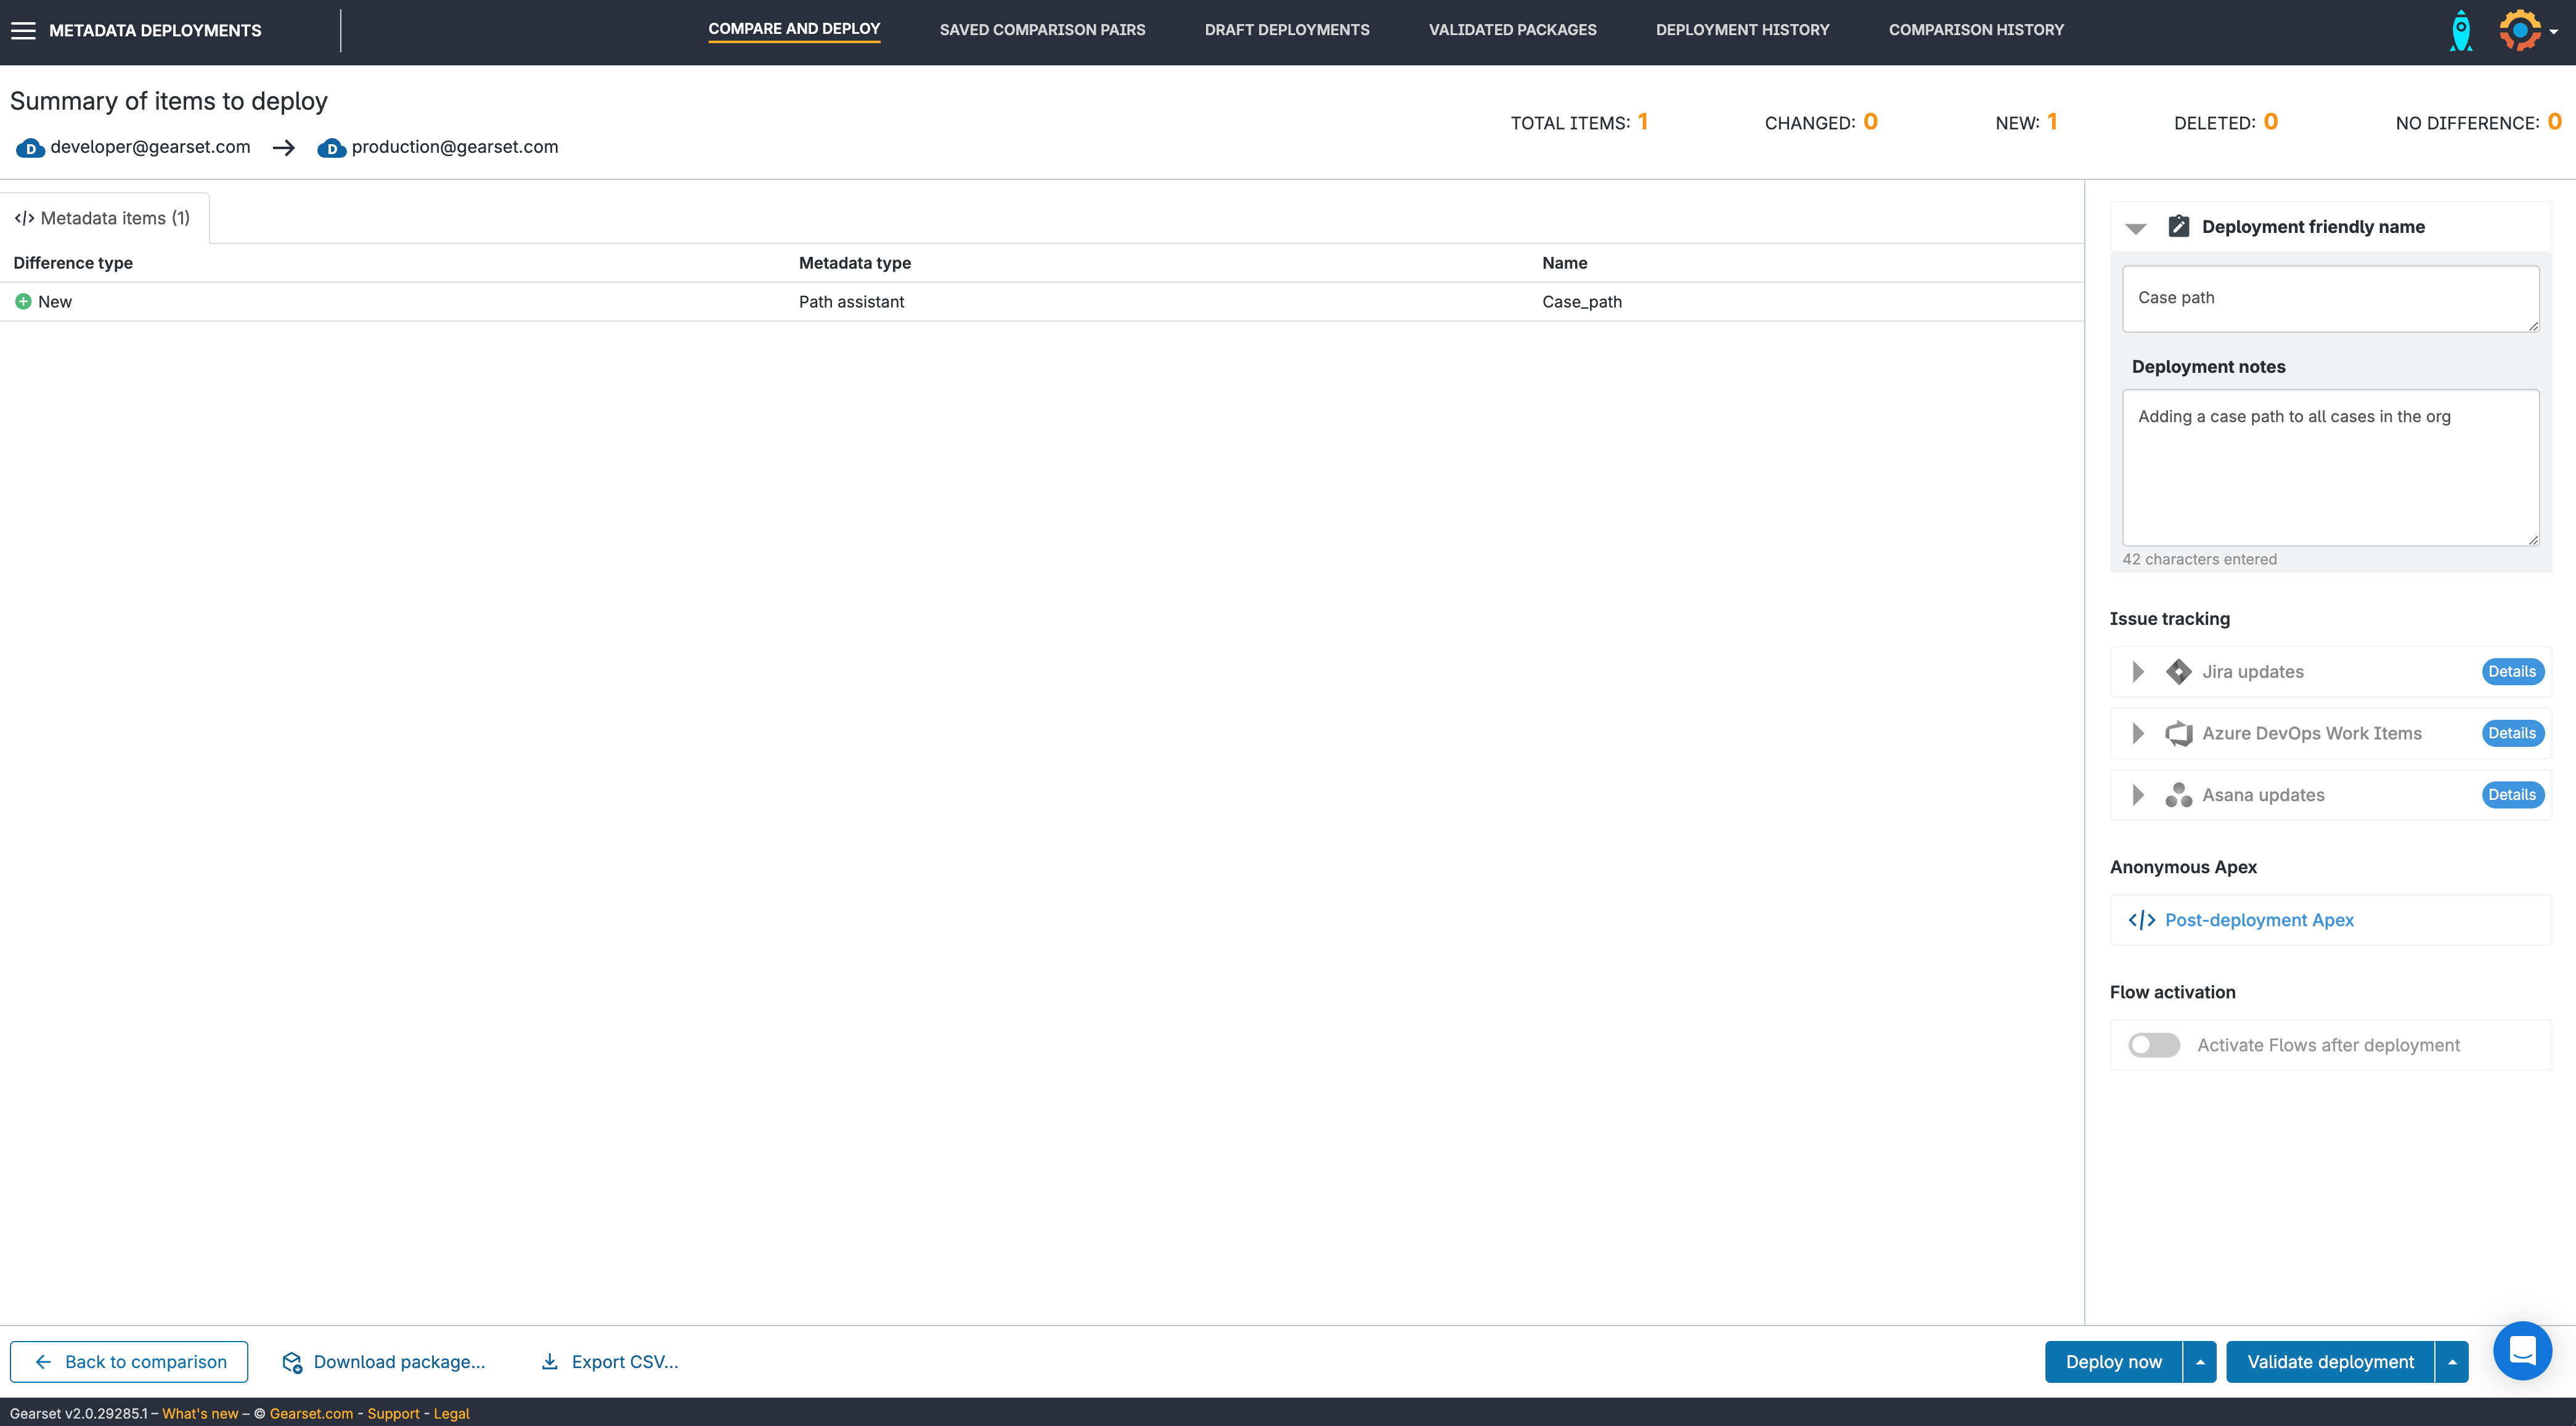
Pre-deployment summary
Give your deployment a friendly name. You can decide to Validate deployment, Deploy now, or schedule the package to deploy at another time, such as when your end users are offline.
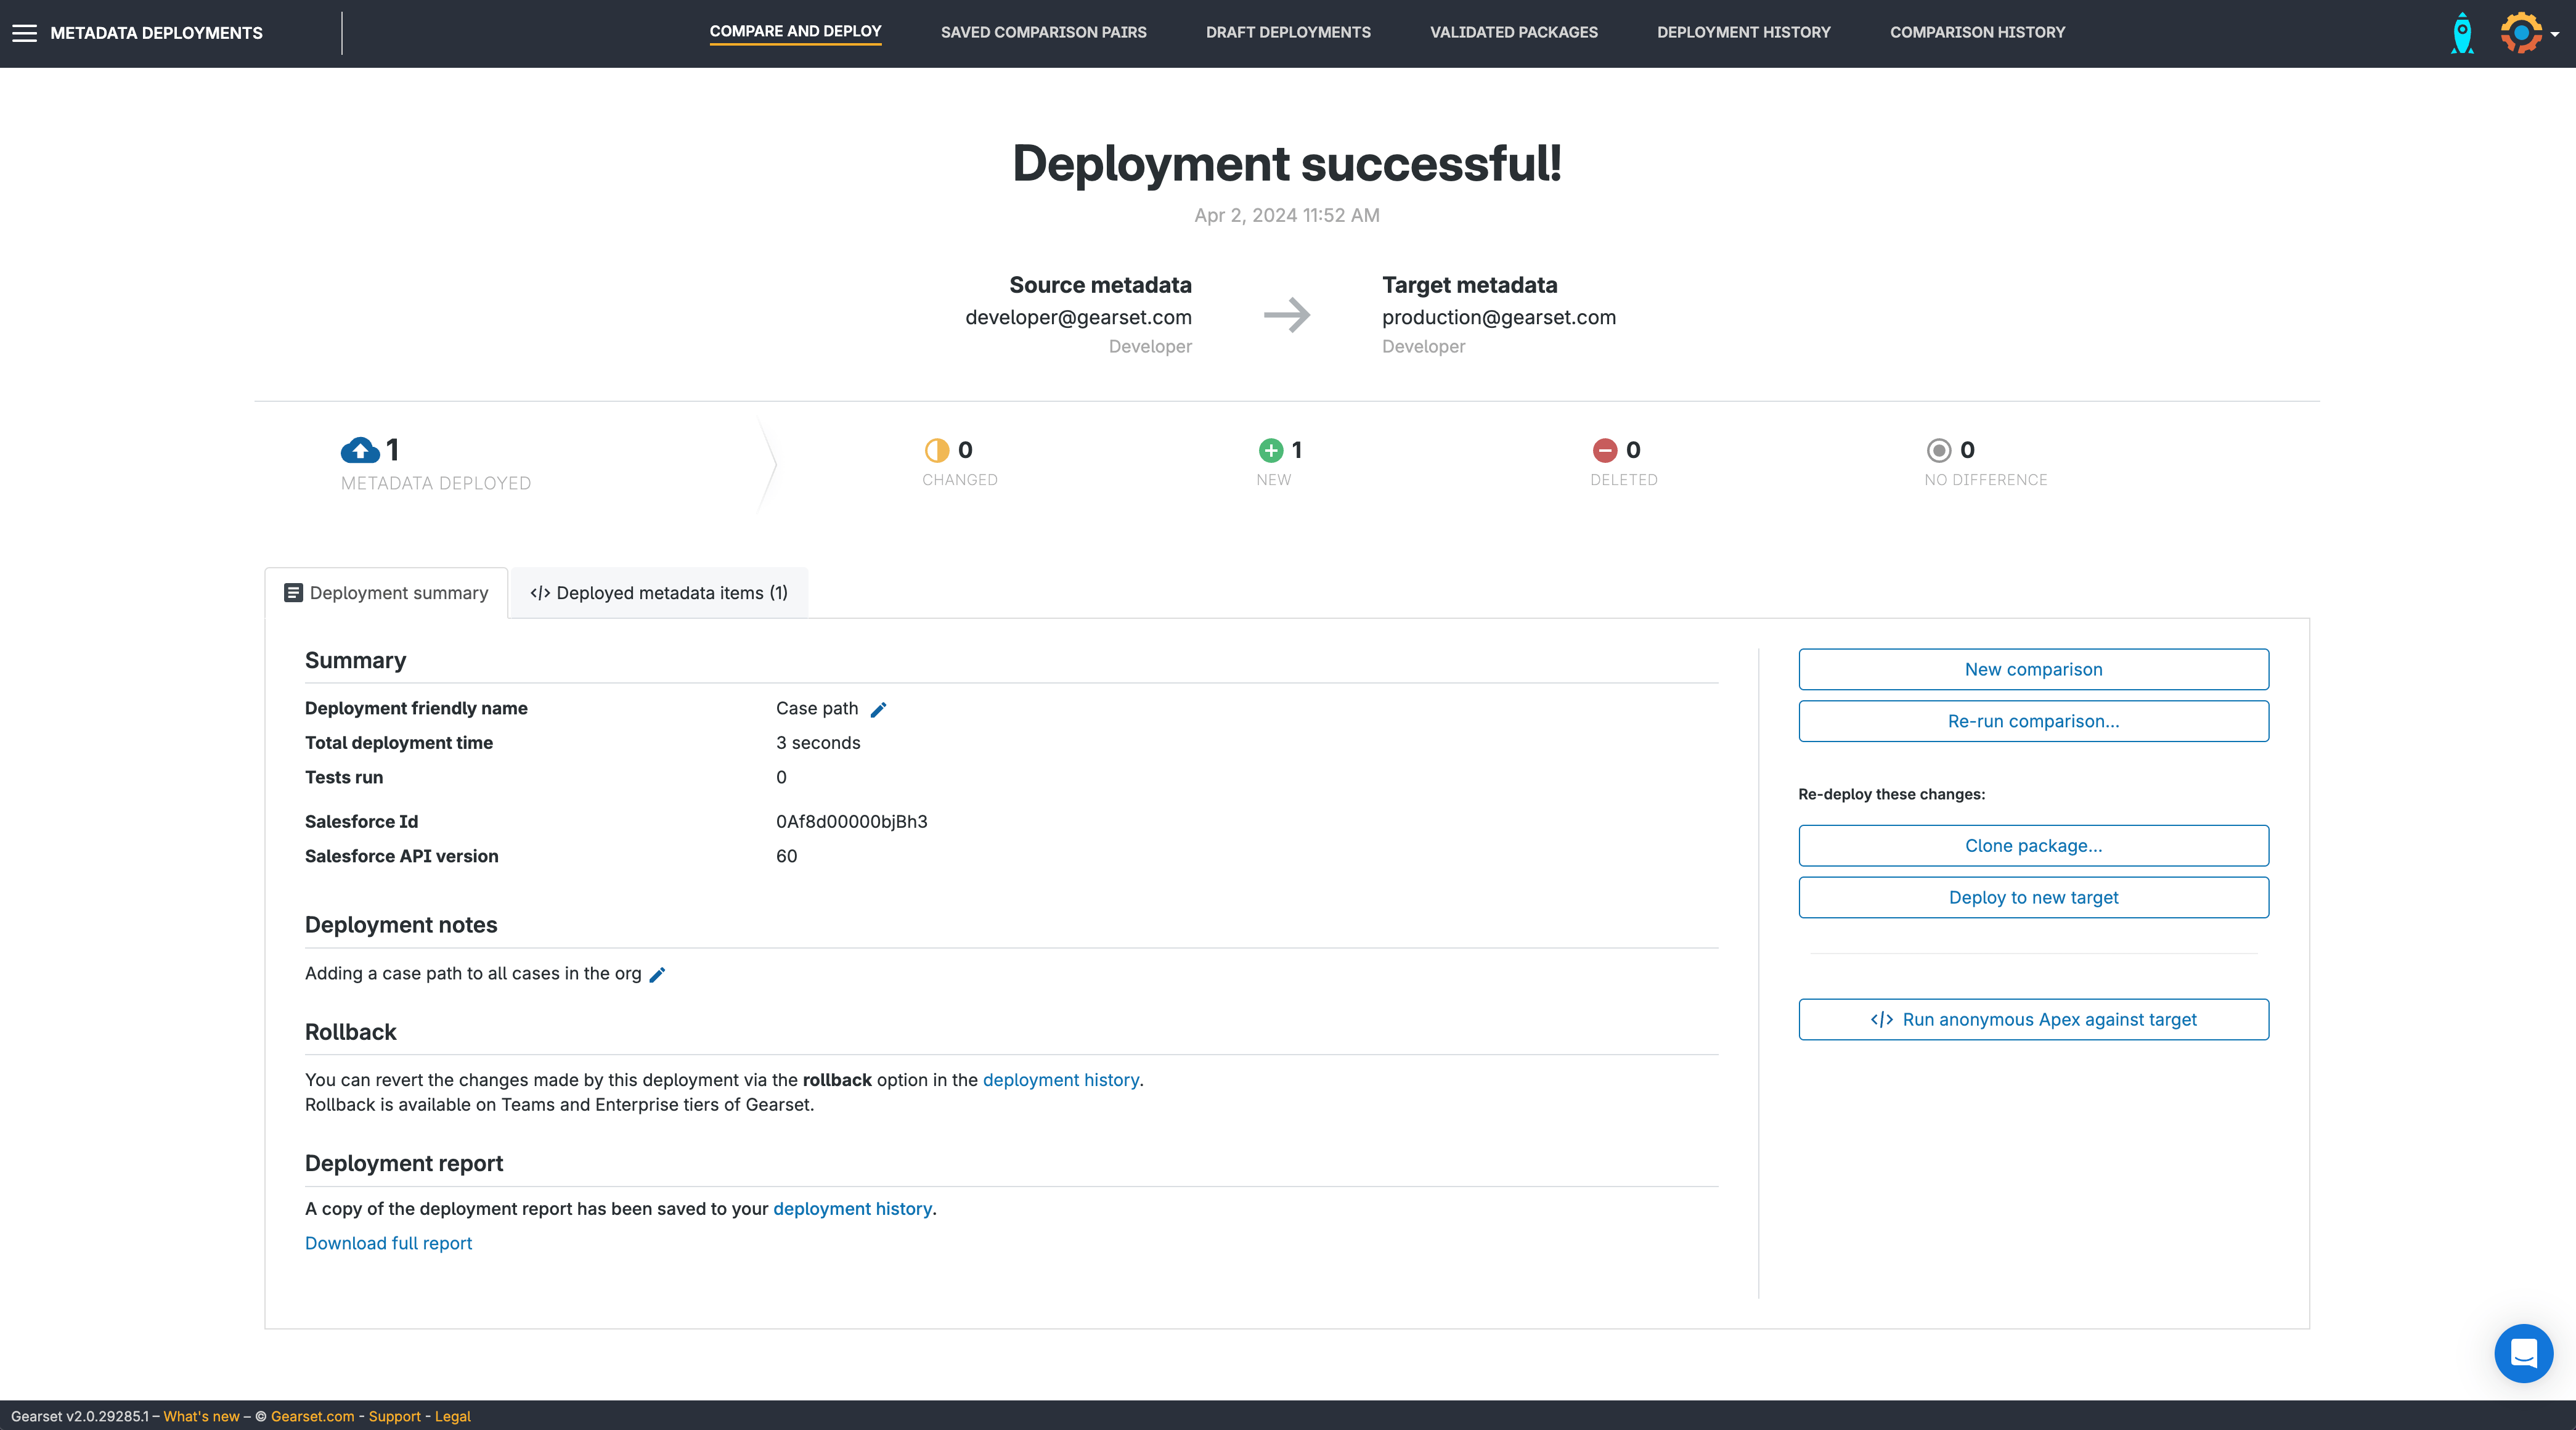
Finish your deployment
Once the deployment has run, you’ll be given a summary of the deployment and can download a full report at any time from the Deployment history page. If you’re not happy with the deployment, you can roll it back.
One last thing
Once you’ve deployed your path’s metadata to Salesforce, you’ll need to head back to your Lightning record page in the Lightning App Builder of your production org. Your path will be in your org, and will just need to be dragged to where you want it on the page.
Deploy your Salesforce paths easily with Gearset
Manually recreating your Salesforce paths in your production environment is a disaster waiting to happen. Not only is it time consuming, but the many customizations and variations can leave you open to human error.
Deploying your sales paths doesn’t need to be a chore. With Gearset you can select the paths you want to deploy, see any dependencies that you might have missed, and then move them all across in a matter of clicks. To see for yourself how easy it is, sign up for your free 30-day trial of Gearset today.
