

IP restrictions play a critical role in securing your Salesforce environment — especially for organizations that need to comply with regulatory standards, protect sensitive data, or limit exposure to bad actors. But deploying IP ranges across orgs can quickly get tricky if you don’t have a clear understanding of how Salesforce handles IP metadata.
In this post, we’ll explore what IP restrictions are, how they enhance your company’s security posture, and what you need to bear in mind when deploying them — whether manually with change sets or using complete DevOps platforms like Gearset.
Why IP restrictions matter in Salesforce
Controlling access to your Salesforce org based on IP address helps prevent unauthorized access — allowing log-ins only by the users, integrations, or applications on networks you trust. So even if credentials are compromised, attackers can’t get access to your org without being on an approved network.
IP range restrictions help teams:
- Prevent unauthorized access to Salesforce from unknown or unsafe locations
- Enhance trust and security within corporate and partner networks
- Support regulatory compliance by ensuring data can only be accessed from approved sources
- Secure integrations and API access, reducing the risk of data exfiltration
- Layer security controls in conjunction with SSO, MFA, and role-based permissions
Teams often refer to trusted IP ranges as allowlists — or historically, whitelists — to designate safe, pre-approved networks.
TDX
Understanding IP address management in Salesforce
Salesforce provides two main ways to control access and safeguard data using IP restrictions: organization-wide trusted IP ranges and profile-level login IP ranges. Both serve different purposes, but when used together they form a robust approach to access control and data privacy.
Organization-wide trusted IP ranges
Trusted IP ranges are defined in Network Access settings and apply across the entire org. When users log in from a trusted Salesforce IP address or range, they can skip the verification code usually required for new devices or locations — even if multi-factor authentication (MFA) is enabled.
This type of IP range offers a smoother login experience for users within known, secure networks, like your corporate office or VPN. For example, employees working from your headquarters or internal network won’t be prompted to verify their identity with a code, but if they try to log in from home or a public location, Salesforce will enforce the usual verification process.
This setup is especially useful for minimizing authentication steps in high-trust environments, making it easier for teams working behind secure firewalls to access Salesforce, balancing user experience with authentication requirements, and to enforce access controls for compliance and auditing.
When defining your IP ranges in Salesforce it’s important to note that only a single IP address should be entered for each start and end field. Avoid using the same address for both field values — the end value should be the higher IP address.
Login IP ranges on profiles
Login IP ranges offer stricter access control by defining which IPs users can log in from — and blocking all access outside those IPs. These ranges are set on a per-profile basis, enabling different levels of restriction depending on role, location, or team function.
For example, you might configure:
- A customer support profile that can only log in from the call center network
- An external contractor profile that’s restricted to a specific range of approved IPs
- A system administrator profile with broader IP access to support flexibility
If a user tries to log in from an IP outside their profile’s allowed range, the login is blocked entirely — they won’t even reach the verification stage. You can also configure multiple ranges for a single profile to account for hybrid work setups or VPN fallbacks.
What are the differences between trusted and login IP ranges?
This table breaks down the key differences between trusted IP and login IP ranges:
| Trusted IP ranges | Login IP ranges | |
|---|---|---|
| Scope | Org-wide | Profile-level |
| Location in setup (using the quick find box) | Network access | Profile settings |
| Enforcement | Blocks logins from non-authorised IPs on a per-user basis | Blocks all logins from non-authorised IPs at the organizational level |
| Behaviour outside defined range | Users must verify identity | Users are completely blocked |
| Use cases | Streamline logins from secure environments | Restrict access based on role or location/region |
| Metadata type | Settings | Profile |
To explore all available metadata types, Salesforce support provides a full reference list.
Regularly reviewing the approved IPs across your orgs is essential. If allowlists contain IPs that are no longer relevant then you’re increasing the risk of unauthorized access to your orgs.
Don’t get confused by IPAddressRange: Email tracking based on IP ranges
To confuse things, Salesforce also have a metadata type called IPAddressRange. This can be a common source of confusion — especially if you’re searching for the metadata behind an IP range you just updated. Unlike login or network access IPs, this type of IP range isn’t about access control; it’s focused on keeping your marketing data clean. When sending large campaigns like newsletters, product announcements, or release notes, it’s common to include internal team members for visibility within the business. But if those internal users open or click the email, they can skew your engagement metrics.
To prevent test data from inflating engagement metrics you can exclude internal IP addresses using Setup > Filter Email Tracking. When deployed, these filters appear under the IpAddressRange metadata type.
You can also filter tracking for entire domains like @yourcompany.com.
How to deploy IP ranges using Gearset
In this walkthrough we will be deploying the metadata types Settings and Profiles with Gearset.
Gearset retrieves and compares metadata between your Salesforce orgs, highlighting what’s different between environments. So you can easily identify changes and deploy with confidence, knowing you’ve not forgotten what modifications have been made.
To follow along with this walkthrough, start your free trial today.
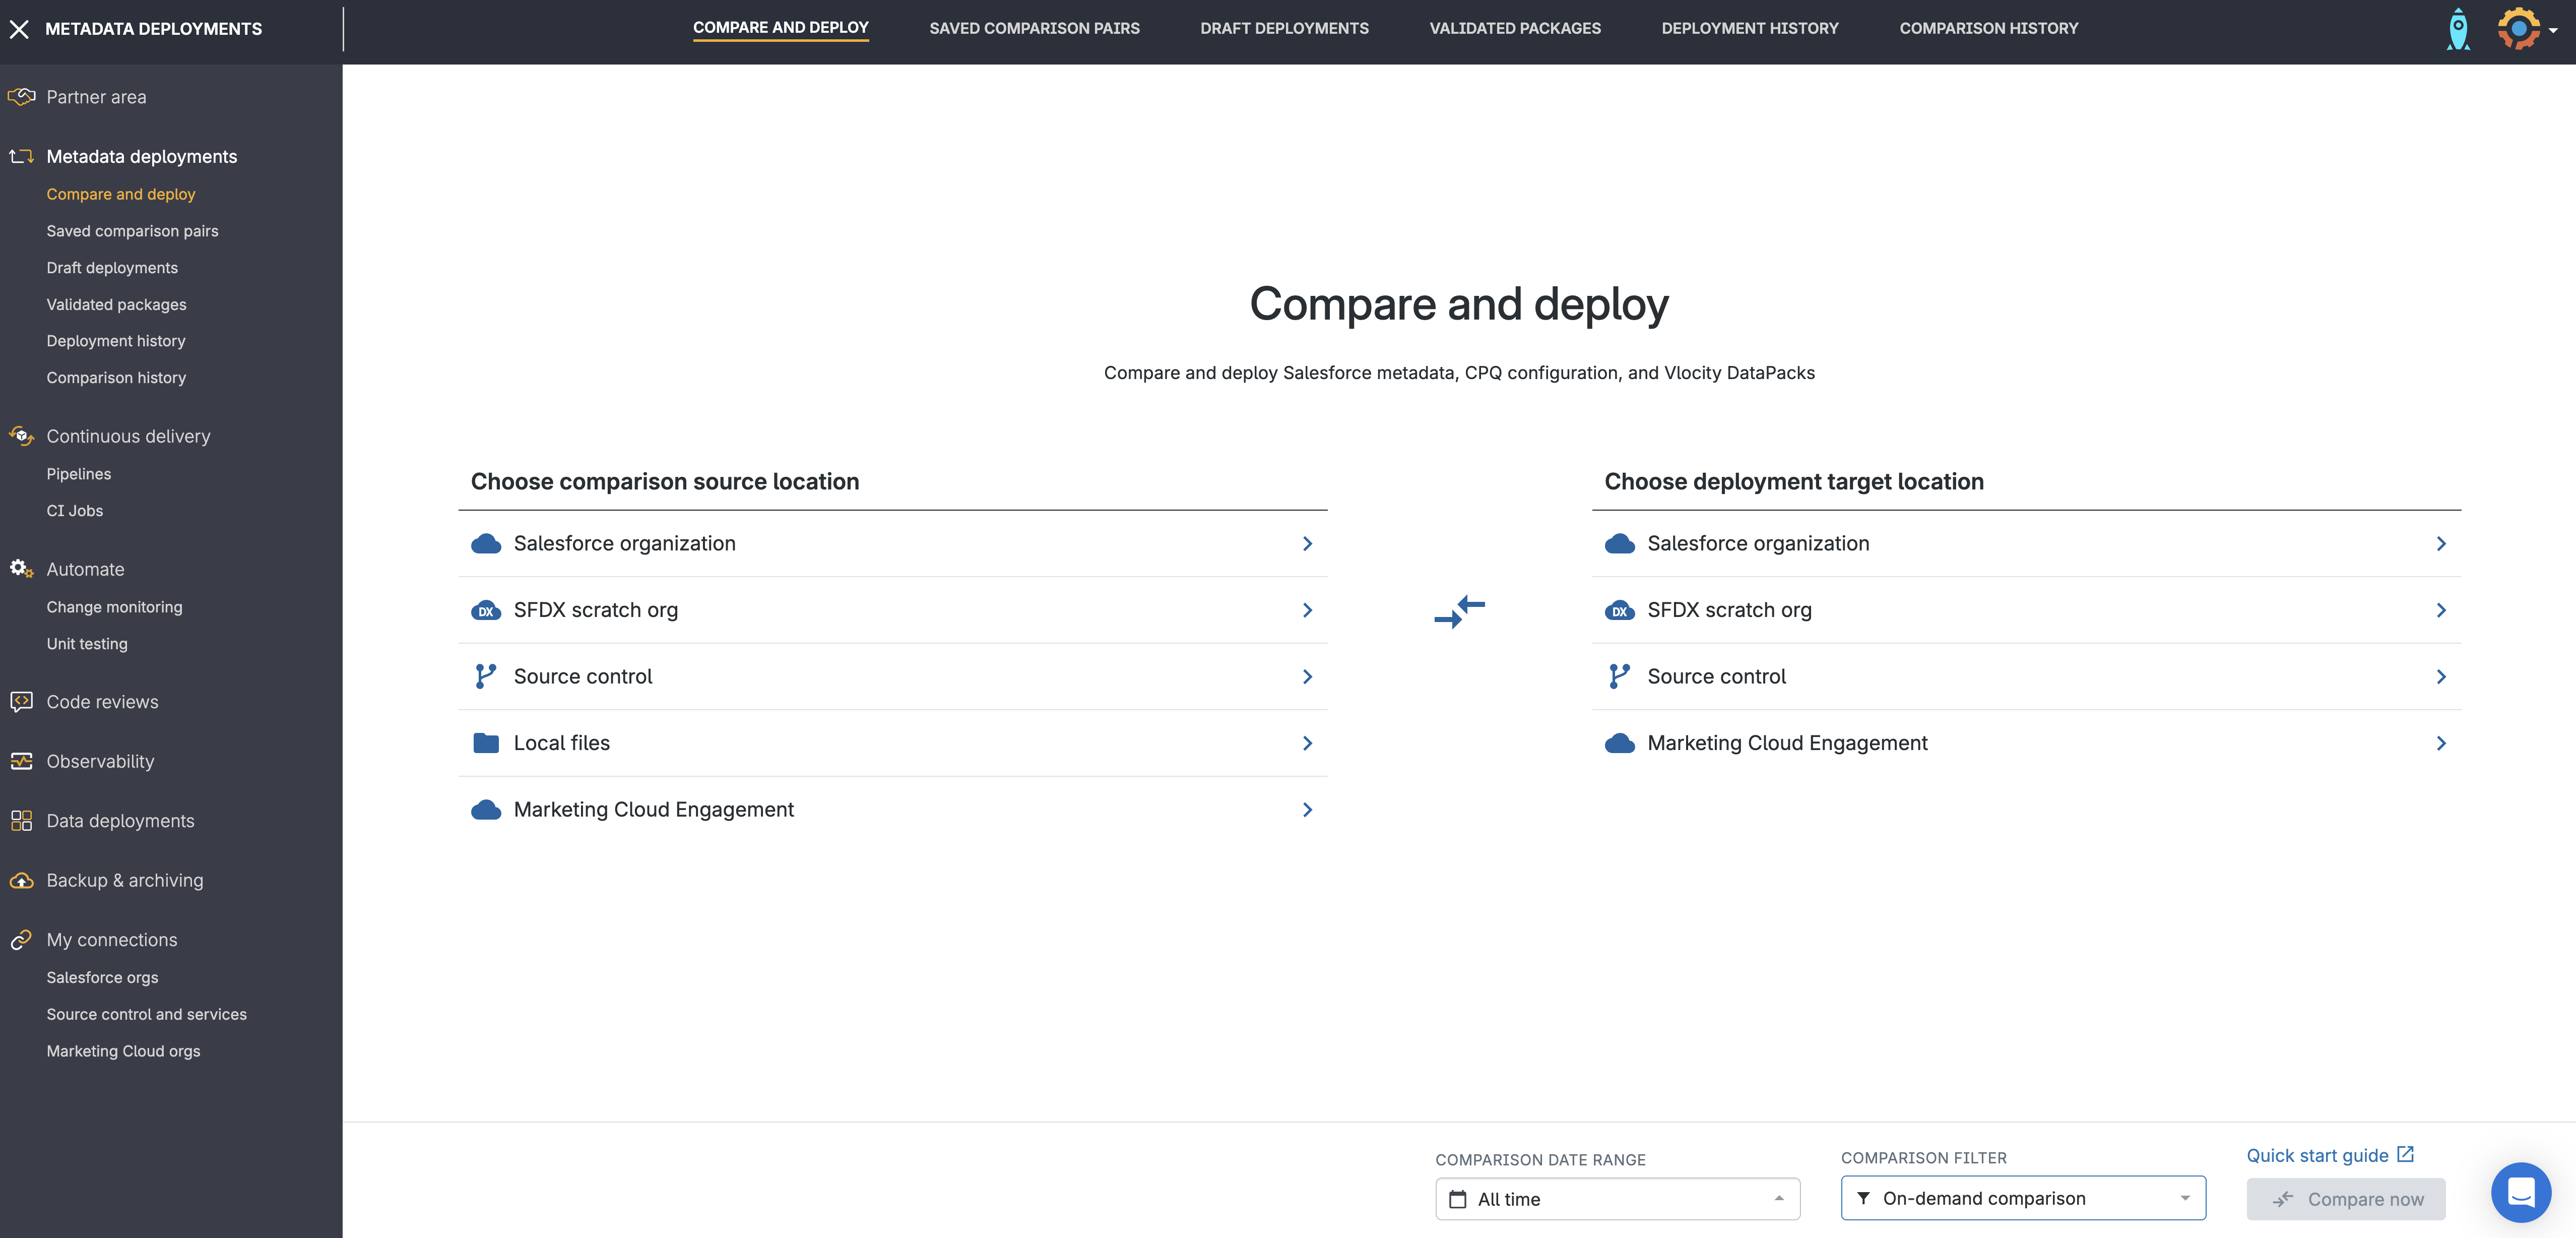
Compare your orgs
From the Compare & Deploy screen, choose the environments you want to compare.
Click Compare now and Gearset will retrieve the metadata from both orgs and highlight all the differences between them. You’ll see changes, deletions and new items.
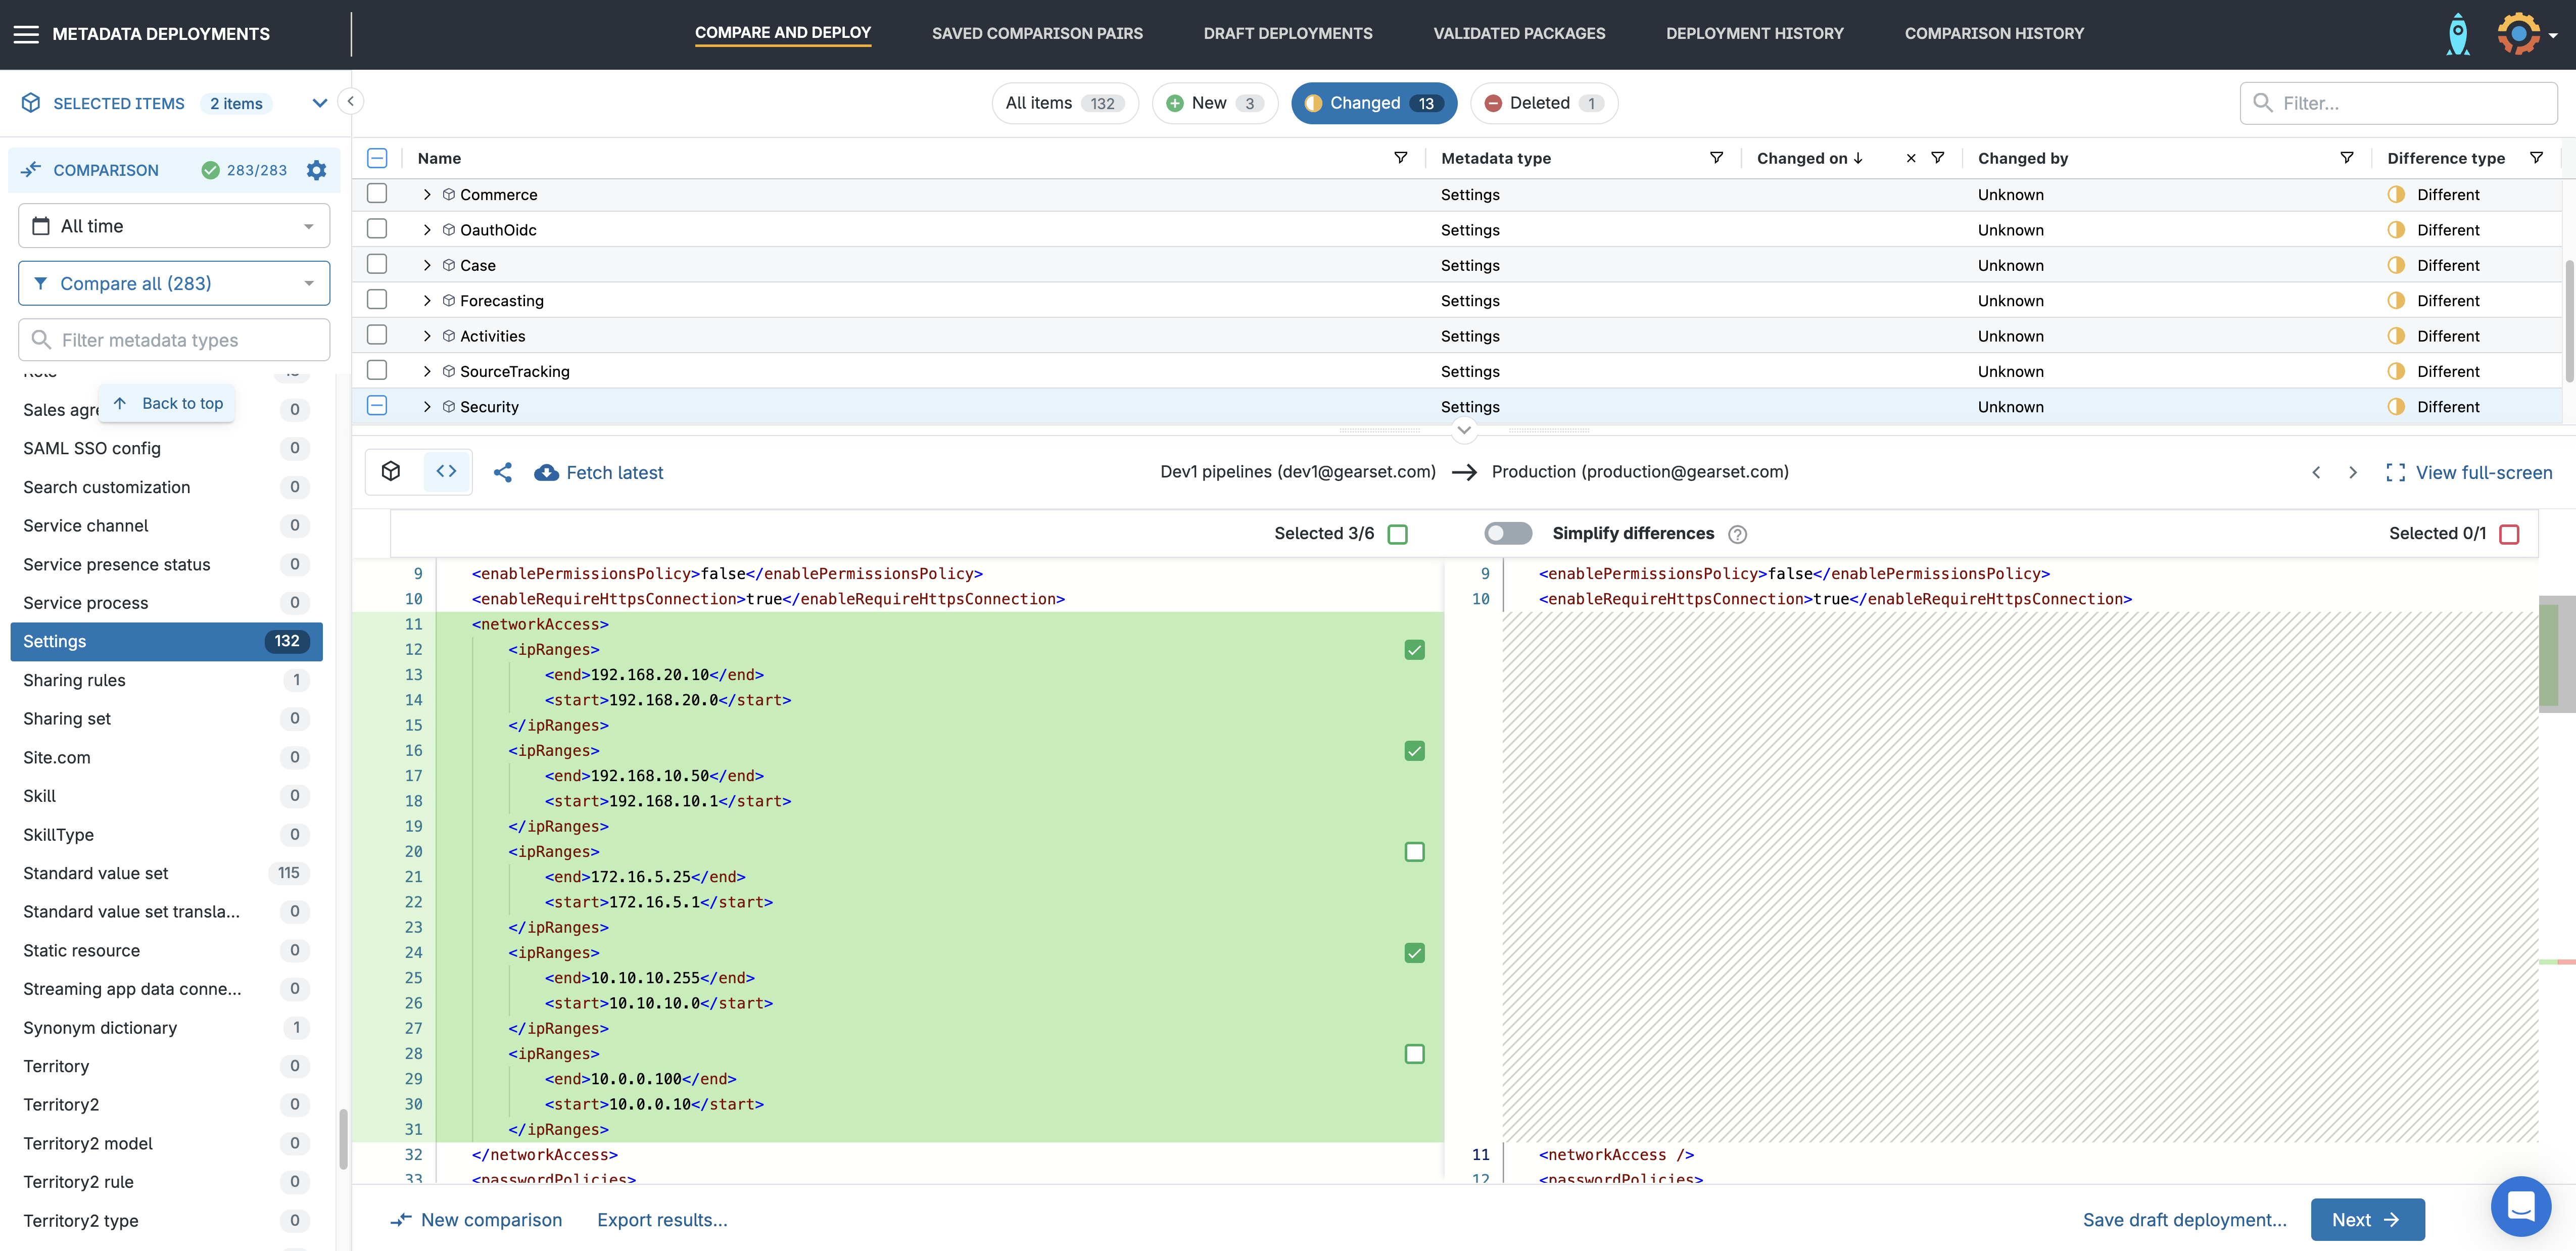
Filter for IP range metadata
To focus on your IP range changes, use the metadata filter down the left-hand side to compare the metadata types you’re looking to deploy.
Network access changes (trusted IP ranges) can be found under Settings > Security.
Profile changes (login IP ranges) can be found under Profiles.
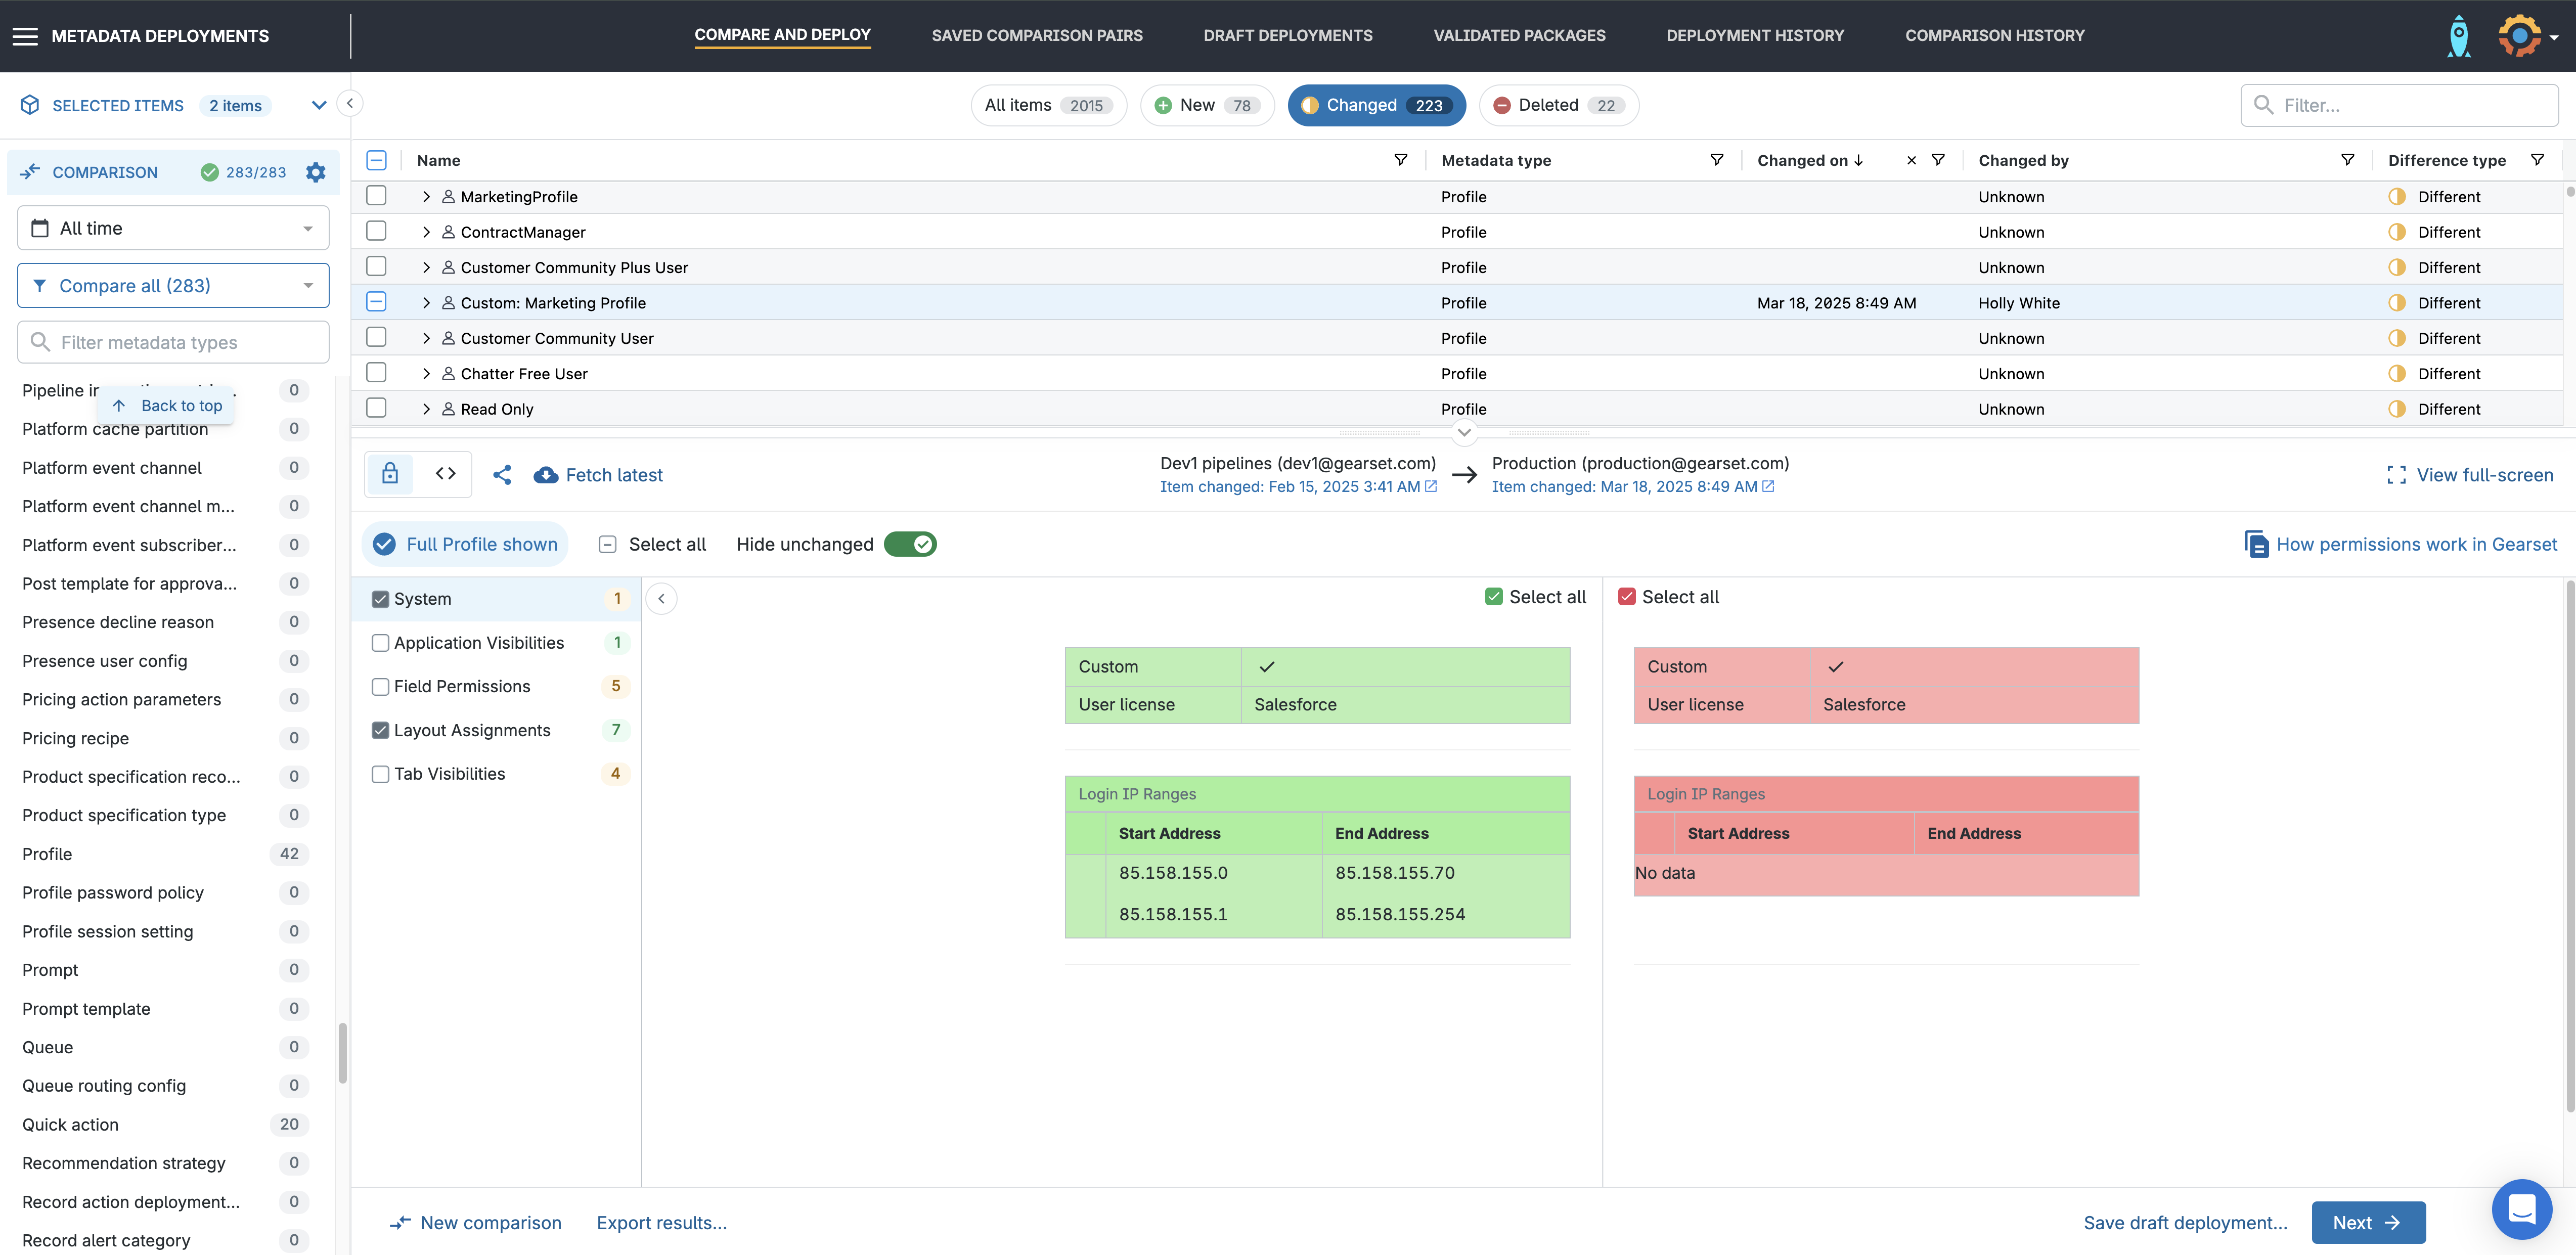
Gearset makes it easy to review your changes before you deploy. You’ll see the IP ranges side by side — what’s currently in the target, and what’s coming from the source. Simply select the items you want to include in your deployment package from the comparison grid.
Once you’re happy with the changes, click Next to build your deployment package.
Run the problem analyzers
Before deploying, Gearset automatically runs problem analyzers — smart pre-deployment checks designed to catch common issues that might cause your deployment to fail or behave unexpectedly.

Deploy your changes
Once you’re happy with the changes, click Next to finalize your deployment package. You can add deployment notes, assign user stories, and run pre-deployment validation checks.
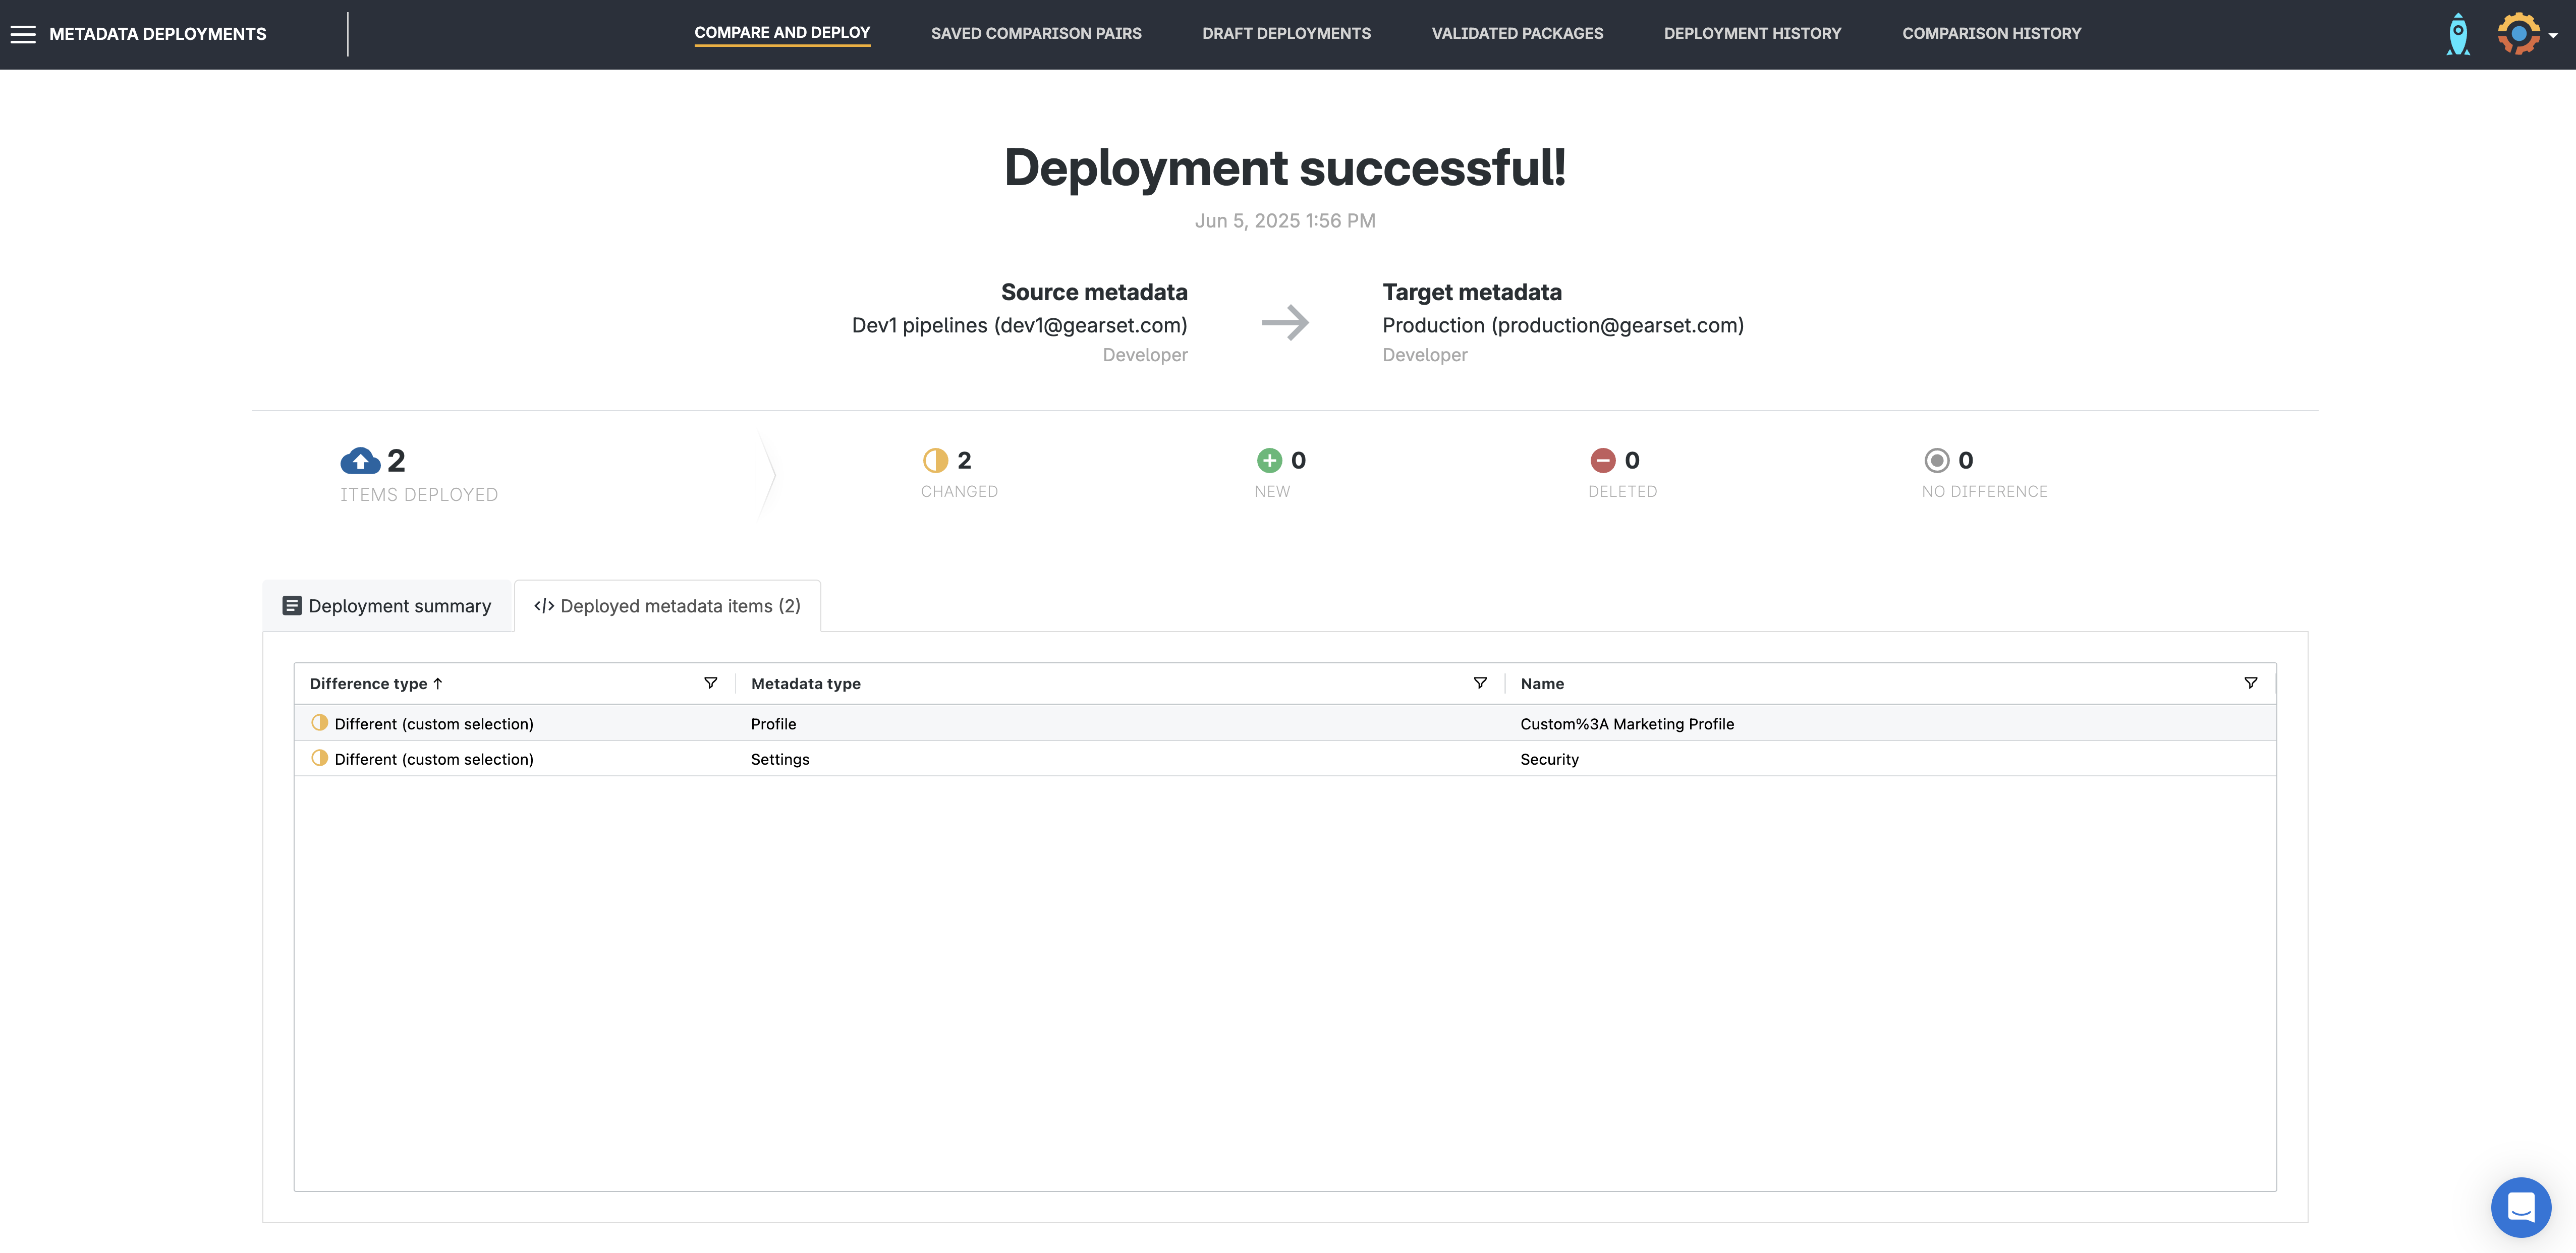
When you’re ready, click Deploy or schedule the deployment for an off-peak time. Gearset will apply the changes and give you a detailed deployment summary.
Roll back if needed
If something goes wrong — for example, if you accidentally remove a trusted range or block a key user — Gearset makes it easy to roll back. Simply navigate to Deployment history, select the relevant deployment, and hit Roll back to revert the deployment partially or in full.
Manage IP restrictions with ease
Managing IP ranges in Salesforce isn’t just about ticking compliance boxes — it’s about building a secure foundation for everything your users do on the platform. Whether you’re enforcing tight login control or simplifying trusted access, IP restrictions are often a key component of a business’s security posture and compliance measures.
But getting it right across multiple environments can be challenging — especially when manual steps and limited tooling slow you down or introduce risk.
With powerful comparisons, reliable deployments, and built-in rollback, Gearset gives you the confidence to manage sensitive metadata like IP ranges with speed and control — all while keeping your environments in sync and your users securely connected. Sign up for your free 30-day trial now!
