
Today’s post is brought to you by Marc Behr, Salesforce Solutions Architect, Dreamforce speaker and one of Gearset’s Community Advisors.
Before deploying changes between Salesforce environments, it’s really important you understand the shape of your source and target. By being able to see how they compare, and how they differ, you’re in a much stronger position to build deployment packages that will keep your orgs in sync. This is why a comparison is always the first step in your deployment process with Gearset.
If you’re new to comparing Salesforce orgs, the results grid in Gearset can be a little overwhelming at first - it’s packed with information about the state of your source and target environments, showing you the line-by-line differences in the XML. To help you become a pro at navigating the comparison stage, we’re going to thoroughly explore the results grid in this post.
Standardizing Salesforce delivery in Manufacturing: Lessons from a release team
Navigating your Salesforce org comparison
NOTE: Gearset’s comparisons have had an upgrade! We’re updating all our blog posts with the new UI images — but in the meantime, you can learn more about what’s changed.
When the comparison completes, you’ll have a screen that looks something like this:
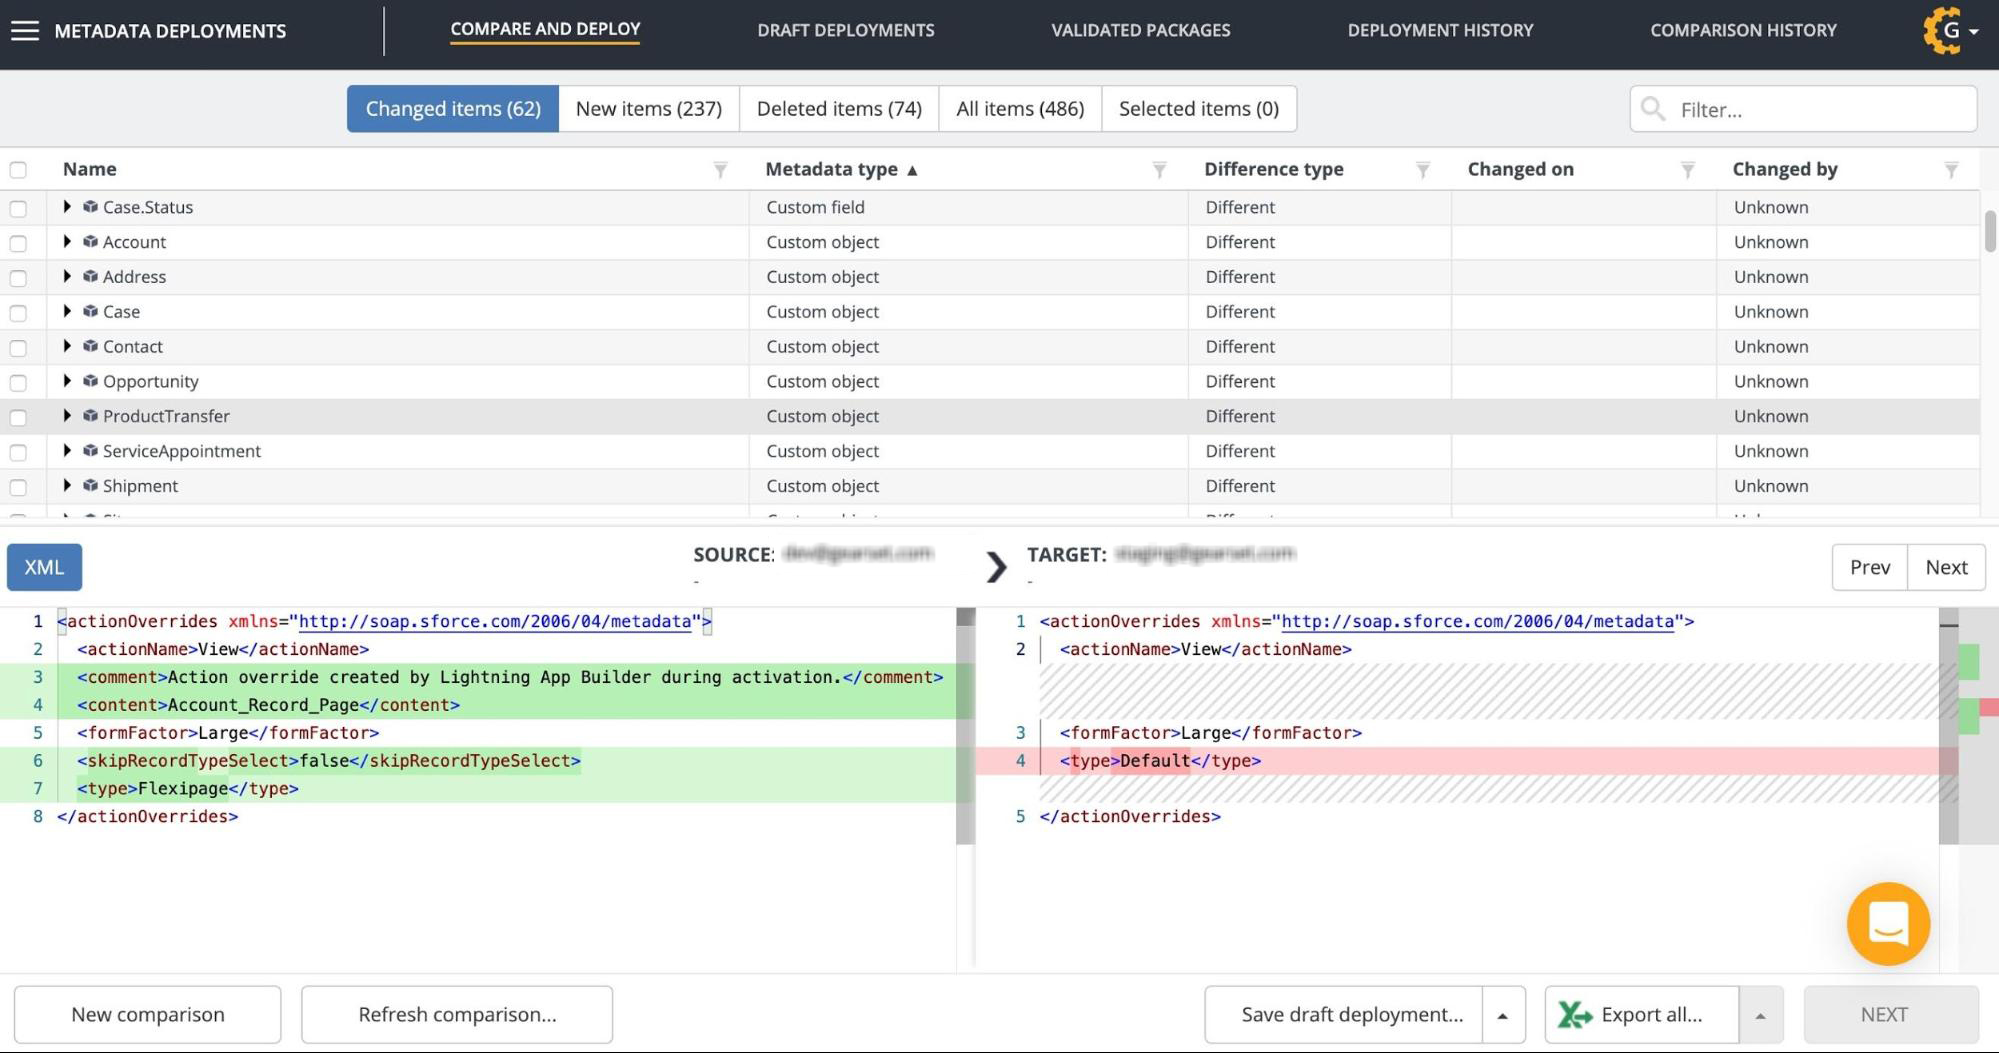
Let’s explore this screen one section at a time, starting with the five buttons at the top.

These buttons indicate the status of each item for which Gearset detects a difference between your orgs. Changed items are the items that exist in both the source and target, but have been modified. New items are the items that only exist in the source. Deleted items are the items you’ve deleted in your source but still exist in your target. All items shows all the items that are changed, new, and deleted. Selected items are the items that you have selected to deploy using Gearset. In brackets, Gearset shows the number of items retrieved that fit into each category.
Clicking on any of these buttons will show the list of items that Gearset identifies as matching that status. In our example below, we’ve clicked on Changed items, so we can see the list of items that are different.

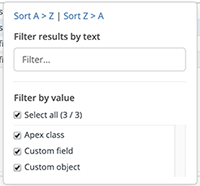
There are a number of options in this section that we should explore. First, there is a filter available at the top of each column. Clicking on any of the filters allows you to narrow down the results to just the metadata you’re interested in.
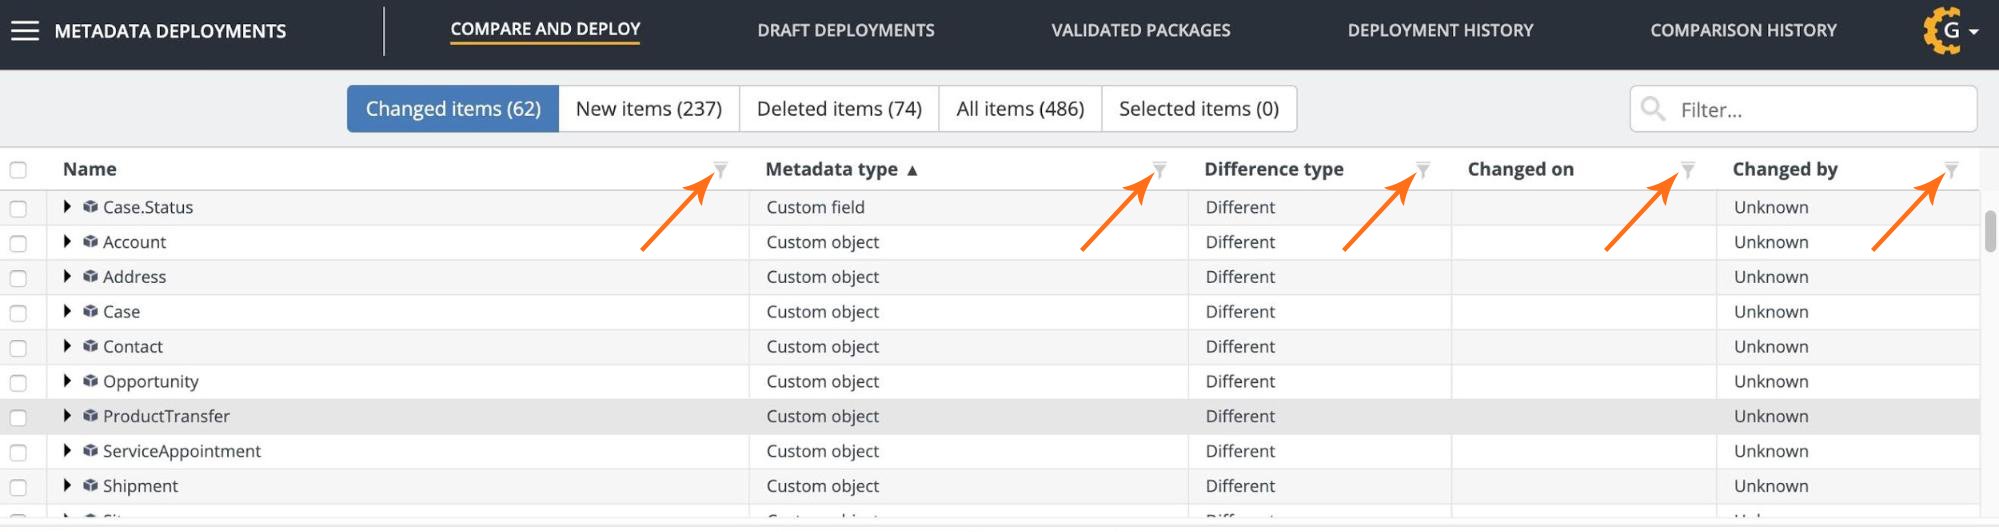
You can filter by text, or - except for the Name column - you can select as many or as few options as you like from a picklist.
Each filter is additive, meaning that if you filter the Metadata type column to just see Custom Objects and then also filter the Changed by column to only show your name, both filters are applied - so you will only see custom objects that were changed by you.
Just to the left of each metadata item is a small triangle (or arrow). This is a really valuable feature that can sometimes be overlooked.
If you click on that triangle for any item in the list, it will expand that item. Exactly what appears in this list will depend on the item, but Gearset will identify any subcomponents as well as its dependencies (if there are any).
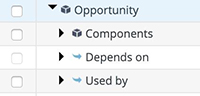
Being able to see the other items that this item depends on, or that depend on this item, lets you know what other metadata you should include in your deployment package to ensure it successfully deploys. If a dependency has an additional dependency of its own, it too will have an arrow that you can open, and select from. Note that sometimes, when you open these dependencies, you may find that some of the section boxes are grayed out and not selectable. This simply means that the metadata in that option has not changed, so it does not need to be included in your deployment package.
Finally we come to the bottom section of the screen. When you click on a specific row in the list of metadata items, the differences for that item of metadata will be displayed in this bottom section, with the source XML on the left and the target on the right.

Differences between source and target are highlighted in color. Green indicates metadata in the source that will be added to the target if the item is deployed; red indicates metadata that will be deleted from the target if the item is deployed. On the far right side of the screen, change bars show you exactly where these differences can be found.
These differences can usually be viewed in a few different formats too, depending on the item. XML is always an option, and others are available where relevant, such as Object view, Picklist and Apex class. This is particularly useful for those less familiar with XML, or just for helping to visualize the changing shape of your metadata and org.
I hope that this helps you understand a few of the options that are available to you in the comparison results screen. It’s just one small part of Gearset’s metadata deployment functionality, but it will ultimately help you understand what state your environments are in, and help you build a deployment package to get your orgs in sync.
Want to see more accurate releases and finer control over your metadata deployments? Start a 30-day free trial of Gearset today!
