

Gearset’s integration with Jira has been around for a while now and has made it easier for users to automatically track the progress of user stories. Since its initial release, it has evolved in response to the helpful user feedback we’ve received. This article outlines some of the improvements that we’ve made over the past several months to Gearset’s Jira integration.
Adding deployment notes to Jira tickets
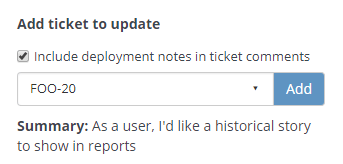
In an earlier update, we added a checkbox to the Jira updates tab on the Deployment summary page. If checked, any deployment notes that you enter in the Deployment notes tab are included in all Jira ticket comments posted by Gearset for that validation or deployment. This means you can see the relevant notes without having to navigate away from Jira to the Gearset deployment report or validated package page.
As part of a later update, we removed the deployment notes from Gearset’s ‘Deployment started’ or ‘Validation started’ comments, because they’d caused the comments section of tickets to appear overly cluttered. Since a ‘started’ comment is always followed by a ‘succeeded’ or ‘failed’ comment, including the deployment notes in every comment is a little unnecessary.
Ticket references are included in the deployment report
To allow users to check which Jira tickets were associated with a deployment, we released an update to include associated Jira ticket references in the deployment summary, the PDF deployment report and any automated deployment emails.
Quickly selecting a Jira ticket
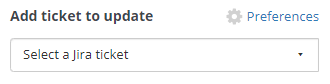
Some users with very large numbers of Jira tickets experienced long wait times before Gearset populated the list of tickets retrieved from their Jira instances. This made the Jira updates tab less usable than we’d like for these users, so we added quick select. If you know the reference of the Jira ticket that you want to attach to the deployment, just type it into the search field and hit ‘Enter’. If a ticket matches your reference, it’s removed from the list of searchable tickets and added to the Associated tickets list. This not only makes the Jira updates tab less awkward for users with large numbers of tickets, but also adds a useful shortcut function for all users.
Navigable ticket references in deployment reports
The deployment report shown at the end of a successful deployment contains a list of associated Jira tickets. Previously, the items in this list were just plain text. In a more recent update, we made the list items clickable so that users can see the content of tickets by following a link from directly within the Gearset deployment report.

Only post a comment to a Jira ticket after a successful deployment
We added an additional checkbox that allows users to further de-clutter the comments section of their Jira tickets. If the option is checked, Gearset only posts ticket comments after a deployment or validation has finished and succeeded.
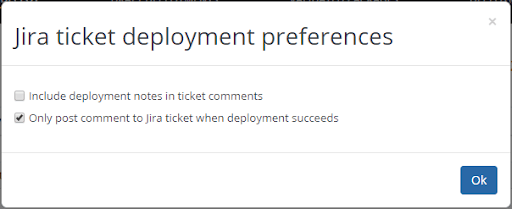
This update also included a couple of other minor changes. The Jira deployment attribute checkboxes can now be accessed by clicking Preferences in the top-right corner of the Jira updates tab. We’ve also set the initial values of the checkboxes to the preferences of your team’s most recent validation or deployment. This way you don’t need to worry about setting your preferences on every deployment.
Updating the status of associated Jira tickets
In our most recent Jira-related update, we added an option for users to change the ticket status for individual associated Jira tickets upon successful deployment. If you use Jira alongside Gearset, this feature lets you automate another aspect of your Jira workflow directly from within Gearset.
Integrate Jira with Gearset today!
Gearset’s full integration with Jira can take the pain away from manual ticketing updates to boost your team’s collaboration and visibility. Learn more about how Gearset can support your full stack by booking a consultation with one of our DevOps experts. Or get started today with a free 30-day trial.
