

Delays in the sales process can be catastrophic — deals are significantly less likely to close when they lose momentum. Making sure your org enables the sales team to work quickly and effectively is key to their success. That’s why accurate lead conversion field mapping is essential, to make sure your sales users have all the data they need to do their job well.
In this article, we’ll explore what lead conversion field mapping is, why it’s useful and how to deploy field mapping settings with change sets. We’ll also see how Gearset’s visual compare and deploy process not only makes that process easier and quicker, but also more likely to succeed.
What is lead conversion field mapping?
When leads enter the sales funnel they are unqualified and it’s unclear whether they’re a viable sales opportunity for the business. Once the lead has been scoped out and identified as a legitimate prospect, the lead needs to be converted and the data stored on that lead record needs to be accurately transferred into an account, contact, and opportunity (ACO). But if you have custom fields on your lead, Salesforce won’t know where that data needs to go. This is where lead conversion field mapping ensures your sales and lead conversion process runs smoothly.
Lead field conversion mapping allows you to specify assignment rules for custom fields to determine which data goes where from your lead on a per-field basis. These settings are saved as the LeadConvertSettings metadata type.
Custom field mapping is an invaluable way to make sure your team’s sales path runs quickly and efficiently with minimal data risks. Not only does it save your end users time spent manually transferring data across objects, but it removes the risk of human error.
Standardizing Salesforce delivery in Manufacturing: Lessons from a release team
How to configure lead conversion field mapping
Setting up field mapping for custom fields on your lead object is quick to do. You’ll need to start by creating the custom fields on your lead object and the relevant Account, Contact, and Opportunity objects. Once the fields are in place, you can follow these steps in Salesforce to map the fields:
- Navigate to Object Manager.
- Select the Lead object and go to the Fields & Relationships tab.
- Select Map Lead Fields where you can switch between the Account, Contact, and Opportunity tabs, and use the dropdown menu to select which fields to map to each other.
Common causes of validation errors and how to fix them
It’s important to regularly review your lead field mapping, to make sure it’s running as expected. Metadata changes on the Lead, Account, Contact and Opportunity objects can impact lead mapping and cause unexpected errors for end users.
Here are some of the most common lead conversion errors end users encounter, what they mean, and how to fix them.
Error 1
Validation error on <object>. Please define the <field> for all new <objects>
This error means that data on the lead record that’s being converted doesn’t comply with a validation rule on the ACO objects. Thankfully, you can configure custom error messages for validation rules to give the end user insight into what they need to fix to successfully convert the lead.
Error 2
Your lead is missing a field mapping for the <field name> field. For help, talk with your admin
In this instance, a required field on the ACO object has not been filled with data during the lead conversion process.
There are a few possible causes for this error message:
- There’s no lead field mapped to the required field on the ACO object
- The mapped field is a different data type to the required field
- The user has not input data in the mapped field on the lead they’re trying to convert
It’s worth checking there is a compatible lead field mapped to the required field to rule out the first two possible causes.
If the mapping is correct, it’s likely that the user can fix this issue themselves by inputting data into the relevant field on the lead record before converting. However, it’s not possible to customize the error message for required fields so users will probably reach out to you about the field mapping error in this scenario. Running user enablement sessions and/or internal documentation that explains how the user can fix this error themselves should minimize the amount of support requests coming through to your team.
Error 3
The lead conversion failed because the value for the field <field name> is invalid. The value comes from the lead field that’s mapped to the field <field name>. Ask your administrator to check the field mappings.
This error message appears when mapped fields have different pre-set field values, such as mapping two different picklists. Check the impacted fields and make sure they’re aligned. If the available field values don’t match, Salesforce won’t be able to convert the lead and the error will continue.
Error 4
There was an error converting this lead. Please try again. If the problem persists, please contact your administrator.
Unfortunately, this error message will be harder to debug because it’s generic and doesn’t give any insight into what caused the error. Salesforce has listed the main causes for this error message but it will need further investigation if the error message persists after addressing these issues.
Deploy LeadConvertSettings with change sets
Once you’ve configured your lead mapping, tested that it works, and troubleshooted any issues, it’s time to deploy to production!
Unfortunately, it’s not possible to deploy the LeadConvertSettings metadata type with change sets because it’s not a supported component type. Instead, you will need to recreate the field mapping setup in your target org manually (which is time-consuming and error-prone) or use a different tool that supports this type of deployment.
Deploying LeadConvertSettings with Gearset
Using the Metadata API, Gearset can deploy the LeadConvertSettings metadata type through a comparison UI that makes it easy to follow deployment best practices.
To follow along with this guide and see just how easy it is to deploy lead convert settings, sign up for a free 30-day trial.
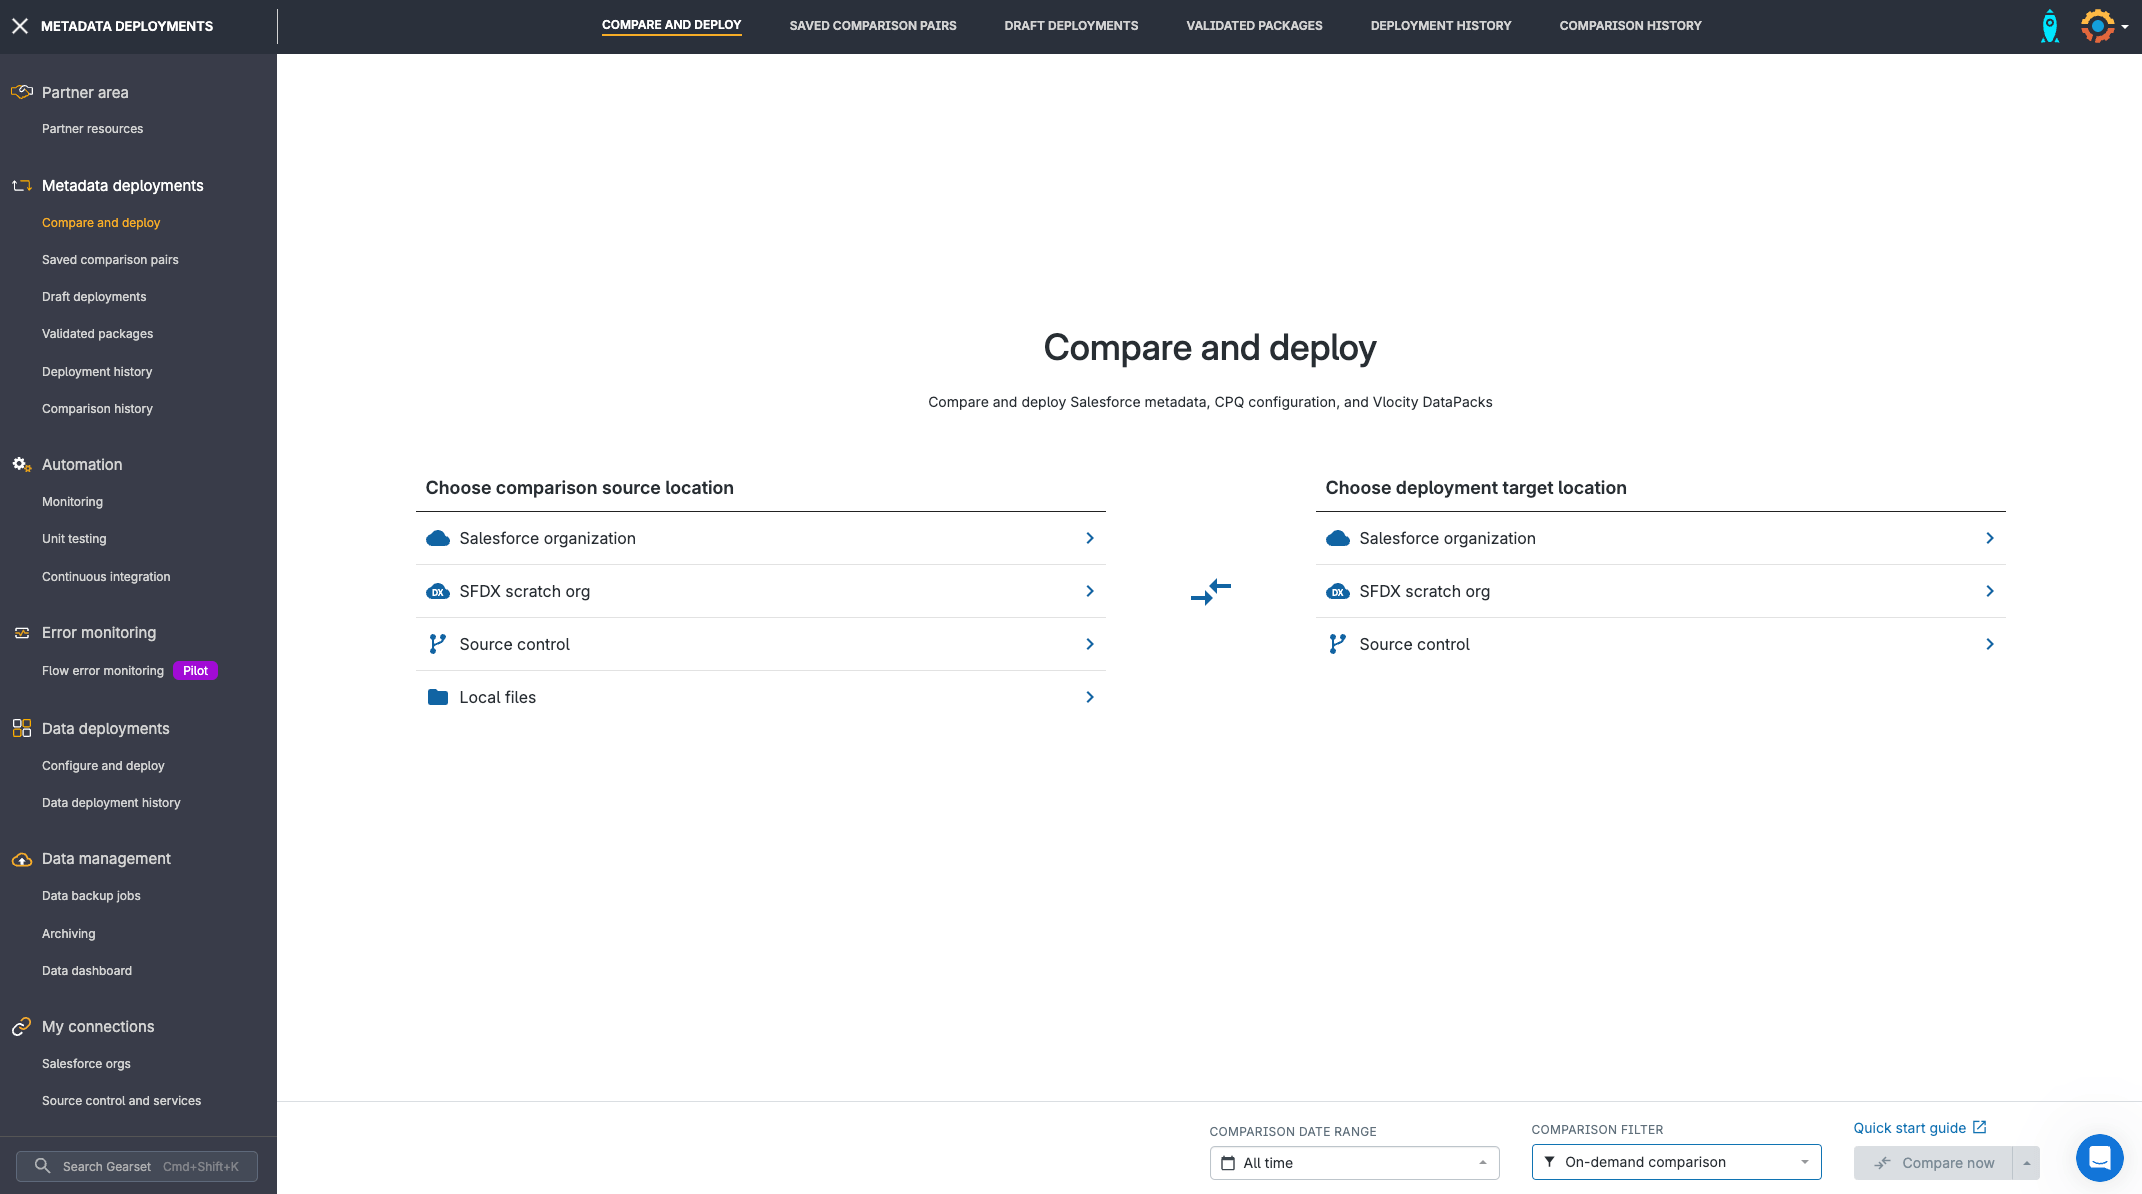
1. Configure your comparison
Select your source and target environments — the deployment process is the same with whichever environment type you choose. After pressing Compare now, you can select which metadata types to include in your comparison. You’ll need to include Lead convert settings in your comparison filter, as well as Custom field if the mapped fields are new.
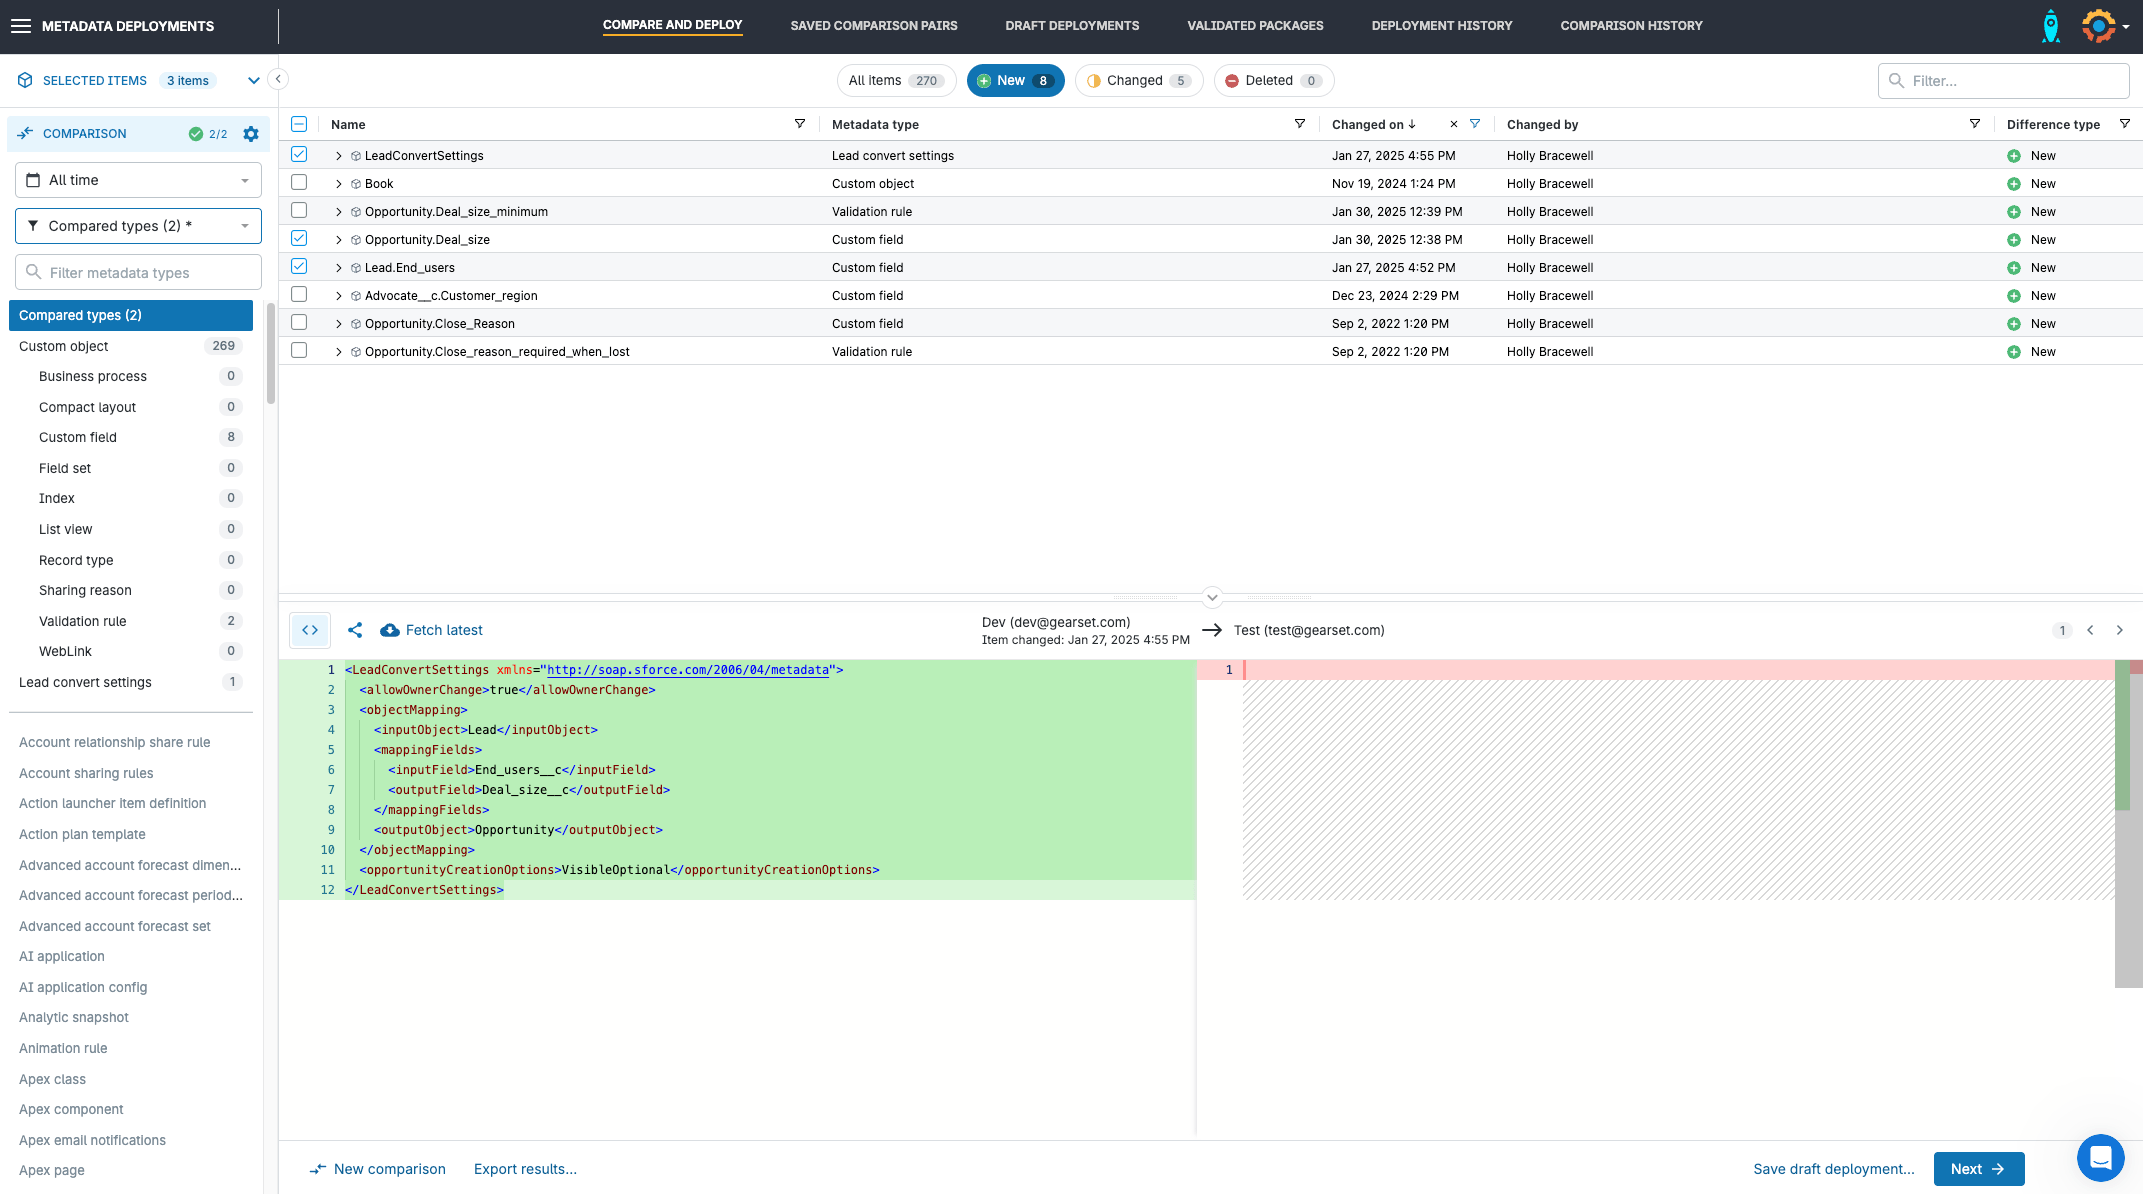
2. Build your deployment package
The comparison page flags the changed, new and deleted items between your environments. Simply select the items you want to include in your deployment package.
To deploy lead convert settings, the mapped fields need to exist in both the source and target for your deployment to succeed. If the custom fields are new, make sure to include them in your deployment package.
For lead convert settings, you can use Gearset’s Precision Deployments to select specific field mappings to deploy, allowing you to update individual mapping rules without deploying the entire LeadConvertSettings configuration.
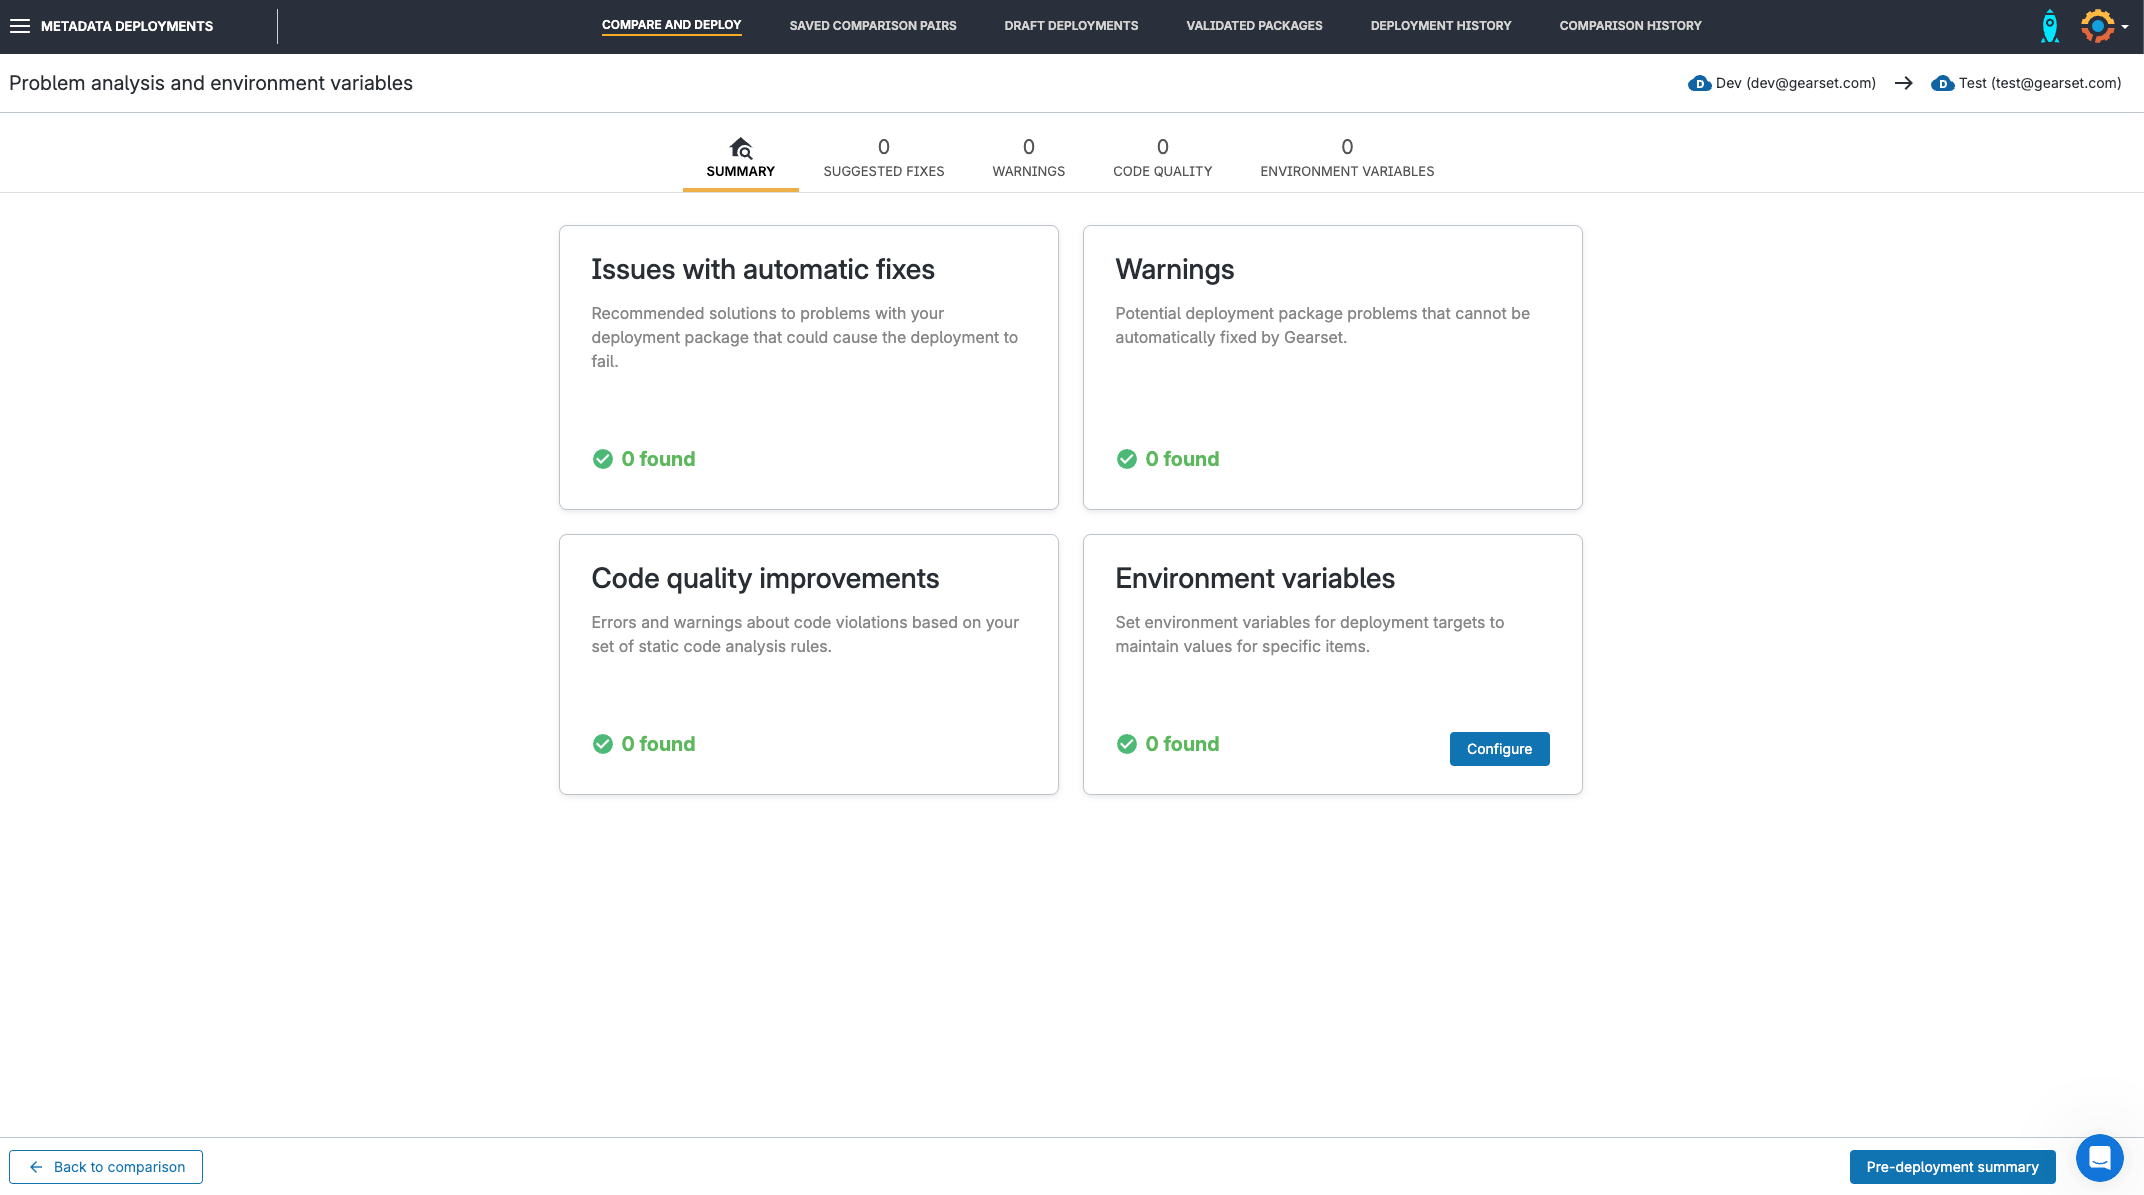
3. Troubleshoot your deployment package
Gearset’s problem analysers will identify common issues with your deployment package that could cause it to fail, as well as suggesting fixes that can be accepted with a click.
Static code analysis will also run to check the quality of your code according to your custom code quality rule sets.
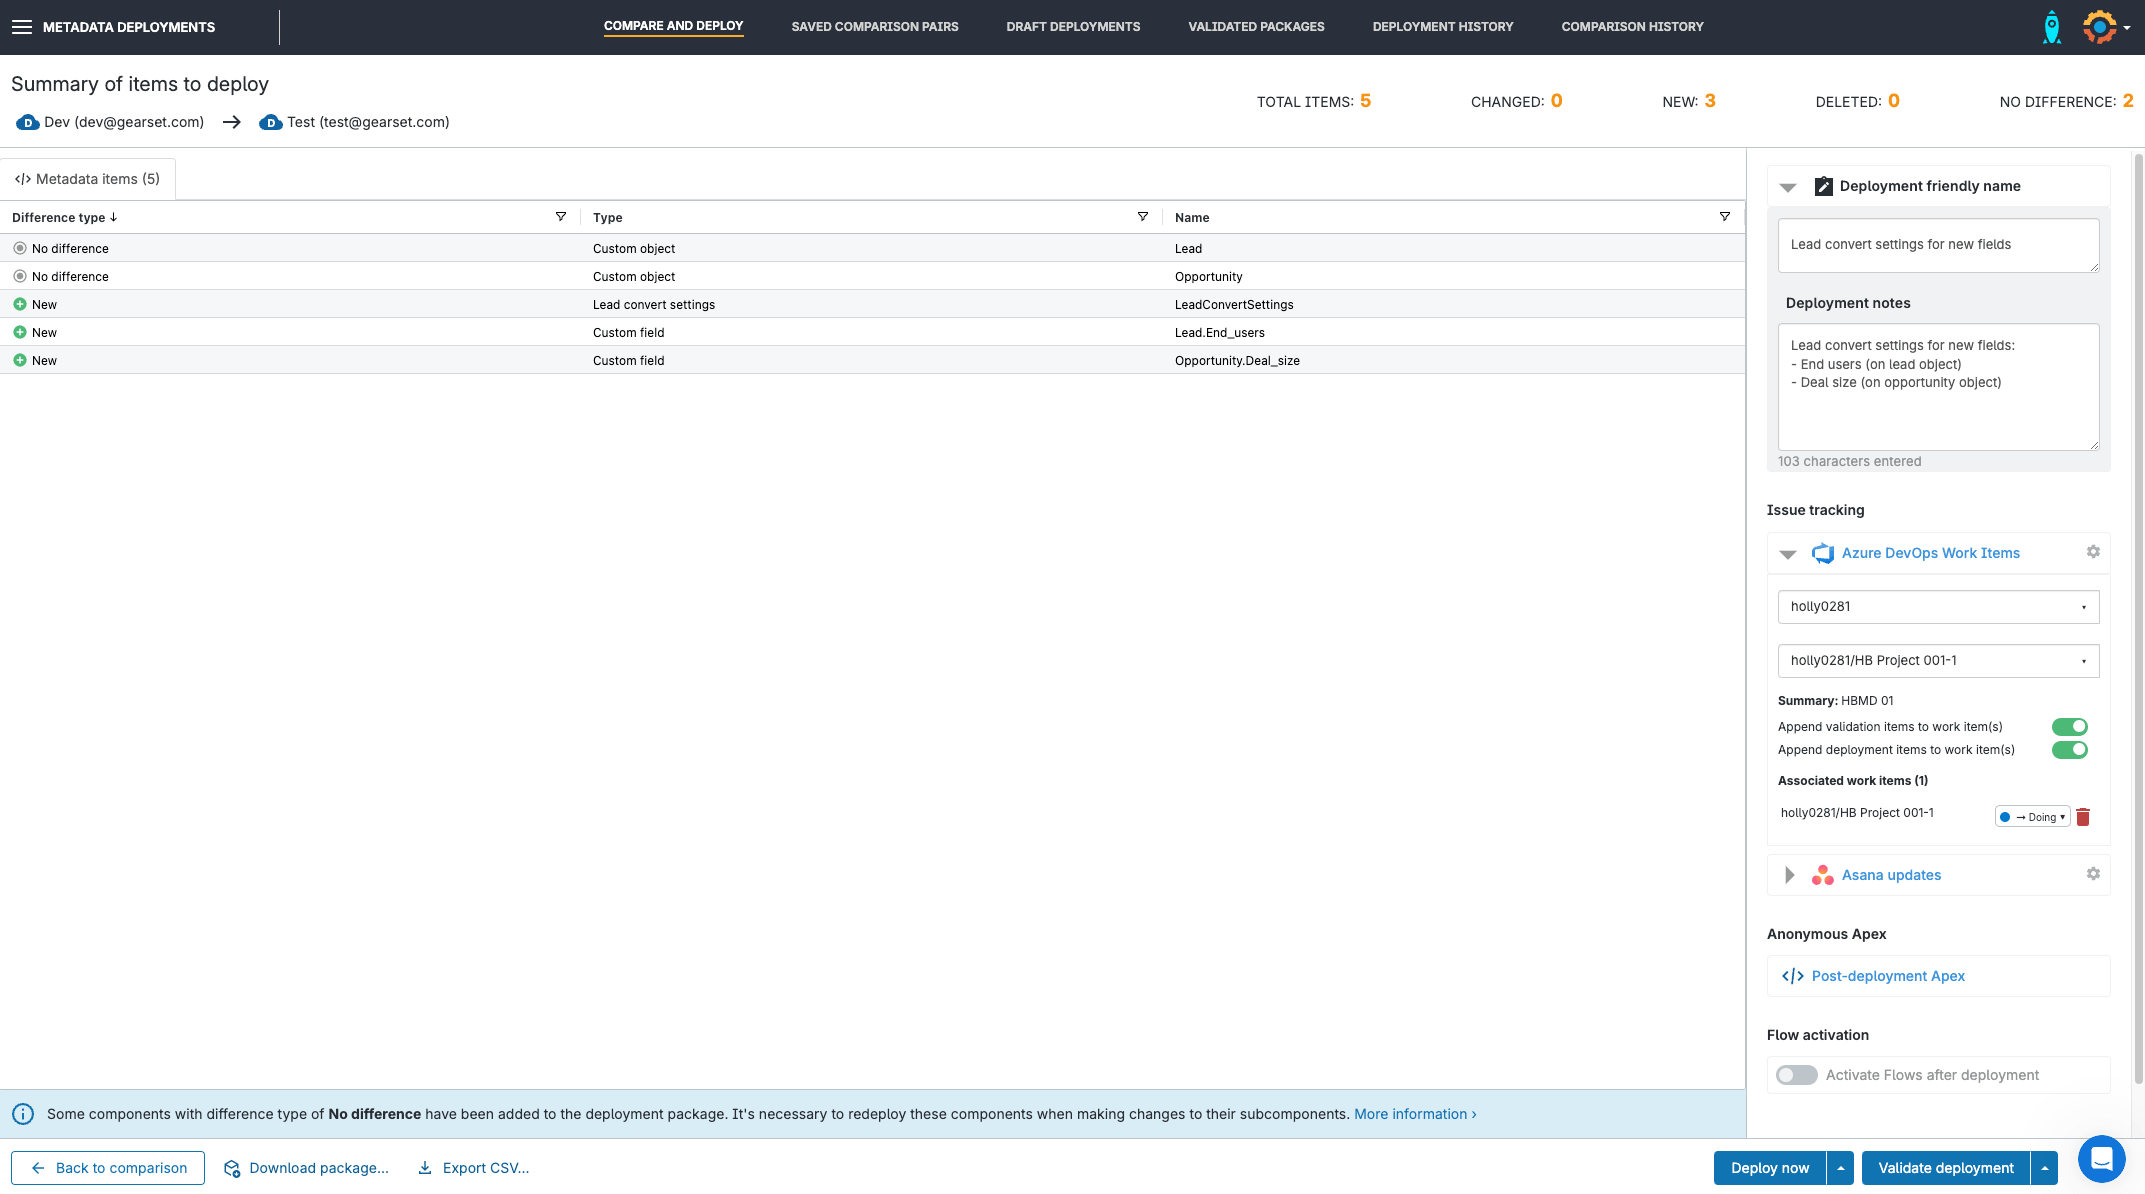
4. Review your deployment package
The pre-deployment summary allows you to review the items included in your deployment package and give the deployment a name for easy identification. If you’re using Jira, Asana or Azure DevOps Work Items, you can attach the relevant user stories to the deployment, change their position on the kanban board, and automatically attach a full deployment summary to the tickets without leaving Gearset.
5. Deploy your package
Press Validate deployment to see if the deployment will succeed or Deploy now to instantly deploy your package. You can also schedule the deployment for a later date and time.
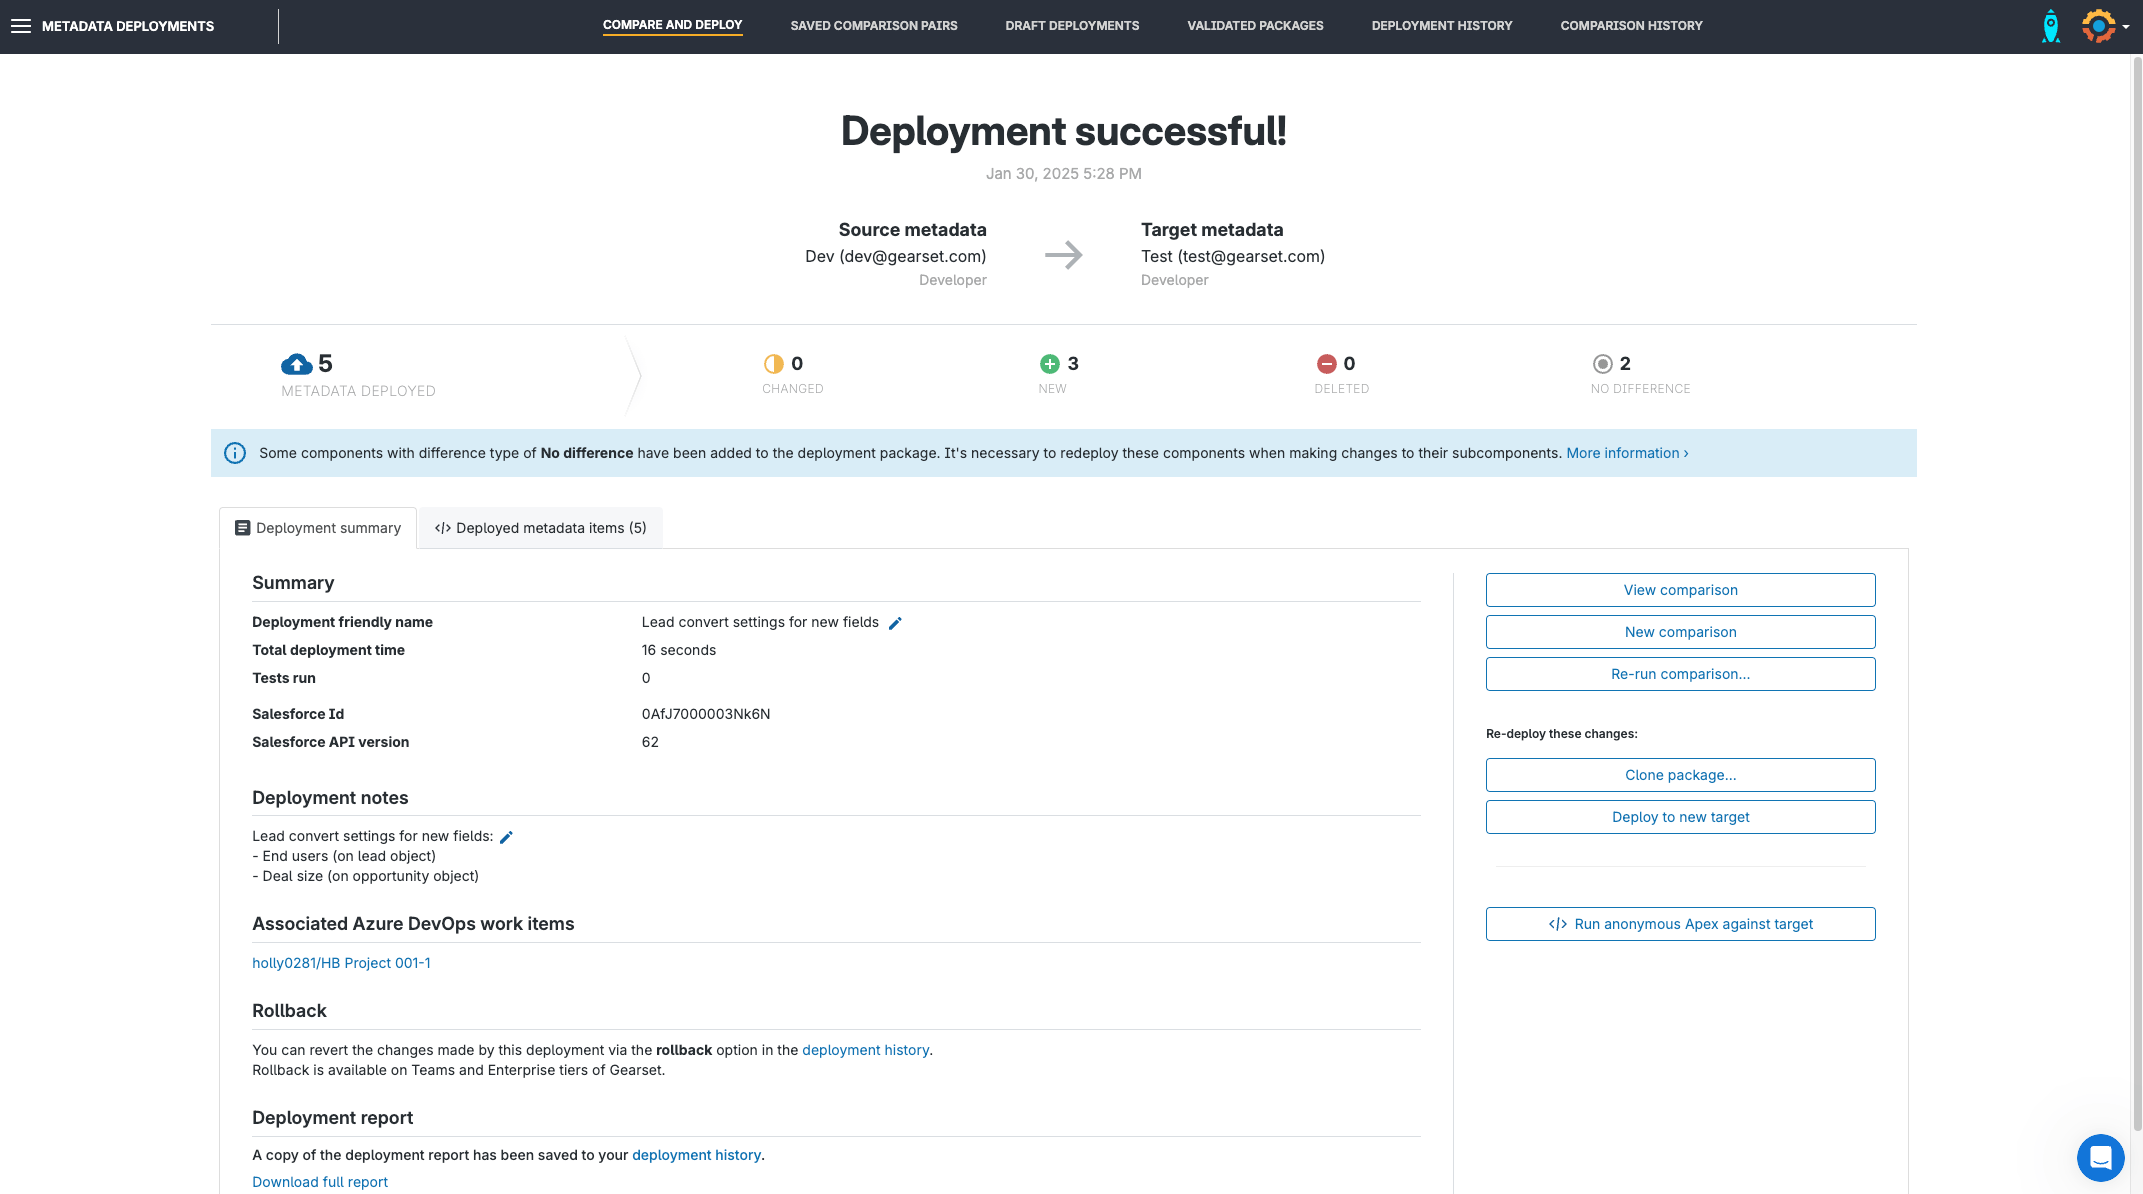
A full record of all deployments is kept in the Deployment history tab where you can roll back deployments, download a complete deployment report, and re-deploy the package to other environments without rebuilding.
Lead your team to deployment success
The performance of your sales team depends on the smooth and effective functioning of your production org. If you’re ready to deploy lead mapping easily to lay the foundation for your sales team’s success, start a free 30-day trial of Gearset or speak to one of our DevOps experts.
