

Imagine being confident that everything is in order across your production org, and no changes can be made without your knowing about it. You and your team spend a long time building and customizing your Salesforce metadata so ideally you want to be the first to know when there’s a change that you weren’t expecting. This is where Gearset’s unique change monitoring tool comes in very handy.
Even with a comprehensive audit trail of the changes you deploy to production, you won’t necessarily catch rogue changes made directly in production. How long would it take your team to notice if a field was added or a checkbox had been changed?
We all know that making changes directly in your production environment is a bad idea and should be avoided. But sometimes a teammate will skip the proper development and release process, either because they think the change isn’t risky or because they’re making a hotfix. In either case, you really want to know when that has happened as soon as possible. A good observability approach helps you quickly spot these kinds of shortcuts, understand what impact they’re having, and keep your Salesforce environment healthy.
TDX
What to do about changes made in production?
If the above sounds like an issue you face, then help is at hand. With Gearset, you can set up a change monitoring job in a matter of clicks, so you can easily see who changed what and when in your org.
Change monitoring works by comparing daily snapshots of your org’s metadata and highlighting any changes. Once changes have been detected you have the option to roll back unwanted changes, download snapshots of your org’s metadata on-demand, and deploy detected changes to other environments.

Easily see changes at a glance
Change monitoring in Gearset is a really easy and automated process where you’ll be notified as soon as anything changes in your specified Salesforce environments. You can easily navigate to a full change history and download reports to keep track of changes over time. This will help you avoid overwriting others’ changes by always being aware of updates.
Let’s see how to set up a monitoring job:
- Head over to your monitoring dashboard by clicking Monitoring in the Gearset menu under the automation section.
- Click Add new job.
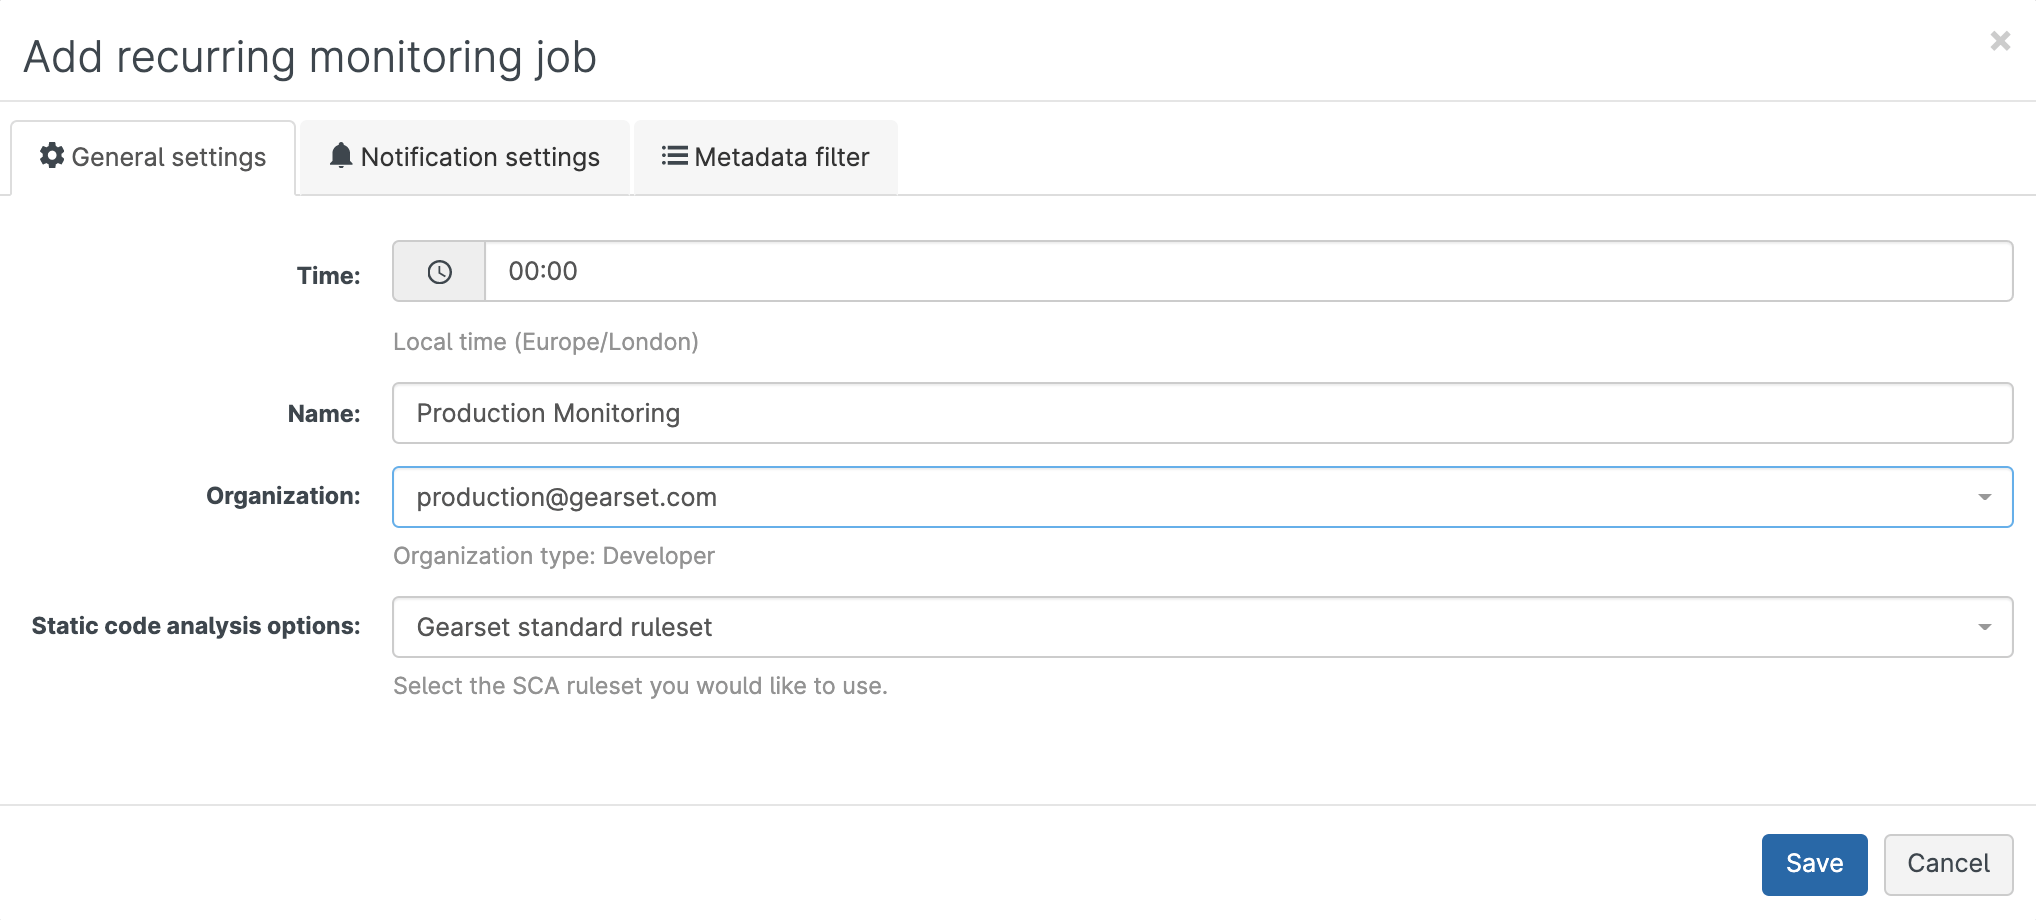
- Set the time you would like the job to run and give it a name.
- Choose the org you want to monitor.
- In the Notification settings tab, choose whether you want to be notified on every run or every time there is a change and then add your email address or choose another way to be contacted.
- Choose any specific filter settings under the Metadata filters tab or leave them as default. You can monitor CPQ and Vlocity changes as well as regular metadata.
- Click Save.
- Gearset will now take a snapshot of your org as a baseline to compare to any future comparisons.
Roll back any unwanted changes
What happens when you come across a change that you weren’t expecting and don’t want to keep in your org? With change monitoring it’s easy to roll back those changes. Rollbacks take advantage of Gearset’s unique dependency analysis to identify and include any required dependencies for the rollback to succeed.
Here’s how to roll back a change:
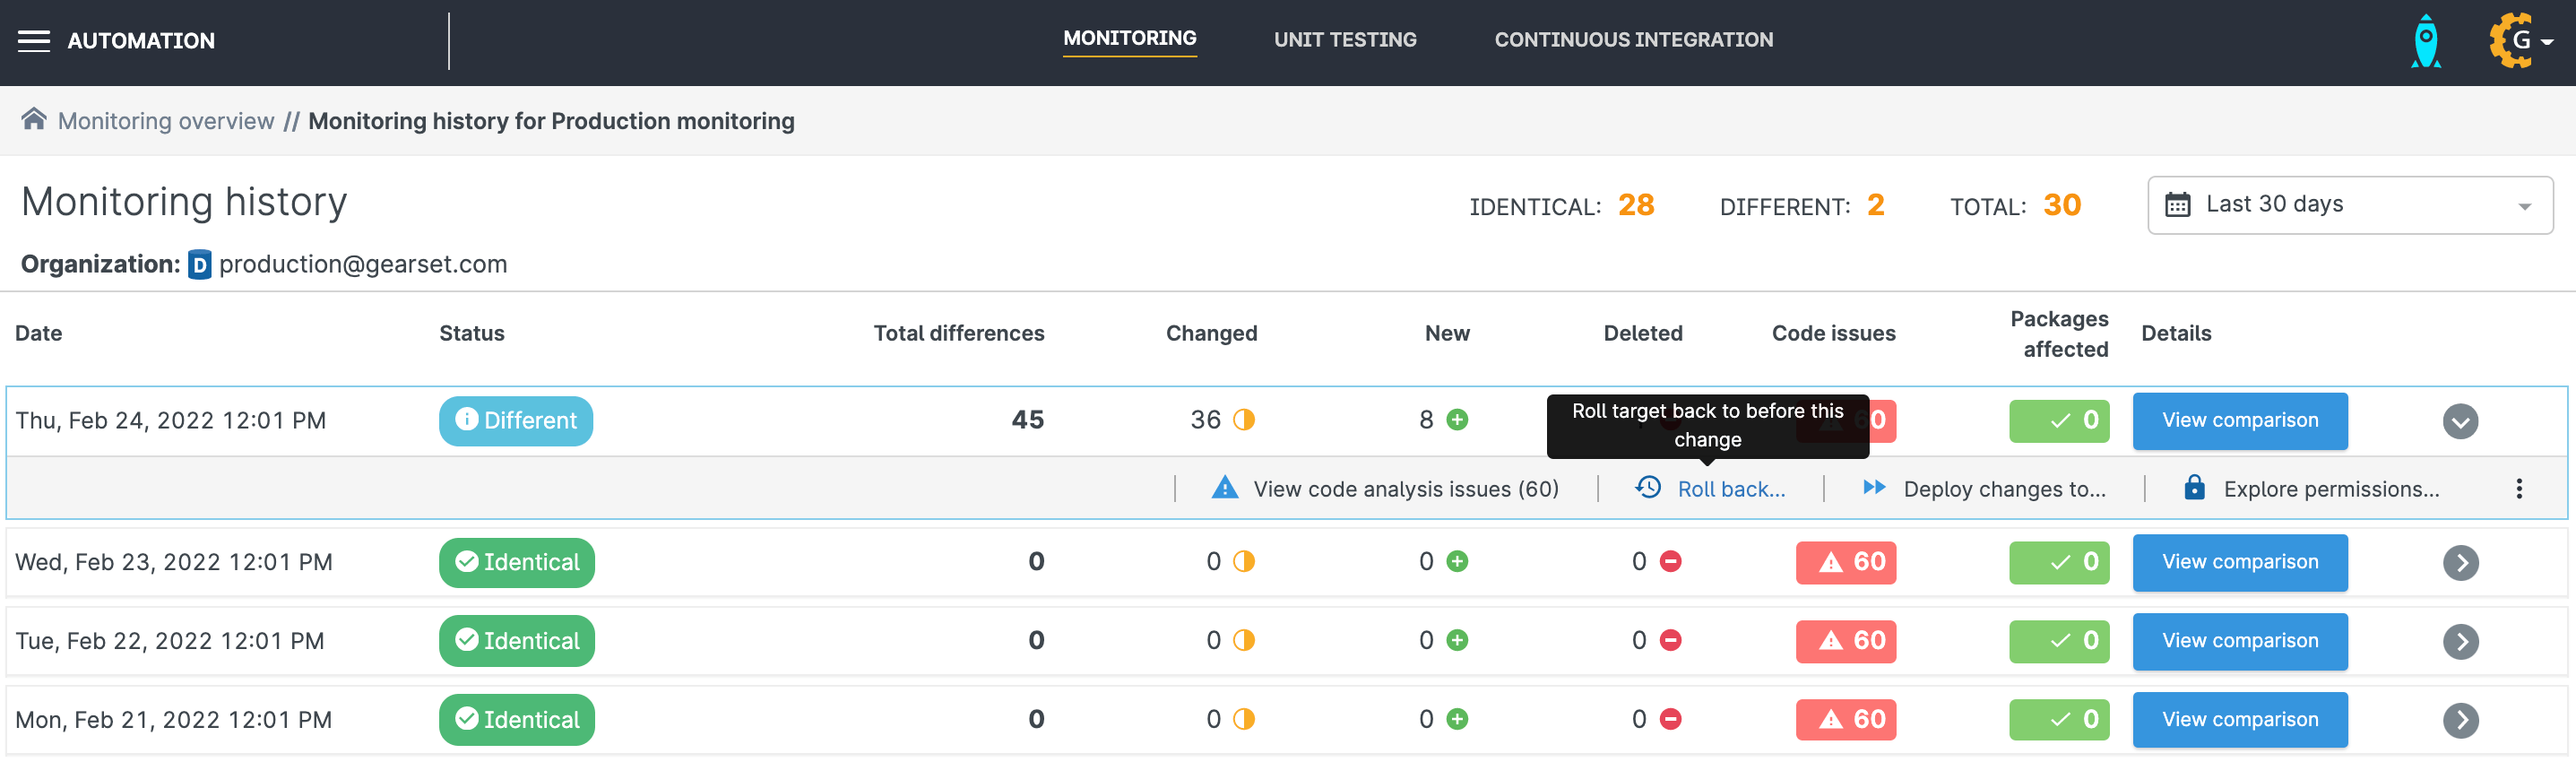
- Click View history on the relevant monitoring job to see the Monitoring history.
- Click on the relevant job and a number of options will appear. Click Roll back.
- Click Start rollback comparison.
- Follow the usual comparison and deployment steps. In effect, you’re deploying destructive changes to delete the detected metadata from your org. Gearset will automatically preselect the metadata changes detected by the monitoring job, but you can change this selection if you only want to remove certain bits of metadata.
Make sure hotfixes aren’t overwritten
If you want to keep the change (because it’s super helpful or a hotfix), Gearset will let you deploy it back through to your other environments, neatly syncing them up and making sure those changes won’t be overwritten in future.
- Go to the Monitoring history page for the relevant monitoring job.
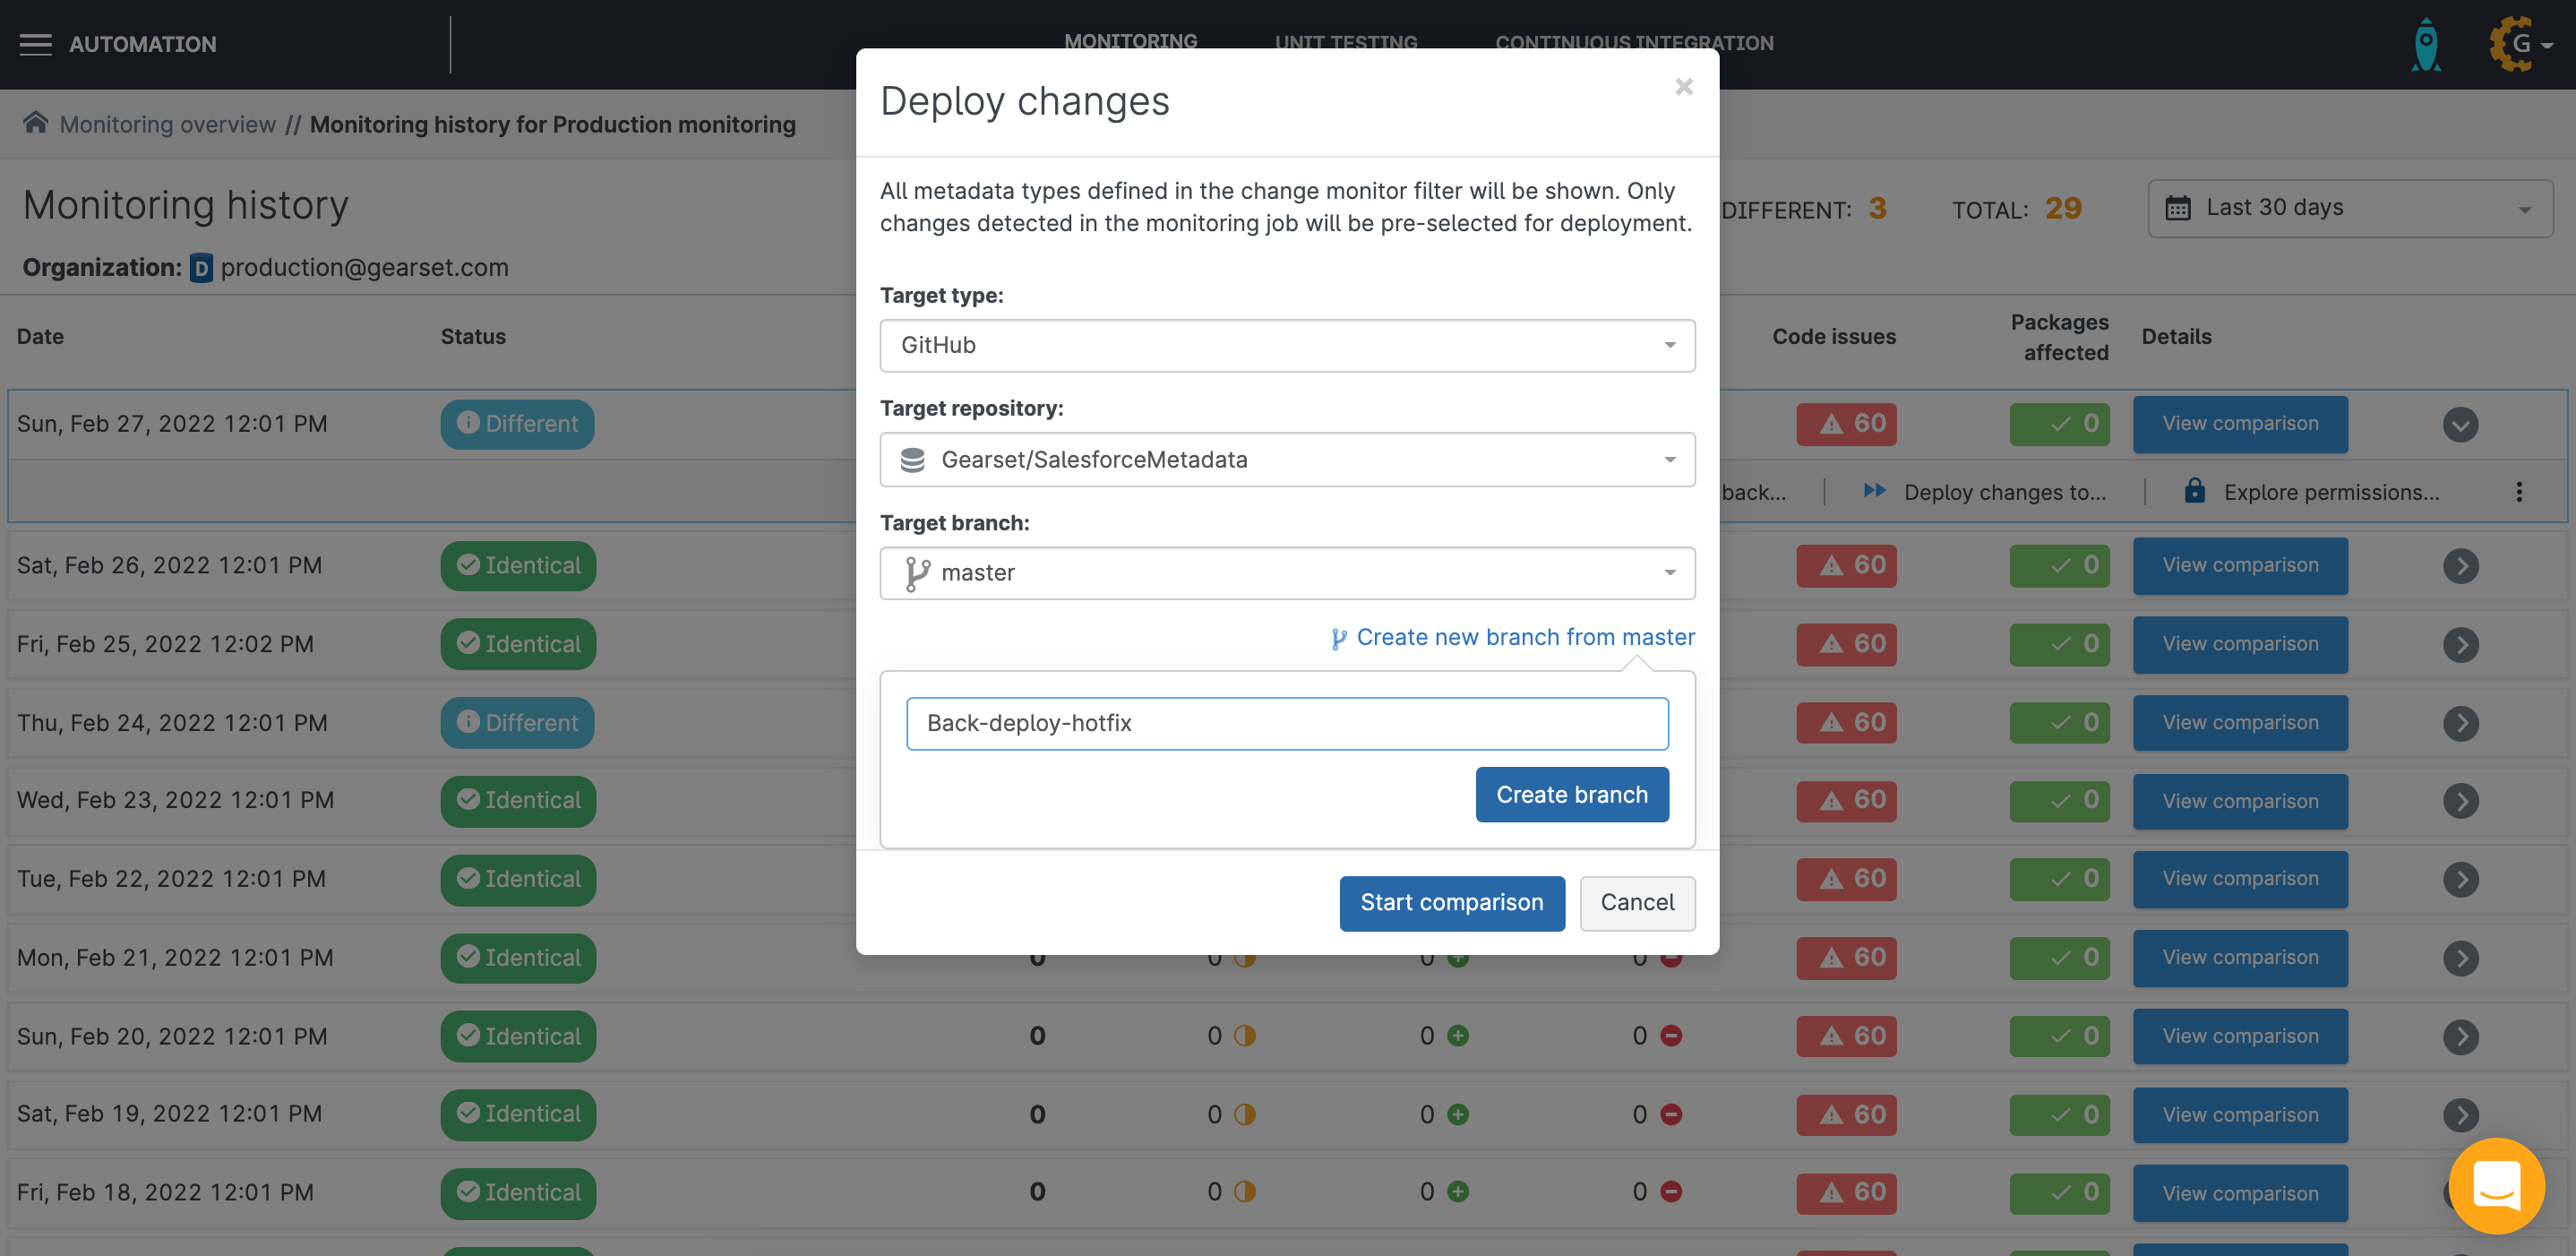
- Click Deploy changes to...
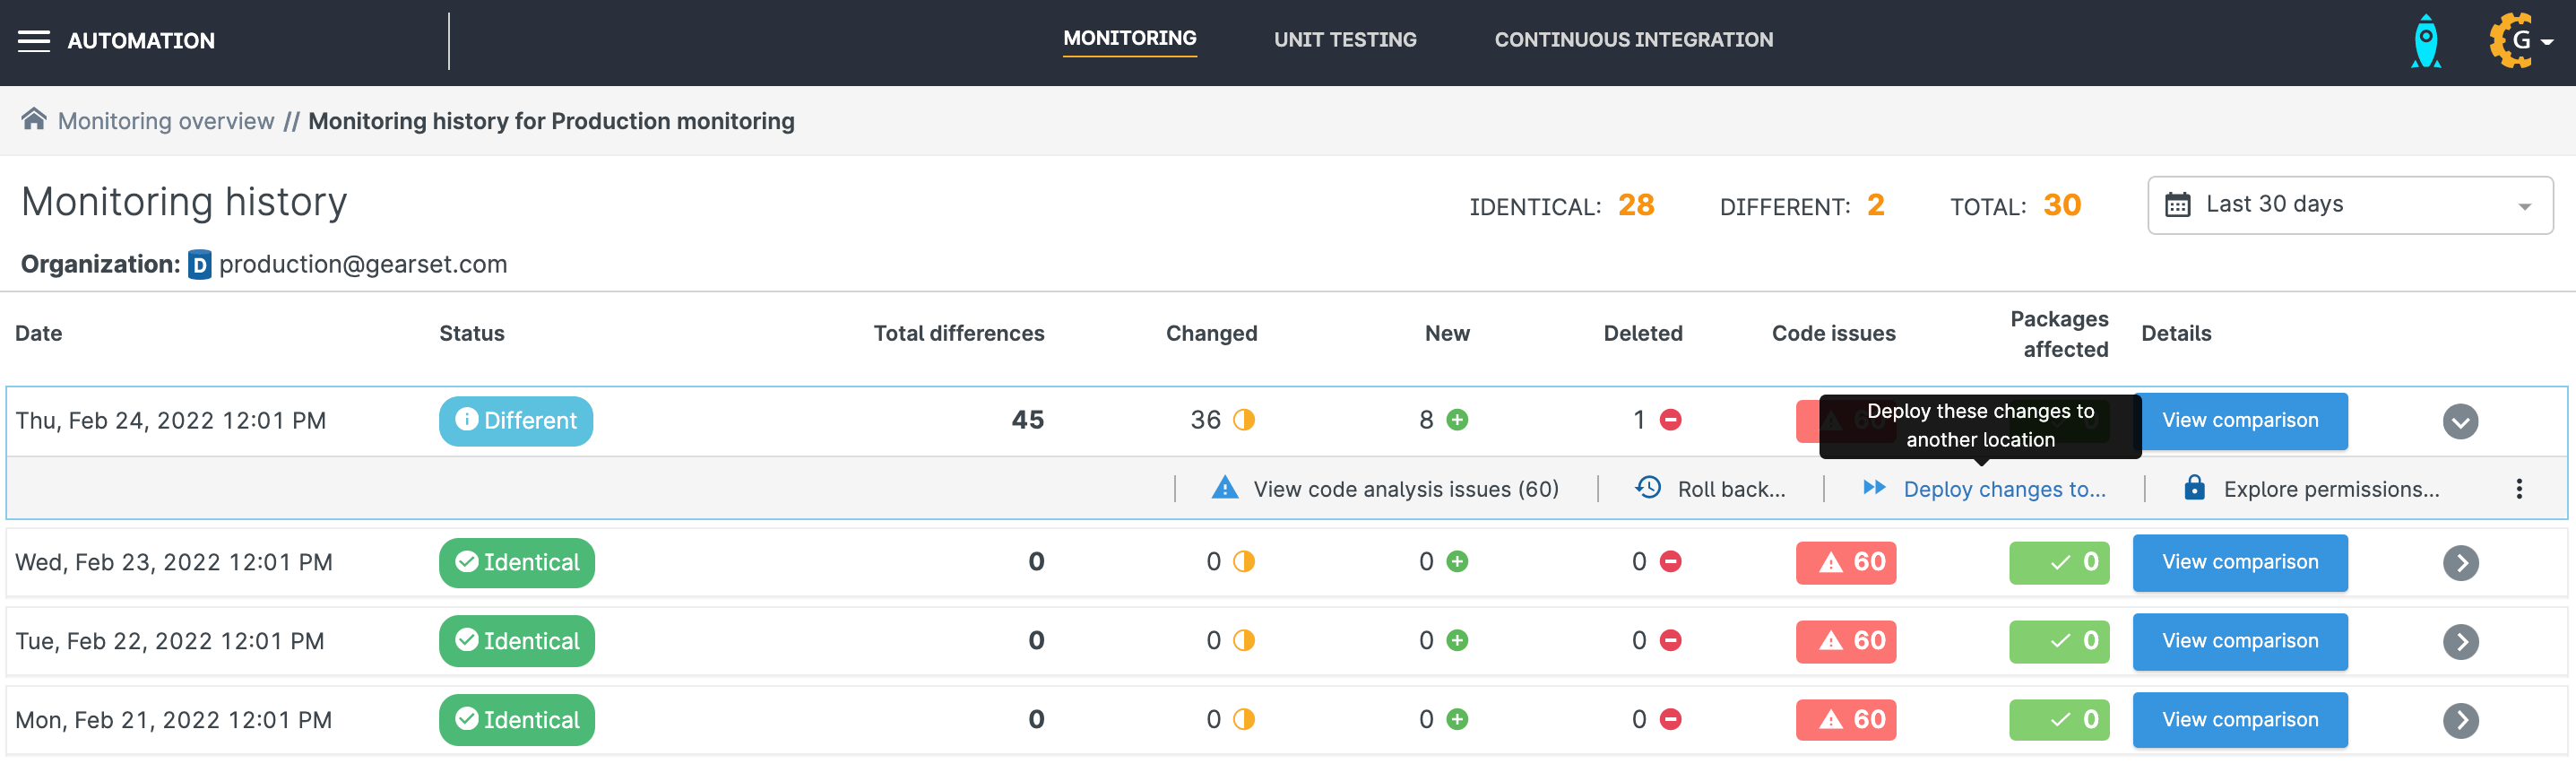
- Select the target environment for the hotfix. If you’re using version control and your main branch is the source of truth, that’s where you want to deploy this metadata. You should still follow best practice. So you might create a new branch, e.g.
Back-deploy-hotfix, and then open a pull request to merge that branch into main.
Static code analysis
Gearset will also run static code analysis on your org’s Apex classes as part of each monitoring run. This will help you to check the quality of your code and will provide helpful feedback.
From the Monitoring dashboard, you can even view a summary graph of the static code analysis for any monitoring job, so you can track code quality over time and hopefully see a steady improvement.
Automated change monitoring makes your life easier
Change monitoring in Gearset is the perfect solution for keeping your production org in check. This easy and automated process takes the stress away and allows you to focus your time on developing your org. Whether it’s a hotfix that needs to be deployed backwards or a rogue addition that shouldn’t be there at all, you’ll be notified about it straight away and offered a selection of tools to help you on your way to achieving the dream of perfectly synced environments.
To see how Gearset can help you monitor your org, start your free trial. Or if you have any questions, just get in touch via the live chat.
