History tracking for Salesforce metadata can be really valuable for seeing how your fields have changed. But, it’s also a common cause of deployment failure that can slow teams down and block releases. In this post we’ll look at what field history tracking is and how to deploy field tracking in Salesforce easily.
What is field tracking history in Salesforce?
Ever needed to see when a field was changed, by who, and what change was made? That’s what history tracking is for.
Field history tracking allows you to track changes on up to 20 fields per standard or custom object. This change history will be retained for 18 months. Some objects have a much lower threshold, such as events and tasks, which only allow tracking for up to 6 fields — so make sure you know which objects you need to track and check for limitations.
Important note: while field tracking history usually records the old and new field data, if the field has more than 255 characters Salesforce will track that the field was edited but won’t retain the old copy.
Stop flying blind: How Truckstop brought clarity to a complex org
What’s the difference between field history tracking and field audit trail?
Although they’re similar, there are key differences between field history tracking and field audit trails. Depending on your use case, one is likely to be a better fit than the other.
Field audit trail is only available as part of Salesforce Shield, retaining a higher volume of fields per object (around 60) for a longer period of time (up to 10 years). This is a great fit for teams with extensive compliance requirements but does come with a higher cost.
How to enable field history tracking in your source org
To set up field history tracking, you’ll first need to have history tracking enabled on the parent object. You can then turn on history tracking on a per field basis, tracking changes just for the specific fields you’re interested in.
To enable tracking for a field, you’ll need to:
- Use the QuickFind box to get to the Field History Tracking page
- Press View next to the object whose fields you want to track and turn on Enable {Object_Name} History
- Select the fields you want to track — depending on the size of the field, Salesforce will either give the option to track old and new values of the field or just changes to the field
Deploying field tracking history with change sets
Once you’ve got field history tracking up and running, you’ll want to get that configuration over to your target org. Unfortunately, it’s not possible to deploy field history tracking with change sets. Because of this limitation, you’ll need to manually replicate any changes to history tracking in your target.
Deploying field history tracking with Gearset
Using the Metadata API, Gearset can deploy field tracking history for you and has built-in problem analyzers to avoid the deployment failures that are usually caused by field history tracking.
If you’d like to follow along with this guide and see how easy field tracking deployments can be, sign up for a free 30-day trial.
Step 1. Configure your comparison
Select the source and target org for your comparison, press Compare now and build your comparison filter — make sure to include the CustomObject metadata type in your comparison to see the differences in tracking history for your objects and fields.
Step 2. Build your deployment package
Gearset will highlight the changes between your environments, including whether field tracking history has been enabled on any fields. Simply select the tracked field you want to include in your deployment package — for some custom field types, you can deploy just the change to the field tracking and not the whole field.

Step 3. Check your deployment will be successful
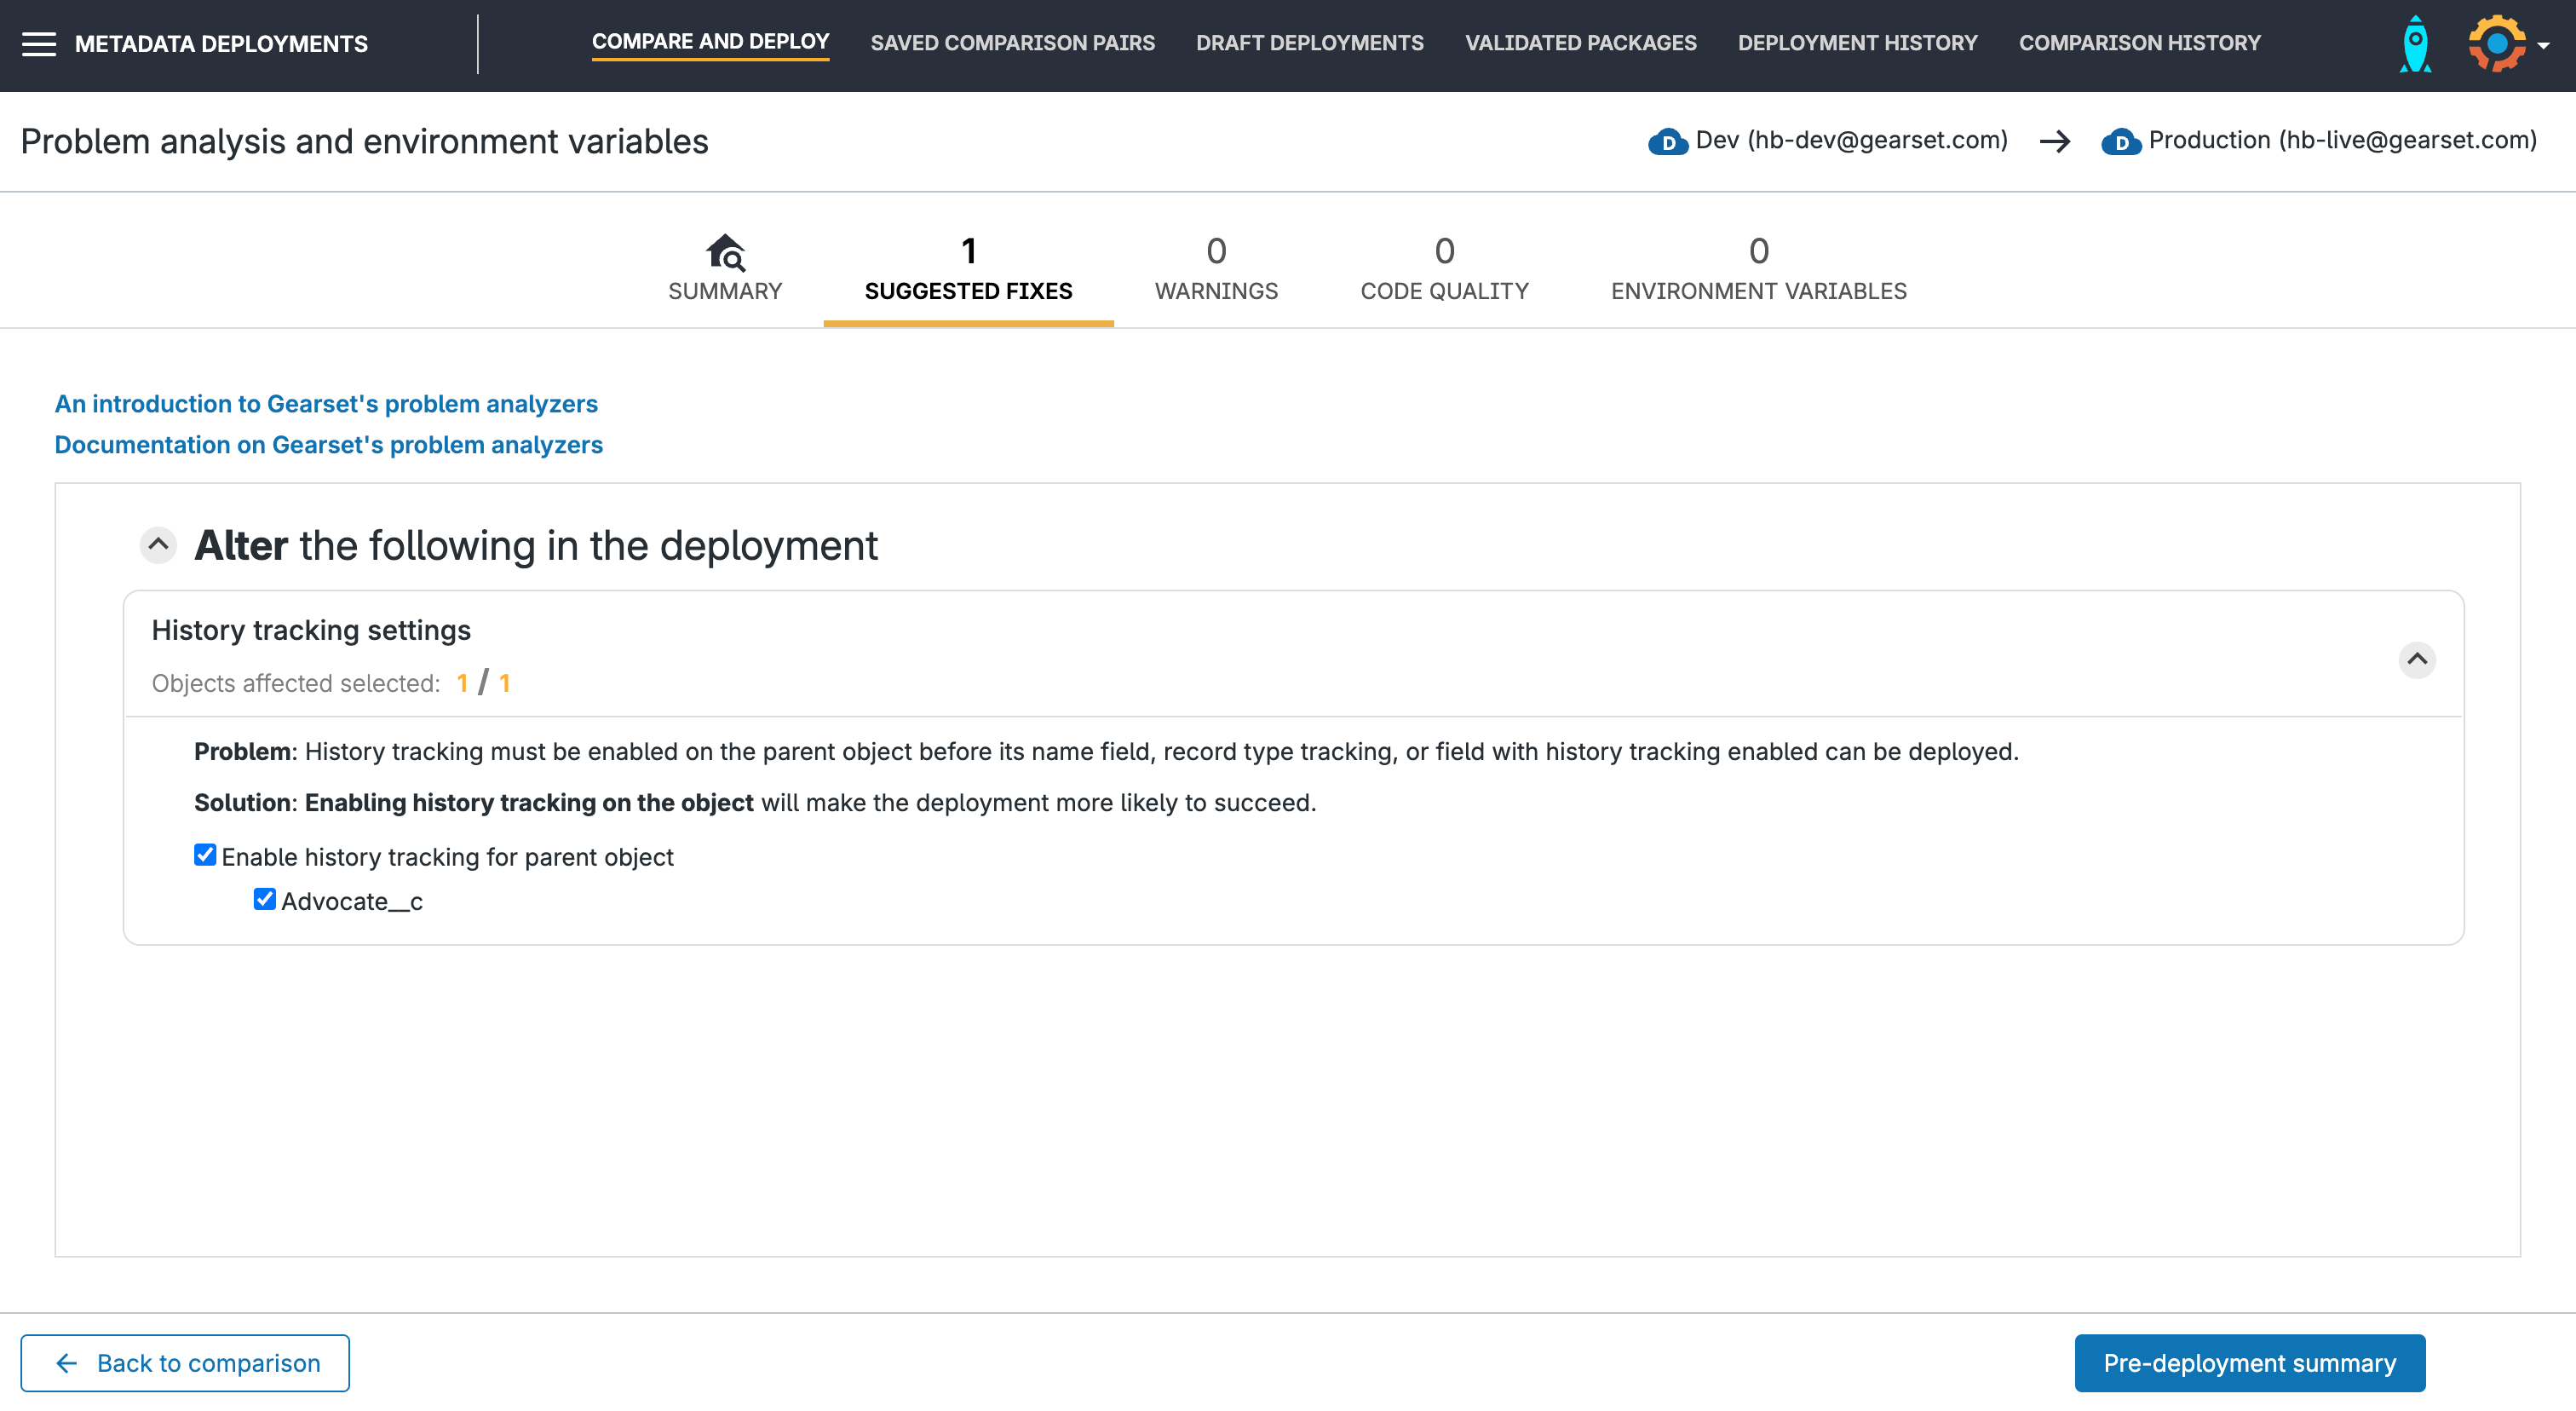
Gearset’s problem analyzers will check your package for any common issues that could cause the deployment to fail. For example, if you try to deploy history tracking for a field on a parent object that doesn’t have history tracking enabled in the target, you’ll get the error message The entity: {object} does not have history tracking enabled.
If history tracking isn’t enabled for the object in the target, Gearset will automatically suggest that you include the parent object as part of the deployment to enable history tracking. You can accept this suggestion with a single click without rebuilding the package.

Step 4. Deploy your package
Give your deployment a friendly name, add any relevant Jira, Asana or Azure DevOps tickets, and press Deploy now. And if you need to undo your changes, simply roll back from the Deployment history tab.

Ready to make field history tracking a breeze?
Take the headache out of field tracking history and increase your deployment success rate with Gearset compare and deploy — you can get access to the full Gearset platform free for 30 days, with nothing to install in your orgs and no credit card details needed.


