
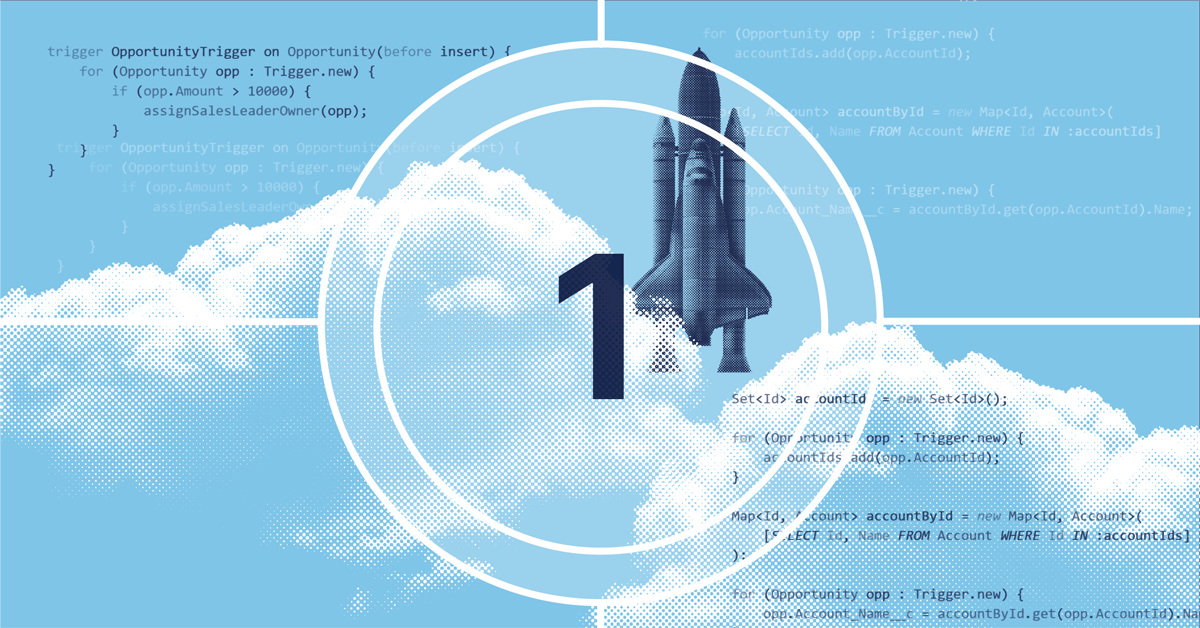


Apex helps make Salesforce a widely customizable platform, allowing teams to add their own business logic to their orgs. But deploying Apex can be a challenge and it’s even more difficult to delete from production once it’s been deployed.
In this blog, we’ll look at the supported methods for developing Apex and how to deploy Apex classes with native change sets. We’ll also look at how Gearset can help streamline the deployment process and give you a quick and easy way to delete Apex from any org, including production.
What is Apex?
Apex is a programming language specific to the Salesforce platform — this is also known as a proprietary programming language. Apex is used in two ways on the Salesforce platform: classes and triggers. Apex classes can be used across a Salesforce org to define properties and code methods that can be called from elsewhere in this system. You can think of them as libraries of code, logically grouped together. Apex triggers execute in response to events, which are triggered by data changes such as creating, updating or deleting records.
To support Salesforce teams in writing robust and reliable Apex, Salesforce enforces unit testing. Unit tests verify whether an Apex class or trigger is working as expected but does not change the metadata or data in the org. Salesforce specifies a minimum threshold of 75% code coverage for Apex in production orgs — that means 75% of the lines of code must be covered by passing unit tests. If code coverage drops below that threshold, Salesforce won’t allow deployments to the org. Most teams keep a close eye on their unit tests and aim to keep their code coverage well above this threshold, to avoid deployments becoming blocked.
But how can teams build, deploy, and delete Apex classes?
Live eventConvene, Chicago
DevOps Dreamin' Chicago 2024
How to deploy Apex classes
Currently, Salesforce doesn’t support creating Apex in production orgs — to create or edit an Apex class, you will need to use a developer edition org, sandbox, scratch org or trial org. The Apex classes will then need to be deployed to your production org.
Native and third-party solutions are available for deploying Apex classes — we’ll look at how to deploy with change sets and how Gearset can streamline the deployment process.
Deploying Apex classes with change sets
To start, you need to create a deployment connection by allowing inbound change sets to your target org from your source org. You’re only able to allow inbound change sets from orgs that share the same production environment, known as “related” orgs. Deployment connections can’t be created between “arbitrary” orgs that don’t share a production environment.
Once you have created the necessary deployment connections between your orgs, you can start building your change set. To do this, you’ll need to log into your source org, navigate to the developer console and go to Change Sets > Outbound Change Sets > New. Give your change set a name then search for and add the components you want to deploy, such as your new or updated Apex classes. Make sure to include your relevant unit tests and any dependencies in the change set too or the deployment won’t succeed. When you’re happy with the change set, hit Upload.
Log into your target org to start the process of accepting and deploying the inbound change set. Select the change set you want to validate and choose which level of testing you want Salesforce to run. The options are:
- Default: Salesforce provides default settings for testing, but this varies depending which org is being deployed to.
- Sandbox: no tests are executed
- Production: local tests executed if the deployment contains Apex classes or triggers.
- Run Local Tests: all test classes in the org are run apart from managed package tests. This is the default testing level for apex deployments.
- Run All Tests: all tests are run, including those from managed packages.
- Run Specified Tests: only the test classes provided by the user in a comma-separated list will be executed. The specified tests must cover the classes and triggers included in the package and need to comply with the 75% minimum code coverage specification.
If the package validates successfully, it will then be deployed.
But what if you no longer want an Apex class that’s in your production org? Change sets don’t support destructive changes and Apex classes can’t be modified directly in production; you’d need to use developer tooling such as the Salesforce CLI to disable or delete an Apex class in production.
Deploying Apex classes with Gearset
Gearset helps streamline deployments for all metadata types, including Apex classes, as well as supporting destructive changes — so you can make changes to your Apex classes in just a few clicks.
If you want to follow along with these steps to deploy Apex, get 30 days access to Gearset free of charge.
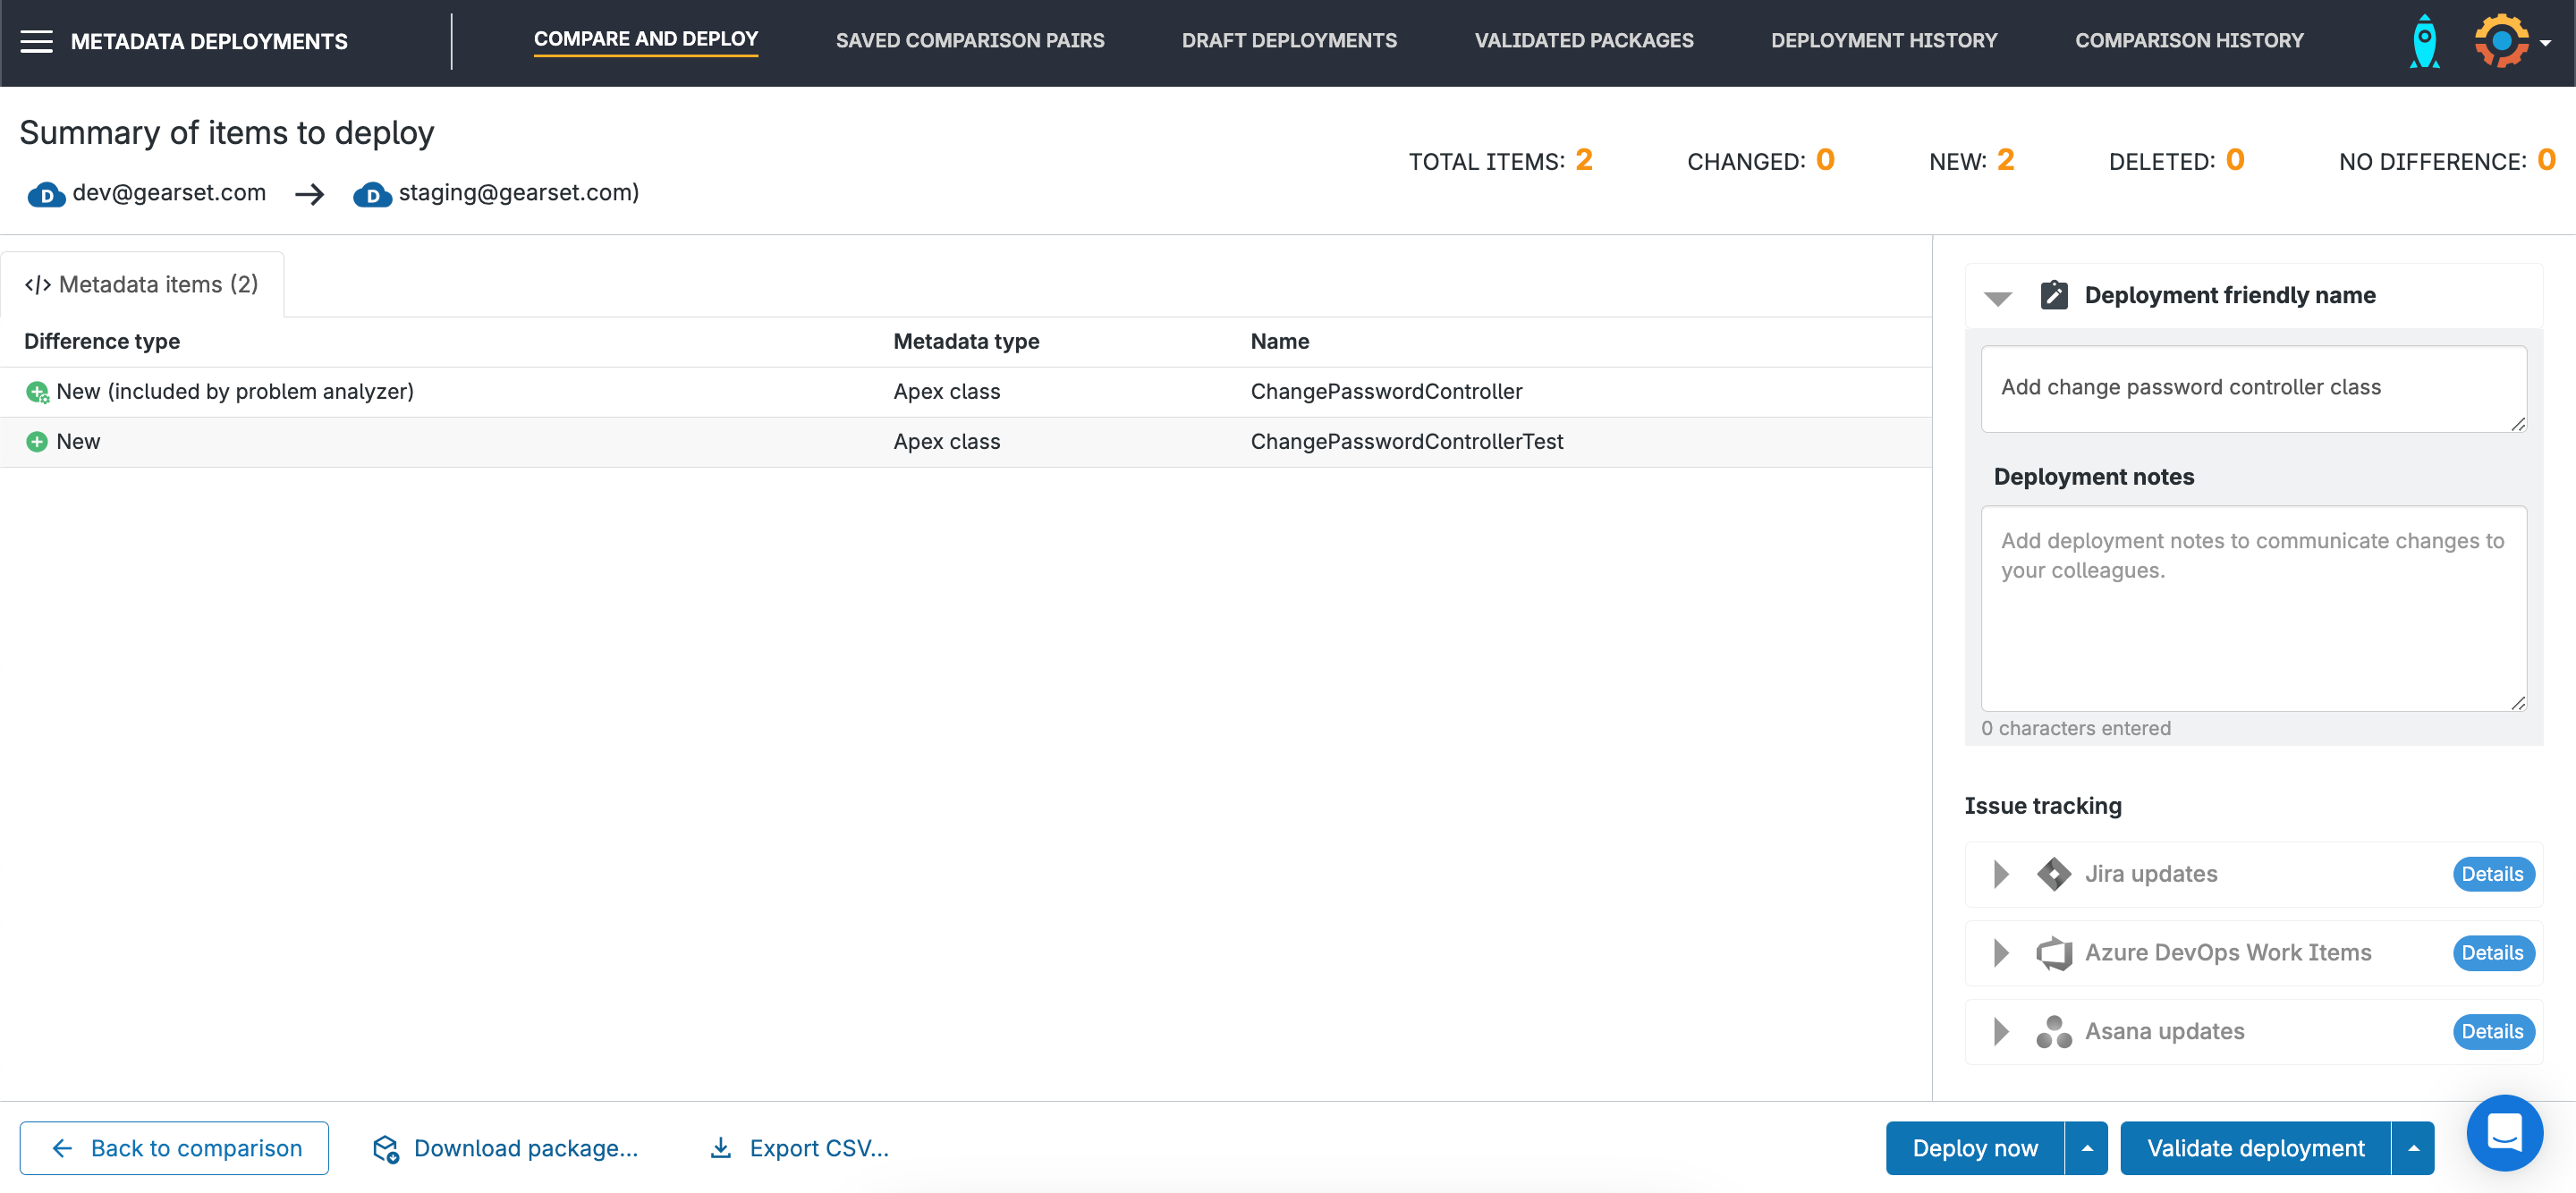
1. Compare your orgs and build a deployment package
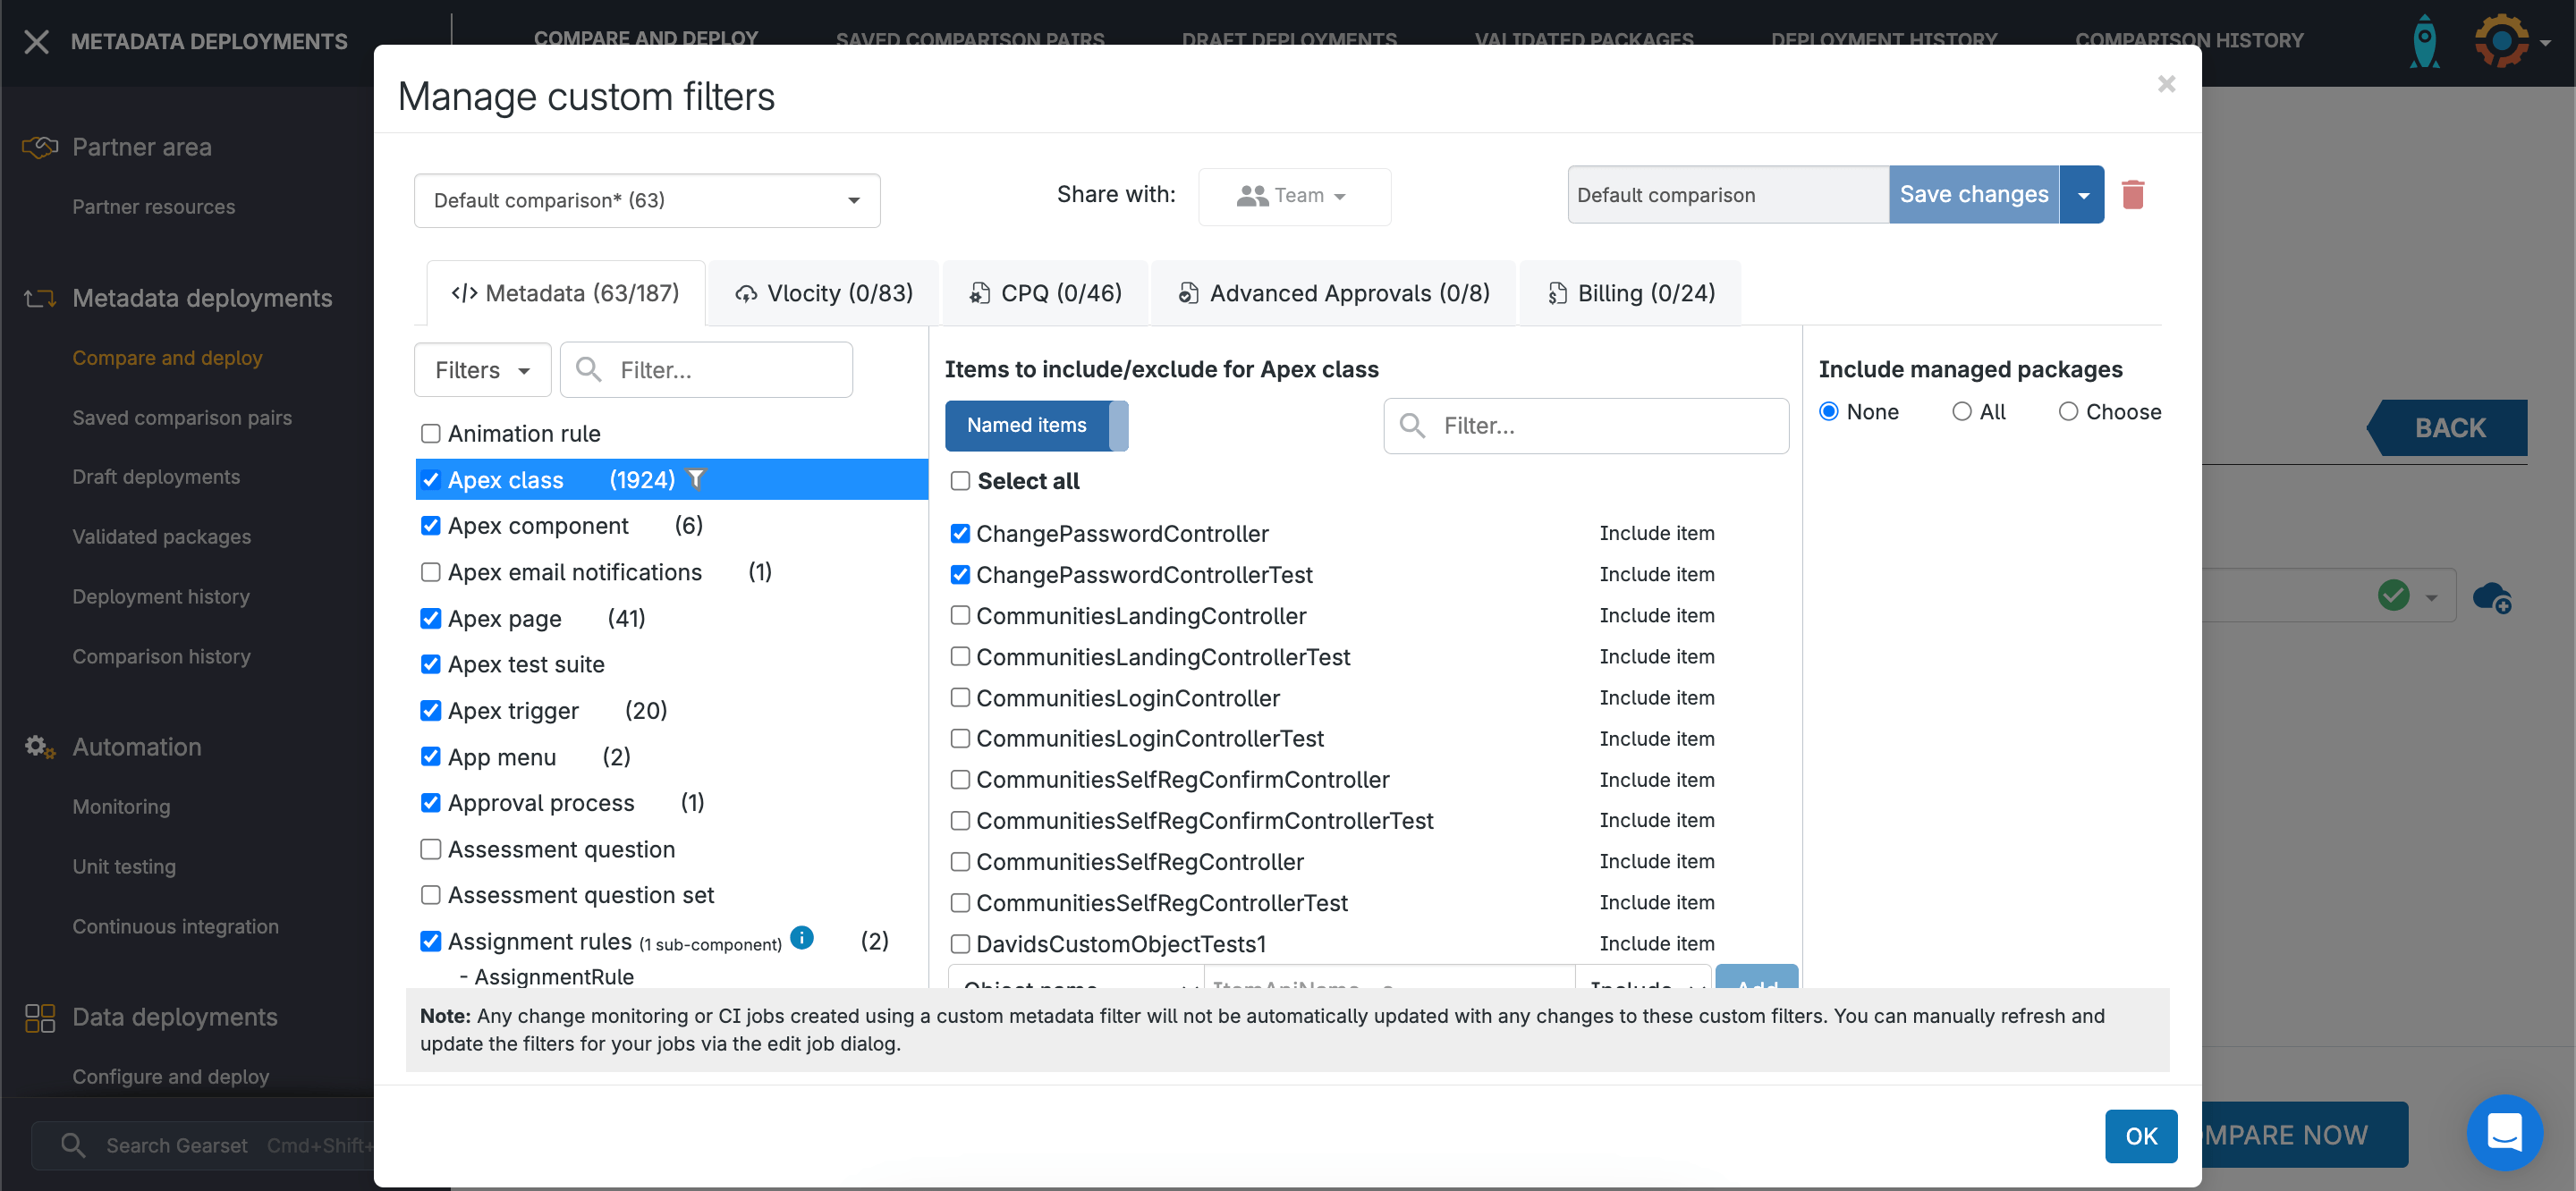
To get started, head to the Compare and deploy page and select your source and target orgs. Focus on just the specific metadata types you want to compare, by building a custom filter or using one of Gearset’s ready-made filters.
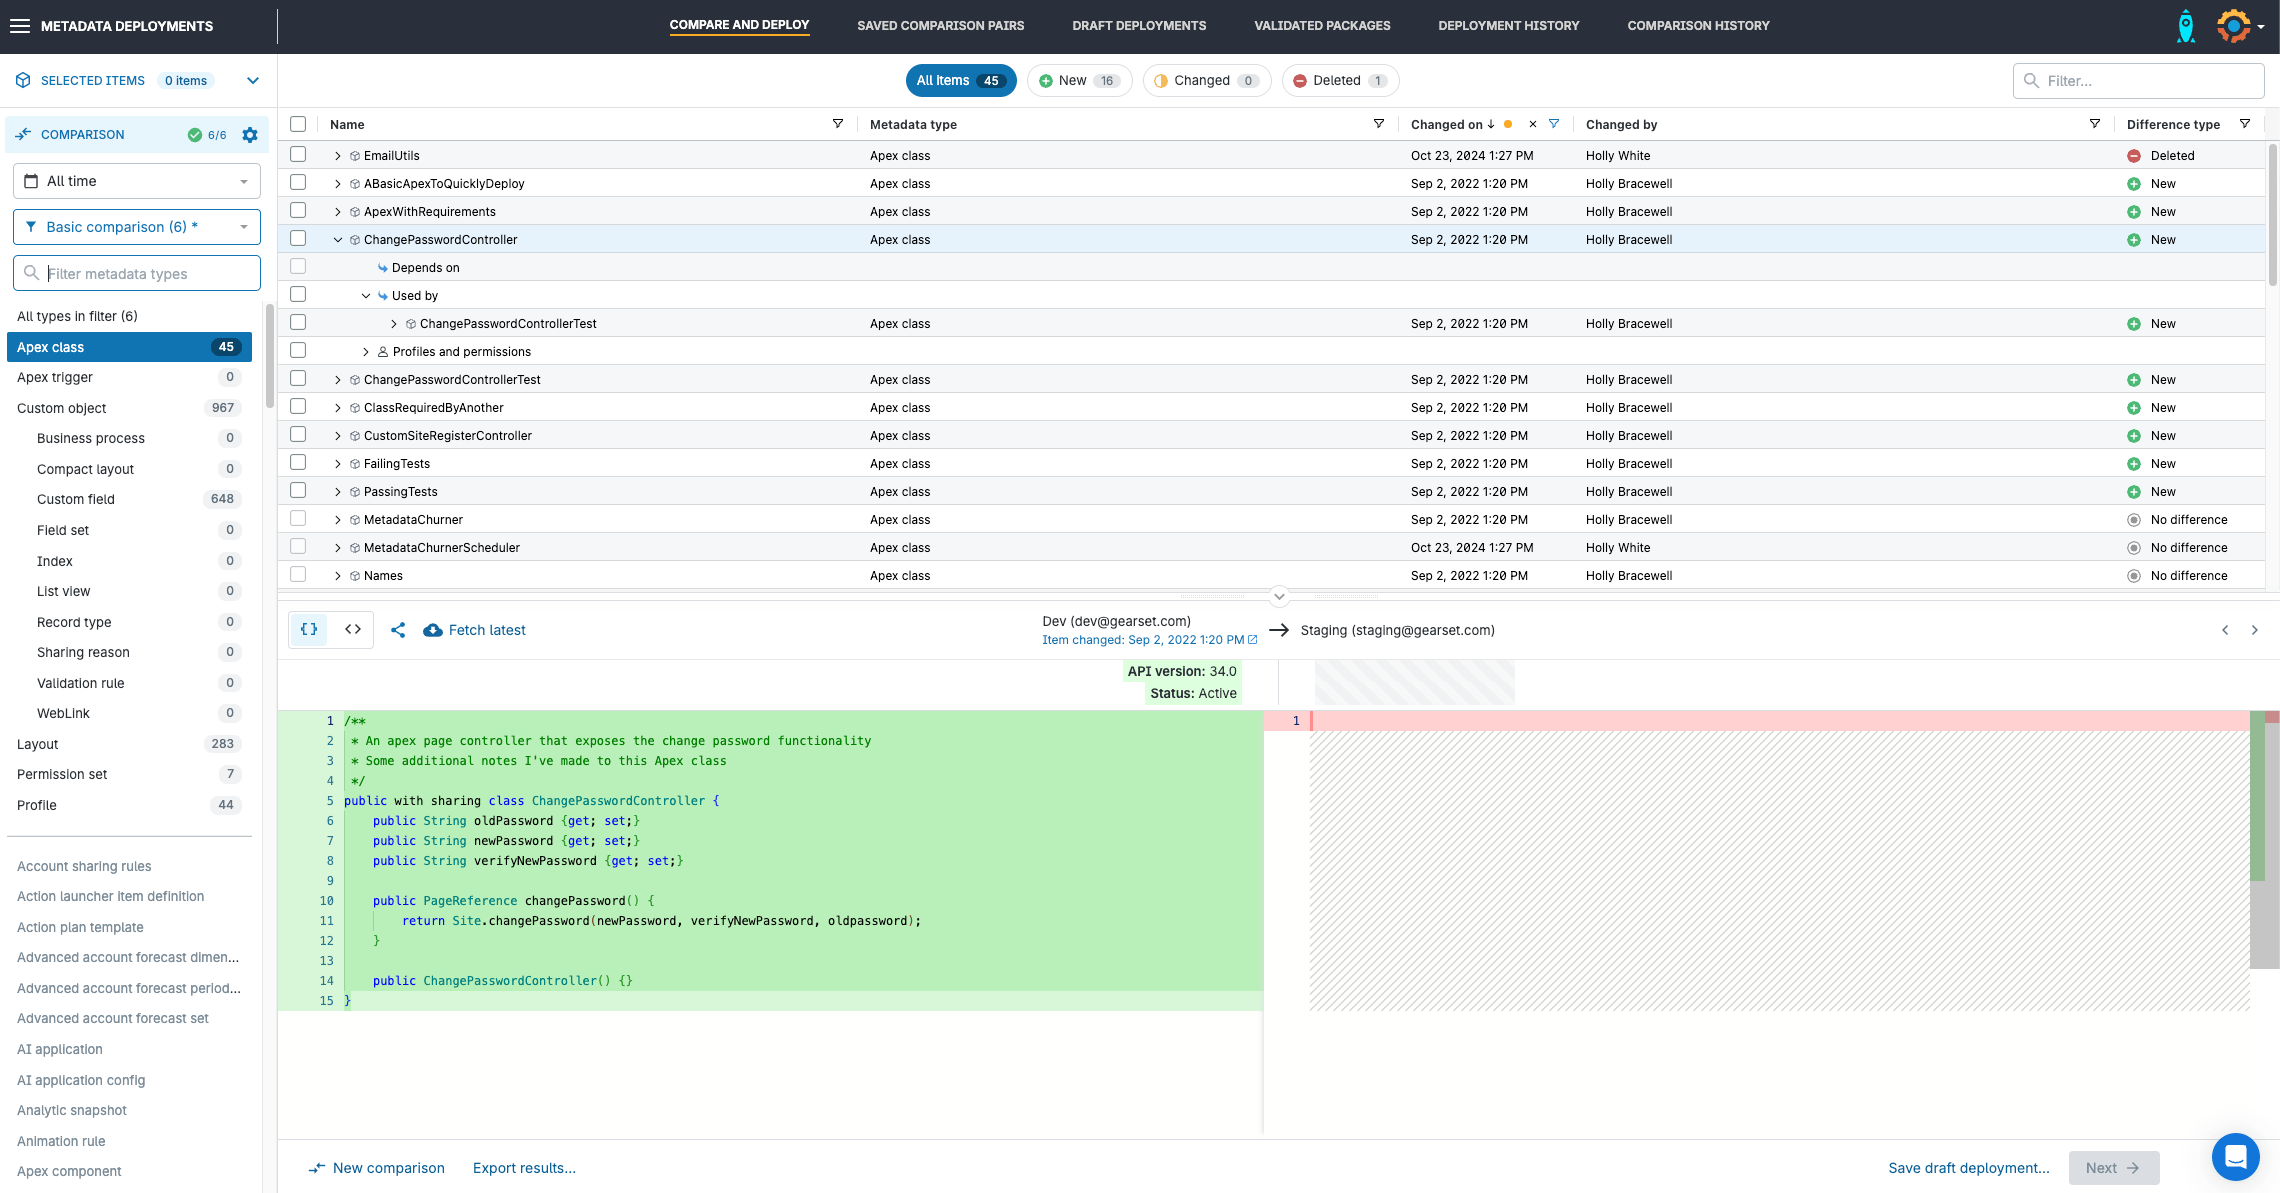
Gearset compares the metadata between your source and target orgs to show you what’s new, changed, and deleted, so you don’t need to remember every component that you edited and can see all the differences at a glance.
Simply tick the Apex class you want to deploy to add it to your deployment package. Gearset will also show any relevant dependencies and related components, so you can make sure you’re including everything you need.
2. Troubleshoot your deployment package
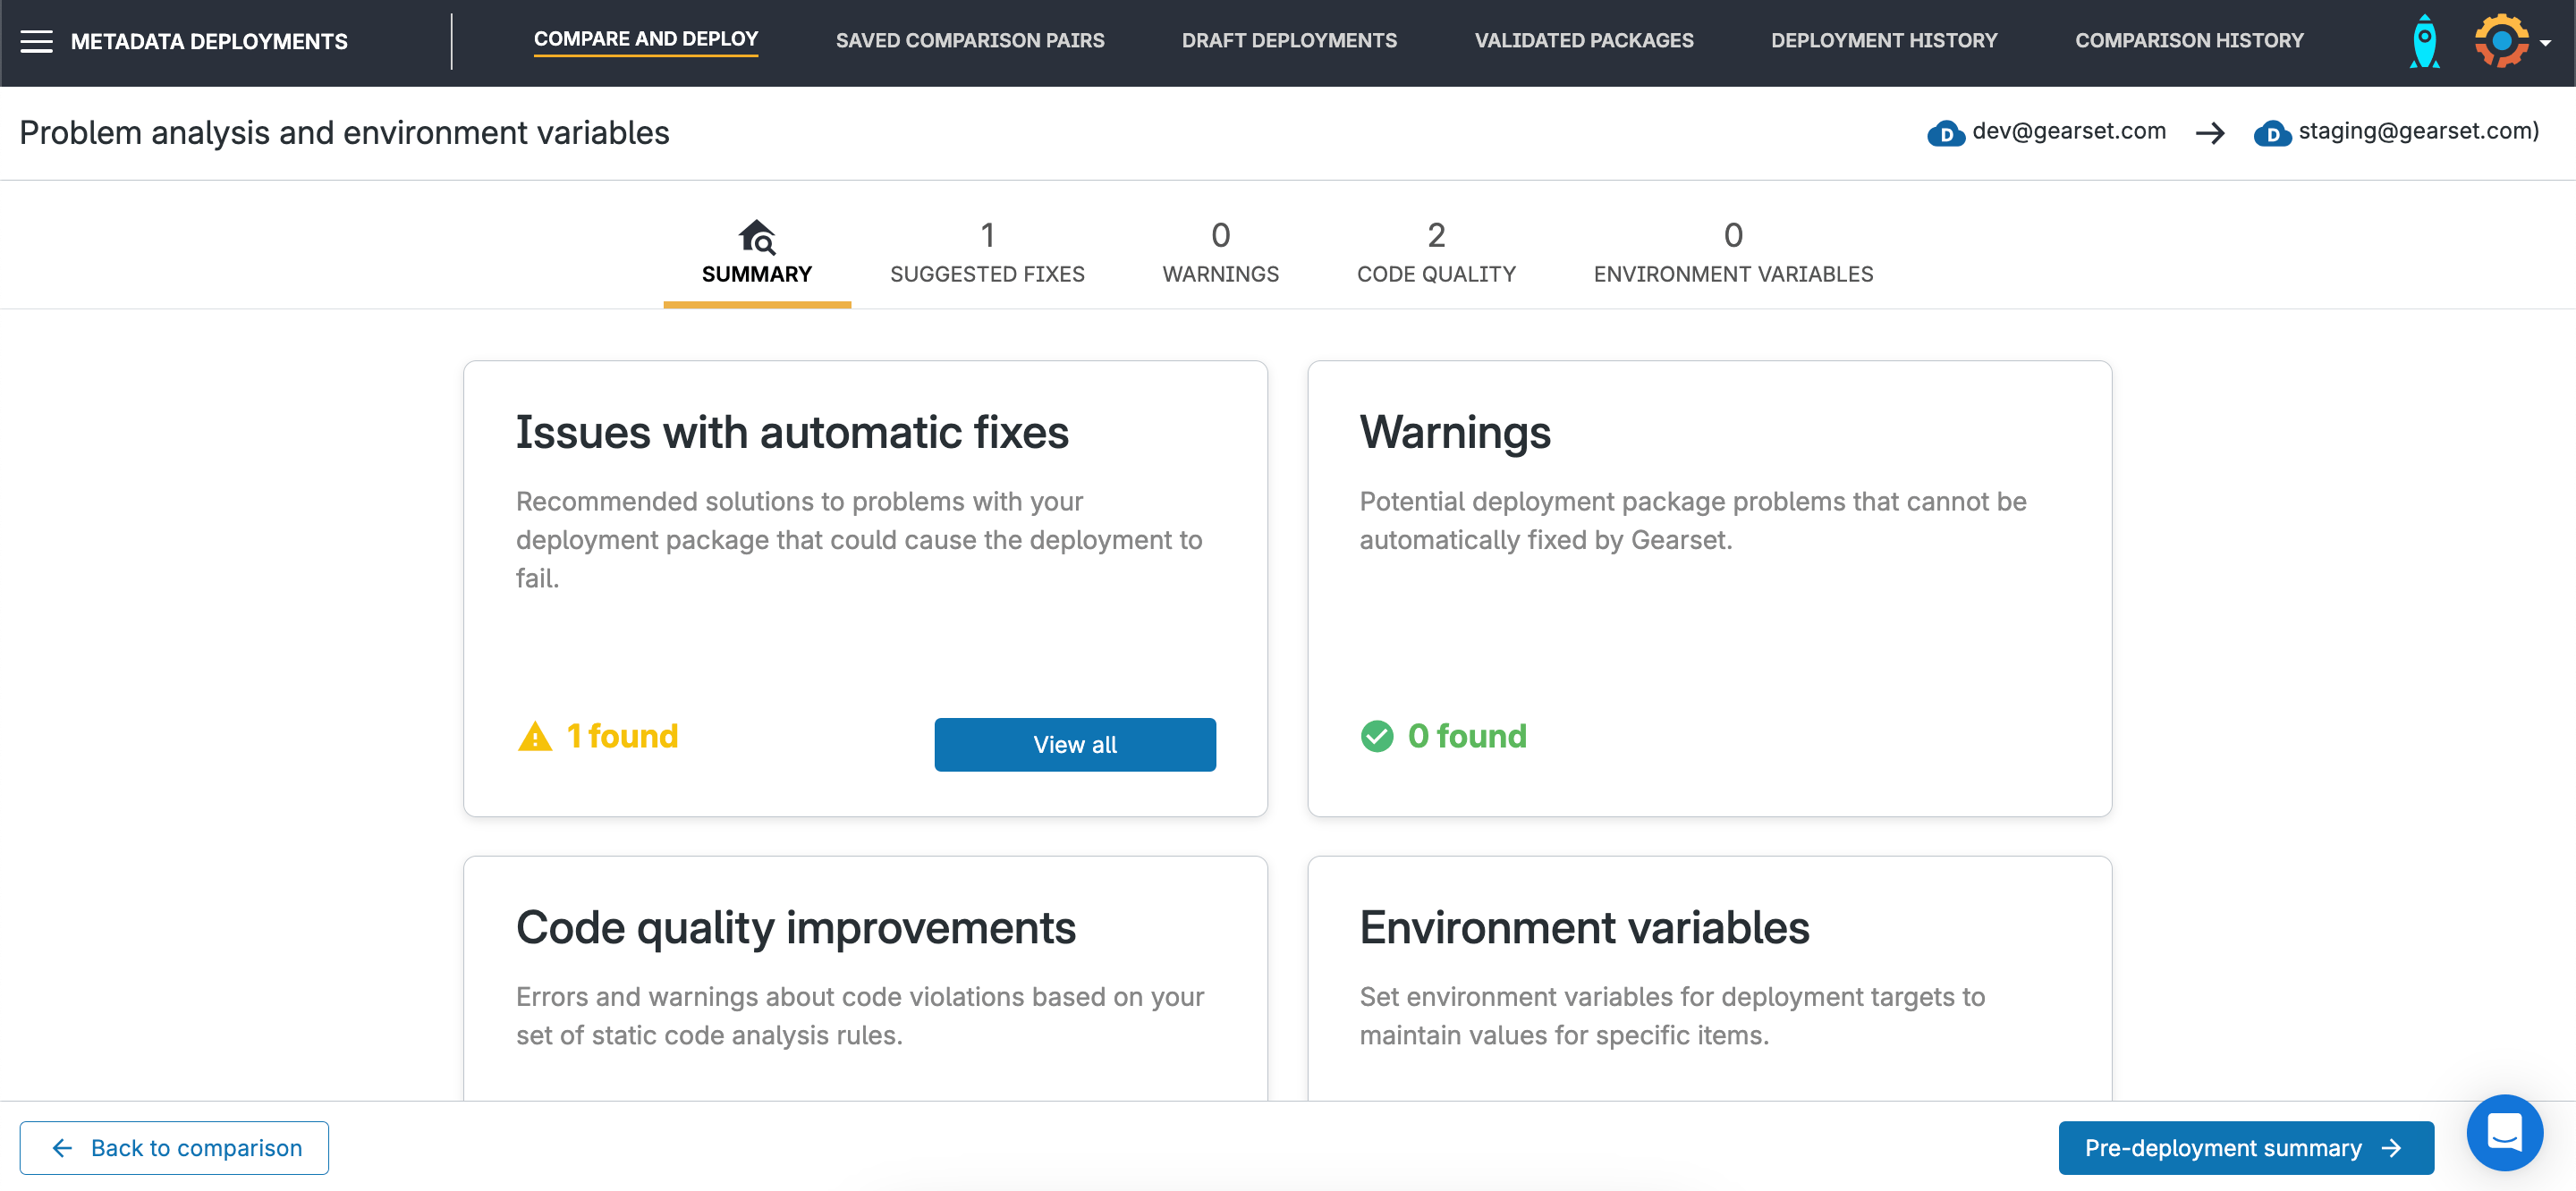
Once your package is built, Gearset will run a series of problem analyzers to check your package for common issues, such as missing dependencies. If any issues are detected, you can choose to accept the changes with a single click rather than rebuilding the deployment.
Gearset will also run static code analysis on your package, so you can make sure you’re deploying quality Apex to your environments. You can customize the static code rulesets, so Gearset flags the rules that are important to you.
3. Add deployment notes and tickets
Give the deployment a name and add deployment notes. Attach any relevant issue tracking tickets to your deployment and Gearset will update the ticket automatically with details of the deployment and the items deployed. You can also change the ticket status on your kanban board without leaving the Gearset app.
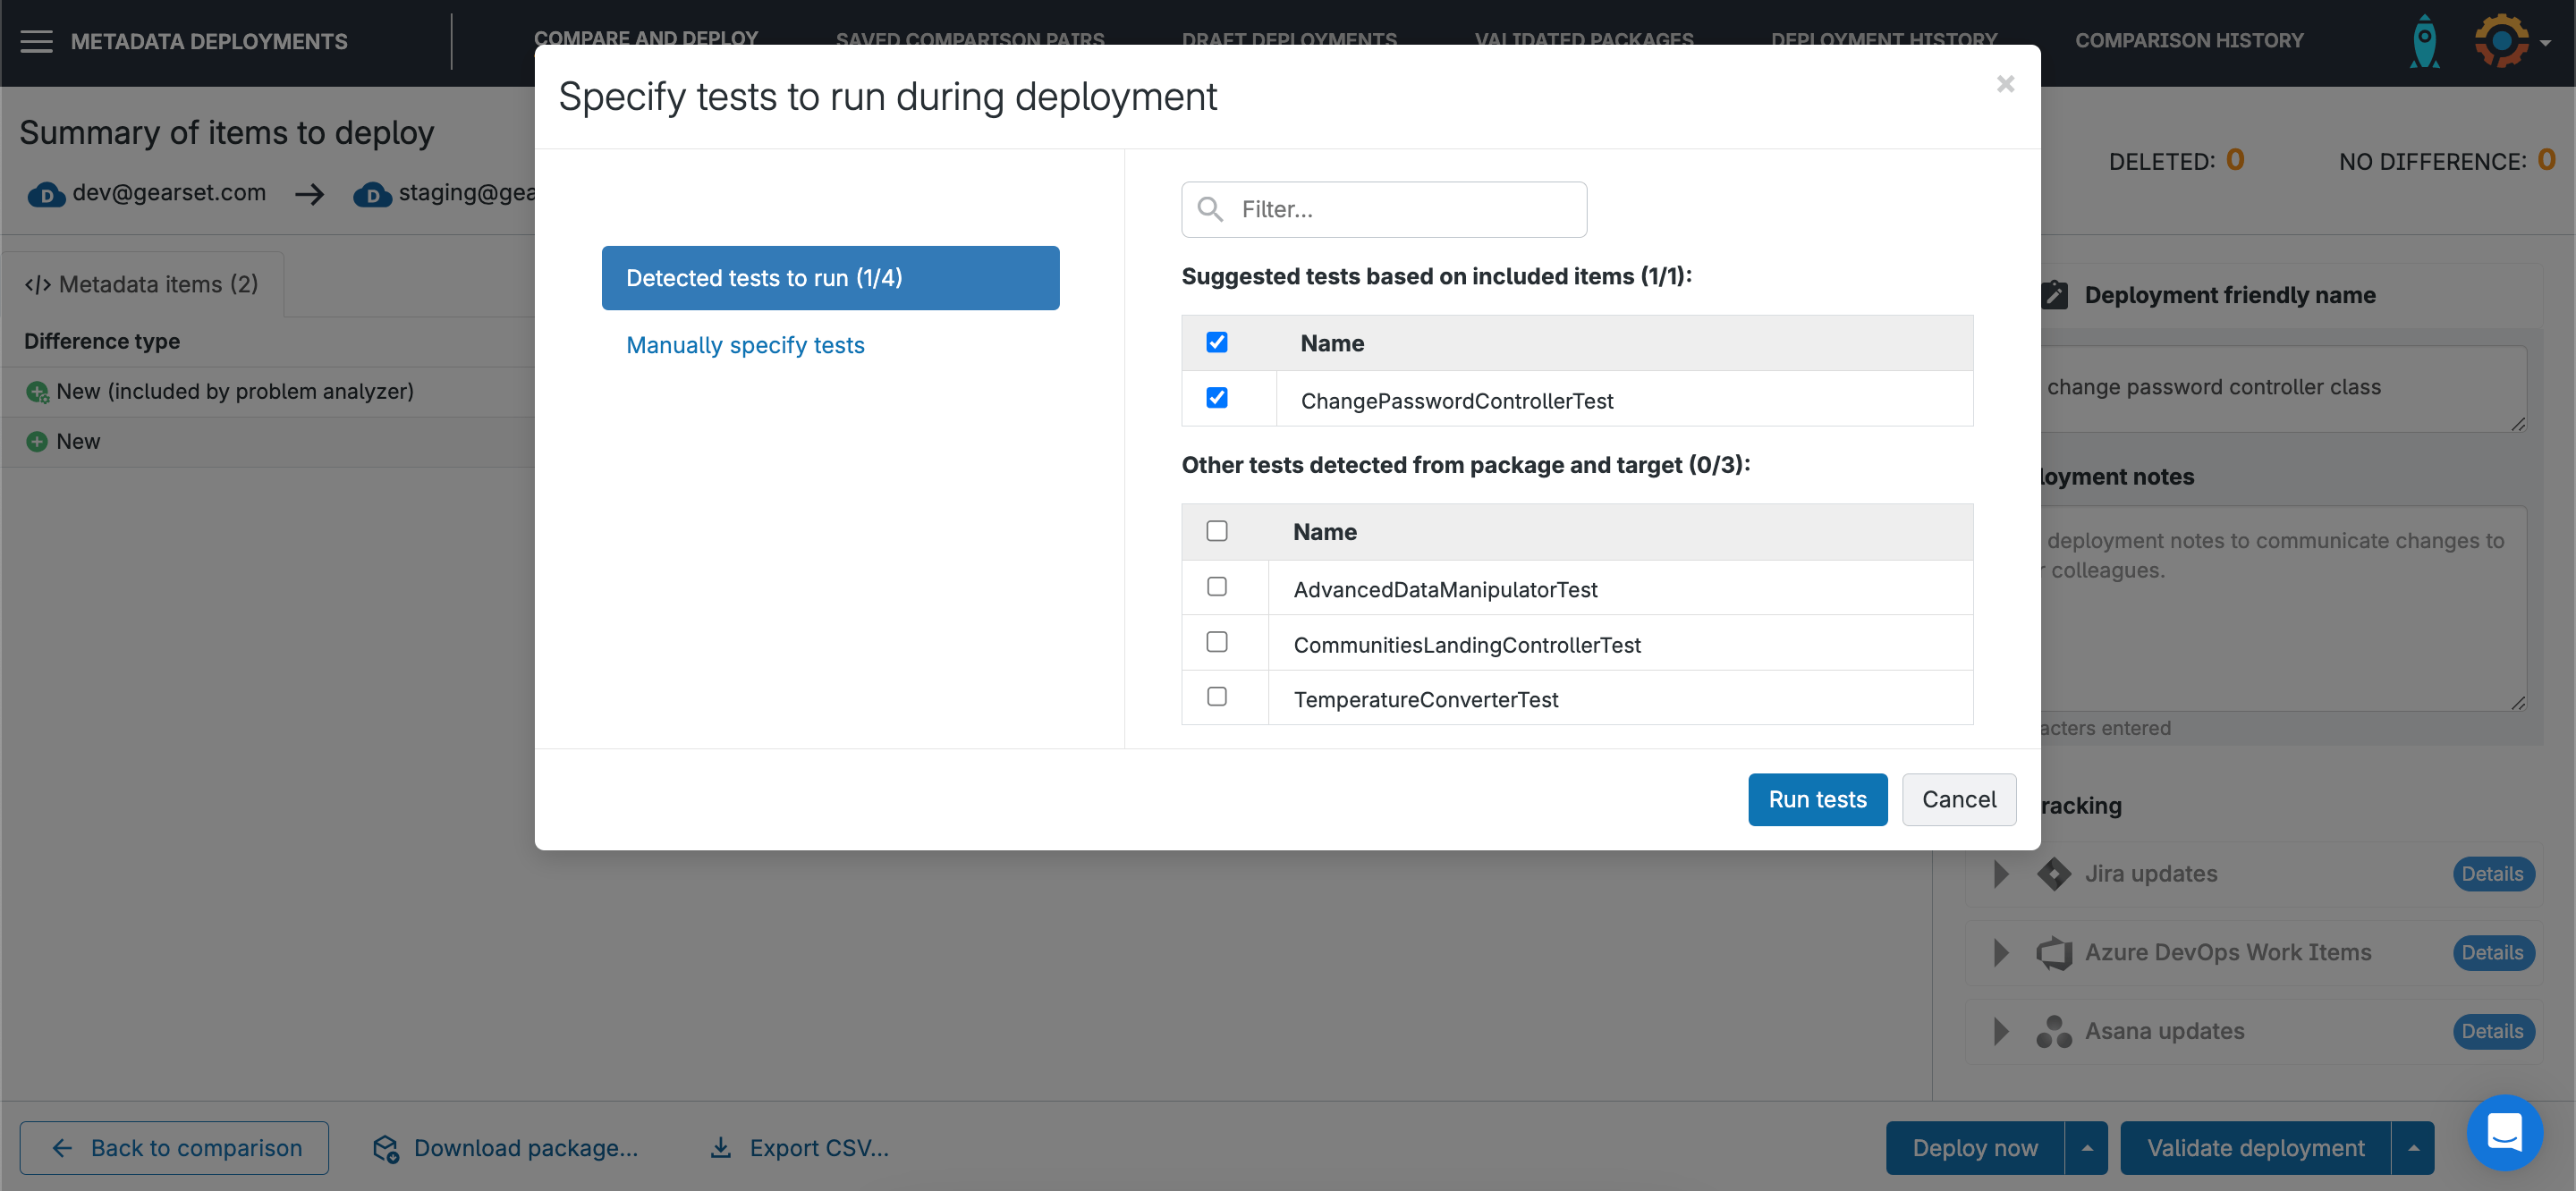
4. Run unit tests and deploy your package
When you’re ready to deploy, you can select whether to run all, local, or specific unit tests. Running all unit tests can make a deployment slow and even if you just run local tests, that can still be a big time delay when a lot of the classes likely aren’t relevant to the deployment package. Specifying which tests to run helps you move as quickly as possible but it can be painful to work out which tests you need to run and then list them all out. Gearset will automatically suggest a list of tests to run based on the Apex included in your deployment package.
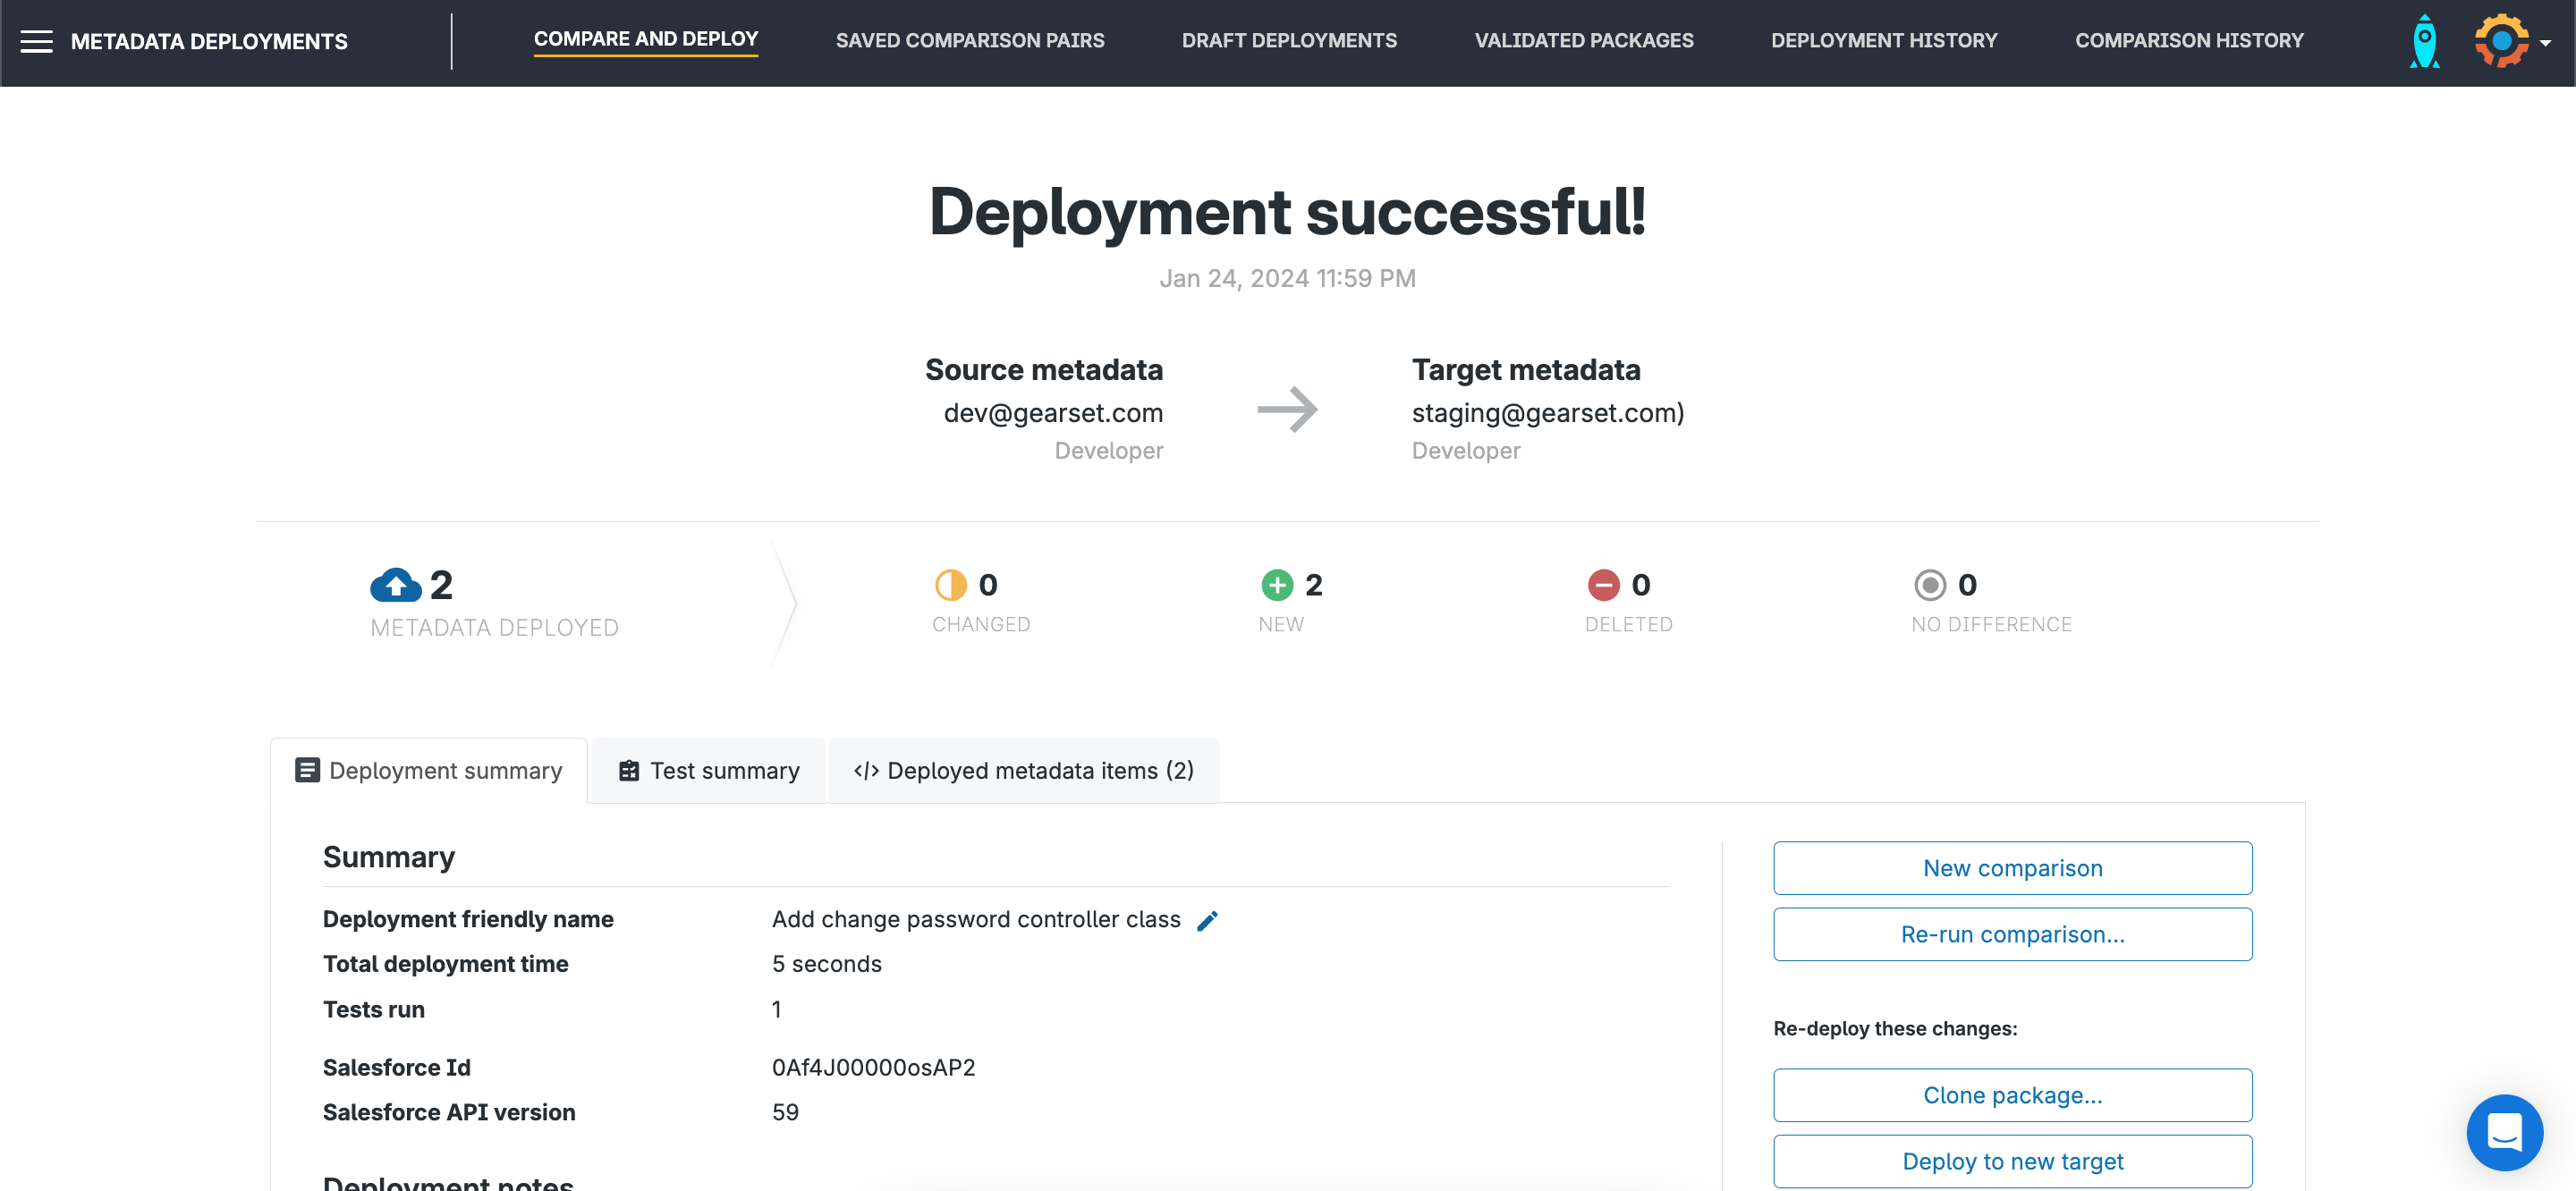
You can then choose to deploy the package immediately or schedule it for a specific date and time.
Gearset will give you a summary of the deployment once it has run, including a full PDF report. You can access your lifetime deployment history at any time from the Deployment history page.
5. Deleting Apex classes
If you want to remove an Apex class that you’ve deployed, you have two options:
- Destructive package. If the Apex class has been deleted from your source org, you can run a comparison to your target and select the deleted Apex class as part of your deployment. Follow the same deployment steps as above and Gearset will remove the deleted Apex class from your target org.
- Deployment rollback. Alternatively, if you deployed the Apex class with Gearset, find the deployment in your deployment history and select rollback. You can choose to do a full rollback, to revert the entire deployment, or a partial rollback to remove just the specific Apex class.

Get started today
To try out Gearset’s streamlined and intuitive approach to Apex deployments, set up a free 30-day trial — no credit card needed and nothing to install in your orgs! Or book a tailored demo to see Gearset in action.
